I thought I'd share an old family recipe with you folks, one that our family loves. (Note that there is a similar recipe posted at helium.com, but with some important changes that make the buns worse in my opinion ...and I wonder where the lady that posted the recipe got the recipe from too? I'm betting that somewhere along the line, someone got the recipe from the Prewitt family and it got 'adjusted' along the way ...the similarities are too close to ignore ...but THIS one is the original and dates back to the fifties):
Grandma Prewitt's Overnight Buns
Yield: 3 dozen 2-1/2" buns
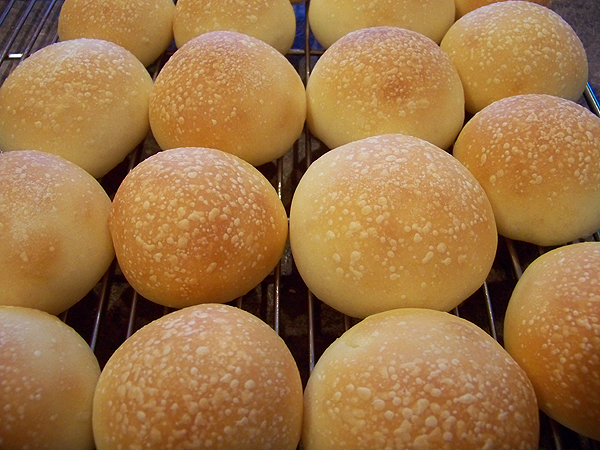
Description: Slightly sweet, airy, 'touch of yeast' flavor, bun recipe for your favorite dinner or special occasion. When rolled flat, also makes a fine base for cinnamon rolls. These buns have a unique, thin, crust with tiny 'pinhead' blisters and a light airy crumb. They keep well in the refrigerator or counter, and they freeze well too. The recipe is generally started at around 4pm on the day before they are needed, then baked first thing in the morning (see schedule below).
Ingredients (sorry for the volume measurements ...I haven't converted it to weight measurements and baker's percentages yet):
2-1/4 cups Water
3/4 cups White Sugar
3 ounces Vegetable Oil or melted Shortening
2 Eggs (large, AA)
1-1/2 teaspoons Salt
1-1/4 teaspoons Instant Yeast (original utilized Active Dry Yeast)
6 to 7 cups Unbleached All Purpose White Flour
Method:
4:00pm, Start:
Boil the 2-1/4 cups water and the 3/4 cups sugar for 5 full minutes. At the end of the boil, immediately add the 3 ounces of oil to the sugar water mixture. These two steps are important in order to achieve the light airy structure that these buns have. Let stand, or set pot in a cool water bath, until luke warm.
In a separate bowl, whip the 2 eggs and 1-1/2 teaspoons salt until foamy. Do not over-beat the eggs.
Mix the egg mixture into the sugar water mixture, then add the 1-1/4 teaspoons of instant yeast.
Using the flat blade on your mixer (or by hand), add flour until the dough is starting to get too thick for the flat blade (or too hard to stir by hand). Add no more than 1/2 to 1 cup of flour at a time, and make sure each addition is mixed in well before adding more. Switching to the dough hook (or bowl kneading with a spoon or bowl scraper), continue adding flour until you have formed a soft, still slightly sticky, dough. Turn the dough out onto the counter to knead in the final amount of flour. The dough should be soft, still slightly sticky but not too sticky, when complete.
Place the dough into a large greased bowl, turn over and let rise for 3-1/2 to 4 hours. While the dough is rising, cover the bowl with a dampened warm towel plus plastic wrap to prevent drying.
8:30-9:00pm, Form Buns:
Punch the dough down, cover, and let rest for 15 minutes. Knead gently then roll or pat out to a thickness of 1 inch. Cover with a slightly damp pastry cloth.
Using a dough blade, cut off a 2" wide strip of dough along one edge. Form buns by cutting off 2" long, e.g. for a 2" square piece of dough, piece of dough, then turn the corners in and press into the back side of the piece of dough. Continue turning in the edges of the bun into it's back side to form a smooth stretched surface on the top side. With your finger tips, gather the edges to a single point on the back and pinch so they will stay there. Turn the bun right side up, pinch edges into the back side as necessary to make sure the buns are round, then place pinched-side down on a greased pan. Continue cutting off 2" square pieces of dough and forming buns until you've used up the 2" wide strip of dough. Cut off a new 2" wide strip of dough and repeat. Repeat the entire forming process until all of the dough has been formed into buns and have been placed on greased cookie sheets. Note that the oven spring will be primarily vertical rather than sideways, so you should be able to place 12 to 15 buns on each cookie sheet without risking that they will rise and stick together in the oven.
Arrange all of the cookie sheets close together and cover with thin tea towels. Do not spritz the buns with water, to prevent drying out for example, and make sure the tea towels are very dry. Moisture will only cause the towels to stick to the buns by morning, thereby ruining your efforts and patience. Allowing the buns to rise overnight dry is part of the process that helps form the unique, thin and delicate, crust that these buns have.
Next Day, 7:00-8:00am, Bake Buns:
Preheat oven to 350 degrees F (use a thermometer). Bake buns 10 to 13 minutes or until done. These buns will continue to cook a tad after being removed from the oven, so very much like baking cookies, you should be careful to not over bake them. Remove them from the oven the moment the top 1/3rd of the bun has become lightly browned. Optionally brush with melted butter after removing from the oven. Cool on bread racks.
NOTE: In the image above, the buns were not brushed with any butter. We have never tried the optional butter, liking them very much as they are without it.
Brian
Thanks for the recipe. They look terrific, and the recipe sounds great.
I grew up in the 80's visiting my grandma's house in Harvey North Dakota. I vividly remember her having cookie sheets of yeasty smelling rolls in various warm spots around the house, slowly rising. I remember the spotted appearance of the final baked roll and as an adult I decided I wanted the recipe from my grandma to recreate them. Turns out they were frozen rolls from the local Harvey bakery and I was upset I would never have the recipe. I decided to search the internet hoping a recipe for these North Dakota buns existed. After much too long of a search I came upon this recipe and the moment I saw the photo of these buns I knew I must have found them. I purchased King Arthur bread flour which I knew was make from hard winter wheat from North Dakota and used it to make this recipe. They were the exact flavor and smell from my childhood memories, it was unbelievable! I have now been making these rolls for the past 6 years since I found this recipe and when I eat them I can feel myself sitting back in my grandma's old farmhouse. A treasure.
I love your story! I can imagine your frustration at discovering that the rolls weren't entirely homemade after all.
My mom's Polish and still makes a lot of the food her mother did, but there are no precise recipes for anything because my grandmother didn't use recipes, so my mom's version of our traditional family food is different from her sisters' versions. My mom once watched her mother make pierniczki and wrote down everything she did so we'd have a recipe, but I've tried that recipe and it just doesn't work well. Something is off about it, and my mother even agrees. My grandmother's been dead for years, so we will never have pierniczki or anything else quite like she made them.
It's great that you found a recipe for your grandmother's buns. It brought a smile to my face.