I posted this tutorail on another food site before they banned me from the site (no sense of humor...their loss. LOL), so rather than give the link to that site I figured some of the newer artisan bakers could benefit from this tutorial, especially if they are having difficulty working with wet dough. Hopefully many will benefit from the dialog and the pictures.
No Knead Bread & Parchment Paper
By: Joe Valencic, Mentor, Ohio
I see this topic come up frequently, especially when someone is being challenged by handling this very loose dough. Some folks can understand a verbal description of using parchment paper, but some need to SEE what is being explained in order to fully understand. I’m a person who likes lots of pictures to make sure I’m doing things as described, and for those of you who are like me, here’s a short tutorial on working with parchment paper and no-knead bread dough.
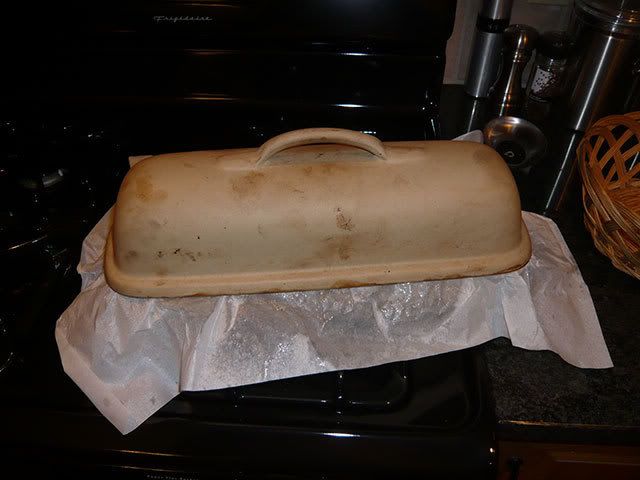
I mainly work with round baking vessels for this bread, but I do own one La Cloche Oblong Clay Baker. Here are two of my many choices for baking vessels, and the proofing baskets I use for them. Notice how the baskets are similar in size to the baking dishes. This is important so that the proofed dough is not larger than its baking vessel.
I take a sheet of parchment paper and work it into the basket, being careful to fit it closely to the inside of the basket. Once I’m happy with the paper placement, I trim off the excess so that there is about 2” of paper left over the basket edge for lifting the proofed dough. I then spray a liberal coating of cooking spray on the parchment paper to prevent the dough from sticking to the paper. Shape the dough and then drop it in the basket and cover with plastic to rise for about 60 minutes.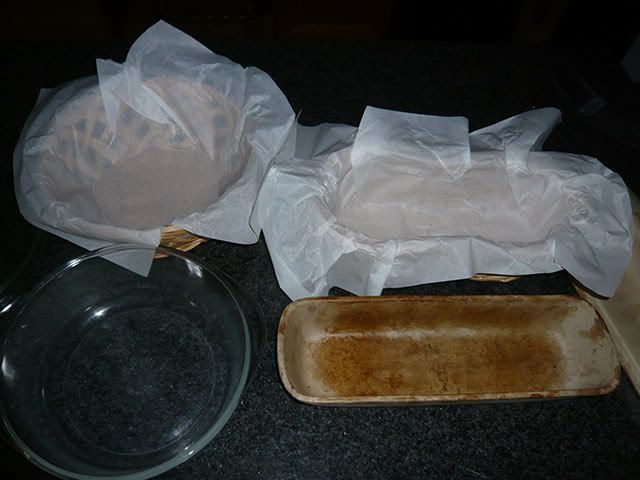
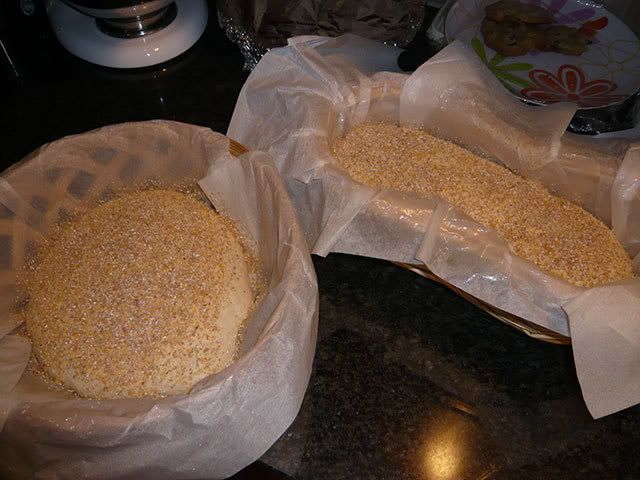
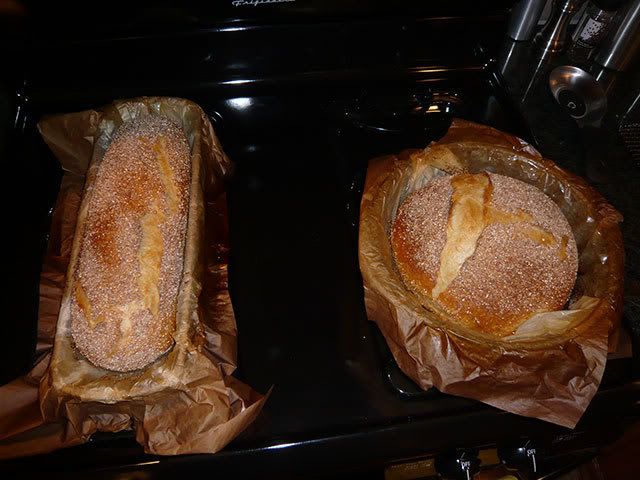
Once the dough has risen and is ready for the oven, I like to ‘dress up’ my No-Knead bread with a good topping of 10-grain cereal. I take a spray bottle of water and wet the top of the dough so the grain will stick, then sprinkle a liberal amount of cereal on top of the loaf. You could also use wheat bran, oatmeal or other toppings that you enjoy.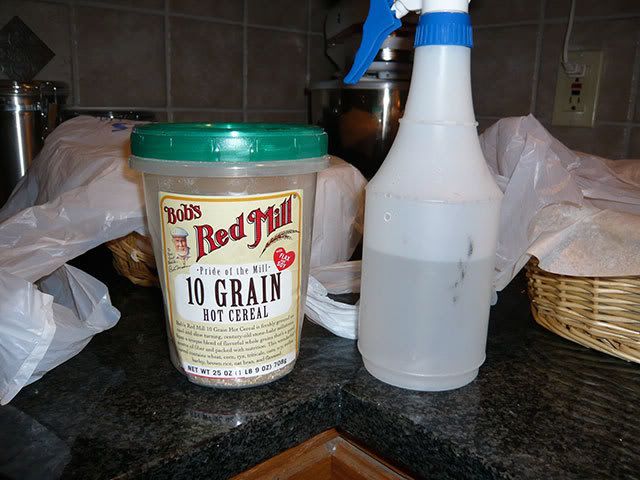
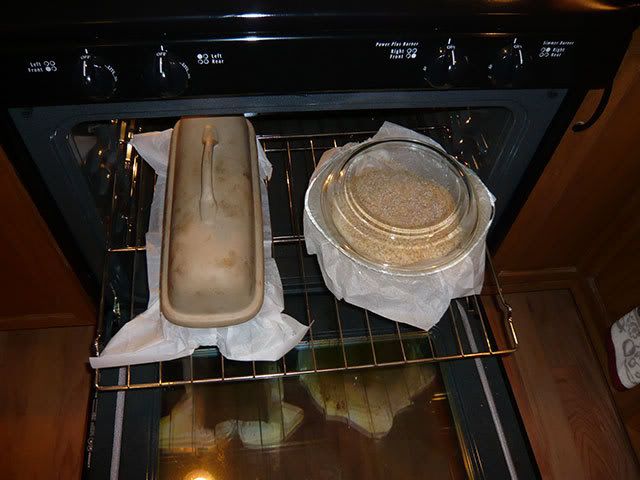
You’re now ready to put the dough in the cooking vessel. Just lift the dough by the parchment paper edges and place the whole thing into your pot. Put on the cover and bake as usual. To save energy I like to bake two loaves at a time. The dissimilar shapes work very well for this, but I can also fit two round baking dishes in my oven. If doing this, make sure there is at least 1” between vessels and away from walls so the air can circulate around the pots in the oven.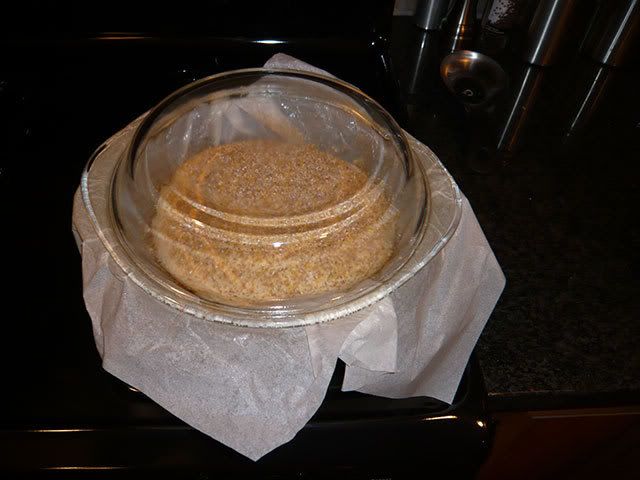
When the bread is done remove the pan from the oven using long oven mitts. Don’t try to lift the bread by the parchment paper, because it will just fall apart in your hands.
Tip the bread out of the pan using the oven mitts and place on a wire rack to cool. For best results, allow bread to cool for at least two hours before cutting.
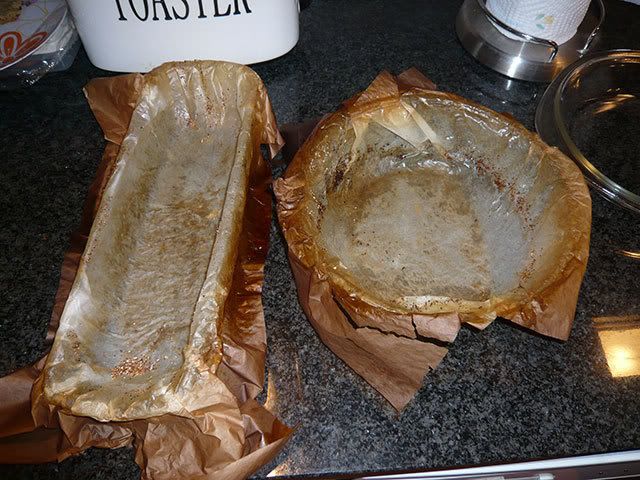
If you did it all correctly, you will be left with beautiful, delicious bread and a shell of parchment paper to throw away.

I hope this makes your No-Knead baking experience more enjoyable.
A very nice tutorial. Thank you for sharing it here.
Nice, detailed tutorial. But I have a kind of off-topic questions. When do you put the glass cover in the oven. The bowls I bought said to put the glass in after preheating, but I'm afraid that it might shock the glass.
The bowl shown in the picture is an old Pyrex Ovenware that I bought at a garaged sale last summer for $3. The lid is also a 9" pie dish, which right now has an apple pie in it. LOL
I put bowl and lid both in the oven at 450 F for 30 minutes before putting the risen dough in them. Since the dough is at room temperature, there is not a severe shock to the Pyrex bowl.
I also have an enameled dutch oven that I use for no-knead bread, as well as some terra cotta bakers that I bought at thrift stores, never paying more than $6 for any of them.
This is the last La Cloche that I bought from Eric at Breadtopia.com. He's got the best prices on clay bakers, and is exremely helpful.
And here's an old glass bread pan with lid that I found at a garage sale. It's small, and only makes a 1/2# loaf, but I thought it was unique so I bought it for $2.
for the beginning to end tut. It's great to see pics of all the steps.
Thank you for your tutorial, Joe, and for showing us your assortment of ovenware. I check Goodwill and the Salvation Army stores frequently for bread-baking pots, pottery and oven glassware. My current favorites are crocks from crock pots. I use pie pans for lids on the crocks.
Sometimes when you're fitting parchment paper to a baking container it's helpful to wrap it around the outside first, then you can make the final adjustments when you put the paper inside.
DANGER, Will Rodgers, DANGER. Not all crock pot liners are rated for high temperature, and may crack or shatter above 350 F. You need to check the manufacturer's websites to determine if you can bake with them ar 450 F and higher. I see them in the thrift stores all the time, and just walk on by. Most of them don't have the manufacturer's name on the bottom, so it's not possible to tell if they are safe for high temps.
Just my 2 shiney pennies on that route.
Joe
Your pictures are really helpful--guess this is why they say a picture is worth a 1000 words.
--Pamela
Anyone who has been banned for [appropriate] humor is a friend of mine!
Thanks for the pics -- I also use La Cloche... pan shaped [two of them]. One of these days, when I just happen to have $50 I don't know what to do with, I'll get a round.
~ B
It's a long story on the banishment. About 20 of us were banned for disagreing with the Admin, and he retaliated by banning many just for associating with us. He doesn't know that many of us are back, just under another name. We've nicknamed him Napoleon, for the obvious reason.
Anyway, that's water over the dam and life goes on. You mention wanting a round baker, but you may not need to spend the money if you are willing to live with a square circle...
If I have a lot of bread to bake, I sometimes use this 3-1/2 qt Corningware Covered Dish to handle the overflow. It does the same thing as a dutch oven, but it's glazed ceramic. Use a round shaping basket with parchment paper liner and this is the result.
Hope this helps save you a few bucks.
Joe
Joe,
Have you ever tried spraying a bit of water on the dough or better the paper inside the cooking area just before covering? I do that and I think it gives me a better spring and a little shine on the crust.
Welcome to the loaf.
Eric
Joe,
I like the particular parchment paper you are using. It appears to be translucent and more flexible than the kind I use. Can you share what brand you are using and where you bought it? Thanks.
Jessica
channer,
My no-knead breads all get a water spray and a top coating of either 10-Grain cereal or oat flakes. So yes, I do spray the bread before it goes in the oven, and it does give a nice finish on the top crust.
jesswin,
The parchment paper I use comes from Gordon Food Service. I pay $3.49 for 50 sheets, and here is what the label says:
Pan Liners
Quilon Coated Baking Sheets, 16-3/8 x 24-3/8", Reorder #162-50
Brown Paper Goods Company
3530 Birchwood Drive
Waukegan, IL 60085-8334
Joe,
Thanks for your help.
Jessica
Joe, good point about checking manufacturers' web sites to see if their crocks can be used for high temperature baking. Mine are made by Rival, and are the first generation of crocks that could be taken out of their electric surrounds. They're the crocks with a ribbed outside surface, and they're so old that they're not on the Rival web site. I've baked in them for well over a year with no problems. After I'm finished baking, I return the crocks to the oven to cool slowly as the oven returns to room temperature. Crock pot lids are not oven-safe; I use pie pans for lids in the oven.
I've read warnings on other sites that glass bakeware has shattered after being used to bake bread at high oven temperatures, so be cautious about glassware too.
(By the way, can someone please tell me how you indent a reply directly under the post to which you're replying?)
hit the "reply" link right in the post you want to respond to, not the reply box at the very bottom of all posts.
Thank you, rainbowz. I didn't understand at first, because I usually browse TFL without logging in. I've just been clicking on "log in" in the box of the post to which I wished to comment, then typing my comment without clicking "reply". The "Reply" option and the Comment box don't show up until you log in.