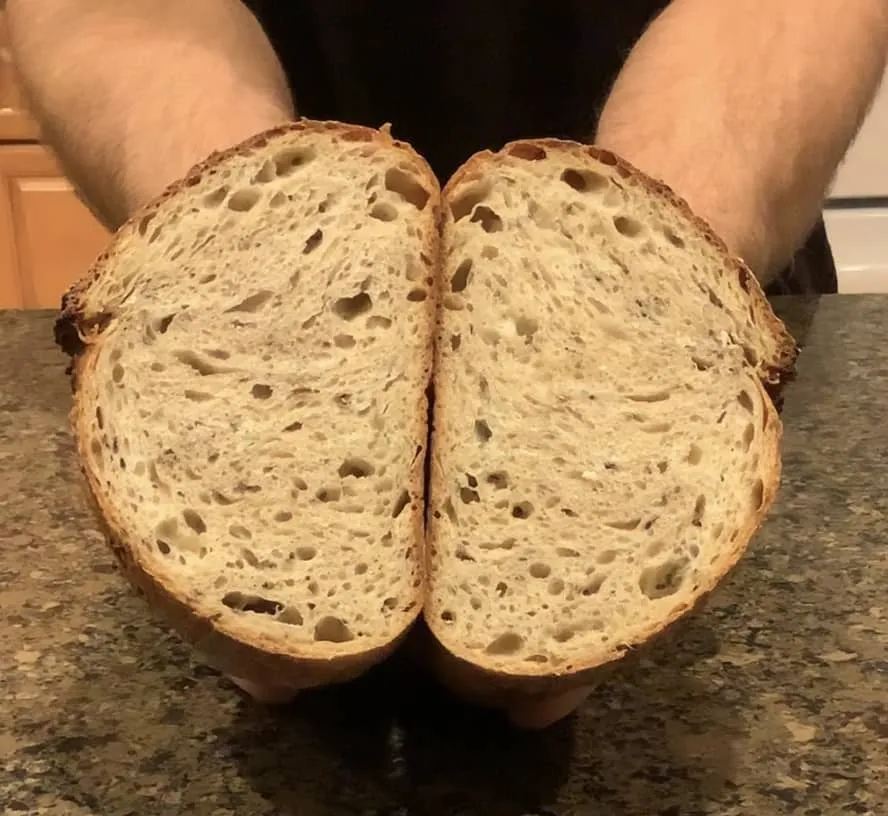
Inspiration for this loaf came this fall while canning up some of the many cucumbers we grew this year. Garlic dill pickles are something I really enjoy and felt that combination had potential as a bread as well. Happy to say that it turned out quite well. A friend tried it this morning as buttered toast for breakfast and then again as avocado toast for lunch. He's tried many of my breads and said he thought that this was one of my best. I'll run with that for now... :-)
For this bake, I wanted to do something to really bring out and blend the dill and garlic flavors. To do that, I added both of them to the whole wheat mash. The mash helped to both increase the sugar content in the whole wheat as well as fully hydrate and soften the bran. It also helped bring out the dill and garlic flavors and give them time to meld. In my mind, it's similar to how a soup just seems to taste better the next day after the flavors have had a chance to combine.
For the last 5-6 months, I've been trying both Wheat Montana and KAF flours for my All Purpose and Bread. To me, the Wheat Montana feels finer and has more flavor (the flour itself is noticeably more yellowish), but the KAF is stronger and forms better gluten. Over time, I've started blending them 50:50 on many of my bakes and that's the case with this loaf.
Levain
67.5g Bread Flour (WM/KAF)
67.5g Water
13.5g White Flour SD Starter
1) Combine all ingredients and ferment at 68 deg F for 12-14 hours
Mash
45g Whole Wheat Flour (freshly ground - Janie's Mill (Blend of Glenn, Red Fife, Turkey Red, and Warthog)
90g Water
9g Whole Dill Seed
13.5g Garlic Cloves, minced
1) Preheat mash equipment to 150 deg F (I use Crockpot with water bath and an Inkbird controller)
2) Combine flour, dill seed, and minced garlic in a bowl.
3) Preheat water to 165 deg F. Add the water to the ingredients from Step 2 and stir. Immediately cover and place in Crockpot water bath.
4) Cook the mash for 3-8 hours. I went for about 6 hours overnight.
5) Heat the mash to 180 deg F to denature the amylase. (This step took about 90 minutes for me. After 1 hour I checked and the mash temp was at 180 deg F. I held that for another 30 minutes)
6) Remove from water bath and cool to room temperature.
Final Dough
247.5g All Purpose Flour (WM/KAF)
90g Bread Flour (WM/KAF)
247.5g Water
67.5g Blueberry Yeast Water
9g Himalayan Pink Salt
1) Combine all Final Dough ingredients but salt with the levain. It will be stiff but workable
2) Fermentolyse for 15 minutes
3) Add mash and salt in small amounts and fold into the dough. After all the mash is folded in, pinch and squeeze dough until the mash is mixed in and the dough is uniform.
4) Perform 4 sets of bowl kneading with 10 minute rests to form good gluten.
5) Perform bowl stretch and fold every 45 minutes until dough starts to feel puffy. Let dough rise 80-100%.
6) Pre-shape and shape.
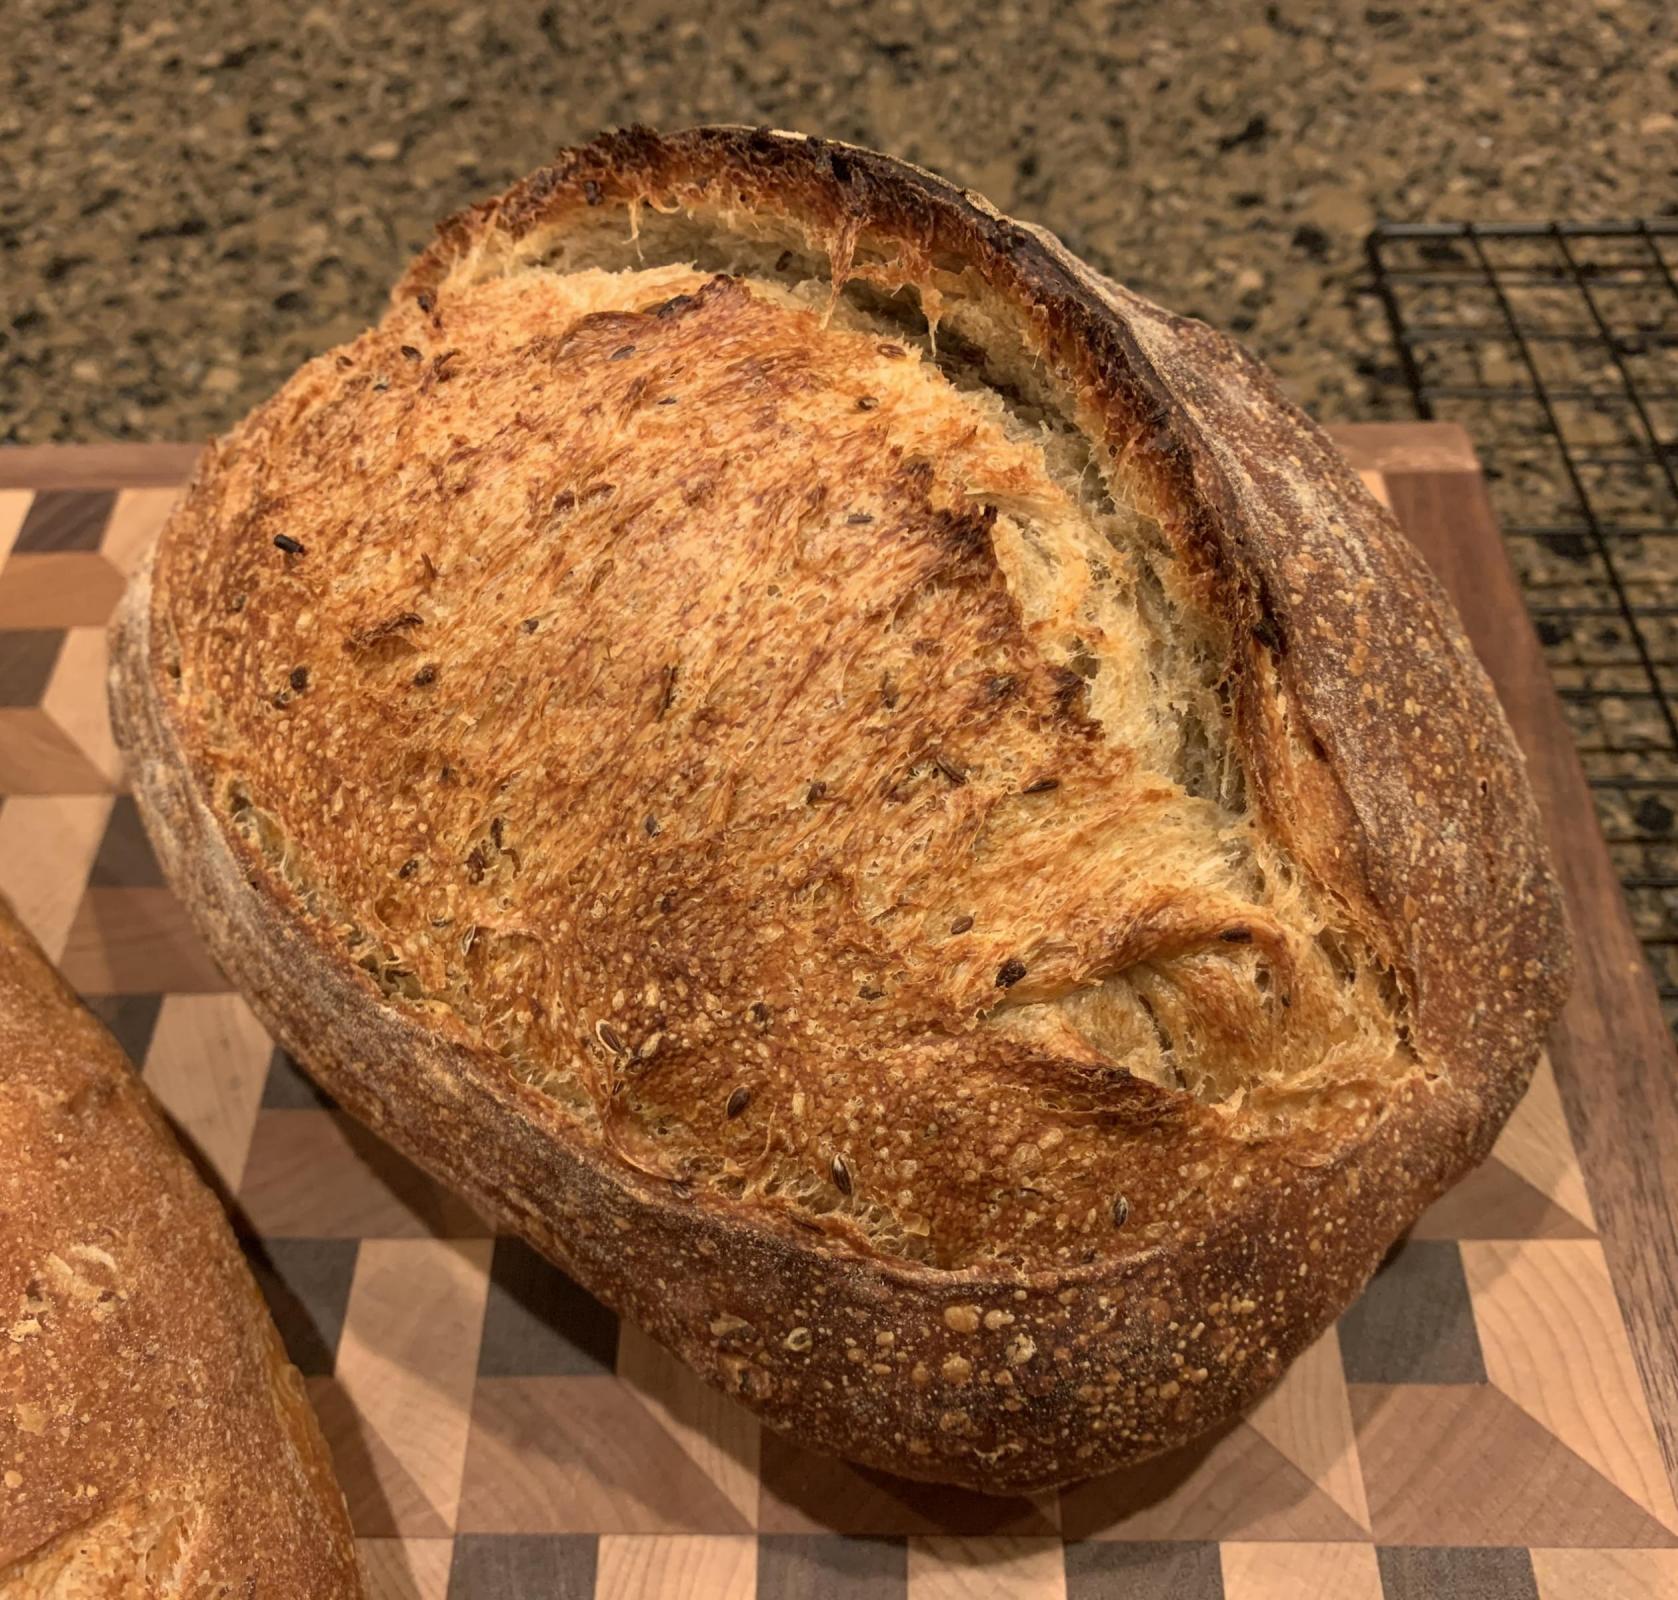
7) Pre-heat oven to 465 deg F for 1 hour. Immediately steam the dough after loading into the oven. Bake at 465 deg F for 1 minute and then lower temp to 400 deg F for 19 minutes. Vent oven and remove steam sources. Increase oven temp to 440 Deg Fand bake for 20-25 minutes more until you have a hollow thump.
- HeiHei29er's Blog
- Log in or register to post comments
That’s an amazing combination of flavors and a beautiful loaf. I bet your friend was delighted you shared. It would make a fantastic grilled cheese with a Havarti or Gruyère .
I don’t have a set up for doing the mash but it sure sounds interesting. c
added: after reading the other thread about the controller which one do you have? I can borrow a crock pot to see how this works . Thank you. c
Thanks C!
This is the one I use. If you decide to get it, send me a DM and I can walk you through how to set it up. It’s pretty straight forward. I put about 1” of water in the Crockpot and then put the temperature probe for the controller in the water. I then cover the Crockpot with two large beach towels to insulate it, which minimizes the on/off cycles for the Crockpot and keeps things pretty stable.
https://www.amazon.com/Inkbird-Max-1200W-Temperature-Controller-Greenhouse/dp/B01HXM5UAC/ref=sr_1_1_sspa?crid=1YI21C9CYPL4Y&keywords=inkbird+temperature+controller&qid=1665484403&qu=eyJxc2MiOiIzLjIwIiwicXNhIjoiMi44NyIsInFzcCI6IjIuNjYifQ%3D%3D&sprefix=Inkbird%2Caps%2C114&sr=8-1-spons&psc=1&smid=A1RUFFFCQ74BCW&spLa=ZW5jcnlwdGVkUXVhbGlmaWVyPUEyWkhZSE5QQ0UwRUtKJmVuY3J5cHRlZElkPUEwODA2MzM5MkNWN1BJV0VKWUtWUiZlbmNyeXB0ZWRBZElkPUEwMDk5NDM0SFdFVkRSRDVNS1YzJndpZGdldE5hbWU9c3BfYXRmJmFjdGlvbj1jbGlja1JlZGlyZWN0JmRvTm90TG9nQ2xpY2s9dHJ1ZQ==
Superb bake Troy, I love the flavors you’ve incorporated into this one. The crust and crumb both look amazing.
Benny
Thanks Benny! I have another variant I want to try soon, but need to knock off a couple items from the “to bake” list first. 😁
Troy, what a beautiful curved shape in the main picture. And can only imagine the mash did great things to the flavour. Lovely bake.
P.S. do you recall how long bulk took?
Thanks Jon!
Sunday was a busy day and this was made while working on getting ready for winter. I’m terrible at keeping notes (one thing I’ve vowed to get better at), but best guess…. About 4.5-5 hours at 70-71 deg F.
One other thing that I did differently on this loaf that I should have mentioned…. I did not pre-shape it. It was a single loaf batch and the dough had a decent dome to it in the bowl at the end of bulk. I turned it out to the counter (smooth side down) and moved to shaping.