Borodinsky the Sequel
A couple weeks ago I made a Borodinsky bread with sprouted rye kernels, homemade solod and toasted caraway. Delicious flavour, moist texture and tasted great with homemade mascarpone but pretty strong to eat with anything else.
The second time I do anything I like to change things around and start learning conceptually what happens. This often means I break something the second time around in order to learn from it going forward.
New Solod
Last week I made a big batch of solod and changed the process. First time, I malted rye, fermented at about 45C 12 hours, then saccharified at 55C for 12 hours. I dried it on low, then toasted. It smelled amazing throughout, a combination of sweetness and fermentation,
Last week I doubled both the fermentation and saccharification times, dried it fast and hot, and toasted it. It never had the same strong fermented smell, more of a hint of it. Same with baking.

Here are my solod and coriander toasting. I decided not to mill my solod until I needed it.

Varied Recipe
I kept the Rye Baker recipe for Borodinsky but changed some of the ingredients.
- Last time I sprouted rye kernels, dried them and milled them and used them as all grain flour. The bread was sweet and delicious. This time, I used dark rye flour from Bulk Barn. The bread was missing something. It was never bitter but it certainly had a hint of rye edginess. Conclusion? Sprouted is better.
- Last time I used sugar. This time I used honey at the same weight. Not sure if I noticed a difference in anything. It might've softened the rye flour flavour
- Last time I used toasted caraway. This time I used toasted coriander. I prefer the flavour of caraway for bread on its own or with mascarpone. But coriander was fine when I ate the bread with egg salad on it. No conclusion on this one. Might try aniseed next time.
- Last time I did 100% rye. This time I subbed in 15% all-purpose white to make it a little more bready for slicing and chew.
- Last time my scald was allowed to cool at room temp. This time I maintained the scald at 55C for about 4-5 hours before letting it cool inside an insulated box. Not sure it helped anything.
- Last time I did not dock or slash the top and it kind of separated a bit. This time I slashed a diamond pattern and the bread was able to expand a bit more without popping its lid. Repeat or similar next time.
Breadier Result
While baking, the bread had a lot less intense aroma (vs the solod caraway of the last one). I think I messed up my solod. Perhaps drying it too hot and fast?
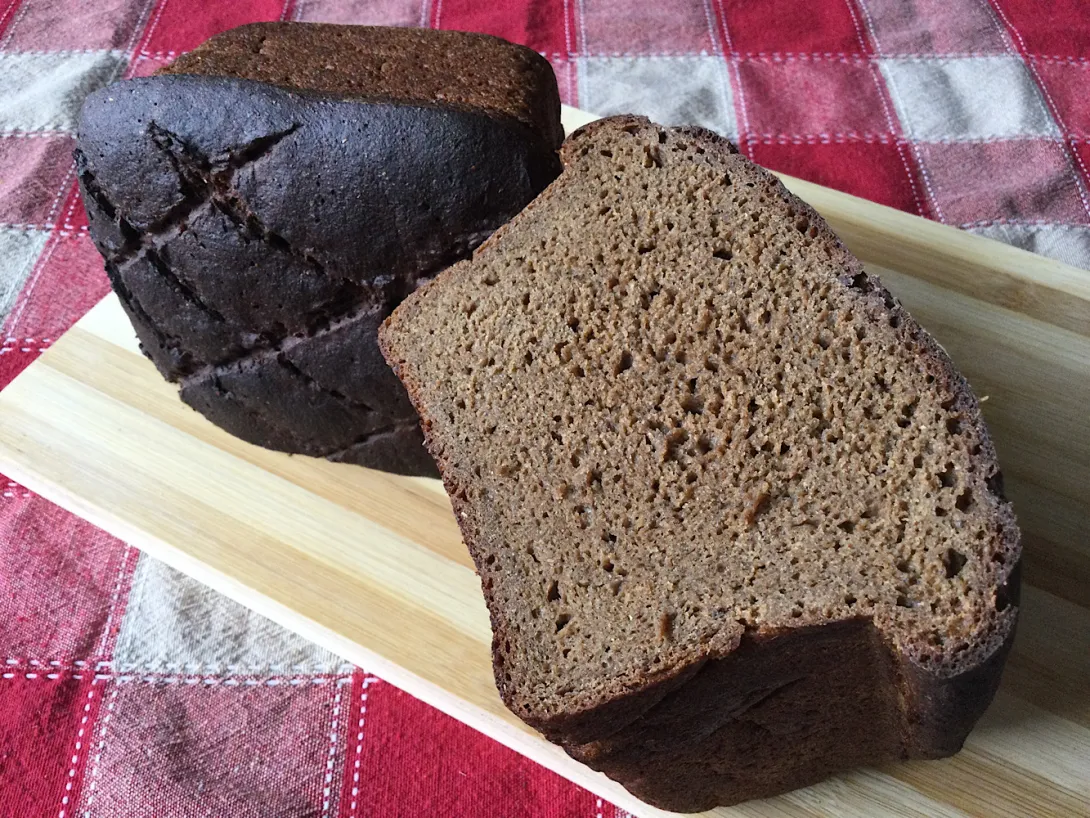
The bread texture was a moist but firm sponge that was strong enough for thin slices. It had rye and coriander flavours but nothing as intoxicating as the first. It held up nicely as squares for open faced egg salad. It tasted good with the egg salad.
I wanted to bake up some rye breads to use during the holiday break with a giant prosciutto and mature cheeses. This version may actually work better for that task than the last one.

A slice of the loaf...

Conclusions
I loved my first Borodinsky but the labour was a bit crazy. The second one is probably better for putting stuff on it. Interesting dilemma... superior bread with sprouted grain flour on its own, or lower labour bread that is not magical but also doesn't fight with toppings.
I also made a Black Rye from The Rye Baker site. I'll slice it tomorrow after noon.
- happycat's Blog
- Log in or register to post comments
I agree with you. Experimenting is a great way to learn! I like the diamond pattern and the crumb looks good.
Do you think the high temp while drying had the biggest impact on the solod?
Thanks. It's kind of a brutal crosshatch design but it kind of fits the rough, brooding, heavy dynamic of the bread.
I'm not sure why solod #2 was so much less pungent. I thought doubling the fermentation and saccharification would just enhance what was good the first time. I'm thinking it was the hot, fast drying because the official method is in many more lengthy stages of lower to higher temps. ie they use long fermentation and long saccrification anyway before a slow, drawn out drying.
I just kind of dropped the ball there as I was doing other things at the same time.
I'll take a look at Ilya's link though.
I'm very interested in seeing the results and reading your impressions of your Black Rye bake. That one is on my long (and getting longer) list of rye breads to try.
Here is my Black Rye.
It's dense and spread out. Might've worked better in a pan. I think I didn't develop the gluten enough though there is very little white flour in it. My KA created a smear around the bowl vs mixing it and I kept scraping and folding and mixing but it never pulled away. So that's my error probably.
I left it 24 hours then sliced. It's firm and moist and had a rye plus almost light pickle sour to it. Might be interesting with the right toppings.
Again, I feel that it would be enhanced with whole grain sprouted rye. I feel that whole grain sprouted flour offers a little something more in sweetness and texture. I don't think I am imagining it. It's much like fresh versions of anything I suppose, a bit more dimension.
Oy vey, amigo. Both your Borodinsky and this loaf have activated the Ashkenazi portions of my DNA. I haven't salivated this much over rye loaves since one of Ilya's classic rye bakes.
Your Boro inspired me to put some whole rye in a bannock this morning, and this afternoon my clay pot muffins had 25% rye.
I've dug up some rye recipes from Greenstein's book, and from nybakers.com, and from theryebaker.com.
I don't think I can wait to navigate the learning curve, and will be hitting up the two local Russian groceries in search of whole grain rye loaves.
Hopefully, I will be able to order a 25 lb bag of rye berries from CLNF this month.
Oh, and Hamelman's formulas too. I almost forgot. I have his 1st edition.
I'm jealous you can buy such large portions of rye and presumably grind it with a real grinder vs my hodgepodge of manual and electric gadgets and sifting.
I think you will be well rewarded by the results. The recipes on ryebaker.com seem to work as advertised. Hope you share your results for comparison.
Well, that looks just like the the one Stanley made! I'm closing my eyes and imagining how good it tastes. It is definitely one I want to try.
Thanks for the kind comment. I guess you are right now that I look at his again.
I hope you're able to give it a try. His recipes do require starting a day or two ahead but they use tiny portions of starter to build the sponges. I just used week old starter from the fridge without refreshing it and it bubbled up the sponge nicely overnight.
After tasting a bit, I sliced mine up and froze it. My vision is to have a bunch of different rye loaves to enjoy during the holidays.... with the workload done over the preceding weeks.
I generally prefer my breads frozen in slices then toasted back to life for eating anyway.
Interesting experiments!
Have you seen this video how to make red rye malt? https://www.youtube.com/watch?v=CTa19hYag4Q
Also FYI scald should be kept at ~63-65°, not 55. The temperature affects not only the speed of the reaction but also the relative activity of alpha and beta amylases, hence the properties of the scald.
Thanks Ilya
I was aware of the video. I tend to have a lot of difficulty watching youtube video as I find them overly long and inefficient. I did read the comment that summarizes his method and saw it depended on CLAS. It seemed a more involved process than I was willing to attempt at least for now.
I depended instead on adapting from this link https://www.beetsandbones.com/russian-red-rye-malt-solod/
Interesting comment about the scald. My box won't go above 55c for now, which is the reason for the limitation.
I thought the solod is dried and toasted hot enough to denature the enzymes so I am wondering if you are expecting the enzymes to be primarily coming from the flour. For sprouted and whole grain that would certainly be the case. So maybe a scald with sprouted and milled whole grain makes way more sense than just regular dark rye flour if I do a mashed scald?
I should try the mash again with sprouted whole grain and see.
You can just use an oven for 65°!
And yes, Borodinsky uses a self-saccharifying (is this a word?) scald, i.e. just from the enzymes in the whole rye flour. You can keep a tablespoon of the flour aside and add it in after everything is homogenized to ensure there is some active enzyme and not all is kill by heat.
Great points. Clearly need to go back to whole grain rye so I am sprouting some now.
The oven scald isn't really an option for me given I run the scald overnight and the oven has poor controls, but point taken.
Yeah if the oven controls aren't precise for the temperature you have to manually find the right position of the knob with an external thermometer... Can take a little while. And then yeah maybe don't do it overnight.
Love reading about your rye experiments David. I hope to keep learning through your experiences. It sounds like it is a good solid eating bread and another good variation on this style. What will you change next?
Benny
Thanks Benny. Your kind comments are always greatly appreciated, a little sunshine in these shortest days of the year.
For changes, that's a good question.
Ilya is right that my solod could be better but I did make a whole bunch the last time so I'll work through it for now.
I would try aniseed spice maybe.
I am also curious about using molasses for sweetening in place of sugar or honey.
I also think I should go back to fresh milled sprouted whole grain rye. I also think I would use maybe some sprouted wheat or spelt for the 15% white. Dark rye flour makes a fine bread but it's just not the same.
I'm hoping to do another 4 breads (2 per weekend) before the holidays, all from rye baker and all using sourdough leavening:
auvergne
franconia
lublin
vitebsk
Borodinsky is labour intensive, even more so when you make your own malt, but what a lovely result. I've been thinking about making my own solod but for now do you think the same process would work for buckwheat? I wonder what the resulting malt would be like.
Honestly I am curious too. I hope you give it a try and let us know.
Buckwheat groats have amylase like barley apparently, and can be malted and roasted to various degrees for use in making beer.
The solod aspect would be trying to additionally get some fermented flavour as well by using a stepped heating process after the malt and before drying and roasting.
https://beerandbrewing.com/dictionary/heOJLe8Zkp/
https://brewingbeerthehardway.wordpress.com/2017/12/09/malting-buckwheat-save-it-for-pancakes/
Thank you for the articles. Having just read through them I think i've seen one mistake in his brewing process - for buckwheat! When malting buckwheat groats do not soak for more than 15-20 minutes. This is enough time for them to soak up water and not develop the viscosity he complains about. I'm assuming after they've been sprouted, fermented and heat treated (as well as the 1:4 ratio malt to water) they won't develop the same viscosity in the final mash. Of course this won't be an issue as malt in bread.
I'd love to see the results when you are ready.
The aroma of my first solod was intoxicating.
I just sprouted and hand milled 1.4kg of whole grain rye for my next two breads this weekend. It takes time and effort but boy, the fresh sweet aroma of the flour was delightful and I certainly missed that element in these dark rye flour based breads.
Sounds like malting buckwheat groats could be way faster! I'm curious what aromas and flavours will come out for you.
Last night I realised that perhaps I didn't make the best of choice when choosing the buckwheat to sprout. The store was out of the usual brand I buy so I bought raw buckwheat groats but boil in the bag style. Realised last night that many were damaged and might not sprout. But still they were mostly whole buckwheat groats so while I wouldn't get 100% to sprout there'd be enough to call it a success rate. In any case even if they were all whole there is rarely a 100% success rate. There's always some which don't. It did cross my mind to scrap it and buy more but I had started already so thought i'd see where it would go.
Crickey... this morning I had a peak and it isn't even 24 hours yet and they're sprouting like Jack and the Beanstalk. Only been about 18 hours. So while it wasn't the best choice of buckwheat groats I think we have enough sprouting making up for the fact. I was anticipating 3-4 days before moving onto the the fermenting but 2-3 days will be enough I think.
Since this is an experiment I have just done 100g. If it works then i'll do more. 1.4kg! Your kitchen must smell wonderful!
EDIT: After 24 hours...
I'm thinking 2 days max and then move onto the ferment?
P.s. now just a few hours later and it's progressing fast. More have sprouted and i'm getting a good yield. Looks far further along than the above photo. Will be progressing onto the fermenting stage tomorrow. It'll be done in the yoghurt maker for temperature control. Any advice will be appreciated!
4 hours later...
Update: So just under a day and a half i've moved onto the next stage. What I did to sprout the groats was soak for 20 minutes then transferred into the sieve which came with the yoghurt maker and washed them with boiled and cooled tap water. Placed the sieve inside the yoghurt bucket and allowed it to drain. Twice at 12 hourly intervals I washed the groats. Keeping it in the same sieve and bucket i've transferred it to the yoghurt maker at for the next 12 hours it'll ferment at 113°F (45°C).
Then following this blog i'll increase the temperature to 140°F (60°C) for 36 hours. All the while keeping it in the same sieve and yoghurt bucket (it has a lid on it too).
Now the maximum my yoghurt maker goes to is 149°F (65°C) but in the blog they are dried out at higher temperatures over the next day and a half to two days. I'll need to transfer them to my oven but i'm not keeping it on continuously for up to two days. So i'll be switching to Dabrownman's method of drying them out and heat treating them which is a lot quicker. He just sprouts and dries them relatively quickly, without the fermenting step, with good results. I'll do the best of both by fermenting them and drying them out quickly.
Wow that's amazing and fast.
Looking forward to aromas and flavours you experience.
Don't know if it's true but the blog claims rootlets taste bitter so you need to remove them for rye. I took the toasted solod and swished it around in a sieve to detach the rootlets into a powder,
I saved that rootlet powder and it had quite an intense aroma. I was thinking to use it as a kind of spice.
But very difficult to stop the germination early when they grew so fast. If I get that far with no hiccups I'll remove them too. Good idea about keeping it as a spice.
So they're fermenting in a warm humid environment. I'm a bit concerned about growing mold and bad bacteria. What keeps the bad stuff at bay when doing something like this?
I believe > 40 celsius temps. that's the reason for the stepped temps
This afternoon the first 12 hours was up. Had a peek fully expecting it to look like a lab experiment gone wrong but was met with perfectly healthy looking sprouted buckwheat groats. They smell good! No underlying off smells one associates with mold. Has a nice fresh grassy aroma with a faint hint of chocolate. It has generated a lot of water but groats themselves seem less plump. Poured out the excess water that had gathered in the bucket and turned the groats as the mesh in the sieve is quite wet so it'll be more even. Now for the next 36 hours they'll be kept at 60°C which will take it to some time in the early hours of Monday morning at about 1am. What i'll do is spread them out on a tray lined with baking paper and put them in the oven turned off and later on Monday i'll switch to Dabrownman's heating method. Started on Thursday afternoon and on target for them to be ready by Monday early evening.
I'm wondering if there's any correlation between buckwheat sprouting very easily and being able to make naturally fermented buckwheat bread with no starter and relatively quickly.
EDIT: So it's about 6 hours in and it's producing some interesting aromas. Thought I smelt a hint of mustiness (tell tale sign of mold - I know i'm too worried) coming through so while I was going to leave it undisturbed for 36 hours I had a closer look. The groats are beginning to turn brown. With the lid off the aroma is less musty and more malt like now. It's lost the fresh grassy aroma and taken on a more complex flavour. Not wishing to leave it off the warmth too long I quickly poured off the excess water and turned the groats once more. Such a big change in a few a hours and with upping the temperature.
12 hours in and there's a distinct sour smell. Not necessarily an off smell but rather like a sweet and sour cabbage or vinaigrette with sugar. The groats are getting very wet from all the condensation. Is that supposed to happen? The groats themselves seem ok but I think the shoots will disintegrate at this rate. Hope i'm on the right track.
I'm afraid you're in uncharted waters with buckwheat but I think you may be ok. See below.
For my sprouted rye there was quite a bit of condensation on the cover but no water to pour off in the bowl. I sprouted by soaking 4 hours then draining and rinsing every four hours over a period of 24 hours. So it was fully drained when I fermented it.
It fermented in a covered bowl then sacchirified in the same bowl, When it was done it had turned reddish. Then I dried it in the dehydrator to remove the moisture from the original soaking, Then I toasted it hotter to dry it out further and provide some Maillard reaction flavours. Then I scraped it in a sieve to remove rootlets.
The aroma for the first batch at the end was a combination of sweet and fermented... that was the solod experience as I understood it. Maybe that's what hou are getting?
Does any of this help?
The groats are soaked, drained and then regularly sprayed (so they don't dry out) so it stands to reason when covered to ferment and kept very warm it'll sweat creating more moisture.
I'm not too sure about this. think i'll abandon the project. Doesn't sound as if it's going too well.
I think you may be fine. You may have got a previous version of my post before I updated it with some working memory.
I never sprayed my rye during fermentation or saccharification. I'm not sure if that what you tried.
I never sprayed it during fermentation. Only while the roots were sprouting. Then I transferred it to the yoghurt maker (my only source of being able to regulate the temperature) and covered it. The groats were moist, as they are supposed to be, and with being warm and covered it generated its own moisture with it being a humid environment.
Don't want to take any chances. I've thrown them out and thoroughly cleaned the yoghurt maker. It just seemed the perfect environment for growing something unfriendly.
I'm sorry it didn't work out for you. Thanks for sharing the effort!
I didn't have a spray bottle. When I said I "sprayed" the groats I actually ran them under the tap allowing the sieve to drain the excess water. Problem is the sieve is very fine and it held a lot of the water.
Secondly, the yoghurt maker acted a bit like a slow cooker. The very wet sieve and groats together with a hotplate and an enclosed environment caused too much humidity.
If I can think of a set-up that would be more ideal then i'll try again. Perhaps i'll soak the groats in a dish, drain and cover. Since they sprout quickly perhaps they only need to sprayed just the once. Either i'll find a spray bottle or wash them again making sure to drain them well. When they have dried out somewhat, but not completely, then i'll transfer them to the dry sieve, place in the yoghurt maker but cover with a towel instead of the lid. What do you think?
For now a bit of break is needed, a successful bake will be a nice diversion and then i'll try again. I'm always scared when doing this that i'll do it wrong and grow something unwanted. Once I made diastatic malt but that had less steps and simply involved sprouting and drying.
I'm risk averse in many ways but for some things I'll push along and see what comes out at the end vs pulling the plug. It's helped me with a few baking techniques where I learned I needed to push myself a little farther to see the desired result to trigger a chemical change. In coffee roasting some advise that we go too far at least once to learn the entire continuum for a bean.
I think the key issue is holding a temperature either nelow or above bacteria and mould formation. The water issue was a difference in technique vs a problem.
I get the need for a break for sure. I'm taking a rye break and will hopefully return to it in a few weeks, refreshed.
I was looking at the Wikipedia entry on buckwheat and there was a mention of fagopyrism, a skin photosensitivity that can develop from consuming larger amounts of buckwheat sprouts. I suppose if the sprouts were removed from the groat there would be less chance of fagopyrism, but I don't know how much of the phototoxic chemical would remain in the groat.
Was a bit disappointed but something told me I should abandon it. Glad I did! Next time I approach anything like this i'll stick to barley or rye and now have a better idea of how to approach it all. The main problem, apart from fagopyrism, was my set-up for the process was acting more like a slow cooker which was no good. This was not a failed experiment. It taught me something!
...take a look at all these "health gurus" on YouTube telling their followers to sprout buckwheat groats for its health properties. Anyone can be a health guru nowadays.
This was one failure I shall chalk down as a success.
Ask and ye shall receive
https://tartarybuckwheat.com/tartary-buckwheat-and-fagopyrism/
Seems it is concentrated in leaves, stems, flowers. Primarily an issue with lifestock grazing or people drinking buckwheat greens in smoothies every day.
The link compares various sources in a lit review. Bear in mind the difference between a milligram (mg) and microgram (ug) (1/1000 of a mg) when reading. Groats, hulled groats, flour and baked bread are mentioned at the end so you can compare.
Since this is a hulled groat that is sprouted to activate amylase and break down starches (but not in any way a green plant) and will have the rootlets removed after drying, and is then baked, I'm not sure I see the danger but I am no expert. I don't see any connection to the fermented aroma. My solod had a wonderful sweet fermented aroma by design. But again I admit to zero expertise and I did not smell his work :)
Malty and slightly sweet. It was just the environment didn't look right. And anything can happen in 36 hours. Mold and bad bacteria can thrive very fast. Wasn't taking a chance. I'm confident it was just the set-up that was wrong. I'm going to repeat but with barley or rye grain.