
While reading about types of flat breads (made just a few so far like naan, chapati, Barbari bread, puran poli and qatlama patir), I came across interesting ways to make obi non. Some of these use chopped onion in the starter as it boosts fermentation and provide a lovely flavor.
The articles can be found here: http://brotgost.blogspot.com/2017/02/obi-non.html
http://hlebinfo.ru/uzbekskie-lepeshki.html
They're in Russian but Google helped translate. :)
For my small batch of 3 or 4 breads, I decided to use some atta flour and more water was added in the dough to make it soft enough. Also, yogurt or soured milk add extra flavor to this bread :D
Obi non
Stiff starter (12 hours)
20g starter (100% hydration)
80g whole wheat flour
44g water
1g salt
10g onion, chopped fine
Dough
All of the starter
60g whole wheat flour
200g all purpose flour
10g sugar
110g water
80g plain Greek yogurt
1g instant yeast
6g salt
15g ghee
Topping
Milk wash
Sesame, caraway seeds
It took me 2 days to make these as I prepared the starter early in the day, the dough at night. After mixing the dough ingredients with the stiff starter, I left the dough to chill overnight as it was getting late. Preparing the starter at night would have been better. The first proof should take 1.5 to 2 hours (longer if using only sd) at 26-28°C
After the first proof, divide the dough to 3 or 4, shape into boules. Cover and let these rest for 15 minutes.
Final shape: gently flattened discs to about 15-20cm in diameter with wet fingertips. Then, gently press a circular indentation in the middle, so that the border is thicker and puffier.
Cover and let the dough discs rest for their final proof for 45 minutes. Preheat the oven to 180° or 200°C about 20 minutes into the first proof.
Lightly brush oil over the middle of the dough. Then, if the middle is puffy again, press with fingertips or base of a glass into the middle of each dough until a deep indentation forms (this prevents it from rising during the bake), followed by designs with chekichs, fork, spoon, cookie cutter, pinching with fingertips, or even a toothpick. Optional: score or leave light indentations on the border.
Cover and let the shaped dough rest for 10 minutes.
Brush with cream or milk and sprinkle sesame or caraway seeds.
Bake at 180°C with steam for 20 minutes, followed by 5 to 10 minutes without steam until the top of the loaf is golden brown. Or
Bake at 200°C with steam for for 15 minutes, followed by 2 to 5 minutes without steam until the top of the loaf is golden brown.
Brush baked loaves with melted butter or ghee and let them cool for at least an hour before serving.
The next bakes were honey-lemon loaves. I made 3 of these in a week while preparing candied citrus peels (I've yet to start on the fruit loaf). They had lemony scent and hint of honey that we enjoyed! Also, I wanted to see if I can create vertical lines with the swirls too! A bit tedious, but it was like making monkey bread. :)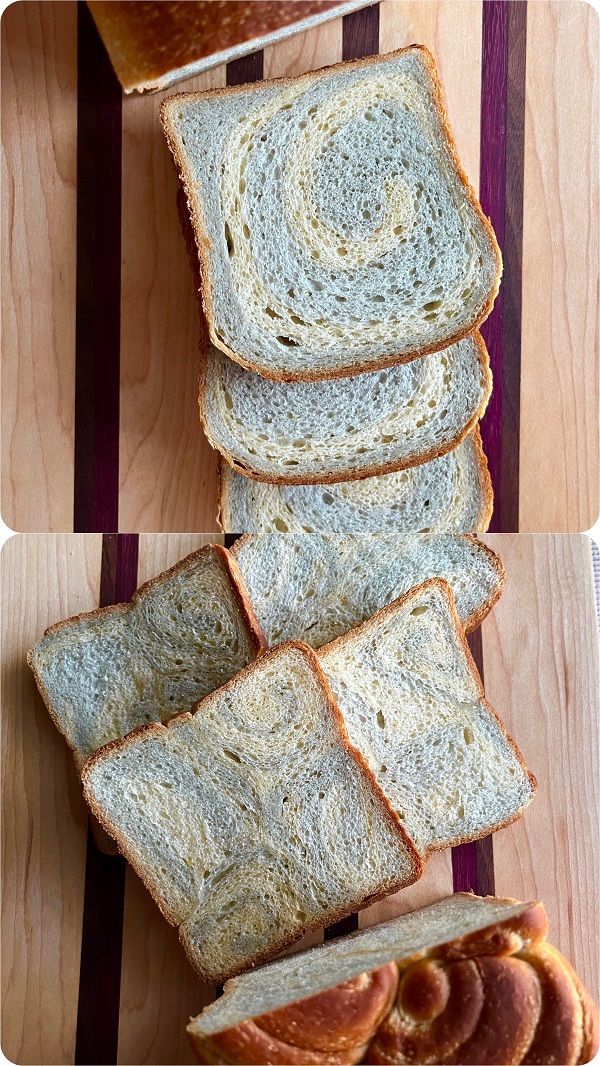
Honey Lemon sandwich loaf with butterfly pea swirls
(& lines!)
Tangzhong
20g all purpose flour
100g milk
Dough
All of the Tangzhong
40g cream
30g milk
35g honey
1 large egg
110g starter (100% hydration)
10g sugar
Zest of 1 to 2 lemons
1/4 tsp pure lemon extract (optional)
240g all purpose flour
80g Kamut flour
5g vital wheat gluten
2g instant yeast
6g salt
40g unsalted butter
10g light olive oil
Butterfly pea tea
3g butterfly pea petals + 100g freshly boiled water.
Steep 15 to 20 minutes while preparing dough.
For butterfly pea blue swirls:
Divide dough in half.
Plain dough: add 15g milk
Blue dough: add 14g butterfly pea tea
Honey Lemon sandwich loaf with matcha swirls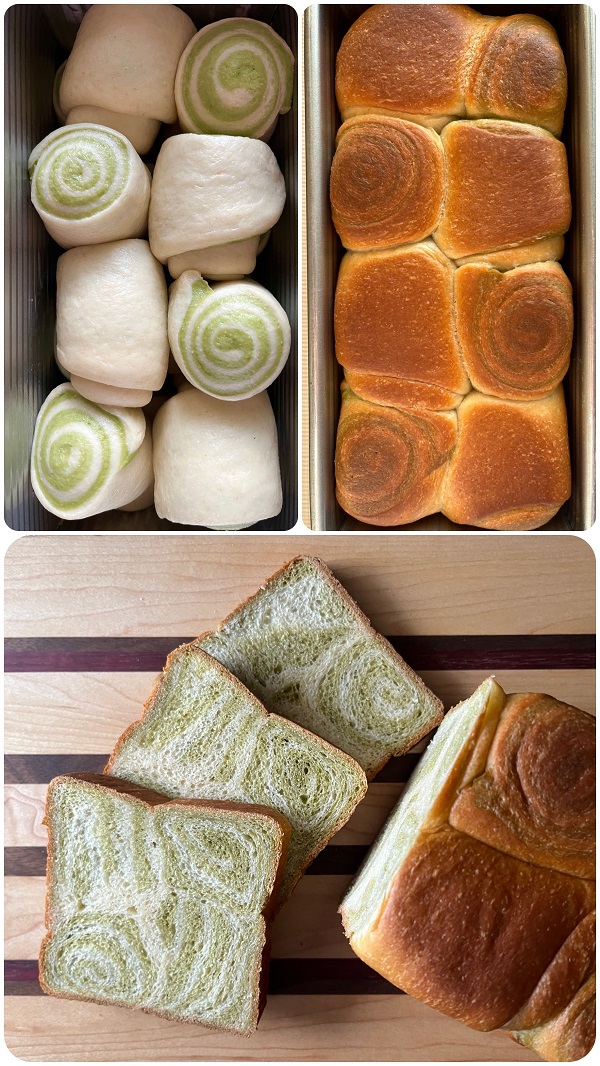
Tangzhong
20g all purpose flour
100g milk
Dough
All of the Tangzhong
40g cream
40g milk
35g honey
1 large egg
100g starter (100% hydration)
10g sugar
Zest of 1 lemon
1/4 tsp pure lemon extract (optional)
240g all purpose flour
80g Kamut flour
5g vital wheat gluten
2g instant yeast
6g salt
40g unsalted butter
10g light olive oil
For matcha swirls:
Mix 2g sifted matcha powder + 4g milk into a paste. Mix this into 350g of dough.
Divide each dough into 8 equal pieces. Roll each into dough balls, cover and let them rest for 15 minutes.
Roll each piece about 15cm/6". Overlay the colored dough over the plain dough. Roll the dough out to about 10cm/4" wide and 20cm/8" long. Roll each pair up, then divide them in two. Place them in alternate directions in 2 rows in greased loaf pan.
They were baked at 180°C with lid for 25 minutes, followed 25 minutes without. Loaf was tented with foil in the last 10 minutes
The next bake took a long time! All because I wanted to make bubble buns (from this post), with espresso mochi in them. These turn out bigger and less cuter than bubble buns though!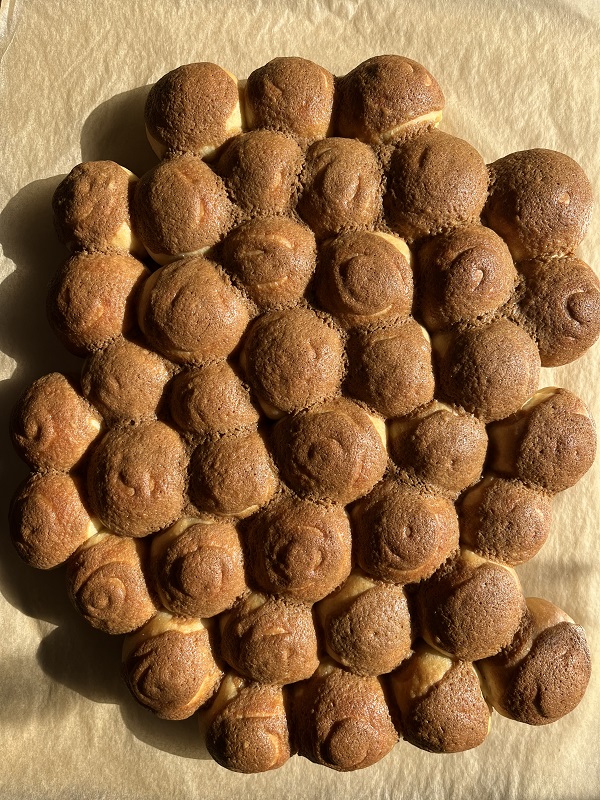
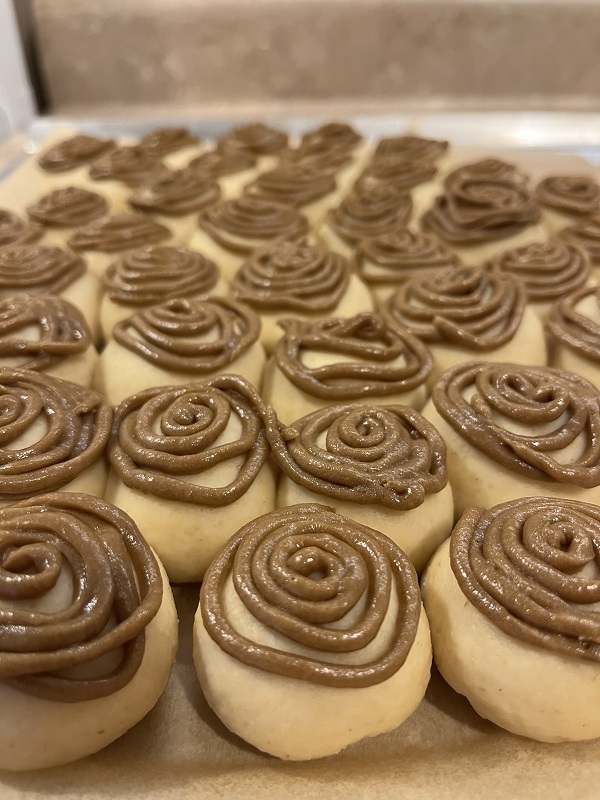
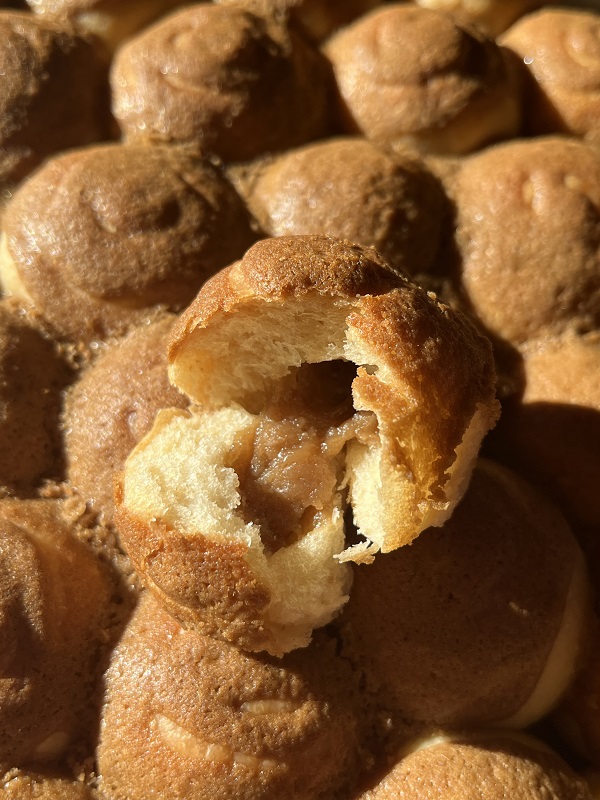
Almost-bubble buns with espresso topping and mochi filling (ha!)
The dough is from that recipe.
Small batch espresso mochi filling
80g mochiko/glutinous rice flour
20g tapioca flour
2g espresso powder
a pinch of cocoa powder
40g brown sugar
10g vegetable oil or melted butter
140g milk
For dusting: cornstarch
Bring water in a steamer to a boil while preparing the batter.
In a medium bowl, whisk together glutinous rice flour, tapioca starch, espresso powder, cocoa powder, brown sugar and milk.
Stir in oil or butter and mix until well combined and there are no lumps. Strain the mixture, if necessary to remove lumps.
Transfer the batter to a greased bowl and place this in the steamer.
Steam the batter over high heat for 20 minutes, making sure the lid of the steamer is wrapped tightly in a towel to prevent condensation from dripping into the bowl.
The mochi is done when the mixture changes from a solid color to slightly-translucent.
Remove from the steamer, and let it cool while covered for 5 minutes.
Then, transfer the mochi to an oiled counter and knead it (with gloved hands) for 2 minutes until it is smooth.
Wrap the mochi with plastic wrap and refrigerate for 30 minutes. Once chilled, slice the mochi into smaller pieces with a silicon dough scraper and dust each lightly with cornstarch to prevent sticking.
Skipping ahead of preparing and the first proof:
After dividing the dough into 40 equal pieces (20-30g each) and resting them, they were each filled with roughly a teaspoon of mochi and rolled into little balls. They were then arranged on parchment lined bake sheet with about 3cm/1" distance between them. Cover and let these proof at room temperature until they're puffy and are now stuck to one another. Pipe cooking topping over each bun (I managed to stick to one swirl this time). Bake at 180°C for 15 minutes until edges are golden brown and the internal temperature is at least 88°C. Turn off the oven, leave the oven door slightly ajar and leave the buns to continue baking in the cooling oven for 5 to 10 minutes. Then, remove the buns from the oven and let them cool completely on a cooling rack.
The latest bake was from last night using leftover syrup from making candied citrus peels. This bake felt rushed as I started preparing quite late in the evening. The baked loaf burst on one side during the bake - I believe I rolled the doughs a bit too tightly and should've used steam in the bake. (Lesson learned: do not make anything while half asleep!)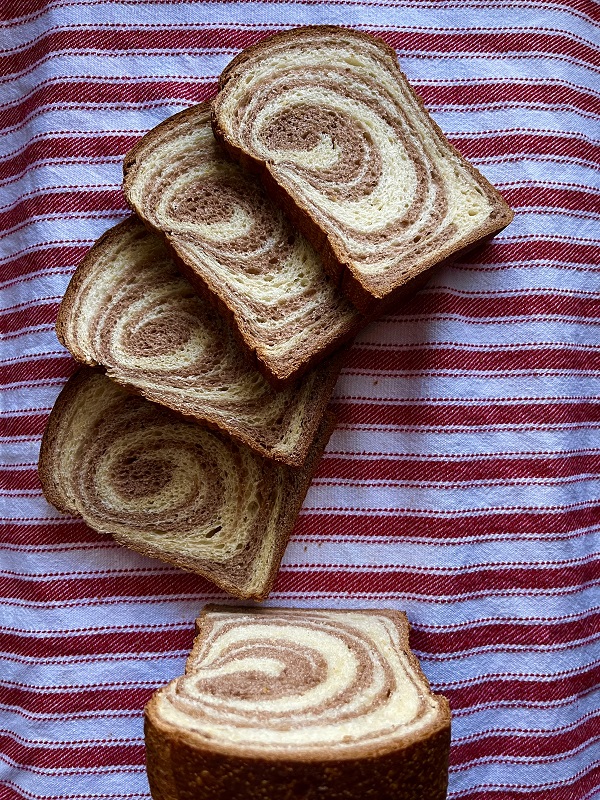
From the photo here, was the loaf under-proofed?
Orange and chocolate sandwich loaf
Dough
70g starter discard (100% hydration)
50g plain yogurt
80g milk
100g citrus syrup
250g all purpose flour
125g Kamut flour
2 tsp orange zest
2g instant yeast
6g salt
1 large egg
40g unsalted butter
10g light olive oil
Chocolate dough
15g melted dark chocolate
2g cocoa powder
120g dough
The chocolate dough was letter-folded with plain dough. Then, turned 90° and rolled out to about 20cm/8" wide and 46cm/18" long. The dough is then rolled into a log and left to proof a second time until it filled about 80% of the pan. Baked at 180°C 45 to 50 minutes. It was tented with foil in the last 10 minutes and reached an internal temperature of 98°C. Then, I left it overnight to cool on a rack.
That's it for now! :D
- Christi
30 Nov 2021 update: Made the orange chocolate loaf with SD discard. I added a lil bit of baking soda into the discard as this was a mixture of stiff and liquid starter from multiple feeds. The doughs were letter-folded once, sliced and braided to fit a 9x4x4 Pullman pan.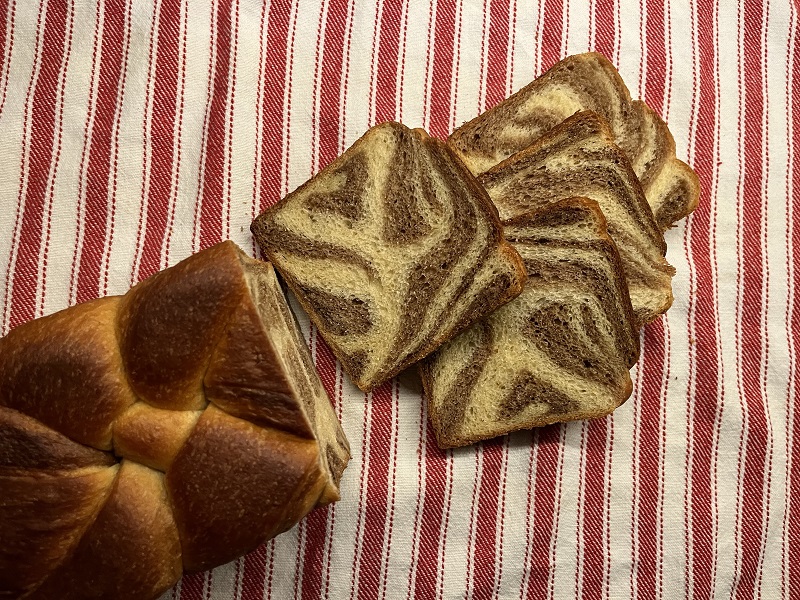
Tangzhong
20g all purpose flour
100g milk
Dough
All of the Tangzhong
30g cream
45g milk
1 large egg
120g starter discard with 1/8 tsp baking soda (100% hydration)
235g all purpose flour
5g vital wheat gluten
80g Kamut flour
3g instant yeast
20g sugar
6g salt
40g unsalted butter
10g olive oil
Chocolate dough (to 1/3 of the dough)
15g dark chocolate, melted
2g cocoa powder
- Kistida's Blog
- Log in or register to post comments
So much wonderful stuff! Thanks for sharing. Those obi non look amazing. And espresso mochi buns? My wife would go nuts about that. We have homeroasted/pulled espresso shots and she's crazy about mochi. I need to find that glutinous rice flour though.
I recently made espresso + dark chocolate canneles... would love to try your recipe next.
I highly recommend real espresso vs powder.
nothing beats fresh espresso shots ;D however, for the topping, the water in the espresso would've created a separated mixture that won't be as smooth. Unless it's a super-concentrated shot of espresso. something to experiment soon! :D
- Christi
Beautiful bakes and recipes! Thanks for sharing!
This is a place to keep my makes/bakes updated so my phone doesn't get too burdened. :p
- Christi
Christi, your bakes are always so imaginative and delightful, both in how they look and the flavours you use. When can I come over to taste some 😉
Benny
for me to take home with me!
- Christi
We’ll have to arrange a trade!
Benny