
I grow peppers in pots on the south side of the house. With the hot dry weather if this summer, I ended up with a bumper crop of beautiful red sweet peppers. I chopped them up in small pieces and dried them in a dehydrator. I remember reading here that drying and rehydrating fruits or vegetables enhanced their flavour. So along with minced garlic, shredded Parmesan, dried parsley and some olive oil, this should be one tasty bread. I’ll have to wait for my friends to let me know as I sold out completely.
Recipe
Makes 3 loaves
Porridge
100 g rolled oats
200 g water
Add-ins
25 g dehydrated sweet peppers (chopped in small pieces)
25 g hot water
30 g olive oil
150 g shredded Parmesan
1 tbsp dried parsley
2 tsps minced garlic in oil
Dough
700 g unbleached flour
200 g freshly milled whole grain Spelt flour (200 g Spelt berries)
100 g freshly milled whole grain Durum flour (100 g Durum berries)
700 g water
22 g salt
30 g yogurt
250 g levain (procedure in recipe)
Extra wholegrain flour of your choice for feeding the levain
The night before:
- Mill the grains and place in a tub. Add the unbleached flour to the tub as well. Cover and set aside.
- Soak the dehydrated peppers in the 25 g of water overnight.
- Take 10 g of refrigerated starter and feed it 20 g of water and 20 g of wholegrain flour. Let that rise at cool room temperature for the night.
Dough Making day:
1. Early in the morning, feed the levain 100 g of filtered water and 50 g of strong baker’s flour and 50 g wholegrain flour. Let rise until doubled (About 5 hours, mine was ready in 4 and a half).
2. About two hours before the levain is ready, put 700 g of water in a stand mixer’s bowl and add the flours from the tub. Mix on the lowest speed until all the flour has been hydrated. This takes a couple of minutes. Autolyse for a couple of hours at room temperature.
3. Make the porridge: Add the water to the rolled oats and cook on medium heat until the liquid is absorbed and porridge is very thick and creamy.
4. Once the autolyse is done and the levain has doubled, add the salt, the yogurt, the porridge, the soaked peppers, the rest of the add-ins, and the levain to the bowl. Mix on the lowest speed for a minute to integrate everything, then mix on the next speed for 9 minutes.
5. Remove the dough from the mixing bowl and place in a lightly oiled covered tub. Let rest 45 minutes in a warm spot (oven with light on).
6. Do 2 sets of coil folds at 45 minute intervals and then 1 more set after 30 minutes. Let rise about 30%. This took only another 45 minutes or so. I’m finding that my bulk fermentation is done after about 3 hours on average. It’s a bit difficult to gauge because I do 4 batches in succession and the first couple of batches do get some extra fermentation time.
7. Tip the dough out on a bare counter, sprinkle the top with flour and divide into portions of ~845g. Round out the portions into rounds with a dough scraper and let rest 30 minutes on the counter.
8. Do a final shape by flipping the rounds over on a lightly floured counter. Gently stretch the dough out into a circle. Pull and fold the third of the dough closest to you over the middle. Pull the right side and fold over the middle and do the same to the left. Fold the top end to the center patting out any cavities. Finally stretch the two top corners and cross over each other in the middle. Roll the bottom of the dough away from you until the seam is underneath the dough. Cup your hands around the dough and pull towards you, doing this on all sides of the dough to round it off. Finally spin the dough to make a nice tight boule.
9. Sprinkle a mix of rice flour and all purpose flour in the bannetons. Place the dough seam side down in the bannetons. Let rest for a few minutes on the counter and then put to bed in a cold (38F) fridge overnight.
Baking Day
1. The next morning, about 12-13 hours later, heat the oven to 475F with the Dutch ovens inside for 45 minutes to an hour. Turn out the dough seam side up onto a cornmeal sprinkled counter. Place rounds of parchment paper in the bottom of the pots, and carefully but quickly place the dough seam side up inside.
2. Cover the pots and bake the loaves at 450 F for 25 minutes, remove the lids, and bake for another 20 minutes at 425 F. Internal temperature should be 205 F or more.
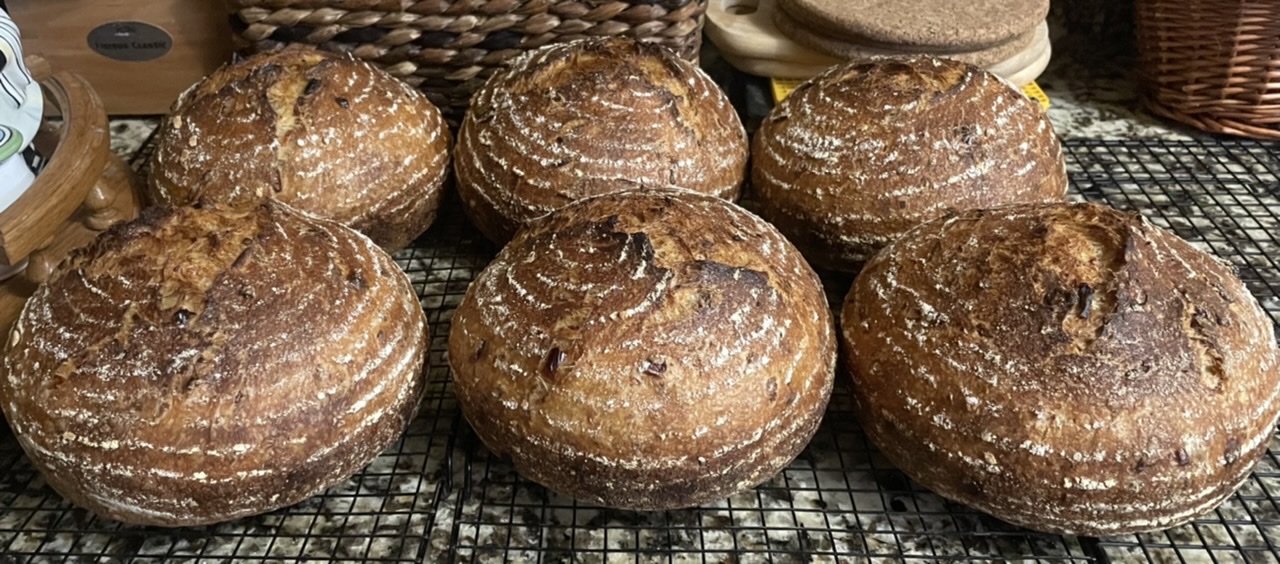
The aroma put out by these loaves is amazing!
- Danni3ll3's Blog
- Log in or register to post comments
What’s not to love about that bread Danni? Delicious cheese, herbs and your red peppers all encased in a beautifully risen loaf of bread.
Benny
I was just reading about your miso loaf and the 5 minute score. I think miso in bread would be fantastic if it taste anything like miso soup. The 5 minute score is an interesting idea. Not one though that I can implement while making a dozen loaves.
I was also pondering your comment about the thinner crust. My loaves above have a nice thin crispy crust. I believe that to come from the olive oil and the yogurt in the recipe. Not knowing anything about miso, I wonder if it’s the ingredients rather than the method that produced your thin crispy crust.
By the way, I like your new photo of you!
Yes I do find adding fat to the dough does help thin the crust. In this case there would be little fat from the miso, just the small amount in soybeans. I have made miso sourdough loaves in the past but never without a dutch oven. Those loaves had the typical crust I am used to getting. Other than baguettes which bake for a short time and ciabattas I seldom bake hearth loaves without a dutch oven. This is why I wonder if it was the baking method in this case rather than the miso which created a thinner crust.
Figured I better update the picture since the hair has gone “au naturel”. Ha ha.
The horse is the old girl we used to look after. Unfortunately, she hurt herself (torn tendon and she already had suspensory ligaments issues) and we had to do the responsible thing and send her to the rainbow bridge a week ago. 😢 It was a hard day.
I’ll keep an eye out for your experiments with the crust thicknesses.
Sorry to hear about your horse Danni, you guys did the right thing to prevent her from suffering.
Benny
Absolutely stunning and the flavours sound amazing. Thanks for sharing the whole process!
Love the description of the smell of baking. And what a beautiful collection of round loaves.
Think I've got to make similar now.
I've always been wary of using parmesan in my breads, but if it is only 50g per loaf I should give it a try. And I like that the amount of garlic isn't too overwhelming either. I'm a fan of little pickled peppers that we get (they're Juanita peppers but are marketed as "Piquante peppers" or "Peppadews") and was wondering if you've got similar small peppers?
-Jon
So that’s what I used but next time, I will try some kind of hot peppers like jalapeños. And the amount of Parmesan is 150 g, not 50. But you can put in what you want. Note I used shredded and not grated Parmesan. Feel free to use whatever amount you like and grated or shredded. It will all taste good!
Happy October Begin! Just seems right for Autumn. :)