I was encouraged to try this bake, and with the recent activity in the 5-grain Levain CB thread, I decided to give it a go. Wow, learning curves galore on this one. First time baking the bread. First time using inclusions. First time using a soaker. Mistake transcribing the formula to my spreadsheet caused a big mess in the first attempt on Saturday. A few curveballs today. It was a weekend of ups and downs, and won't have the verdict for at least another few hours. :-)
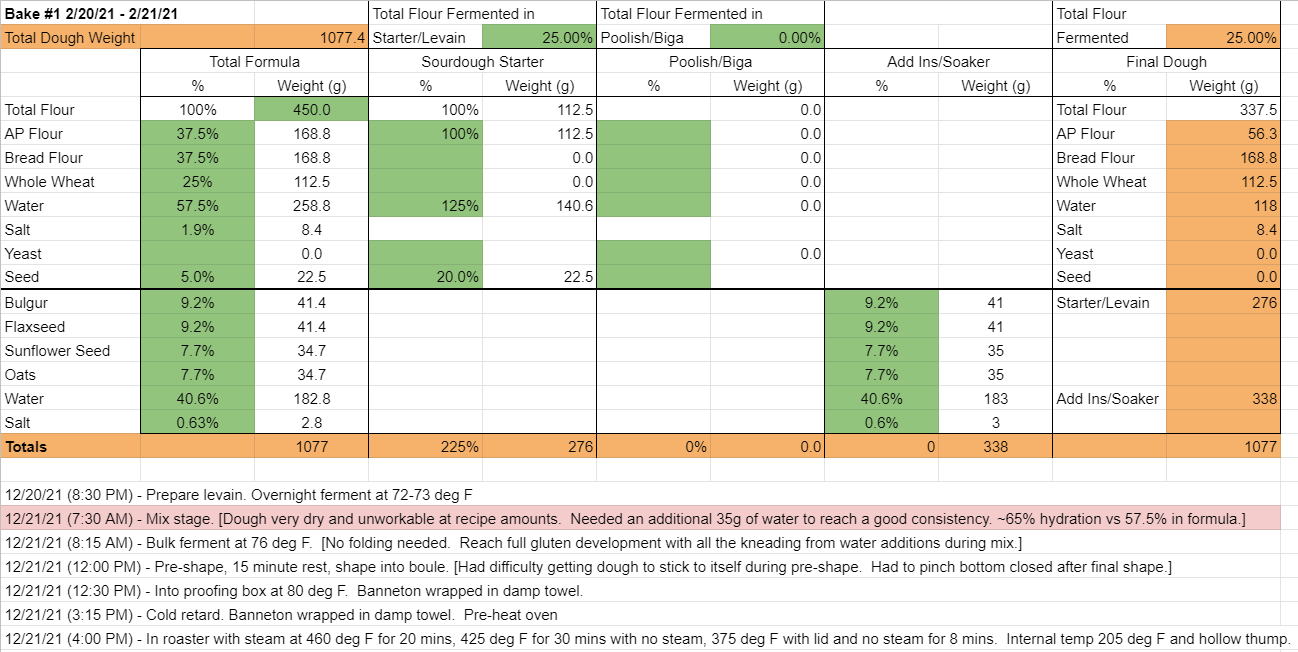
Levain: Went as planned for the most part. Formula calls for 12-16 hours at 70 deg F. My basement is running about 72-73 deg. Despite being 125% hydration, the levain had doubled by the 9 hour mark and actually had the slightest bit of a dome. At 11 hours, the dome had flattened and actually looked like it was starting to sink just a bit. Moved to mix stage at that point.
Mix: The recipe calls for bread flour, but I thought I read somewhere that Mr. Hamelman refers to AP flour as "bread" flour. I wasn't sure, so I hedged my bet and used 50:50 KAF AP and Bread flours. Because of the transcription error the previous day, I was meticulous with measurements this morning and was thrown the first curveball of the day. The dough was really stiff and dry. Added water in 5g increments (7 additions needed) until I got what I thought was a workable consistency. The 35g of water I added would take the final dough formula to 65% hydration versus the 57.5% shown. Should there be free water in the soaker? Mine had no free water after 12 hours covered at room temp. With all the additions, the dough received a lot of kneading and was fully developed (as best as I could tell).
Bulk ferment: All my doughs to-date have relaxed and flattened during bulk ferment and then I'd fold to build them back up. With that, I had some idea on how fermentation was progressing. This dough pretty much stayed a ball throughout bulk. So, it didn't really rise. It swelled. The method called for a 2 hour BF. I went for almost 4 hours. By my best guess it had increased approximately 50% in size, but had stopped swelling for the last 45 minutes (as far as I could tell). Wasn't sure how much it could increase in volume with the weight of the inclusions.
Shaping: Maybe because the dough started out so dry, but I had a heck of a time with pre-shaping and shaping. I tried doing the pre-shape that Mr. Hamelman uses in this video, but the dough wouldn't stick to itself and just formed a big air pocket. In the end, I had to unfold it to get it flat and then do a letter fold followed by rounding to get a decent boule. I had to stitch/pinch the bottom closed and let it sit seam side down for a few minutes to get it to seal. Was able to get good tension in the dough without tearing it though when rounding. I see two shaping errors after baking 180 degrees from each other. Can tell it's where the dough wouldn't stick to itself. No flour was used during shaping, so that's not it. Hopefully, this doesn't have a big, hollow center.
Final proof: Wrapped the banneton in a wet towel as I knew there was still a way to go on final ferment (or at least I thought there was). Wanted to keep things damp to give it the best chance to rise (pretty low humidity in the house right now). Banneton placed in proofing box set at 80 deg F. Saw a bit of a rise after 1 hour. Didn't notice much (if any) change at 2 hours. At 2.75 hours, I did a poke test and it looked ready. Not sure if a poke test works with inclusions in the dough, but I ran with it. Into the refrigerator for 45 minutes while the oven pre-heated. I kept the towel wrapped around the banneton in the refrigerator as well, but the dough seemed to have a pretty dry skin when I put it on the parchment paper. I think the banneton pulled a fair amount of moisture out of it. I sprayed it with a mist bottle after scoring to try and moisten the dough.
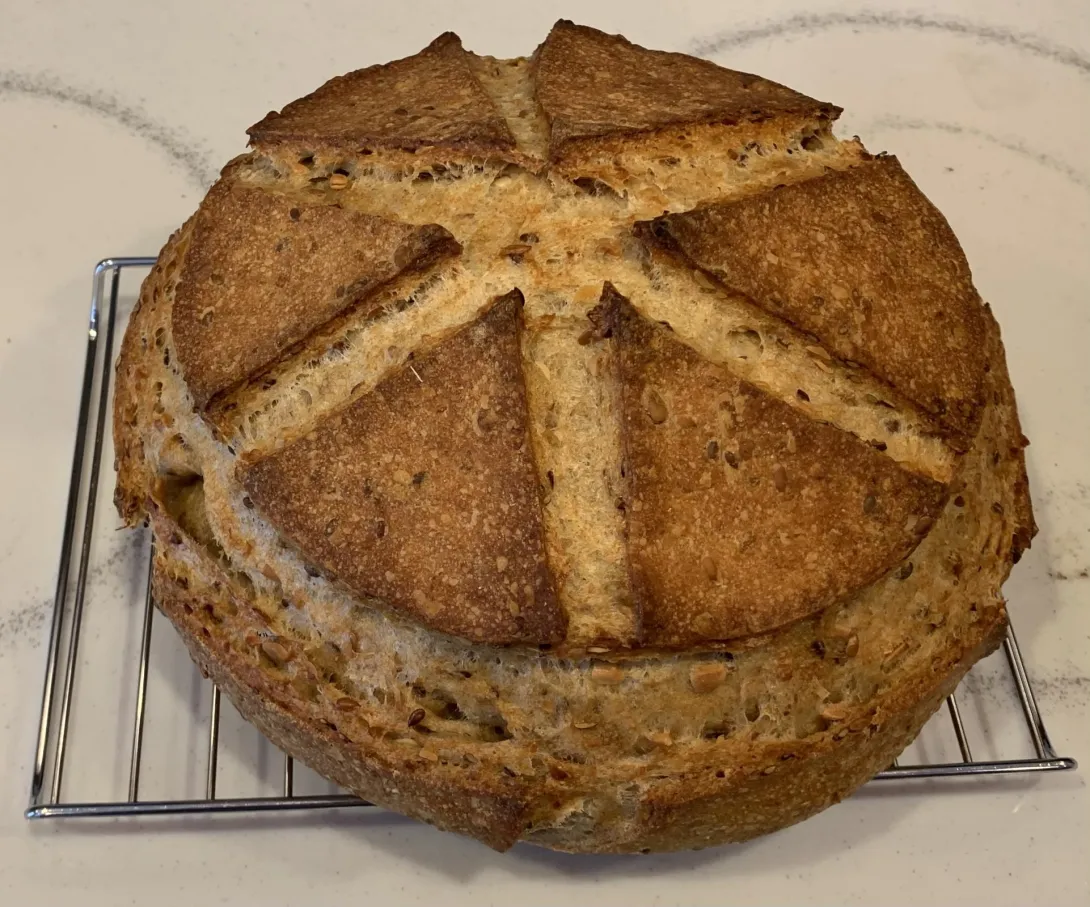
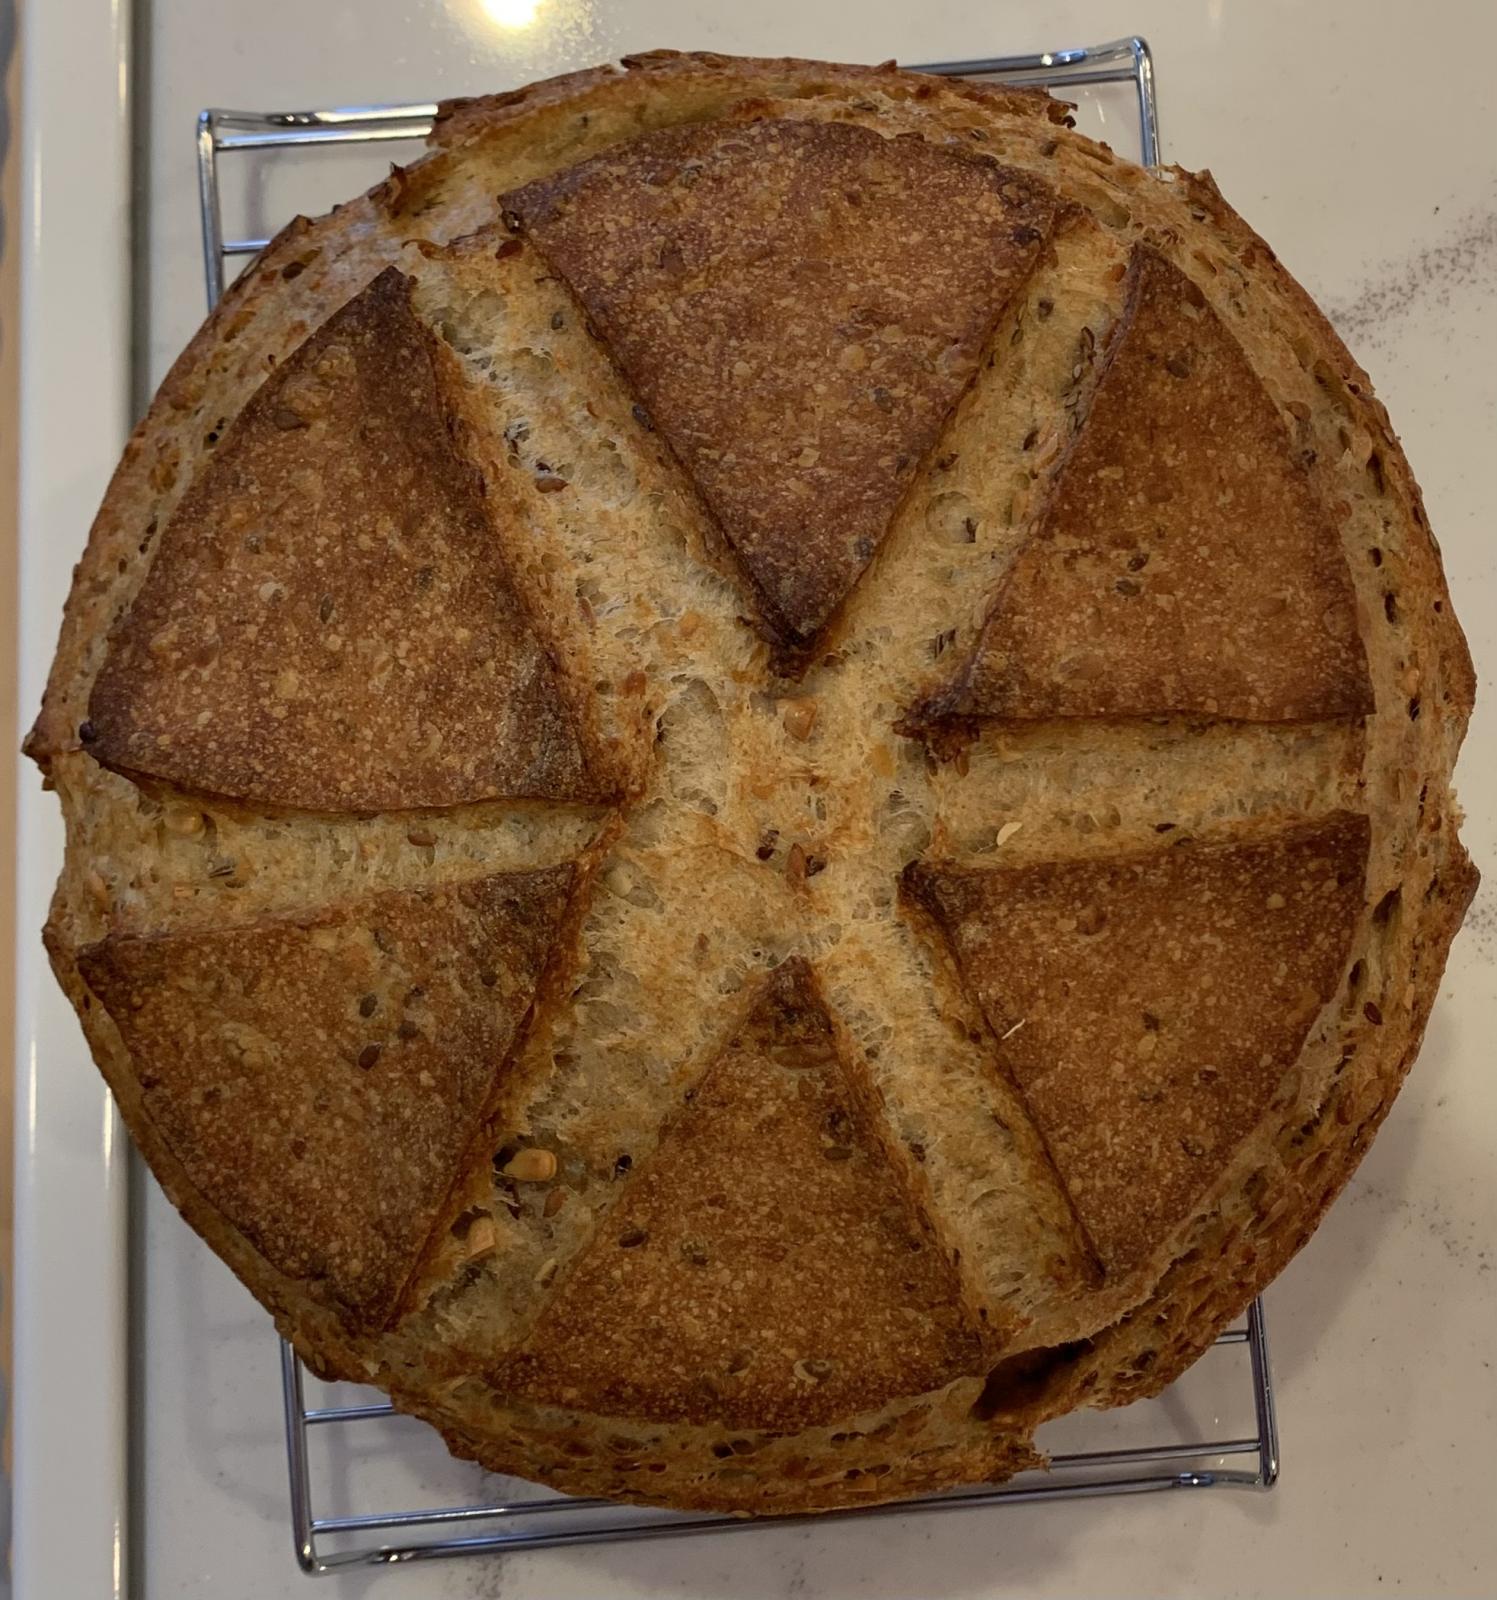
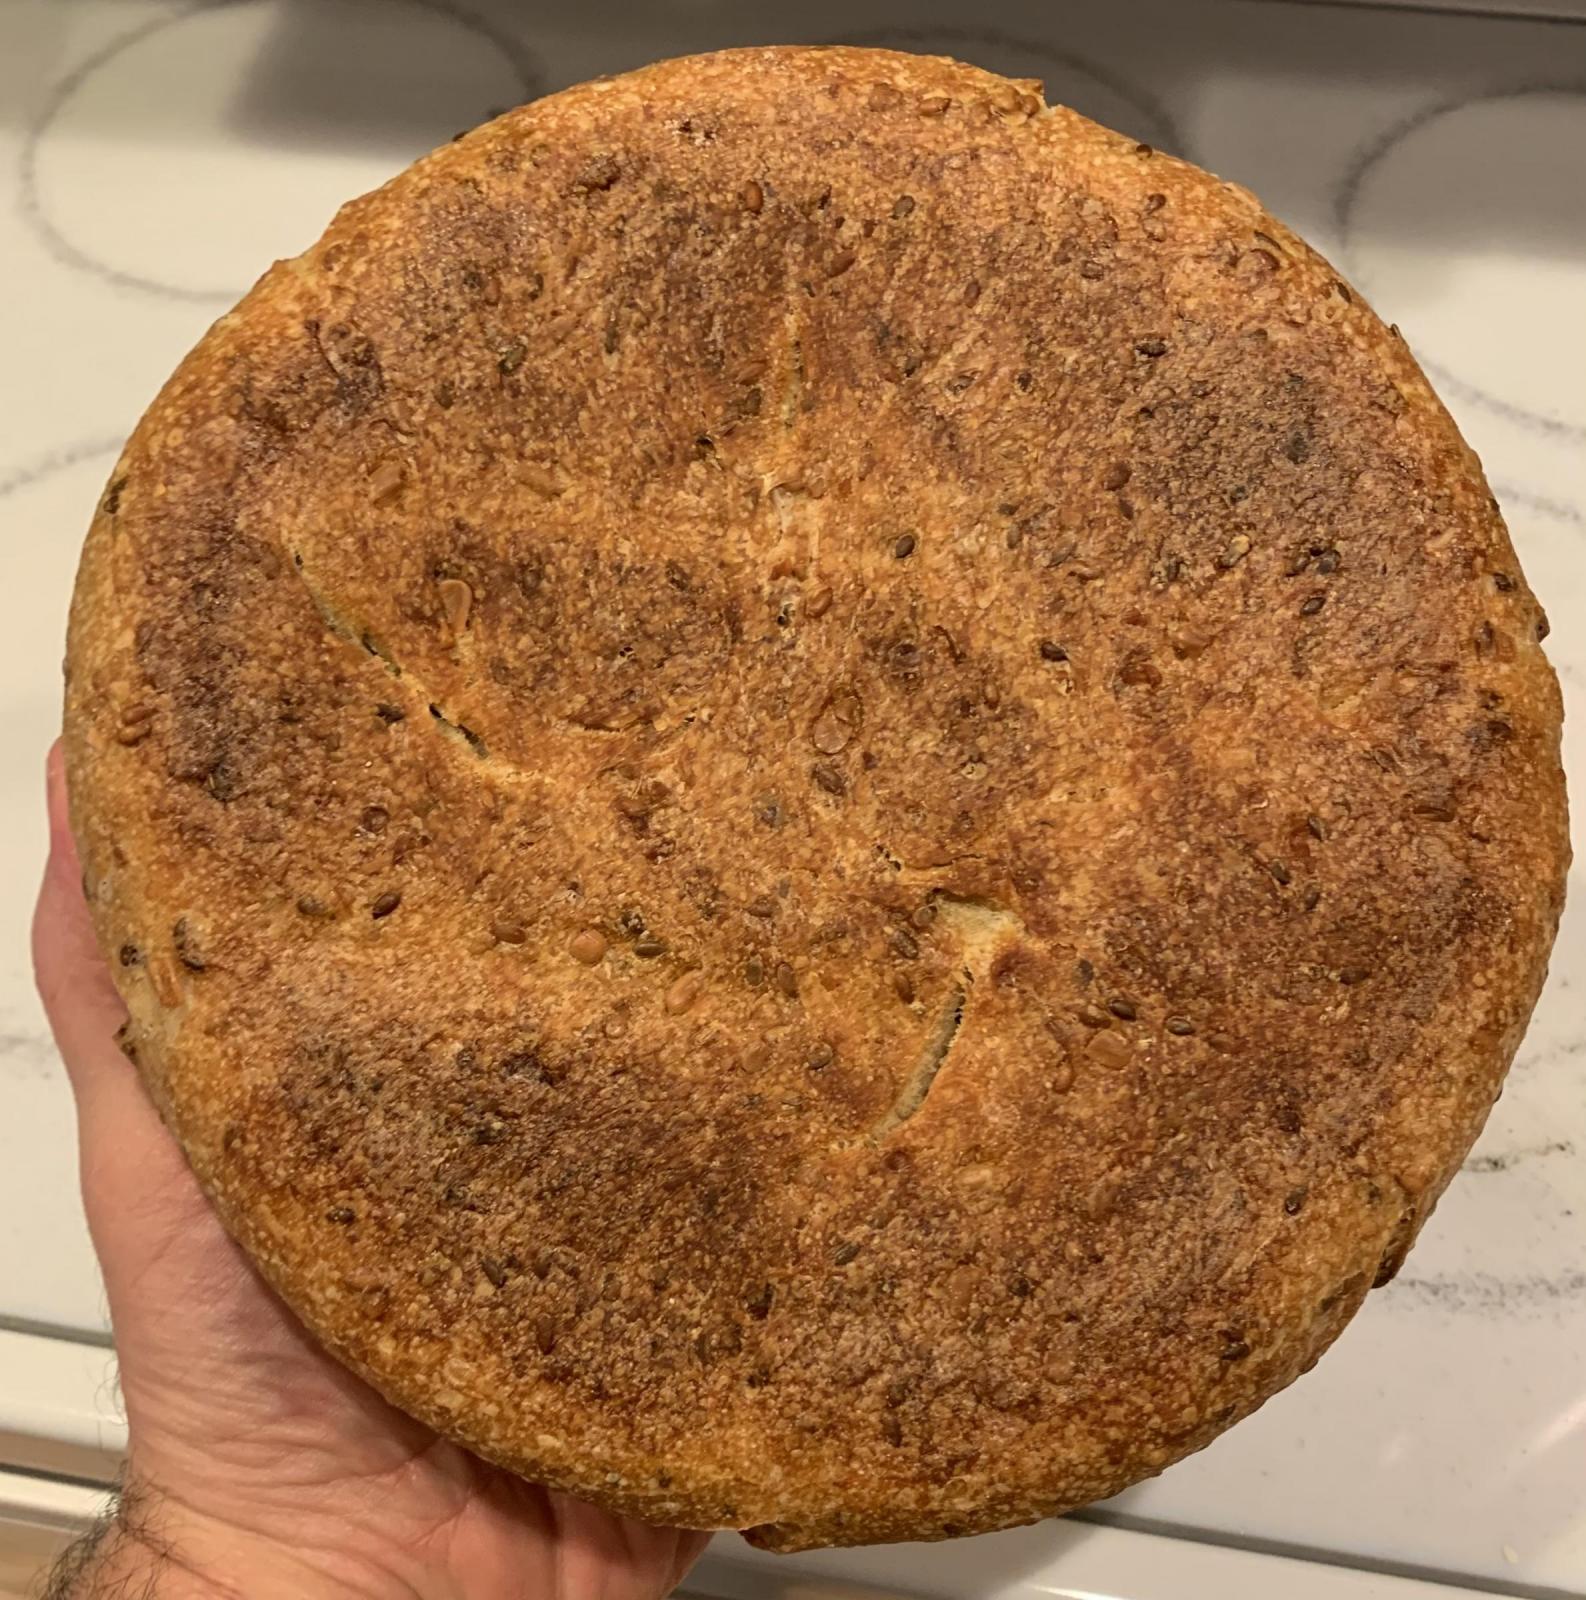
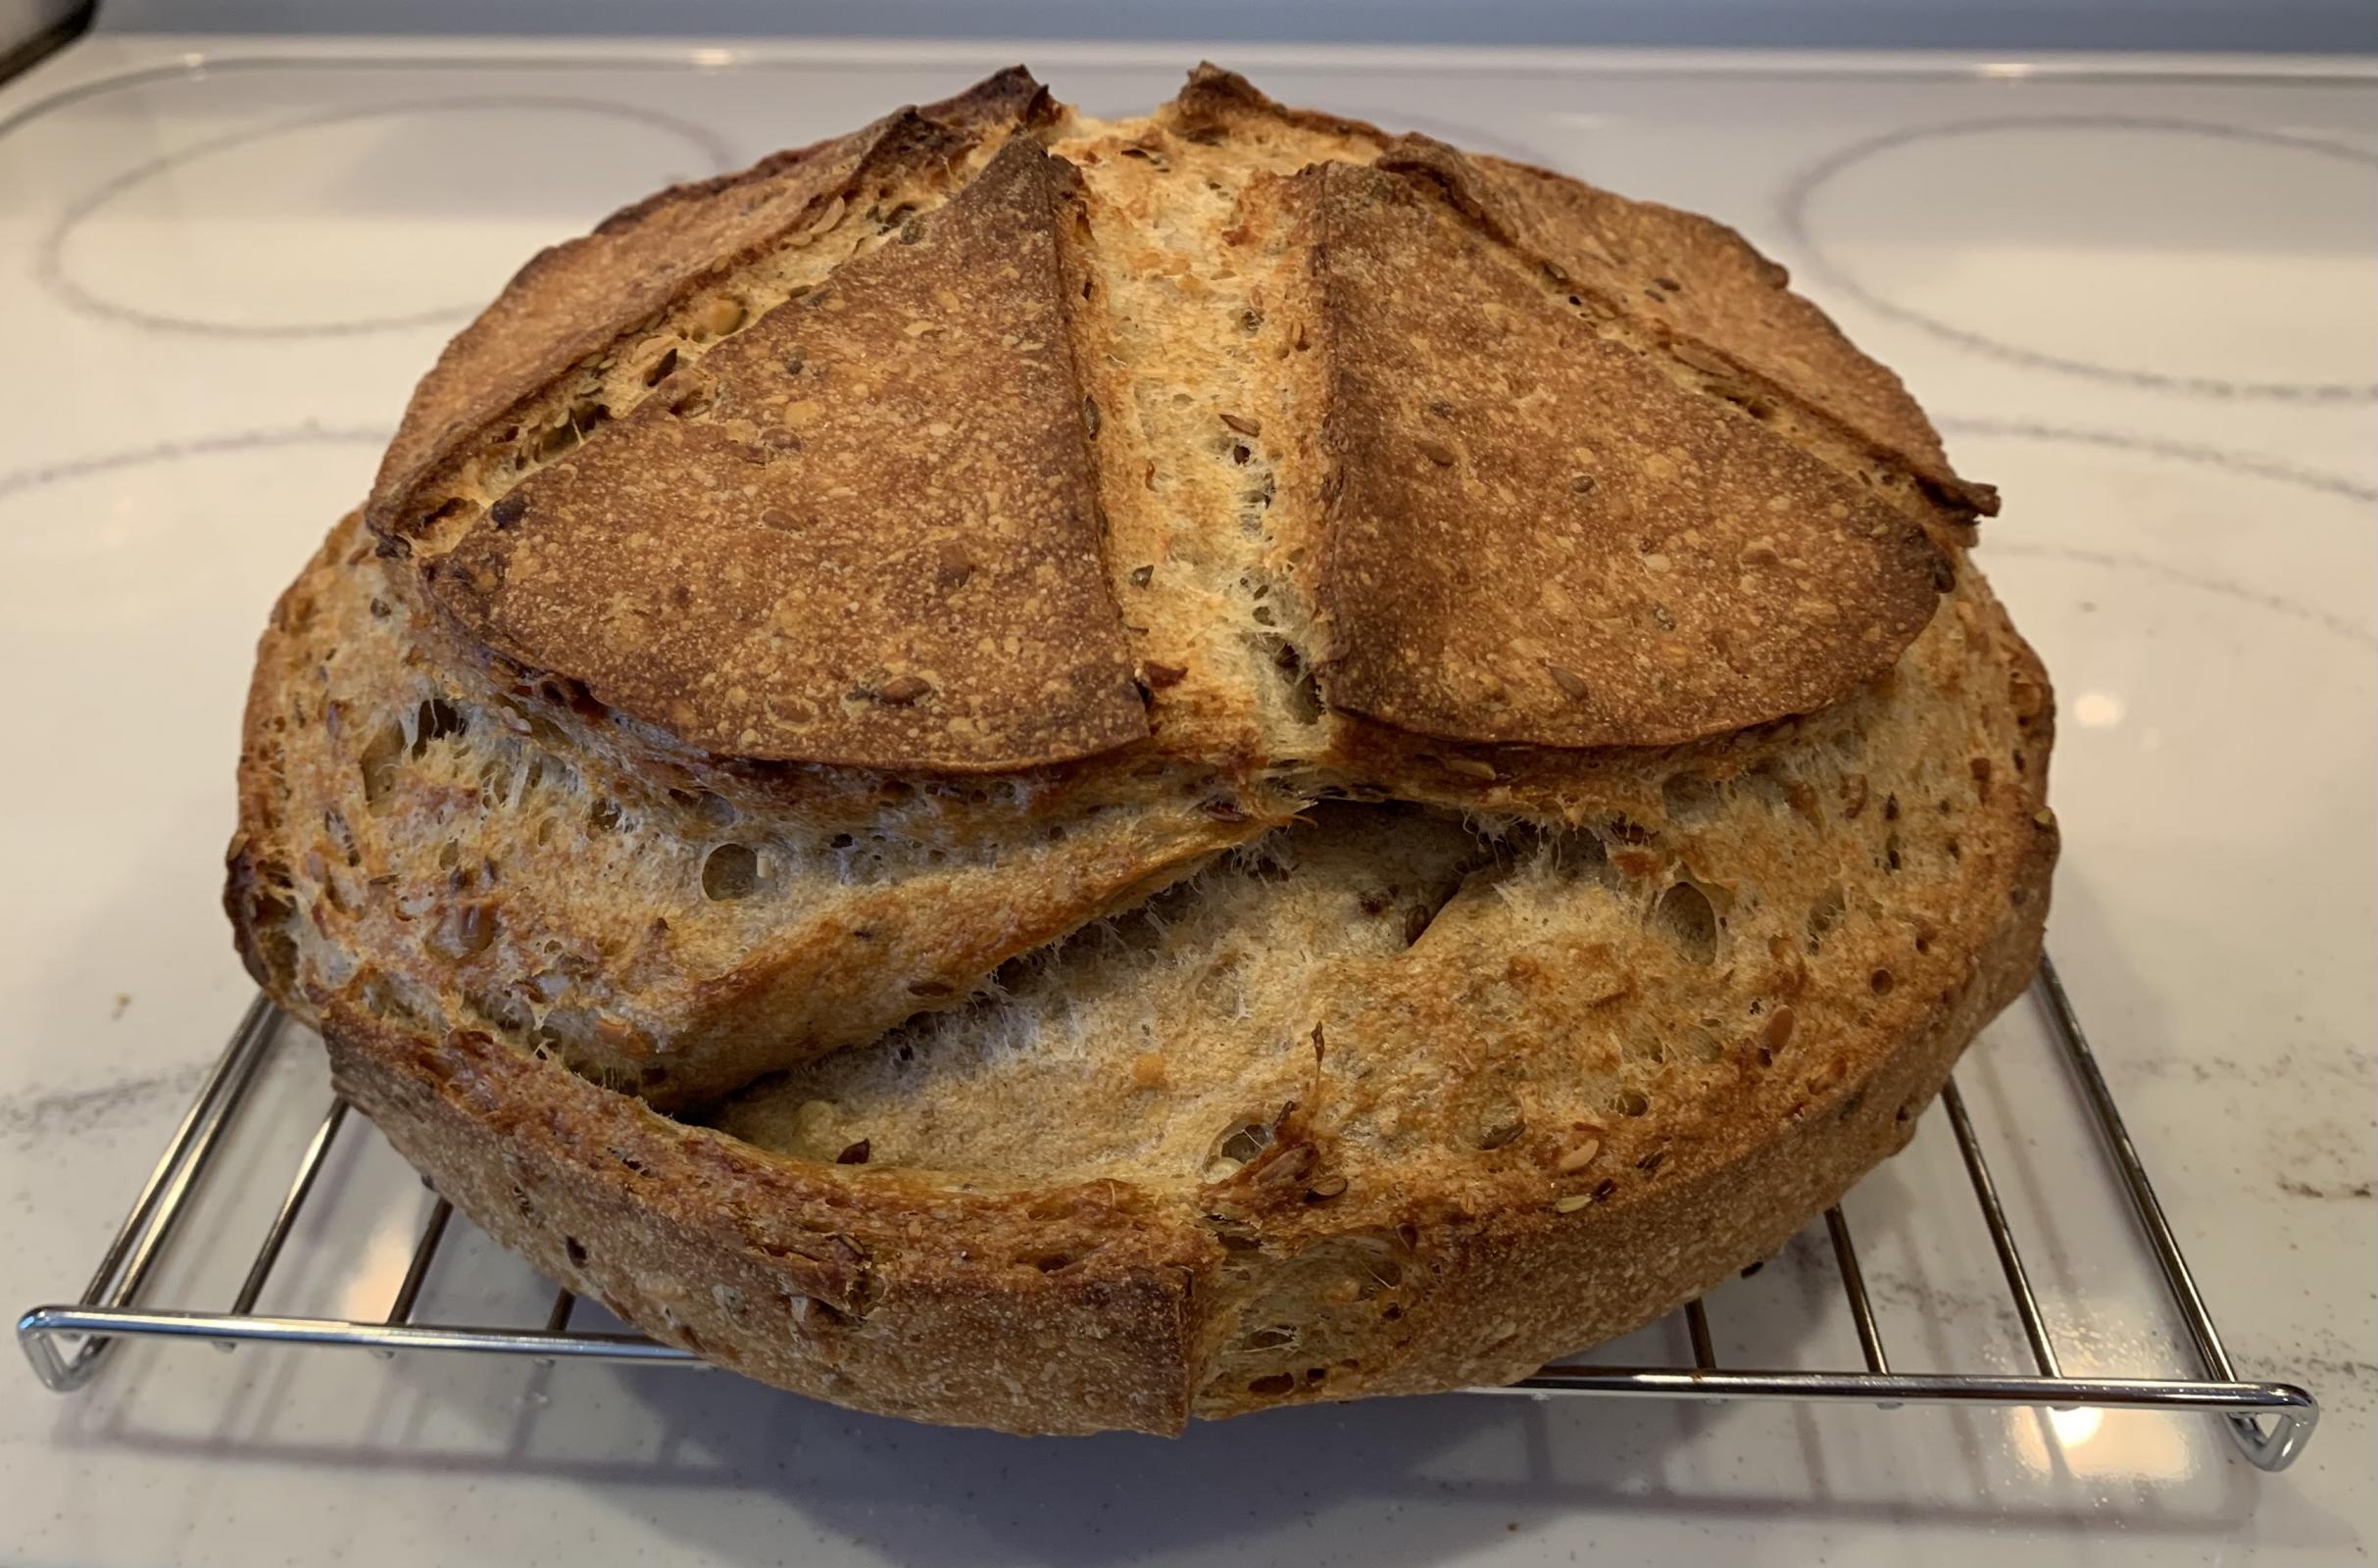
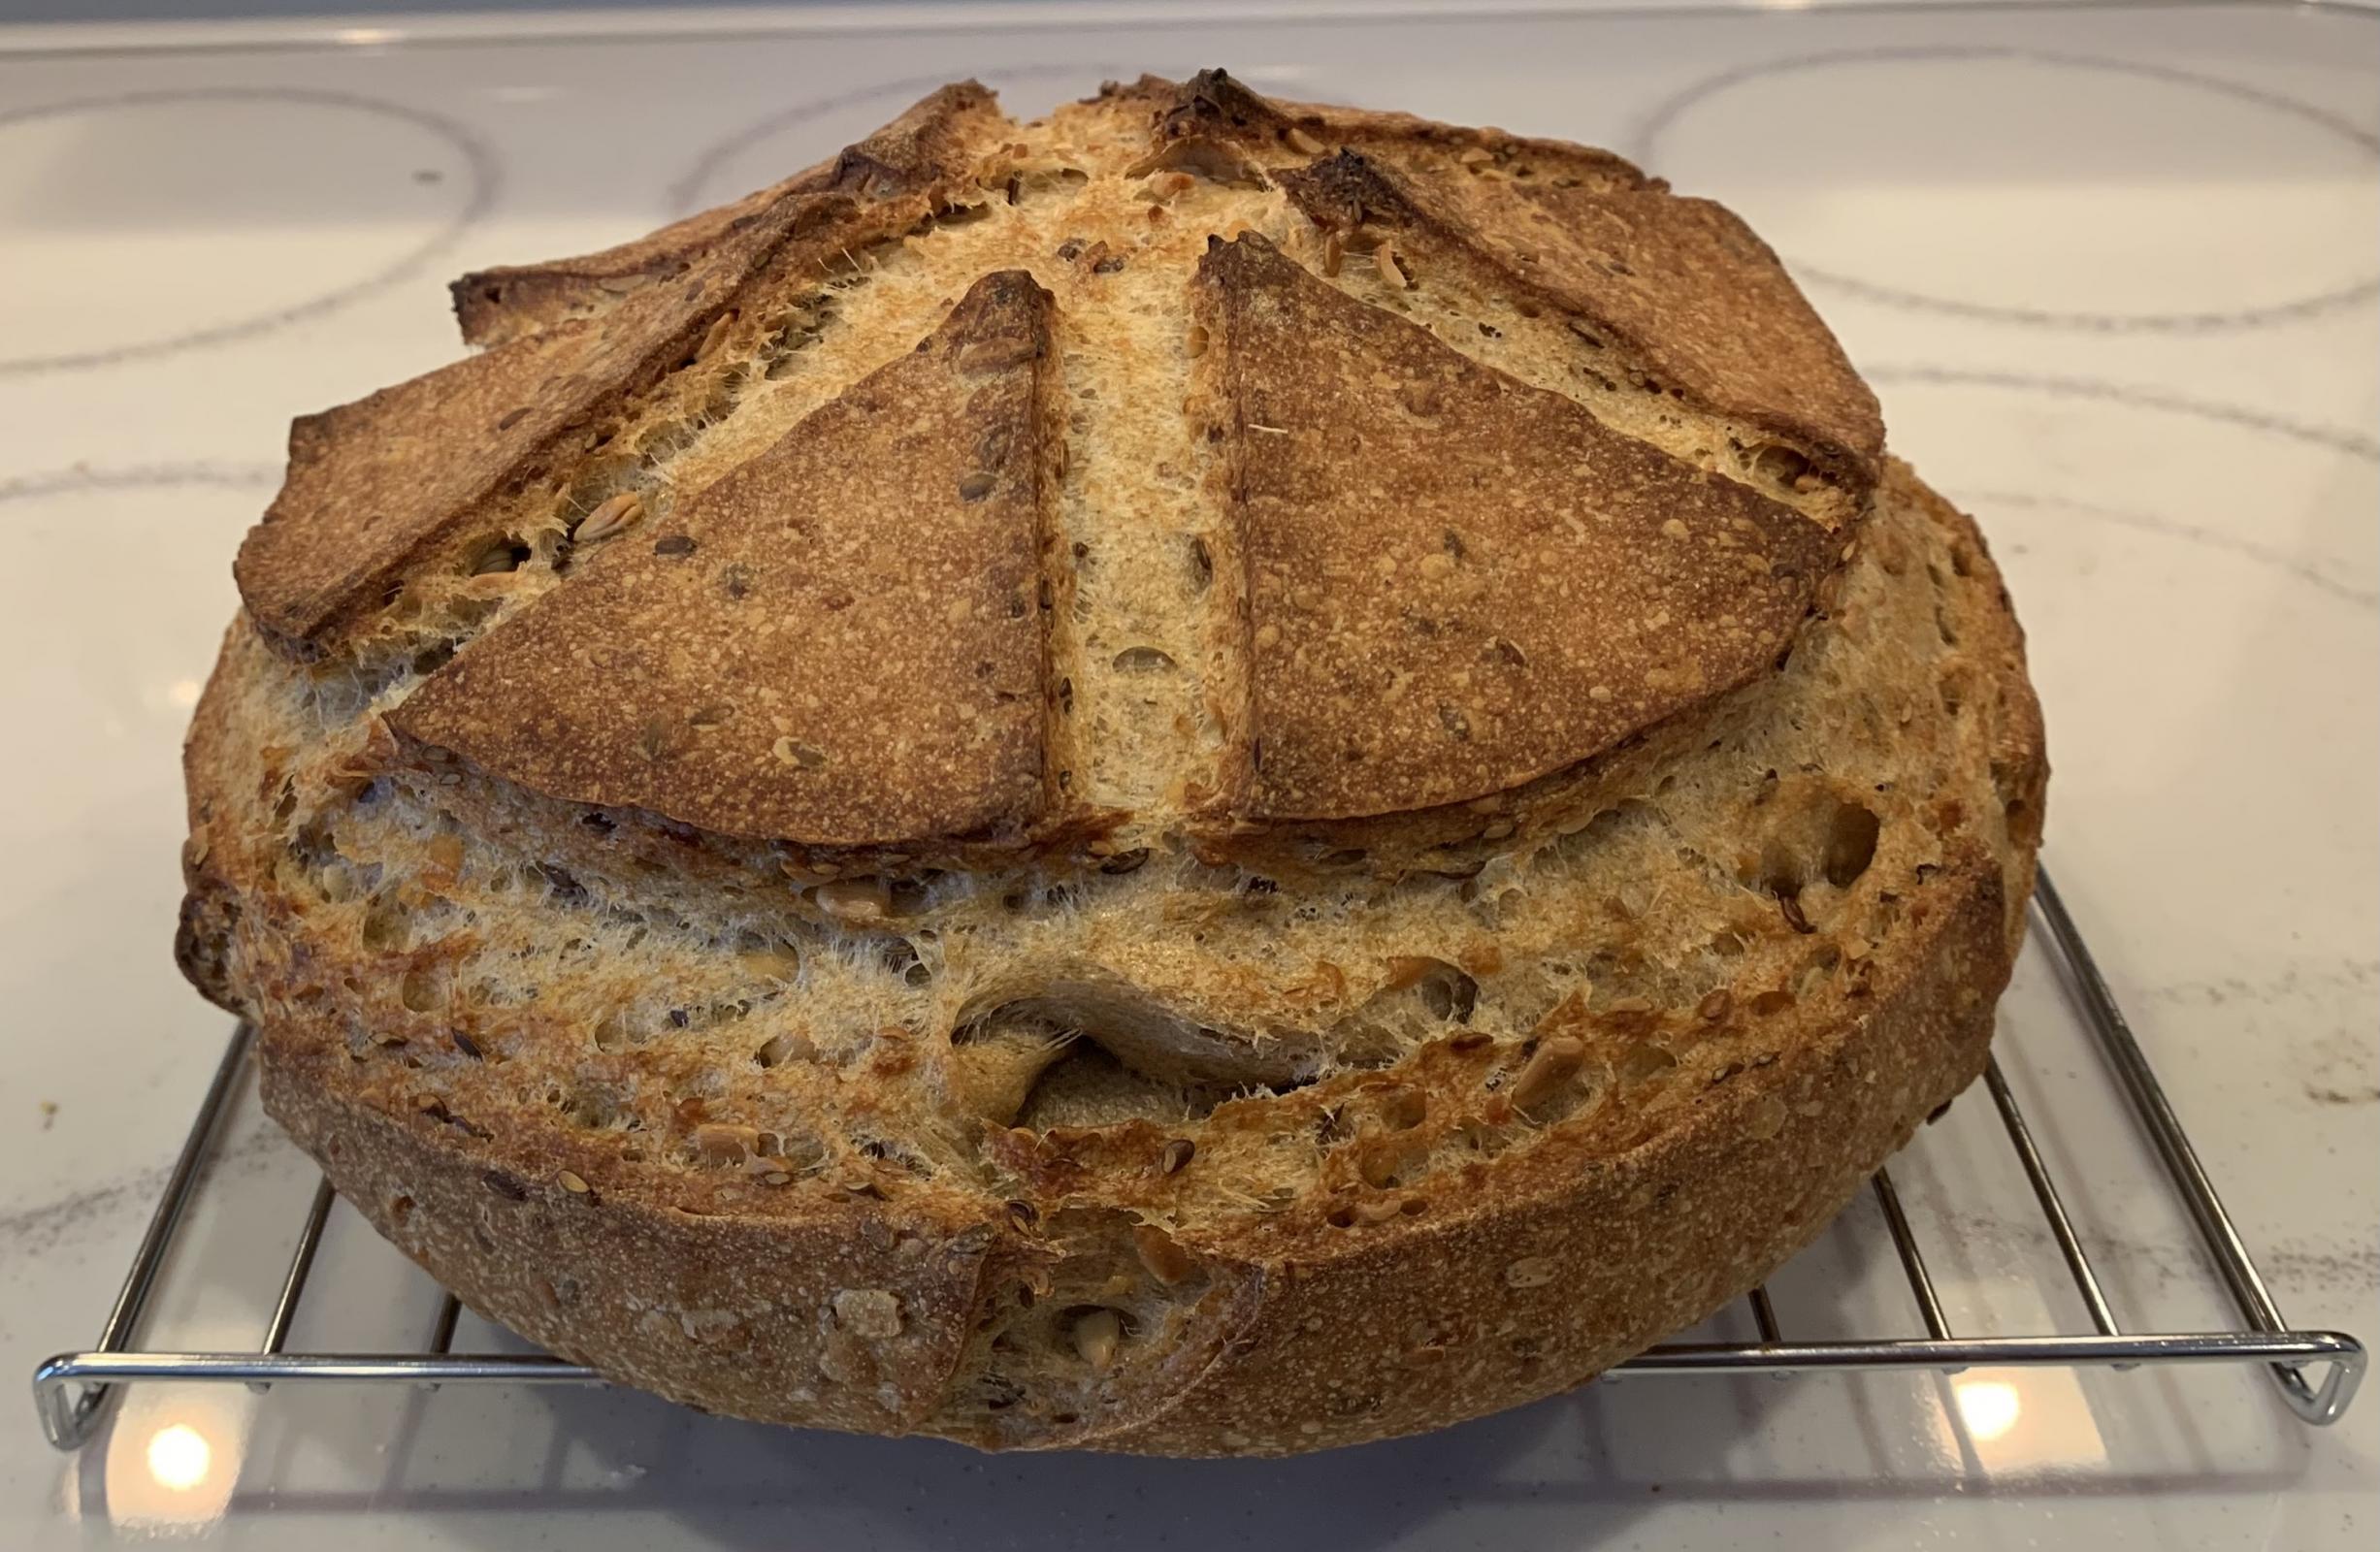
Scoring: One thing I kind of dislike with boules is the small edge pieces you get. They make decent toast, but I'd prefer not to have them. Decided to try a scoring pattern that would open up and fill out the edges, as well as, get good spring up. It looks like mission accomplished, but in hind sight, this may not be the easiest bread to slice now that I see it baked. :-)
Bake: Baked in my turkey roaster and with a bread pan full of water (towels also) inside the roaster for extra steam. Worked well. 20 minutes with steam at 460 deg. 30 minutes at 425 deg with no steam and lid off. The last 10 minutes at 375 deg but with the lid back on (no steam). Internal temp was a little low (about 198 deg) and I didn't want the outer portion of the loaf drying out too much, so I put the lid back on to let it cook but keep some moisture in the roaster. Guess we'll see if it worked after the first slice. Final temp was 205 deg and the loaf had a nice hollow thump.
Quite a few curve balls today, and I had no idea what to expect. To be honest, I still don't. Smells good though! The color from my phone to what's uploaded changes a lot. Crust is actually a much more golden color than what you see here.
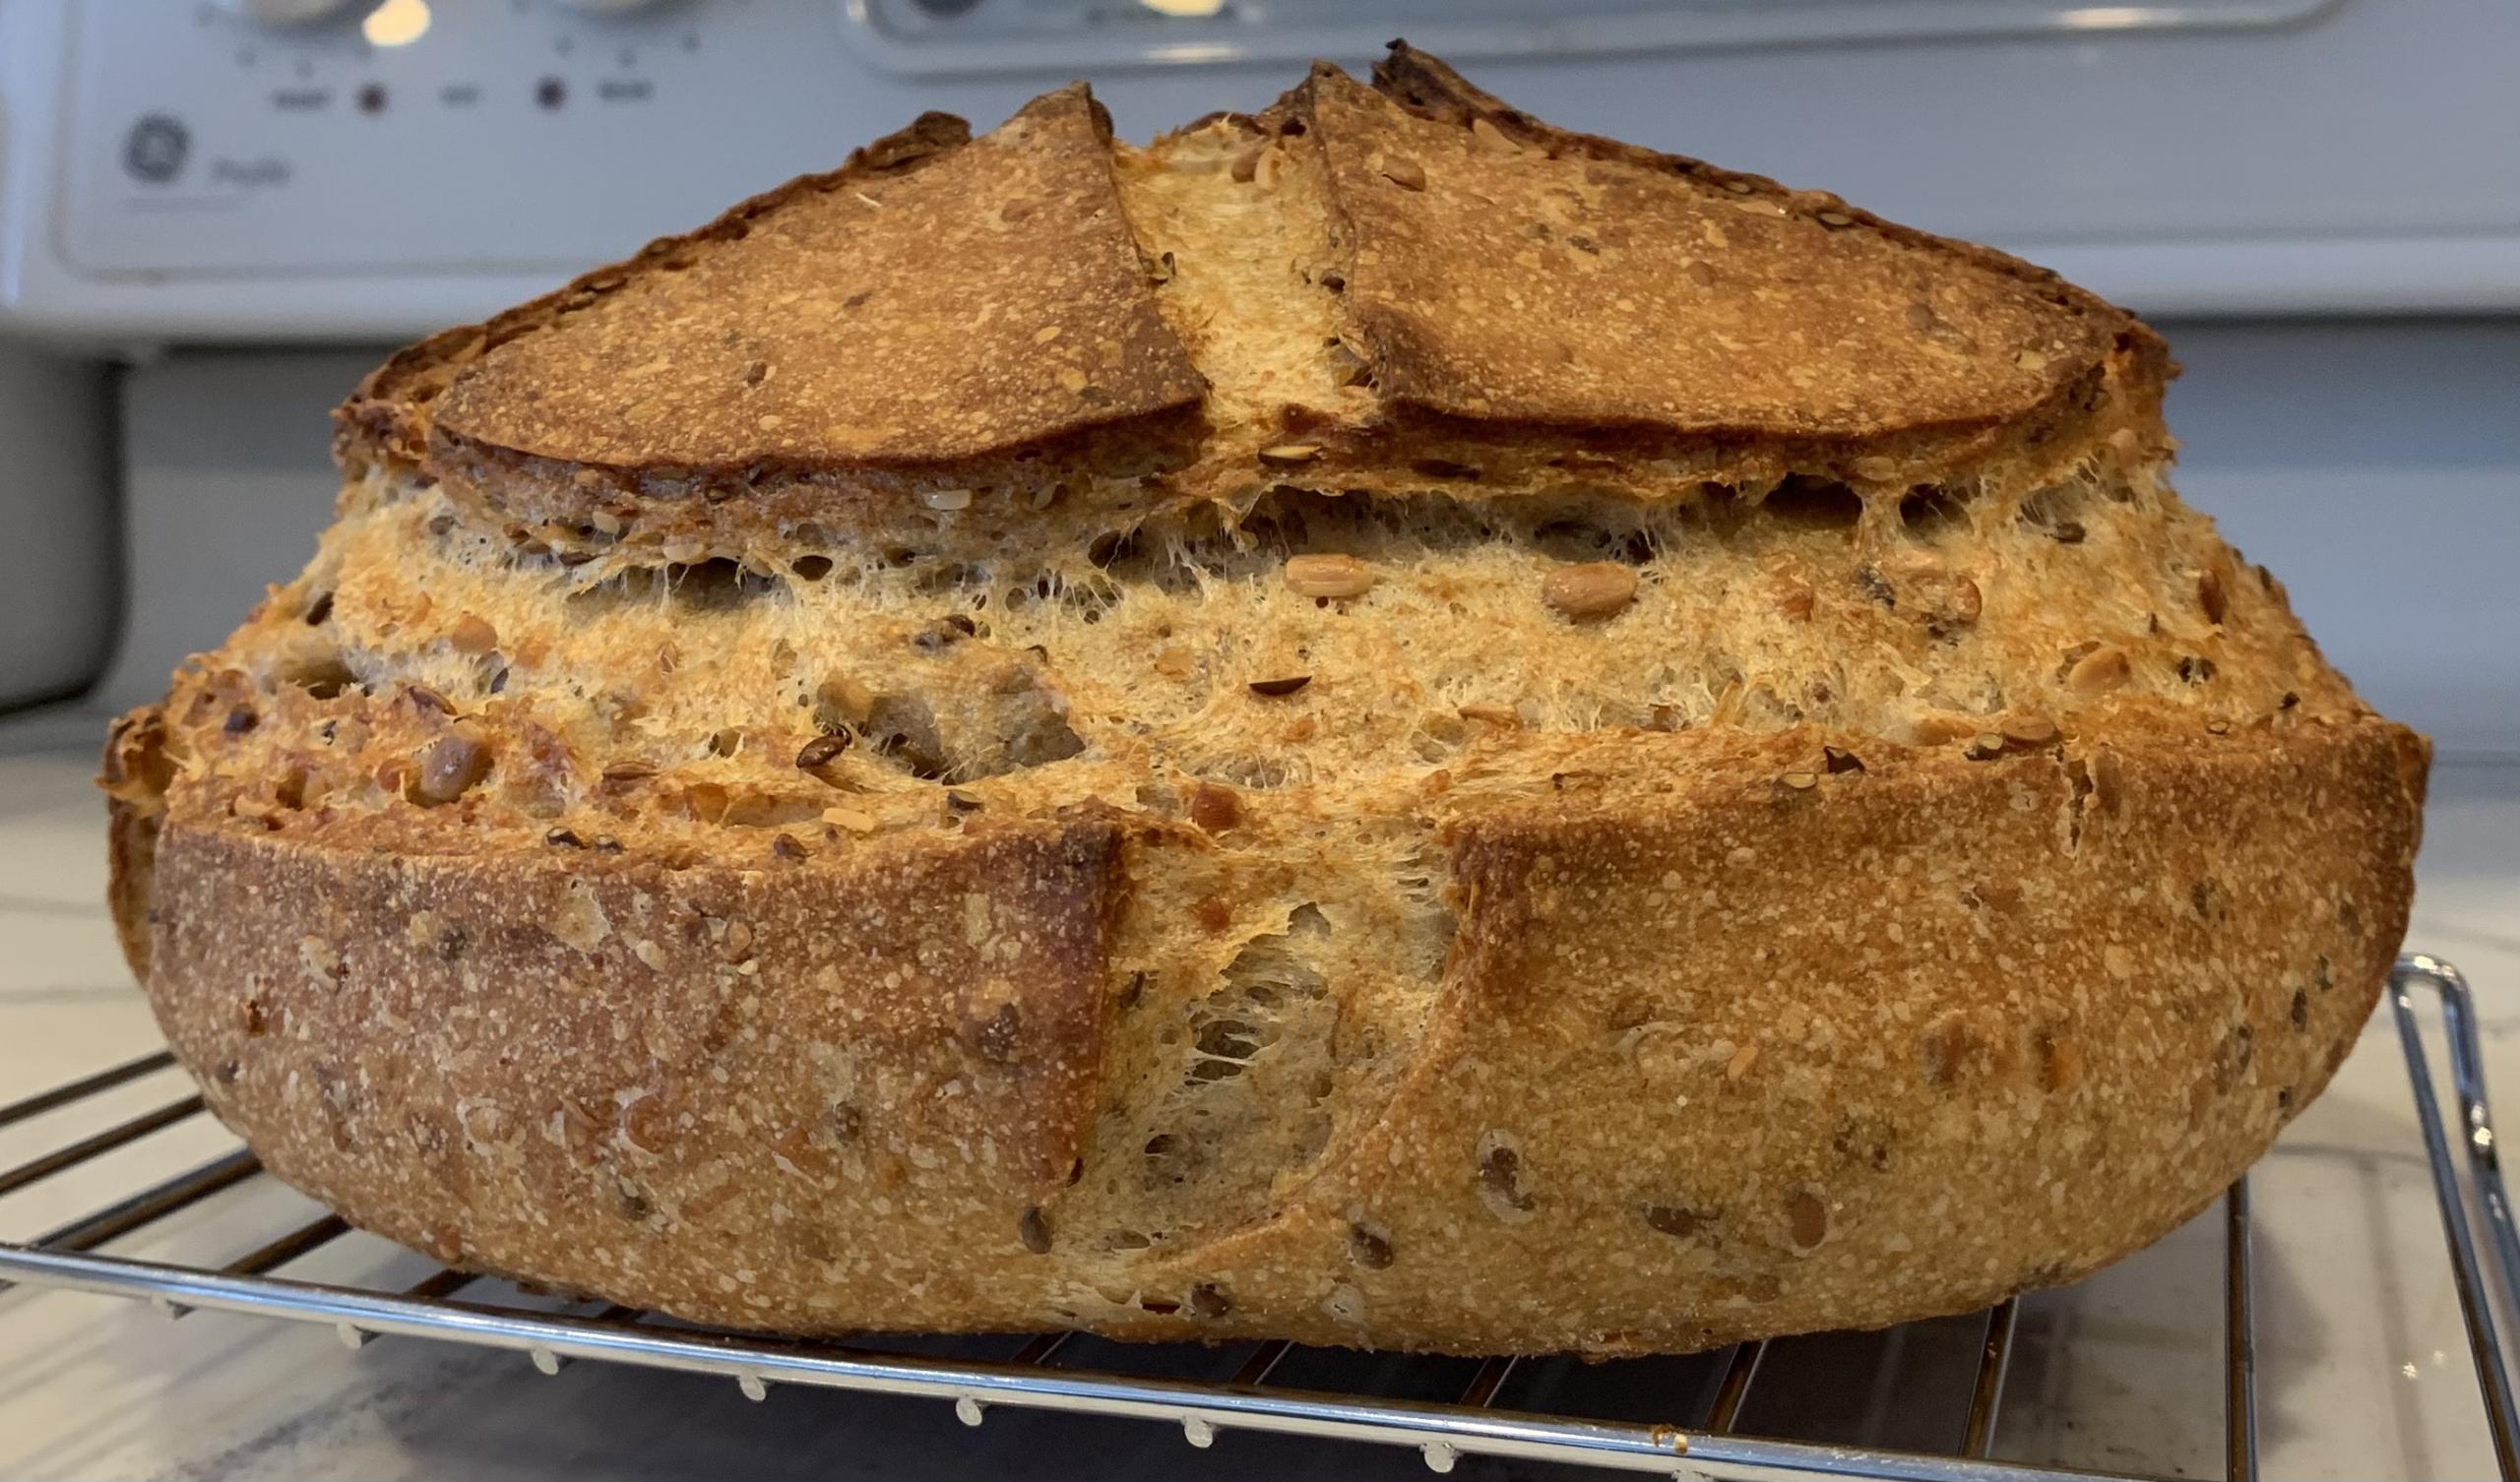
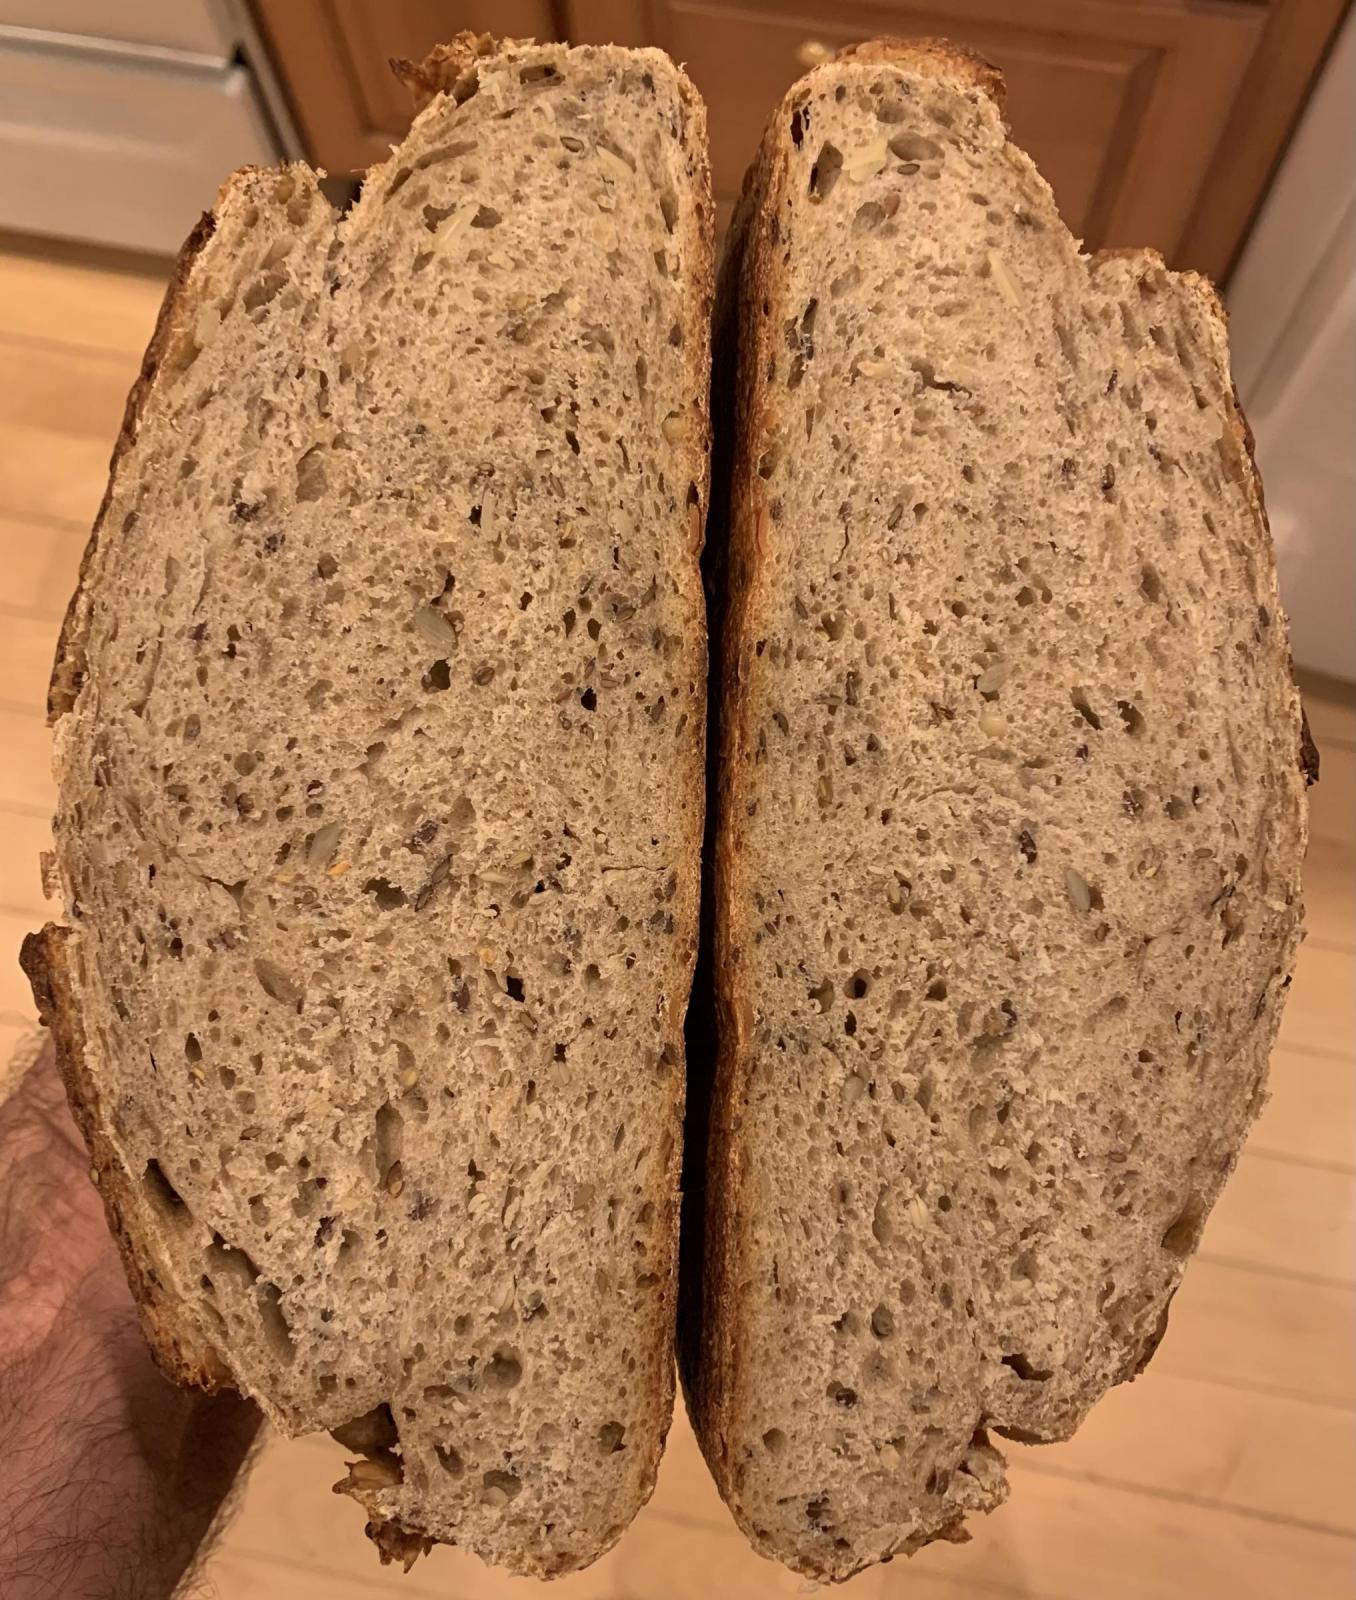
EDIT: Crumb shot added. Everything considered, we’ll call the first bake a success! Still a bit moist. Could have used another 5-10 minutes, but that’s getting picky with everything that went on yesterday.
- HeiHei29er's Blog
- Log in or register to post comments
Wow sure looks like great learning experience! Hope it tastes good. And I love your scoring, very cool pattern.
Incidentally, the recent activity in that CB also reminded me about this bread which I haven't tried yet, and I planned this bake next too.
Thank you Ilya. I think the taste will be great. It smells too good to not taste good. Just a matter of what the crumb looks like and if I see more of the shaping errors when I slice it.
The scoring pattern seemed like a good idea and got the desired effect. I'm just worried about those wedge pieces ripping off when I try to slice it. It has a nice, crispy crust. To be determined. I'm going to cheat when I make the first slice and go right down the middle. :-)
Troy, I must say that you’re a fast learner. At this point in my early sourdough baking I wasn’t doing any of this yet. This is a bake you should be very proud of. Very good oven spring and a great crust. Can’t wait to see the crumb.
Benny
Thank you Benny. It was a bit of a stressful Sunday (not wanting to mess up the second bake in a row), but I think I could do this one again with much more confidence. Need to figure out the hydration piece though. Either I completely botched a measurement (pretty sure I didn't) or my grain soaked up a bunch more water than expected and the soaker didn't contribute any water to the final mix.
Will slice this one for breakfast. Should be fantastic with over easy eggs!
I found the same, I think for my flours I have needed to use more water than the original recipe. This isn’t surprising of course, Mr. Hammelman lives in a different place than either of us I assume and his flours are different. Looking forward to your good result.
Benny
Gotta good crumb there. As for needing a few more minutes in the oven toasting it should take care of that. Toasts up really nice too with all those add-ins.
Thank you Abe, and I agree! It was perfect toast this morning.
I love your scoring. Kudos to you for doing this one! I have been a little intimidated by it, I may need to give it a try.
And I know what you mean about the end bits on a boule. My makeshift batard shaped "banetton" works but is less than ideal, I think that will be my next investment.
Well done, and glad you are enjoying the results!