Recently I posted the arrival of a new oven that I purchsed as a dedicated bread oven, and since then have been in setup mode and quickly realized this has become a project as opposed to a more plug-n-play scenario. So with that, I am seeing some positive results and want to share them here.
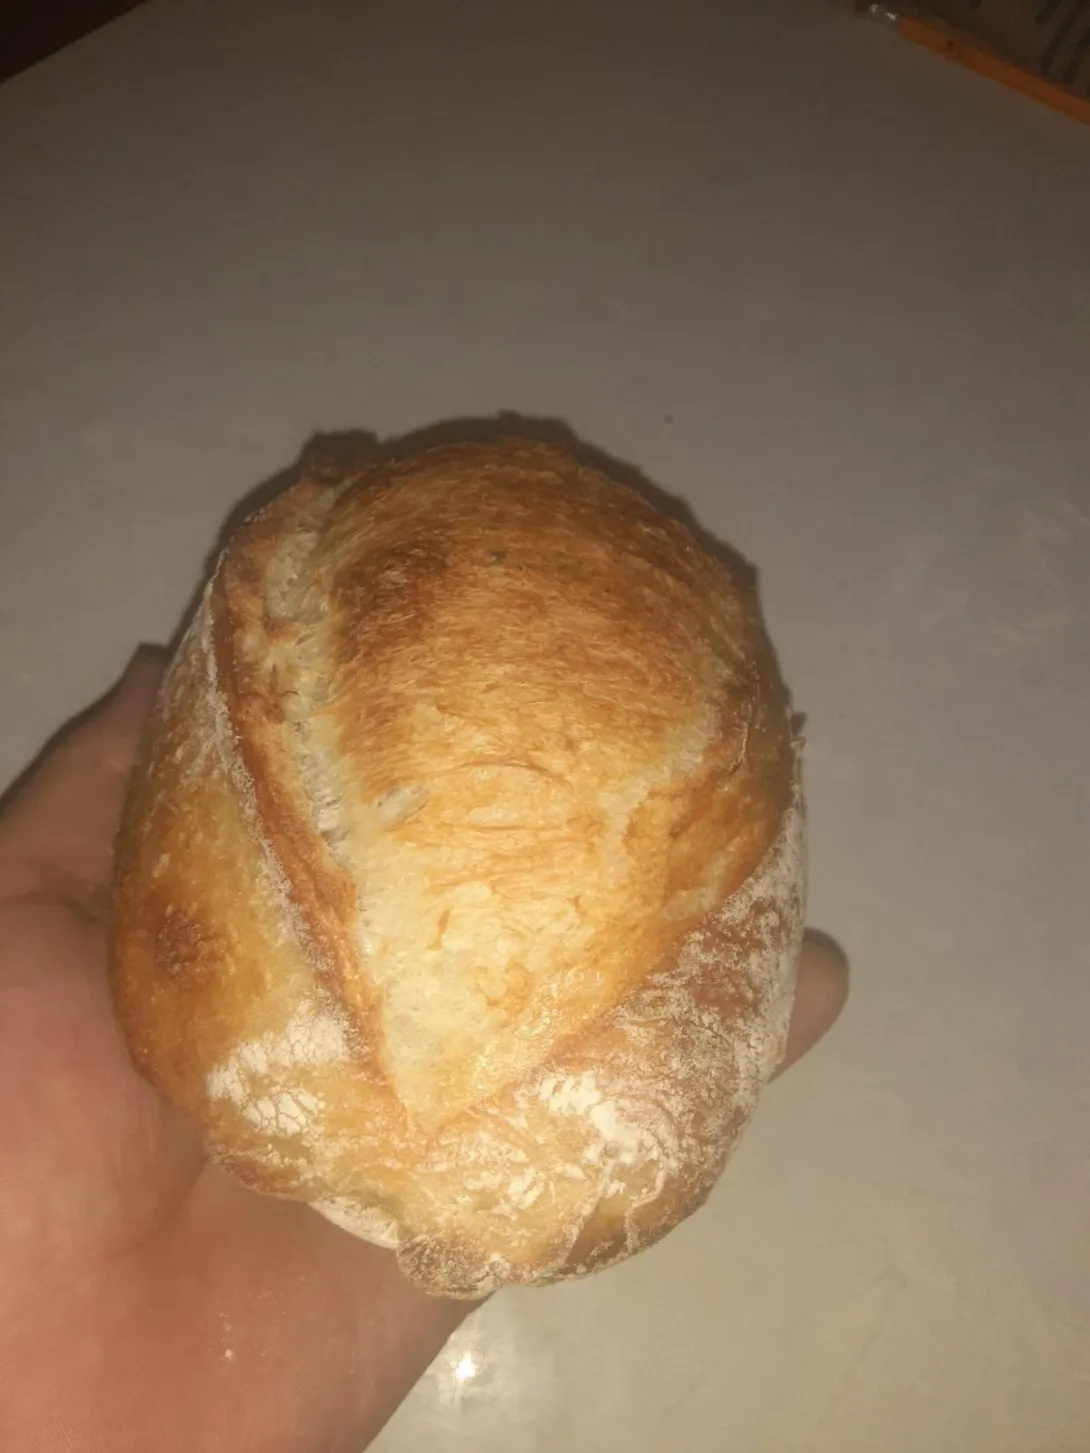
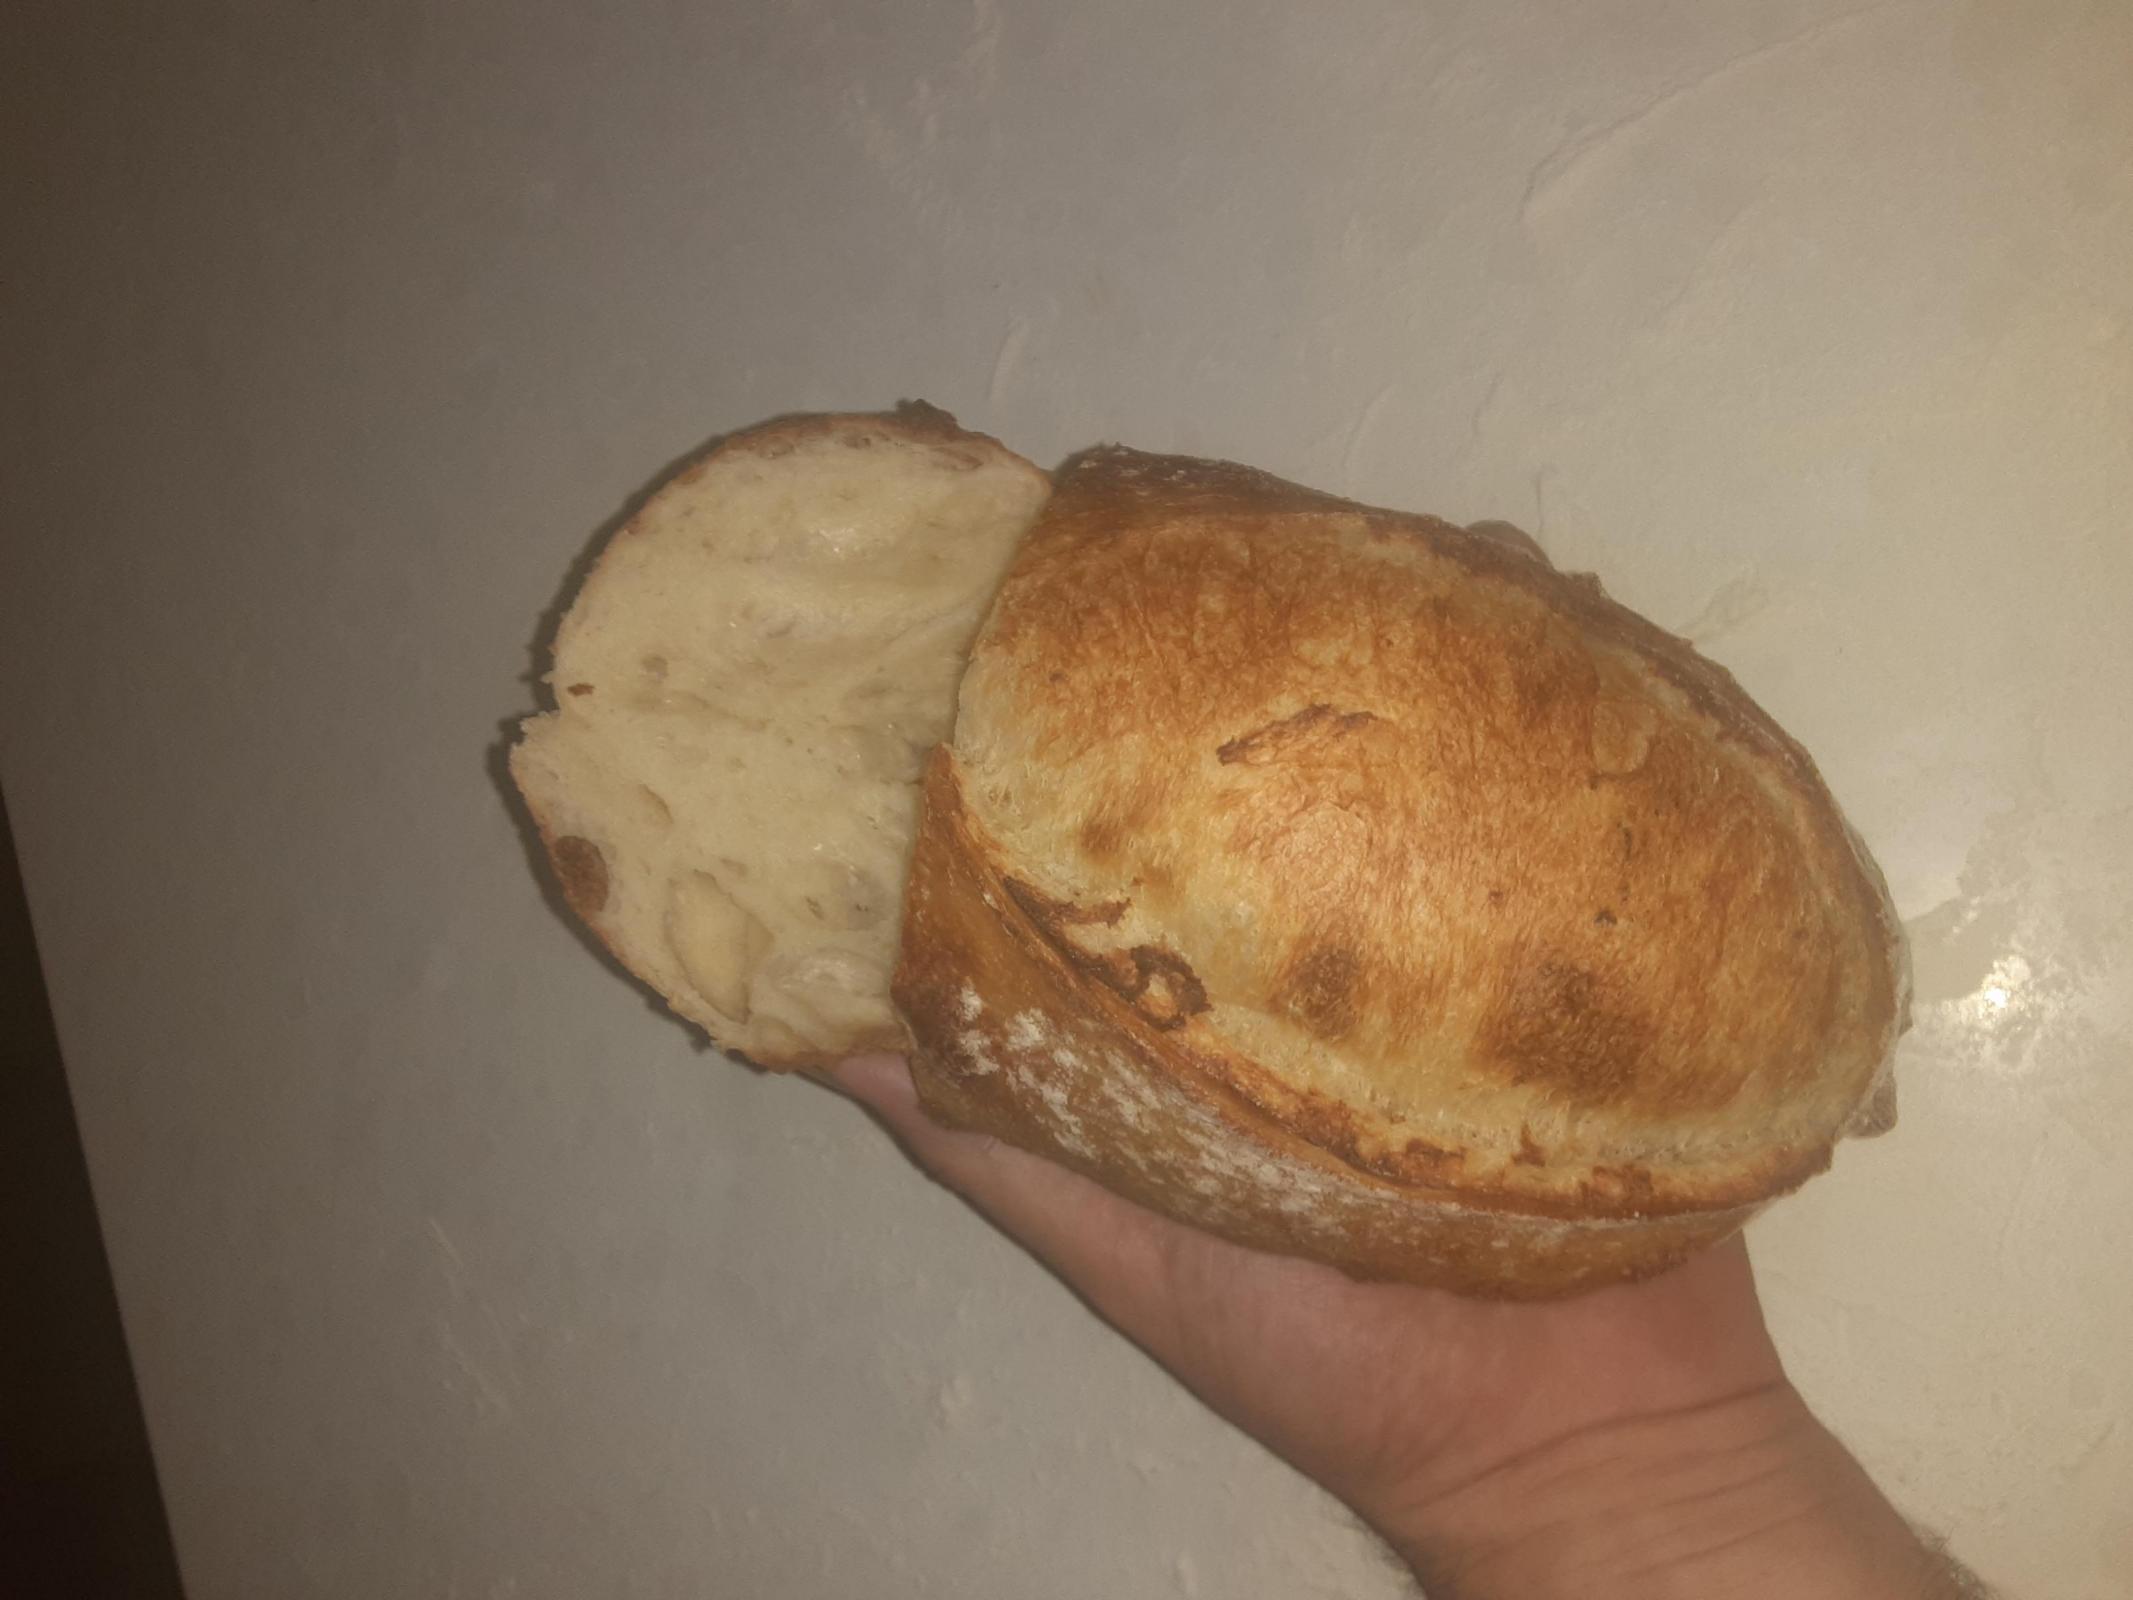
This is a small 350g batard tester loaf to see how well this (relatvely) cheap import mini deck oven performs. the oven I puchased is a 'xoeleo' from china manufactured primarily for pizza and as such has required some tinkering and tuning. Danny ayo was kind enough to send me links to a seal for the door and www.brookbake.com dug up a rofco steam tray (despite them being out of stock). To date I have applied a door seal but still seeing considerable leaking steam from some of the other seams in the body. Despite the leaks I very surprised by the fast spring on this bake. Another surprise is the paper thin crust on this loaf. never had such a thin crust like this ever.
Very little went into the preparation of this loaf - the bake was more a first 'wet' test (as opposed to dry steamless) test, in fact I originally did not even plan to load but rathet test the steam so this is a last minute loaf sort of thing. Very interested to see whats next.
- kendalm's Blog
- Log in or register to post comments
Do you think the copper based silicone will work to seal the leaking seams?
Test loaf looks great!
I actually think now considering thr crust that enough steam was retained. I used about double the recommended water dose and yes I think the silicone should work on the seams. The question is whether there are more seams than I think.
Geremy, how do you like the ROFCO steam tray? It is nice a compact.
Really neat device. The instructions recommend 2 ounces of water. I purposely double that to get a read on leaks in the oven, but as far as the steam tray, for an oven like this where there is no rack with a floor, this fits in with barely any compromise of deck space, so yeah, really like it !
Geremy, would you mind posting a photo of the ROFCO steam tray, I’ve never seen such a thing. Sorry I have no experience in a professional bakery so all this is new to me and I’m quite curious.
This is a 'rofco' style tray. Very thin so as to not compromise deck space. Its very heavy as it contains rebar-like rods whose function is to store thermal energy. At the top is a trough that drizzles water onto the rods and when water is poured in will rapidly convert most (if not all) of the recommended 2oz into steam. I got this from brookbake.com -
Thanks for sharing that Geremy, that is a great device. It would be nice to have that in a home oven or some version of that anyhow.
I hope the steam tray doesn't block/restrict air space between the stone and the side wall.
Air circulation is necessary for both of the temp probes (upper and lower), and for even heating of the chamber.
--
I found out that the vents in a home oven, gas or electric, do more than vent moisture. The positioning of both the vent(s) and the thermostat probe is such that air will circulate in the intended way, and the temp probe will give a meaingful reading.
When we block vents/cracks/clearances, we change the internal air's natural/designed circulation, thereby creating hot and cool spots that the designer and manufacturer never intended. If the temp probe then reads low, other areas overheat, because the thermostat doesn't "know" to turn off the burner/element.
This is not so bad in a convection oven with forced air currents. But in a non-convection oven, the design and placement of vents and the probe relies on the assumption that the vent remains open, as designed.
Not only the design, but the safety testing, is done with vents in a "normal" state.
There is a vent consisting of 6 roughly 1/4 inch holes on the back wall near the ceiling (see image below). seeing these as design elements clearly intended as vents I would not seal them. Not sure if anything is really being obstructed by placing the tray against the side wall, but definitely hear you point about designed flow of gasses. I may consult the folks at brookbake who are currently in the process of designing some intermediate home -> industrial models in the same vain as rofcos so I am sure they're knowledge of this subject is quite intimate. very not interested in killing another oven !
If I were doing this, I'd make sure the oven was on a heat-resistant surface/object, so it won't scorch your countertop.
The lower elements will radiate heat to the lower shell, and the lower shell will then re-radiate a percentage of that heat downward.
So check out this pic. note that near the door gasket in the upper left and right corners I have applied some silicone in the small joint right above the corners. I observed escaping condensation clouds here. I think this small dab of silicone should correct that. However, upon deeper inspection I noticed that inner chamber is built from individual sheets that are not flush and they should probably be continuous sheet that is folded rather than separate sheets flushing up against each other. I noticed addition condensation cloud emerging from the outer body sides where there are vents (on both left and right outer shell). This is a bit concerning but at the same time I recognize that the expanding gasses must have some small escape route otherwise the oven would build up a lot of presssure. the question now becomes, can I contain enough steam ?
Its now apparent the steam containing nature of this oven falls short of hopes. just did this bake wirh the recommended 2oz dose of water and got zero burst (see below). i think the burst from the loaf above can be attributed to the extra large cloud that I created. The steam is just exhausting through the many seams of the internal chamber. I am now sitting here pondering the idea of sealing the entire inside seams with the high temp silicone which otherwise I think would work but I am mostly concerned with the zones near the top elements that would probably experience temps above the silicone rating of 370C and to boot, the top areas are likely the most critical for trapping rising steam. The other option is to go full on and disassemble the unit and braise with silver solder. hmmmmm. what now ?
Geremy, could it be something other than a lack of steam?
The oven cavity is so small, and with the Steam Tray (even if the oven leaks, like most home ovens) should that be sufficient? Why not put a cover over the dough or use a cast iron cooker to verify? You may be barking up the wrong tree.
What-do-ya-think?
I thought the same thing this morning regarding a cover. So far I did a few totally dry runs and got really hard thick crusted loaves. the last two that I did were steam versions and you the first with the huge burst used a ton of steam and second no burst. whats most perplexing though is that the crust in both cases is hardly caramelized. they look dark but once cooled feel like a pillow. that is to say, there is crisp at all, it feels like fabric. Maybe there is as you suggest enough steam retention. if i think about it like this - the cavity fills and expels the gasses due to expansion but would they really be replaced with dry air ? how would it be possible for an electric oven to replace the steam ? perhaps if rising then dry air could suck in from below gaps etc. also its important to note that I dont see a condensation cloud when I open the door.
I think I agree with your plan here to do a covered bake in a dry atmosphere.
One thing is for certain - the oven has plenty of heat retention. The temp swings are minimal when the door opens.
My steam regimen with my old domestic had me plugging the vent. It worked great, until of course the oven set on fire (eventually), but I don't recall ever seeing a condensation cloud. its a mystery. I also solicited some thought from doc dough.
From my engineering school days.... (before I dropped out)
"Dry steam", once it gets much hotter than 212 F, also called "super heated" steam, has no water droplets remaining. It is therefore invisible.
(Which is dangeous in a boiler room if there is a leak of invisible high pressure super heated steam, you'll get 3rd degree burns, and it can cut you open, or cut off fingers/hand.)
But I am unsure of which you want for bread baking purposes, wet or dry.
in fact under 212F is not steam but rather condensed liquid water droplets. what I mean is that steam (gasseous water) will form a condensation cloud when it hits room temp air ans so what I expect to see is evidence of steam as it exits the oven chamber. I agree that steam is invisible it must eventually cool and condense somewhere presumably when it hits the air. maybe it just slowly evaporates. ugh my head hurts !
If super-heated (dry) steam leaves the oven, and the sheet metal through which it passes is over 212 F, (or if the sheet metal does not cool the super-heated steam to 212 Degrees) you will never see a cloud. And if the room is above dew point, the dry steam will just be absorbed as part of the air merely add to the humidity.
The exception would be if the dry steam is confined somewhere in the room, like if the oven is on a countertop, and cupboards are above it, and the steam is not allowed to circulate and dissipate. then as the dry steam cools, confined, and then when the humidity reaches 100%, then water droplets will form somewhere.
I may not be explaining that right. But it's how I remember my marine engineering class, and the profs/teachers instilling a healthy fear of super-heated steam. You'll hear it hiss, if it's escaping high pressure, but never see it.
Specifically the part about steam simply hitting the air and then contributing to humidy, especially above dew point, which if your house is below dew point then you wont be worried about ovens etc. I suppose a way to test would be to chill a glass and just hold it in the cavity for a moment. ok making more sense now :)
Wet, low pressure steam. Most systems that have external boilers operate at about 5psig. Danny ran into this with his external steam generator running at 10-15psig.
during Dans initial experimentation. Dan what happened to the loaves ? I seem to recall the problem being an over abundance of steam and you had to adjust valves and levers and maybe even added doc emmett brown's mr fusion (heh heh). I think you maybe had damp loaves or something. what exactly happened again ?
Looks like the top heating element came on. Or too much steam.
Maybe you super-heated the steam.
Don't let, or unintentionally force, the steam to go where it normally doesn't go. It could short out the electronics.
I killed a cheap Emerson microwave by letting some hot/wet food sit in it too long after the cycle stopped. Something must have got wet that wasn't supposed to get wet. When I next turned it on, "pop", and it was dead.
The baby loaf really had great oven spring. Did you get that thin crust with sourdough or is it commercial yeast? It would seem your oven is doing well off the bat.
Gotta say it was pretty fun to watch - it came up to size so quick. its commercial IDY - nit quite ready to inveat too much time while tuning this thing.
Your test loaf has decent though light coloration, and with lots of oven spring is nice looking. Your soft crust after cooling suggests to me that it was not left in the oven long enough to dry out and the moisture from the crumb just softened the crust. Crust thickness is (sort of by definition) determined by how deep into the loaf you find the boundary between fully dry and still wet crumb. I don't know of any reason why two different flours formed into similar loaves should have different crust thicknesses if baked in the same oven on the same cycle. The mouth feel may be quite different if one flour is low protein and the other is high protein, but I would not expect a microscopic examination to indicate a substantial difference in depth of browning.
Others have pointed out that excessive steam tends to suppress browning (I am just guessing here, but perhaps it interferes with the Maillard reaction) and may hold oven temperature low enough and long enough that the oven does not get up to caramelization temperature.
Keeping the steam in the oven is perhaps less difficult than keeping outside air from getting in. The pressure of the steam is not really higher than local atmospheric pressure. But diffusion will cause it to escape the oven if it has a path.
Regarding time and pulling too soon. Yes, and as a side note I neglected to mention that these loaves browned up so fast as in by the 10 minute mark. As such I pulled both very early. I think that would explain the fabric pillow crust. Now regarding temps - there is no problem with heat and I can verify that by the internal analogue thermometer. As a fan of really hot bakes I tend to jack temps quite high having previously used a gas domestic oven with a big door that will drop temps fast during loading. And so, this routine of hiking temps I am beginning to suspect is a practice that may not be suitable here. Even taking sweet time to load with this oven the analogue thermometer barely budges. Even when the steam is activated, it barely budges.
The strategy of using a steam tray like this seems to be one of trapping the gasses early on because the efficiency of the generator seems to be limited to about 10-15 seconds after which time the water has sucked much of stored energy and just kinda fizzles after the initial burst. So yeah I agree that if a cloud is trapped then any evacuating steam is probabaly excess from the incredible expansion and it seems nearly inconceivalbe that a trapped cloud would be promptly replaced by dry air. I think this is akin to how a bathroom after a hot shower remains humid even with the door open.
Having said all that, I think its best to assume the steam is adequate and a. I'm going to need to control the bake time better starting at a lower temp and b. figure a better 2nd browning phase strategy. a and b can probably be done by temp throttling.
Still, that doesnt explain the non-burst exhibit. perhaps its just proofing faux-pas as I must admit the bread part of all this has been a kinda neglected effort. ok, more to come ...
Sounds reasonable.
I can't tell from the photo if we are looking at the oven heating element or a steam generator heating element. The braided seal is probably not as tight as a silicone seal might be, but you have to be the judge of whether there are other leak paths for steam to escape or outside air to enter.
How big is the oven box? And how much power does it draw from the mains? I think I saw someplace that it was 240vac/single phase which in CA probably means 240vac with a neutral plus a ground.
that I think you are referring to shows the lower elements with the stone removed. Steam is done via a steam tray (which I just posted pics for benny above). The inner box is 25'' wide, 18'' deep by abput 8'' in height. As for power, gee - electricity is a mystery to me I just know its 220v at 50hz. In think typically a domestic electric is 220v at 60hz.
Yup there is still some leak at the braided seal but seem mimimal. The outer casing has vents and they will puff condensation clouds and believe the route to these vents comes at the joins of the inner chamber. imagine the chamber, 3 side walls, a ceiling and floor as separate sheets shored up against one another in such a way that your finger nail can fit in to the seams. In other words, the inner chamber is not so much a pressed bent sheet but several fitting components. Again though back to your point about dry air sucking in without a designed route for such flow, I am thinking it would be a stretch for a steam atmosphere once trapped to vent out and allow dry air to flow in and replace. Compared to electricity I am more comfortable hypothesizing fluid dynamics !
Barry has chimed in on several threads from people baking bread in pizza ovens, usually where the poster has burned tops.
Barry says he turns on the upper element for a couple minutes at the end of the bake to brown the upper crust.
I think that becomes an issue if you have the top elements glowing which in this case will happen when the top control is set very high (as in 600F+). of course I don't intend going that maverick. Counter-intuitevly its seems going lower on general temps seems the best course of action here since as mentioned, browning does not seem to be a concern.
In my limited experience I have found that humidity of some sort versus massive amounts of steam is all that is required and that is accomplished by having a good seal to keep it in( like a DO). My non convection oven will is so well sealed that it holds moisture even after the steam pan is removed. It came that way I have not modified it. If you need more steam to compensate for leakage maybe another Rofco steamer on the other side would do it.
I was also wondering if it baked a decent pizza?
well ... this is a really well shaped loaf that otherwise I think would bloomed quite nicely - dropped temps to about 490 and STILL these loaves are browning to this hue in 13 minutes. burned botton the whole 9 yards. Zero burst - hypothesis (again), caramelization happening too quickly. I think I have this steam situation under control having sealed the inner chamber with high temp silicone and also having consulted brookbake folks on inner sealing strategies ... the horror....the horror ...
Geremy, if you have an infrared gun shoot the stone and give us the temp
I think it was about 530 by the time I pulled the loaf. Also btw - so dang hot in there I baked with door open after 13 mins just to dry out the crust. I will mix some more dough tonight and try to do a couple maybe even 3 bakes tomorrow.
If you think Im crazy - I want to ensure the steam tray gets nice and hot - it really needs to absorb a lot of energy to 'plume' so maybe Im just too used to jacking the temps on the gas domestic. And the other thing is that this first loaf in this thread popped really nice at high temps. who knows ?
Was sure this crumb would be foamy but hey - at least one thing worked. As a side note - please observe the oval shapes of the bubbles, doc dough once PM'd and said 'are you stretching your loaves during the final proof'. what a keen eye. A habit sometimes and in this case - this is stetched just a tad about 10 mins into final.
Are you actually grabbing the dough in the couche and stretching it outward?
What if you raised the stone in your oven up an inch and a half or so to move it away from the lower element?
What is the temp of the stone?
Doesn’t the unit have the ability to control the top element and the bottom one independently? If so, what baout etting the bottom element a little lower.
exactly my thoughts dan. yes occasionally I couche the dough and realize I shaped a little short so I will kinda stretch it on the couche. its bad practice but right now - eh big deal right. the equipment is the focus ;)
Wow the crumb is gorgeous, you are going to school us all once you get your oven going. Sorry it has been so frustrating for you Geremy, I’m sure you’ll get it sorted.
Hey Benny - thanks m8. Gotta say the baguette CB thread is chock full of amazing crumb results - if I recall recently you posted some epics. I think its all about crontrolling the yeast and good gluten development. Too bad getting bloom on these loaves is really twisting my melon. gotta sort that out so we can put the canadian flour through the ringer !
Yes I am very interested in getting your feedback about what Canadian wheat you feel is good for baguettes. Unfortunately the availability of flour is spotty although improving. Every time I get a few bakes in with one flour, it goes out of stock all over the place. My current flour has been good but it is gone from the stores. I have found some flour from Quebec that is also only 10% from La Milanase that I’ve heard good things about, so I will be giving that flour a go soon.
Looking forward to your baguette bakes in this new crazy hot heat retaining oven.
Once I see gringe to my satisfaction will bust out the Canadian stuff. I'm hesitatant at the moment considering this is an ancient grain and probably work best as a blend -
Not the film about wine - the pics - argh sorry Benny :\
Did you have the upper element on at all during the bake?
The oven seems to really retain heat. I fire it up as soon as I start pre-shapes in order to get the steam tray fully heated (this is per Rofco advice). Then drop the dials (both upper and lower) a just enough to switch off the elements. They may click on momentarily but not enough get to that very red glow - maybe the top goes dark red for a minute.
"Then drop the dials (both upper and lower) a just enough to switch off the elements. They may click on momentarily but not enough get to that very red glow - maybe the top goes dark red for a minute. "
There's the problem.
We've dealt with this phenomenon with at least a half dozen foreign guys baking bread in a pizza oven. Overly done tops. And they all used the top element, "just a little."
As I've speculated, and barryvabeach confirmed (he has a pizza oven):
the top element needs to be completely/always off from the time you load the dough, until the end of the bake where you might turn it on just a minute to brown the crust. (Using the top element to pre-heat is okay. )
It's the "radiant" heat that does it, as it is much hotter than air temp. The thermostat registers air temp, not radiant heat. It's like your car getting 150 degrees hot in the sun when the air temp is only 85. The radiant _sunshine_ gets it hot, not ambient air.
Those elements radiate a temp around 900-1200 F, so even a few seconds darkens the crust. And once a little dark, the crust absorbs heat quicker, as a black car versus a white car in the sun. (as Barry also explained.)
Verify with barry. You're having the same problem he did.
Ok - the upper goes off. temps down etc. Btw Ive heat gunned the elements and recorded high 700s F. And btw - 12 hours later the deck is still 120F. This is so not what I am used to but funny thing is the loaves are cooling down and becoming very soft. I just have to get the bake time to a normal 18-20 minute length as opposed to feaking 12-13 mins. Thats just wild but its so counter-intuitive to not have hard loaves. More to come ...
last time this was discussed:
http://www.thefreshloaf.com/node/64854/deck-oven-problems-steam
Though he was doing full loaves, not baguettes.
Ciabatta and barry had good comments.
Don’t feel like the lone ranger. It is common for bakers first using the Rofco go through similar adjustments. I know Kat had to work to get her Rofco dialed in.
He's a genius baker - go look up 'Round River Bakery' in idaho. So it was kind of expected from th me get-go. Now one would think that such a fast bake would produce a hockey puck loaf. Even this last baguette when pillowy after an hour of cooling - ok time get some dough primed.
Well that supposed genius doesn't get crumb as nice as that shot above ;-)
I imagine you've read the thread "My Rofco Experience" but if not, it might be instructive as it focuses on temp control, scorching, steam.
My quick read on a few things:
- use that IR gun a lot and get your temps down and predictable. I made a chart of what dial settings delivered what stable temps and Rofco's #'s were WAY off. As you said, it holds heat well, so even if you turn it down to keep the elements from cycling on, you probably don't need to start that hot, esp. with stones that retain so much heat. I recall doing a bit of cycling elements off/on to get things just the way I wanted (but I still scorched tops often).
- With lower temps and proper venting, baguettes should probably get at least 20 minutes (I do 17 with steam then 5-6 more after venting for 325g baguettes at 480F). 800g sourdoughs get 18 w/steam then another 15+ minutes at 480F. Super thin crust means not enough time, particularly AFTER venting (and so again - likely too hot, which the burnt bottom attests to).
- And yes, good venting, and maybe too much steam...that baguette looks to me like it got too much steam to me, so you may be overdoing it. On venting - open the door at your vent time to make sure you're getting the extra moisture out. While temp's are pretty straight forward (too much heat = shorter bakes and scorching), steam can be deceptive, as folks have noted above.
- And just keep after it...
The 'my rofco experience'. I recall reading it a couple years back and had a vague memory of the rrials and tribulatuons. So now I am in the same situation. I think one of the first challenges is learning how to deal with a stone that sits directly above some very powerful heating elements which compared to a stone sitting on a rack in a gas domestic, heats up really fast and stays hot. As I've experimented, I have been thinking about using the ambient temps after shuttinng the thing down which you discuss in your thread. I think this unit is probably more like a haussler but either way a similar design concept. Would love a haussler but dont think dropping 5k is an option. Also reached out to alfanso by email whos really dialed in his domestic electric and his advice is 460-480F. Again, I became so accustomed to having to blast my gas unit which at 550F could only spring 3 350g loaves at once. Anymore than about a kilo of dough and heat / energy was just not there and would not spring the loaves. So it sure seems I've got to take more notice of the temps and really connect the IR gun readings to the dials. will get there. In the very least I think this thread and others like it should hopefully provide insight to anyone else taking the step from domestic to a semi-professional style oven. Thanks again bikeprof. Maybe will see a round river franchise in L.A. one day !
Looks like the combined advice of idaveindy, dan, bikeprof alfanso, doc dough, MT etc is paying off. Temps dialed way down, upper element off in fact whole oven off at bake time. the residual heat produced some burst and the progression from dough to bread was much much more on par with a normal bake. ie bursts showing early in this case about 3 mins in (I prefer 2 mins). color coming in at the end. I evacuated against bikeprof's 17 minute advice only so I can guage my normal evacuation habits of 10 to 11 mins. the stone was only around 420F most of the bake. Ambient was (I cant believe this) about 390F the whole time except fornthe last 2-3 whereby I triggered off the top element since this entire bake was a bit slow so accelarated the very end phase. total time exactly 20 mins.
This leads me to believe these pillowy loaves that still soft hours (days even) later are essentially steam cooked. This loaf looks, smells and even sounds like a normal loaf with the cracking song while cooling. Incredible difference. Its also mind blowing this happened at ~390F. this oven has a celcius dial so will bump it up a notch on the next round -
Serious improvement!
Artisan baking is not for the faint of heart. Persistence is a necessity...
Is the ROFCO Steam Tray giving you enough steam?
Yes, I am using 3oz and seem to be trapping it quite well. I used the mirror test and also not seeing plumes emerge from the heat vents on the outer shell sides anymore since I silconed the joints on the inner. Back to my saying - its 50% ingredients, 50% equipment control !
Wow what a difference, you guys are really good problem solvers, very impressive. It is remarkable how even and straight that long baguette is Geremy, you have some serious shaping skills. So great that you are getting this new oven dialed in.
Hey Benny - funny you say that coz I've been out of the game so long I was a bit irratated at myself for not being a little more consistent. ha ha - I have said many times here that I think cylinders are so tricky. I will try to pre-shape with already some length, and then take care building more length at the initial folds. I want to see about 75-80% length before rolling otherwise its too much stress on the dough and, risk of thin sections increases. the last thing I want is a thin section. Finally, no rush and g-d speed ;)
Can you explain how you control the oven? Where are the sensors that the thermostat uses? Separate thermostats for upper and lower elements? Or do you have to trick it into using the elements you want by changing modes? Have you checked the oven wall temperature with your IR sensor? Any idea what the emissivity of the interior of the oven is?
390°F is hot enough to brown when there are 5-carbon sugars and protein in the crust but it does seem a little cooler than most of us are using. I start at 525°F and finish at 340°F but because almost all of the heat transfer is via convection the surface temperature matches the thermostat fairly soon after the program steps to the next stage.
No tricks needed here. The markings on each dial are in Celcius 0-350. A top and bottom temp sensor controls the automatic toggling and all I can say is that the stone gets hell-a-hot hell-a-fast. As bikeprof and Dan are advocating - use the IR gun to really make best sense of the dial positions. What think is going to happen is a routine whereby the lower is dial needs to be set a tad bit lower than the top. Its finding those sweet spots. Did another bake just now bumping the amvient to about 430 and stone to around 450. better crust with earlier earlier evacuation - dough under proofed so it was a very similar loaf to the above - its so dang hot here in L.A. Im too lazy to upload pics - plz use imagination !
yes on the wall readings next round.
Baked this at about 420F. Having a hard time getting the oven to hit 450F-ish at bake time especially now that the top element has been identified as having to turned off entirely when its time to load. In this case I started with internal temps at just over 500F, stone around 510F. As soon as the steam is activated the temp will drop considerably (to 420F) After this point the internal is rather stable - very stable actually. I think the steam and humidity inside is good it just apoears to me at this point I need to figure out settings to get this thing a bit hotter once steam is introduced. As for the first identified problem of super fast browning and pillowy loaves after cooling - that is totally under control. I find that I need to evacuate rather early at about 7 mins and the final crust is spot on.
Only saw burst on the ends as above. the interior scores show some beginning tears but never really went full on like the ends. Getting closer !
Geremy good to see that you’re gradually getting thing closer to what you need to bake the bread you want. I’m sure it won’t be long now.
benny
Heres some pics from today where jacked the temps up near max and got the internal to almost 440F after steam addition. Some burst and what I am observing now is the loaf beginning to rupture around 2 minutes and then tuckering out during minutes 3-5. We should see continued rise in this time slot but the spring is mostly done by 3 minutes. Thats too early. Could it be proofing ? doubtful. I only say that due to having done so many of these loaves that I am pretty confident in this arena. I did bump hydration to 74% on this bake (up from 71-72%) and as such got my favorite type of crumb - the very lacey open crumb as shown below. At this point I am thinking about ordering a thick custom slab as I have been shooting ideas by PM with doc dough. Also had some queries from brookbake.com guys about performance with stone thinness and how that is affecting things - so Andy if your out there in the ether, it looks like thick might be your huckleberry - heres some pics -
is the water at/near boiling or at room temp? (Cooler water robs heat.)
Also, you're still adding just 2 fluid ounces? (more water robs heat too.
--
Maybe I misunderstood, but I think you said you are turning off the bottom element too, when loading the dough. Why? What happens when you leave the lower element on and set to 450 F ?
I'm leaving the bottom element switch on and it will auto adjust based on thermo readings. I boil the water first - we are on the same page (see my reply to your ice advice)
Tried raising the plate by 3 inches and really didnt see much improvement - again seems to rising then stop rising about 2 mins in. hmmm
Why did the first loaf burst so well and why can't I use a camera !
At least this worked -
It’s not your camera Geremy, your baguettes are too long. ?
The crumb definitely worked.
Believe it or not - so really not that long. btw next weekend will try the canadian flour ;)
I will be very interested in your reviews. What I am using currently is Milananse organic all purpose from Quebec. So far it seems fine.
Believe it or not - so really not that long. btw next weekend will try the canadian flour ;)
Now doubting my proofing skills I chopped some time off final and also changed up the loading procedure to really minimize how long door is open. As result I can see the loaves looking more lively but still perplexed as to why rising is stopping so early. Im fairly certain steam is not an issue. One observation - scores where the open dough is exposed looks very glossy and crisp. Perhaps thats visible in the pics. That makes me wonder if the walls and ceiling are sort of toasting the surface. More to figure out - more to solve -
(Just throwing out ideas.)
is too much steam, either in quantity or duration, I'm not sure. The shiny crust reminds me of newbies' pictures of steaming too long.
Next thought... are you using a thermometer on top of the stone? The reason I ask is that in one pic, it showed the ledge, upon which the stone rests, effectively seals the air space below the stone (if I interpreted it correctly), therefore the lower thermostat setting doesn't reflect the air temp above the stone, because there is no circulation between below the stone and above the stone.
3rd thought: After preheat, how much time do you give it before loading the dough, in order for the upper element to cool from 700 (or whatever) down to 500 (or whatever) ? Any residual heat in the upper element, above desired air temp, is going to radiate heat (as opposed to convection heat) downward and over-bake the top.
4th... maybe an internal roof is needed so that the upper element can be cycled on/off via thermostat, and so that air temp can be maintained, but the bread can still be shaded from the upper radiant heat.
Good luck, amigo.
in this thread entitled 'I take that back'. Oven was too hot and too much steam. At point I remarked that I saw an 80-100F drop in internal temp at introduction of H2O. So now I've practically forgone the upoer element with lower at max and just a tad of water. You were spot on !
(or else a brain fart.)
My prev comment about an inner roof triggered another line of thought.
what if, during preheat, the upper element is getting the whole metal ceiling of the baking chamber over 700 (or whatever temp) and then the whole ceiling is re-radiating that excess heat back down on the dough?
Because other than too much steam (either quantity or duration, I'm not sure), your bread does look like the loaves of the guys using both upper and lower elements. but.... they are using taller ovens, whereas yours is lower for pizza.
and... with radiant heat, closeness counts.
Suggested experiment: assuming it takes 15 or more minutes to preheat with both elements, turn off the upper element 7 minutes (roughly 1/2 way in) after starting preheat from a cold oven. That way, any excess heat above the 450 (or whatever) in the upper element and metal ceiling will have time to dissipate, and it can hopefully fall back down to 450 by the time you load the dough. and therefore, the upper element and metal ceiling will only radiate 450 degrees back down instead of 700+.
See... with pizza, you want the upper part of an oven to radiate downward with 700 degree or more radiant heat. That's what happens in a brick pizza oven (700+ degree inner ceiling temp), and with Lahey's, Forkish's and Gemignani's trick of putting your pizza under a broiler to finish it.
so.... my thinking is this: don't let your ceiling get up to 700 deg, or ... if it does, give it a cooling off period, or.... use an inner roof to block that downward 700 degree radiant heat.
Whatcha think?
Regarding your eureka moment. For the record I shut the top down 6-10 minutes before loading. I wish I had have recorded some data with firstloaf in this thread - I only know that I got the oven very hot and injected about 4oz of water. blocking the top element is what I am thinking. If I lower the temps, its hard to keep the internal air temp above 400F so I go back to the thoughts of the first bake. Maybe I never activated the top and just blasted the lower. Doc anf I have a separate PM going - he suggested tenting a loaf which I think is the next step. Also was looking at some old pics I did of loaves in my gas oven and never ever saw shiny interior scores. This is just so different (and frustrating)
Considering this problem seems to be about radiant heat from ceiling and sides I want to know if light surfaces reflect heat in the dark. Oh boy, can't believe I am asking this !
it is complicated, but generally yes. Low emissivity surfaces such as reflective metals and some surface coatings will reflect infrared radiation.
Yes highly reflective surfaces will reflect heat in the dark, in the absence of light.
I have never had good success with getting small diameter loaves to form an ear, especially with high hydration dough. The (perimeter of the loaded loaf + 2 x slash depth ) x 1.15 is the approximate length of the hoop that will form when the surface is cooked by the steam and the oven spring first has to expand the cross section enough to fill a circle with that perimeter (you can calculate the area increase and the percentage area increase is quite a bit larger for small loaves than for larger loaves). Only then does additional oven spring burst through where the slash has weakened the surface (assuming that there is enough force to do that). If the dough is weak, then the 1.15 can be a larger number because there is some extra stretch available and the surface never actually fractures. That is what your loaf looks like. The stretch is occuring at the slash and seems to be cooking as fast as it stretches by the steam (thus the shiny surface from the fully gelatinized starch).
after dialing my gas unit. But I agree the gelatinization is happening too early and yes theres a trade off with surface tension which only gets more difficult to overcome as ratio of surface versus volume increases. Just like how difficult it is to inflate a balloon animal without a pump.
John Cougar Melencamp had a song called 'The Kinda Fella I Am' and thats the song that triggered in my head when I did a test bake in my gas unit. This an almost steamless bake just to check my sense as now I am doubting my proofing and everything. Maybe I am just not cut out for electricity -
Adjustrd the electric to only use the lower element . internals up to 450F plate at 500F 2oz max of water for steam. Bingo
Latest looks good! Keep the faith...
Next time you bake, please take a picture of the raw dough after it is scored. The opening of your scores are so evenly located and opened on the baked loaf.
I have been keeping a somewhat close eye on the baguette thread and know both shaping and scoring have been popular subject matter. Boy I really want to do a video coz I think one of the main things to consider is to just relax and takenit easy. Thats the way I get better results but sure thing - I will take some snaps just prior to loading.
Glad it is sorted Geremy, great looking baguette, no surprise.
Haven't been party on this thread until now on your suffering from and triumphing over the slings and arrows of the new oven. But looks like progress is being made and the last few bakes are starting to approach the old kendalm.
Your John Cougar reference reminds me of a song by Steve Forbert, a late 70's folk/rock prodigy who kinda sputtered after a few albums: What Kinda Guy
Your perseverance reminds me of another Forbert tune: You Cannot Win If You Do Not Play
Just can't help it ! The most frustrating part is that you got about 10 years on me so the 70s references I wish I could get 'em without having to hit up youtube - alas I will go and discover Forbet now. Actually the reference I really want to weave in here was to Peter Sellers 'The Party' but that's just all about winning the adoration of a french beauty through fumbling and other antics. Wait a sec, maybe there is a shoe-in here (pun intended - remember Hrundi V Bakshi lost his shoe).
Hidy-ho all y'all. I shall summarize what I learned in moving on from domestic gas to semi-industrial electric oven. Part of my mantra is that baking is 50% ingredients and technique and, 50% knowing your equipment. So, this summary shall focus on that second 50%.
Many a home baker will post here asking why their bake didnt turn out well enough to flaunted on instagram (curse that wretched platform, heck ! curse twitter, and facebook etc etc they reek). Sorry for the segue. Now that I have regained composure, lets talk equipment in the form of that beautiful modern blessing called the 'oven'. Up until this point I advocated really massive temp hiking, well it turns out that is important and still important if I use my gas oven. What I think we are looking for ideally is around 450F and up with a stone temp closer to 500F and just the right amount of steam. Yet, although this is nothing new / revolutionary, I want to more, highlight the reults of not acheiving these conditions. I state this also having studied both Rofco and Bikeprof's testimony on his Rofco experience. So here are a few points to note -
- Too high temps equals quick browning but not quick rise. Consider that 'not quick rise' bit. The conclusion here is that the loaf is entombing itself within just a couple of minutes via early caramelizarion thus precenting expansion.
- top elements are loaf killers. They need to be shut off long before your loaf goes in. I would say 20+ minutes prior. If you bake a loaf with them on, it will be a smooth football or torpedo. If they come on even for a minute at the critical spring stage, it's game over. Beware of top elements !
- too much steam will a. dump your internal temps by even 80F+. The right amount of steam will only barely drop the internal temps. Loaves baked with too much steam will become soft after they cool. If you super heat the oven with too much steam you may achieve some burst but will also end up with a soft loaf that feels like a pillow. no thanks !
- thick stone to retain heat. The thicker the better. I used bricks as heat sinks (see pic below). Loaves should bake on a temp curve that starts high and ends low. With this oven and Rofco technique so-to-speak, we shut the oven off and rely on residual heat. Too thin seems to result in the oven cooling too quickly.
- Long start up. One hour, even two in order to capture and retain heat. My gas oven will hit 500F in less than 15 minutes and even thin stone I use will be scorching but there is not as significant heat retention.
- Just a little steam and capture not vented. 2oz in a small unit is sufficient and will not steal much energy from the oven. If we consider how much water expands - ie a cup becomes cubic meters of volume then thats about all that needs to be aaid here.
In order to make all this work I indeed had to alter some things. After all this is a 'pizza' oven. I think the most important point are 1. sealing the chamber so that I could reliably retain 2oz of steam and 2. Adding some bricks for energy storage.
Beyond the above, tapping into the TFL brain trust ultimately helped recognize that this or that loaf result equates to this or that problem. After all, it really gives you an appreciation for just how eloquently all of the right conditions must come into play. And thats only half the battle. Yeah, at the end of the day this experience, more than anything serves as lesson on how to identify results and adjust towards a solution. Thats a fullfilling skill to learm but even more fullfilling is watching you neoghbors eyes light up when you gift them a loaf. Boomshanka !
(sorry for the aweful photo) here you can hopefully see that I have installed a braided seal for the door. The orange silicone sealant on the inside and four bricks as heat sinks. An internal thermometer and IR gun to observe conditions and how they change over course of the bake.