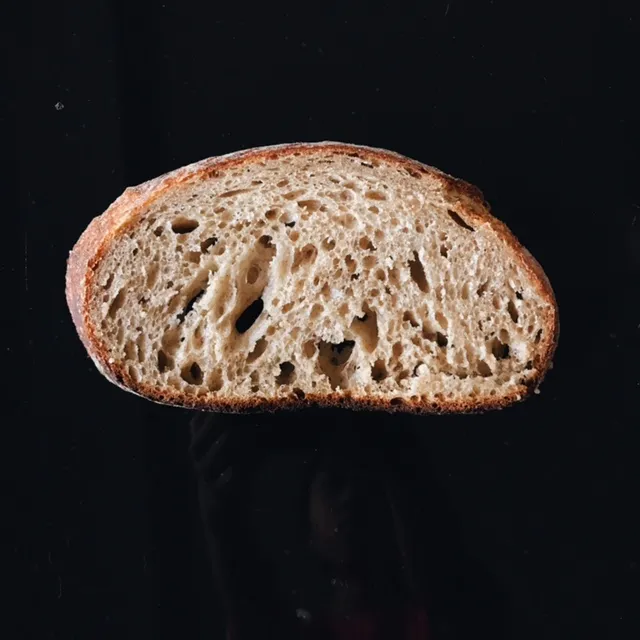
Loaf 1, cold proof for 11h.
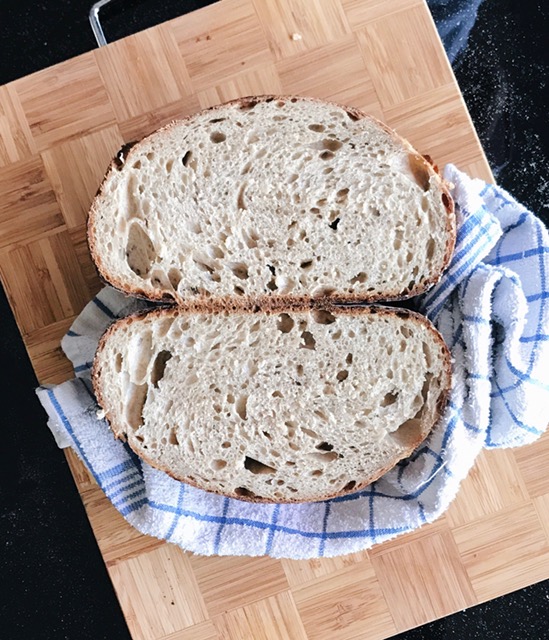
Loaf 2, cold proof for 13h:

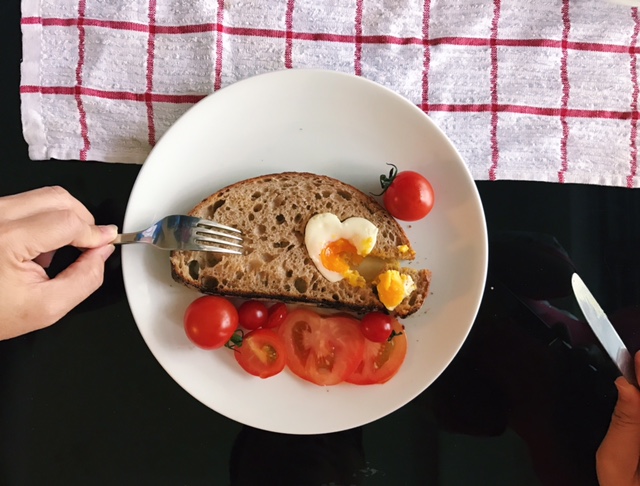
This was the first loaf I sliced open and didn't feel disappointed in... really, really proud of this one. Increased the hydration and rye percentage of the trusty Vermont sourdough and used a 100% rye levain build using the No Muss No Fuss method. The tang of this one was perfect and ghskdfjzdsjkfskdllss it just gives me such joy. Made egg-in-a-hole with it for my dad's Father's Day breakfast plus my homemade bacon jam and olive oil drizzled tomatoes :)))))))
Really gotta thank Lechem !!!! and Dabrownman !!!! for helping me with my incessant questions! I'm beginning to get the hang of how to tweak variables to suit my timing/temperature/taste. I wonder what I should try next. A different technique (been eyeing Breadwerx's Champlain Sourdough)? More whole grain? Add-ins (rosemary-apricot sounds amazing... or maybe kinako-cashew...)
Here's the procedure if anyone wants to know. It's a pretty good method if you live in a super hot climate like me! (Any Singaporeans here?)
For 2 loaves (VD with 20% rye, ~70% hydration)
832g bread flour
148g dark rye
22g salt
660g water
115g levain (100% rye, build using the NMNF method - 3 stages, 24h retard in fridge)
- Mix everything except salt, autolyse for 30min
- Knead until it feels only slightly tacky and can be lifted out of the bowl in one cohesive lump (used a mixture of kneading and S&Fs)
- Rest for 50min. One set of S&F. Rest for another 50min. Second set of S&F.
- Bulk ferment as needed. (Mine went on for about 1h10min more after the 2nd S&F, but not yet fully fermented because I was a) scared b) wanted bench rest after shaping to go on longer.)
- Pre-shape, rest for 20min. Shape, rest for 10min. (Saw a few bubbles under the surface at this point so I was quite satisfied with the fermentation. Maaaaybe I could push it further next time? Not sure what the consequences of under-fermentation are.)
- Placed in chilled bowls and put into the fridge (2degC) to proof overnight. (One was baked after 11h, the second was baked after 13h).
- Score and bake for 15min covered at 230F, and uncovered until crust is nice and brown. Open the oven door a crack in the last 5min.
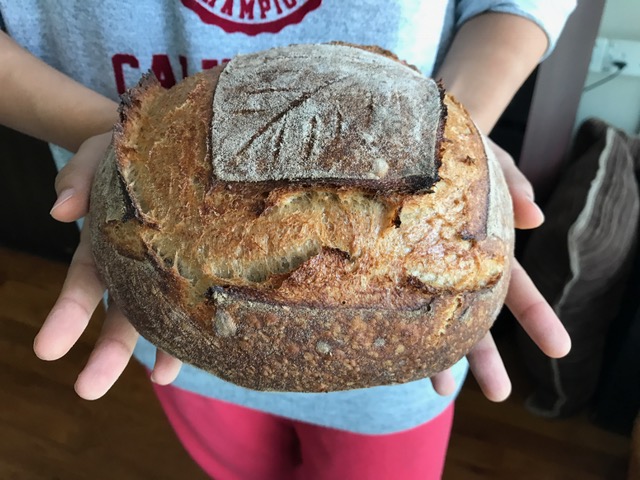
Used a different shaping method this time too, and I'm pretty pleased with the results. I just can't pull off Breadwerx's method (the amount of dough I stretch into the centre varies each time hahahha) Did a simple letter fold and manipulated it into a round shape by pulling towards myself. Also, didn't use ANY flour because I suspected the ugly holes the previous bake were because of flour pockets.
Tried a fancy score. I think I should get a proper razor/lame soon HAHHAHA the fruit knife doesn't really cut it.
BTW, is there a difference in the crumb between the 11h and 13h proof? Could I have pushed it even longer and would that have yielded and even more open crumb?
- loafsniffer's Blog
- Log in or register to post comments
You nailed it!
Looks great!
Perfect crumb.
Love your profile photo. My 5 kitties say hi :)
I can only wish for that crumb. Can only echo Elasquerino "Perfection"!
Everything about making bread is all about what works for you.
Congrats. Looks perfect.