Joe,
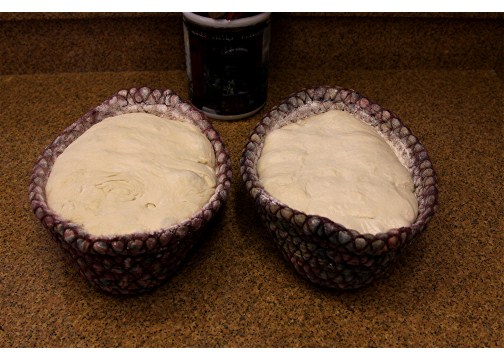
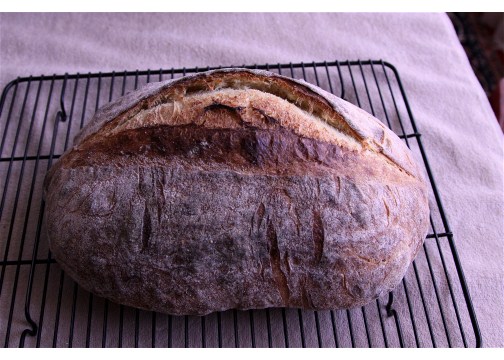
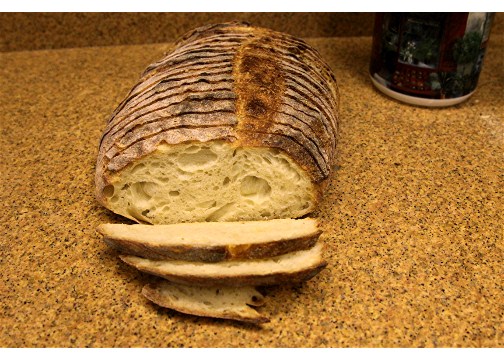
Thank you so much for your terrific formula: Pane con Semola Rimacinata di Grano Duro. The only thing I did different than your formula was raise the hydration level to 68 percent. I made 7.62 lbs of dough and divided it into two equal pieces of 3.81 lbs each, bulk fermented each in seperate containers, which minimized the handling of the dough during shaping.
Howard
Here are some photos.

- holds99's Blog
- Log in or register to post comments
Those look excellent, Howard! Lovely golden crumb. Nice and open, too.
Best,
Syd
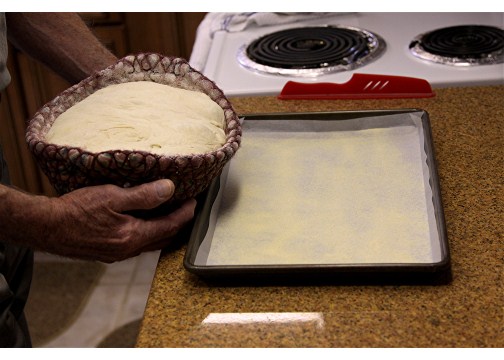
Syd, thanks for your kind words. JoeVa has a winner with this formula. In the past I have made dough batches using semolina, but not durum flour. Coincidentially, a few weeks ago I ordered three bags of durum flour from K.A., along with some other items, then a few days later I luckily found Joe's post on TFL. He wasn't specific about mixing, so I mixed the dough in a single batch, placed it in a lightly oiled large plastic covered bin, then gave it three stretch and folds at 20 minute intervals, then divided it in half, placed it in two lightly oiled containers, covered each container with a lid and retarded them overnight in the refrigerator. The following day I brought the dough to room temperature, shaped it and placed each of the loaves into the cloth bannetons for final proof. The photos pick up at final proof. My wife, who took the photos, is my sharpest critic and she thinks it tastes great.
Best to you in your baking endeavors,
Howard
You're welcome, Howard. :) I have made it three times now. Here was my last attempt. I tried 60%/63%/65% hydrations respectively. There wasn't too much difference between the 63% and 65% but the 60% crumb was tighter than I would have liked. Like you, I also retarded overnight, although I retarded in the banettons after final shaping. This formula is definitely a keeper.
Best wishes,
Syd
Hi Howard,
After seeing Syd baked a batch of them not long ago, your breads look very tempting. My recipe lists getting longer but I think I will bake them in the next few weeks. One more question for you, do you have any burn at the bottom before by using baking sheets together with the stone? Thanks.
Kimmy
Know what you mean about your recipe list.
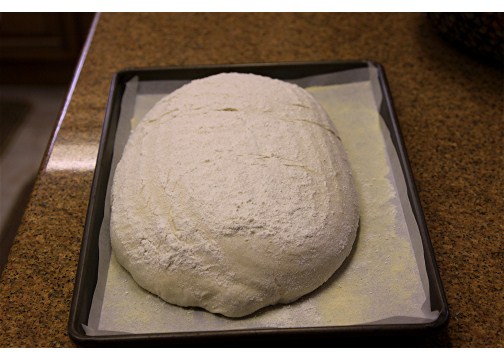
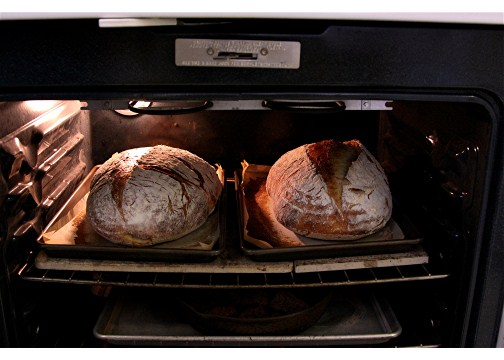
Re: the bottom of the loaves. I always bake my loaves on/in heavy duty (thick guage metal) pans lined with parchment and generously dusted with semolina. If you look at the oven photo you'll see the pans are sitting on a stone that covers the entire surface of the oven rack. I purchased 2 large square, 3/8 inch thick, pizza stones and had one of them cut to fit snug against the other stone to cover the entire area of the oven rack. Home Depot, here in St. Augustine, FL, has a water saw they use for cutting ceramic tile and I marked my pizza stone where I wanted the cut made and had them make the cut. As I recall they charged me $1.00 U.S. per cut. Only needed one cut.
To answer your question, there's semolina on the parchment where the loaves rest during the baking cycle. The semolina acts as an insulator between the bottom of the loaves and the heat coming from the bottom heating coil in the oven and keeps them from burning. It's interesting that the loose semolina on the parchment scorches but the semolina on the bottom of the loaves doesn't scorch at all. After the loaves cool on a rack I just hold them over the sink and use a stiff brush on the bottoms of the loaves to brush off any excess semolina.
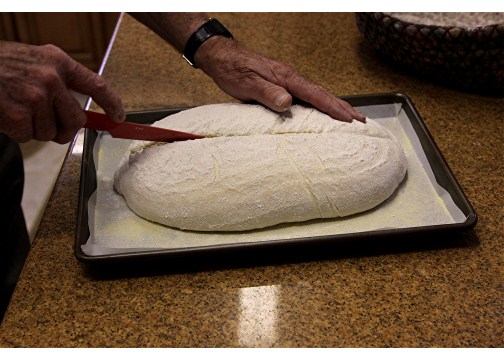
I also have a large aluminum baking pan (permanently) placed on the bottom rack of the oven on which I keep a cast iron skillet filled with lava rocks to pour boiling water to create a nice steam blast during the first 12-15 minutes of the baking cycle. The baking pan on the bottom, holding the cast iron skillet, also deflects some of the heat. It's important to deflect the bottom-heat coming from those red hot heating coils, because I baked these loaves for the first 10 minutes in a 500 degree oven, then reduced the heat to 475 deg. F for the next 10 minutes. Midway (20 minutes) into the baking cycle I turned the pans around and further reduced the heat to 450 deg. F for the final 15-20 minutes of the baking cycle, until the internal temp. of the loaves was 206-208 deg. F. These are large loaves weighing nearly 4 lbs each, so I rely entirely on an internal temperature reading, not timing. It's tricky baking these large loaves to proper doneness in a home oven without burning the tops or bottoms. That being said, the parchment lined pans generously dusted with semolina gives you a margin of safety. I haven't experienced any bottom scorching using this method.
Hope this helps.
Howard
Hello Howard,
Super thanks for the detailed write up and I already passed your information to my neighbor. She has wrist injury before and she loves baking breads. Your detailed write up will help her a lots. I think using baking pan is safer for her too. I will report back when she starts baking again. She wants to bake during her 70th birthday in the coming fall. Thank you.
Kimmy