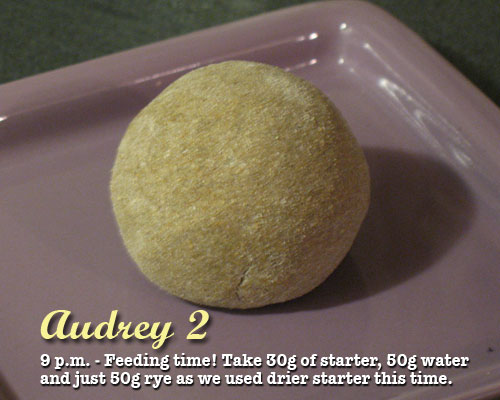
The Fresh Loaf

A Community of Amateur Bakers and Artisan Bread Enthusiasts.

Yumarama's blog

Yumarama's picture
Yumarama

This is from a recipe in Peter Reinhart’s Bread Bakers Apprentice and I didn’t make any changes to the recipe, being the first try at it. 

Well, ok, one or two very minor changes: he asks for fresh rosemary, I only had dried which I soaked for an hour while the dough was warming up. He says to mix in roasted garlic - didn’t have any. I guess next time I’ll have to make that ahead of time along with the extra mash. 

Anyway… here’s the final product, first try (slashed a bit too deep) and the loaves are still cooling so I haven’t cut or tasted yet but boy-oh-boy, does the house ever smell wonnnnnnderful!!

Potato Rosemary Bread
Full post on the blog: Potato Rosemary Boules


Yumarama's picture
Yumarama

Yeah, it's been a fair while. Not that I haven't made bread, I have, numerous batches in fact. But they were really mostly "sandwich" bread and all basic yeast things; specifically "Susan's Farmhouse White Sandwhich Bead" but using part whole wheat. Not as tasteless as store bought "Wonder" type stuff (which they were meant to replace) but not terribly exciting, either. On the up side, these numerous plain breads allowed me to play with the oven's temp a bit and I think I have it tweaked to be pretty accurate now so things don't burn too much. So let's get on with today's bake.

Hamelman's Vermont Sourdough

Vermont Sourdough

"Today" is a bit of a misnomer, of course. I started this batch three days prior after feeding Audrey 2 and Carl out of a two week stint in the fridge. By their third feed they were back to bouncy and fluffy within 8 hours (I was off at work, so I don't really know how quickly they doubled). So this has been a few days process. The pre-build took a while - but thats' expected - then the fermentation period took the better part of a day and the final proof took over 16 hours of fridge time. This recipe is the Hamelman Vermont Sourdough which I got off here.

This time around, the dough was decidedly stiffer than the Norwich Sourdough I'd made which is a take off from this one. Not exceedingly stiff but stiff enough that when I slashed, it didn't all just collapse and make flat brad as the others I have previously made. (This is decidedly my fault for not yet knowing what the dough should be like and adjusting.) 

The crust is also more solid although it looks like it may have been a bit overdone here. The recipe says 460ºF for 40 minutes but I pulled it out at 30 as it was already rather dark. Looking at the bottom, it's a tiny bit burned, though just a small black stripe along the center. So the oven is still not 100% accurate. But the loaves' insides had reached 200ºF therefore it was done enough already.

I picked Audrey 2 as the starter for this one simply because as I was feeding the two starters, she seemed to bulk up the most - maybe 3 times vs Carl's 2.5 times. So both would have worked well. In fact, Carl seems to have a slightly stronger smell and taste. So maybe I'll give that one a try next in this recipe.

And here's the crumb. Nice mid-sized holes, not too fine or too big, the loaf shape is decidedly oval as opposed to pancake so we're good here. The flavour is nice although not terribly sourdough-ish. Perhaps it will develop a little over the next day or so. Although I expect the loaf may not survive long enough to see. The other one needs to go in the freezer as there are already a couple of types of bread on the counter.

All in all, this one is a success. We'll be making Hamelman's Vermont again.

Yumarama's picture
Yumarama

(From the blog)

It's been a short while since I've updated the blog so here's the latest which was actually made last weekend, June 14th.

This time around, I went with a round bread to see how that would work. Since I still don't have a banneton, I made do with a rice-flour coated, couche-lined sieve. By using a sieve, as opposed to just a bowl, I figured it would allow for some air transfer and keep the couche/canvas from getting damp and tacky. It pretty much worked, although it was still a bit tacky and pulled the dough ball a little when I transfered it to the baking sheet. I did not use the tiles this time, just to see how it would turn out and also to help conserve a certain amount of energy heating them for 45 minutes ahead of time (besides, it was already a pretty hot day, no sense heating up the kitchen even more).

The worry here was that the ball of dough would collapse and turn into a giant disk and not a proper "boule" or ball. Well, it did a bit of both. The soft dough rather spread out once it was on the baking sheet but perked up a bit and rose up during the initial time in the oven. Yes, I'm still guessing what the oven temp actually is, have not yet found a reasonably priced decent oven thermometer.

So again spending the entire time watching the progress and giving the bread a spin halfway through the cooking time, here's the result. (Click pics to enlarge.)

 Round loaf - Click to embiggen

 Round loaf crumb - Click to embiggen

So, let's critique.

The crust this time is thinner which meets with Mark's approval. As per the 'quick" version of the recipe, the dough proofed for only 2.5 hrs so it's not very sour - not necessarily a bad thing. The slashing, well... that definitely needs work still. After I made the first cut, the dough ball rather lost it's firmness and spread out a fair bit so I was a little reluctant to slash too heavily for the other three cuts. The crust looks rather lumpy/crater-ish and not very tight and smooth. I don't know what causes that or how to remedy it. Yet. It could likely have stood a slightly longer baking time to get a bit less... anemic looking.

The crumb is light, not chewy, again this has received good reviews from the white sliced bread fan. In fact I have to admit that there was another loaf, a batard, that never got a chance to get photographed as it vanished pretty darn fast. That one got a brushing with butter as soon as it came out of the oven so the crust there was even more like packaged bread. It was tasty but the butter did not all soak in, so the loaf was a little oily to handle. Since it vanished in about a day, I guess it wasn't a big issue. ;)

So again, we have a successful bake (i.e. nothing burned or flattened like a pancake) with a few minor adjustments to look into:

1) How to keep the boule from flattening too much both before and with the slashing
2) What's the deal with the lumpy crust and why isn't it a nice, tight outside?
3) Considering both points #1 and #2, would a tighter crust translate into a chewier crust? Hmmm..

More rounds to go before these issues are settled.

Yumarama's picture
Yumarama

Well, I thought I could sail on through to the actual bread making but it seems not without a slight hitch that needs some sage minds to help out.

Meet Clem.

Clem is Audrey's first child. He was made of the following:

30g Audrey stiff starter (rye)
100g spring water
100g UAP flour

Clem grew up in a warm, cozy 81F environment and is now 18 hrs old. Soon he'll be expected to get a job raising bread. But he seems decidedly reluctant. At 18 hrs, he's barely managed to increase from his original 200ml to 250 ml when we are expecting him to reach 400 within 12 to 24 hrs. Clem is quite bubbly on the surface while rather mild natured but clearly lacks ambition to reach higher goals.

Clem at 18

What shall we do about Clem? I'd really like him to move out soon.

Yumarama's picture
Yumarama

So it's now 9 a.m. (about) and we're ready to go with feed number three. We've taken apart the previous feed ball and scooop out 30g of that starter from the bubbly center.

I might note here that there's a slight sour smell present although not terribly strong.

In the meantime, Mini has added a post to the original forum thread, saying she's started up a stiff ball as well so we'll then be able to track the two stiff starters at the same time to see what happens.

She also makes mention that she's added 70g of flour to her ball so that's what we'll do as well.

So for this third feed we have:

30g starter
50g spring water
70g organic rye flour

And here it is after getting a final dusting:

Audrey Feed #3

Off she goes into the proofing box and we'll check on progress and post any new pics if there's something noteworthy.

I'll also update the forum thread itself in case anyone's interested in following this little saga/experiment.

http://www.thefreshloaf.com/node/6826/oh-please-oh-oh-oh-please-grow-me


Part Deux:

So Mini says Audrey's all growed up and ready to go raise bread of her own. Awww... <sniff..>

They leave the nest so soon...

Anyway, since I didn't get that message until just a minute or two ago (gasp, I did stuff AWAY from the computer??!?) here's another update on where Audrey is right now...

Audrey goes flat again


So I'll now start using her and feeding her over to All Purpose then pop her in the fridge after keeping a chunk for some first run test bread.

Weekly feedings, I assume, pulling her out before the weekend to get some bread going.

Now to go hunt up a recipe or two. I suppose I need to also figure out what hydration ratio she actually is in case I need to use her in a normally comm. yeast recipe (no not right now, in the future). I'll add this to the thread when I get that done so that if anyone else folows along, they'll have the info.

So there we go, the Audrey Saga is sort of at an end already. Who'da thunk it would be so quick!

Of course the REAL end will be posting some bread pics. Since it's Sunday night here, not sure if I'll get time to make any for a few days... Those who are watching, keep an eye out!

Thanks a BAZILLION to Mini and Mike for their help. You guys are beyond great.

See you all in a couple of days or so with the first batch of Audrey Bread!!

Yumarama's picture
Yumarama

So at this point, we're at the 10 hour mark and it's getting late so I mix up a fresh ball. I gather grab some of the previous ball's insides and mix up the following:

30g stiff starter
50g spring water
50g organic rye

Here I cut back from the previous 88 grams of flour which made, in my opinion, too stiff a ball. I'm still just guestimating at this point.

And here is the resulting ball:

Start of Feed no. Two


Audrey now goes into the proofing box, a cooler with a 15w bulb with the cover open enough to keep the temp inside a reasonably cozy 81F. Tucked in for the night, we'll return to see how well she slept.

<tick tock tick tock>

<cue SFX of rooster crowing and first few bars of Tchaikovsky's William Tell Overture>

Good morning! Let's check how our little dear did overnight...

Well, there's no question the dough is softer now! Flatness galore and several cracks showing but whether they're from the flattening and changing shape of from actual expansion, I dunno. So we'll go from here and assume out next step will be doing the third feed. But first, Audrey goes under the knife again.

Although the very action of slicing into this soft ball caused the exposed surfaces to get somewhat messed up, it seems from the dupicate holes on each side that there was indeed some bubbling going on. Let's continue with the dissection...

Peeling away the slightly dryer outside skin, we can now see that the insides are full of little bubbles and the texture is decidedly softer than the original 2nd feed ball was, which indicates feeding activity by the little critters. Excellent.

On to Feed #3...

Yumarama's picture
Yumarama

I'm starting this blog to track the events in the life of little Audrey 2, a reluctant starter that began as a rather wet batter form and, as recommended by Mini, was transformed into a ball of stiff starter. In a forum thread I started in order to get help figuring out why my then 13 day old starter was doing nothing, Mini's thought was that possibly I was underfeeding the starter in the wetter form (basically I was doing 50% starter, 25% each water and flour for each feed) which may have been the reason it went all hoochy rather fast: not enough flour to feed the yeasties and the acid bacteria was overtaking - or that was my thought on it anyway.

I'm also doing this as a blog so the forum thread isn't taken over by too many images and so it's easier to follow along, should anyone care to.

Since this starter, third time trying over a three month period btw, was pretty much destined for the recycling bin anyway in favour of starting yet again with a recipe Mike has on his site (Professor Calvel's Starter) as a likely successful candidate for starter if the previous verion failed. Since this was try #3 and I was already on day 13 with no real success, I was game.

So while I was/am waiting to locate a source for just 5g - about a tablespoon - of malt extract (it seems to come in 600g sizes or bigger running at nearly $10 a pop) to follow the Clavel reicpe, I got going with the stiff starter. So here's the saga.

As per Mini's sugegstion, I took 30g of the "going nowhere" batter starter, added 50g of water and "enough flour to make a stiff ball". Out came the flour and off we went.

Here's our first image, Audrey 2 after being mixed up. In all, I added about 88g of flour to get to this.

I now think that 88g of flour was too much but that's where we were then, so on we go. I had followed Mini's suggestion to drop the ball into the flour and coat it so that any developing cracks would be obvious which is why, even though it's a ball of wet rye, it looks very pale.

Three hours later:

At this point, there's either a shrinkage of the surface or it's expanding a little. Since the surface was still moist-ish to the touch, I'll say we had expansion.

At the six hour mark:

More activity although the ball is showing no signs of softening and flattening out as Mini suggested it would. I'm starting to think I went too far with the added flour.

At the 10 hour mark:

Definitely some activity and expansion has occured but now I'm sure the ball was made TOO stiff. Yes, the critters have lots of flour to munch on, but nothing to drink. Because I wasn't staying up much longer, I decided to do feed #2 at this point so it was time to cut up our ball and see what was going on inside.

Even manhandled like this, the ball is stiff enough to stay in shape. Slicing it open, thetexture inside is realtively smooth, if there are any bubbles, they're hard to see and distinguish from the texture of the rye flour. There's little sour aroma to this, mostly it smells like wet rye.

Time for feed #2...

Subscribe to RSS - Yumarama's blog