The Fresh Loaf

A Community of Amateur Bakers and Artisan Bread Enthusiasts.

Elsie_iu's blog

Elsie_iu's picture
Elsie_iu

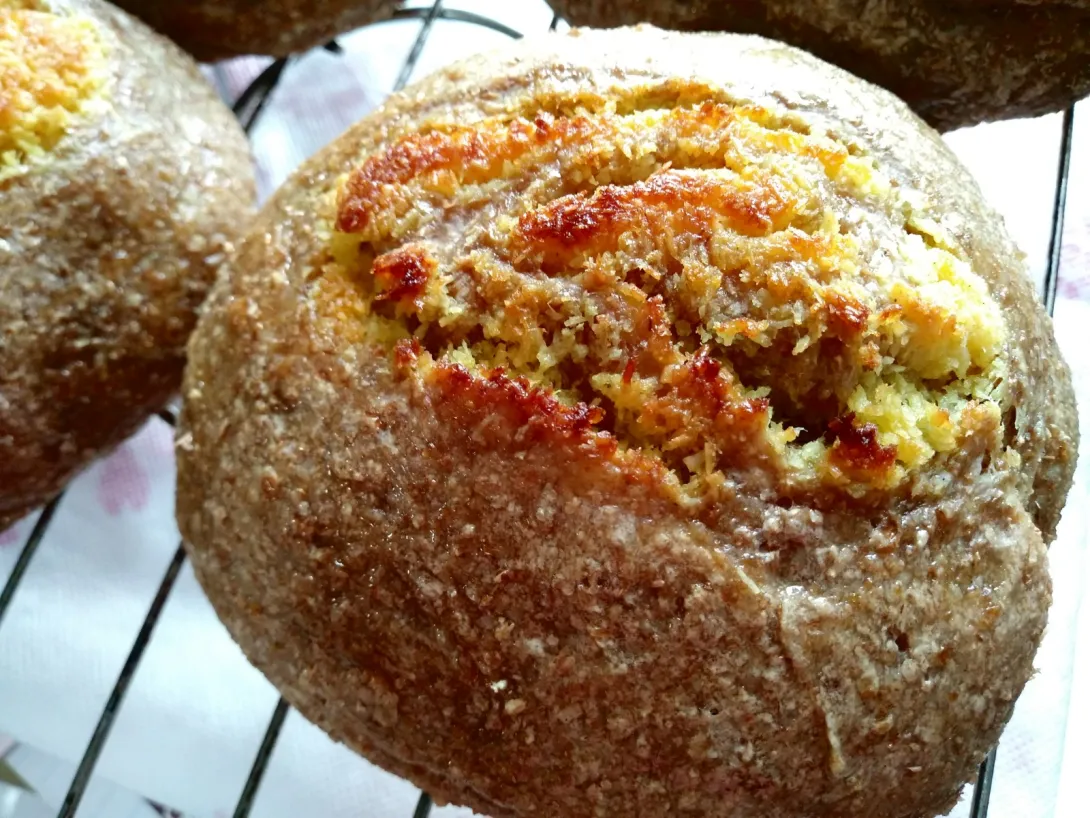
I feel like I should share a HK style bread recipe on this site as someone from HK so when my mom requested some coconut buns, I decided to make it immediately. This is a kind of very typical and popular enriched bread in HK and though I only crave it at very rare occasions, my mom adores it wholeheartedly. I modified the traditional recipe by nixing butter and decreasing sugar in the dough while adding sourdough and tang zhong for flavour and tenderness respectively. An egg is skipped in the filling and condensed milk replaced the sugar. 


For Mom: HK Style Coconut Bun with Tang Zhong and Sourdough 


For filling:

150g     43%      Desiccated coconut

150g     43%      Sweetened condensed milk

50g      14%       Melted butter or ghee

1/4 tsp     -         Vanilla extract

A pinch    -         Salt

A pinch    -         Turmeric (for colour since eggs are used traditionally)


For tang zhong:

20g       6%      Whole wheat flour

100g     29%    Water

10g       3%      Sugar


For dough:

350g    100%     Whole wheat flour

150g     43%      Water

50g       14%      Evaporated milk

30g        9%       Starter

10g      2.8%      Vital wheat gluten

5g        1.4%      Salt

<120g      -         All of the tang zhong


For glace:

15g       4%      Honey

15g       4%      Warm water

______________

370g     100%     Whole Grain

300g      86%     Total hydration (some water in the tang zhong is evaporated)


Combine all ingredients for the filling and adjust the consistency to a thick but spreadable paste by adding just enough water. Keep refrigerated until needed. Mix together the flour and water for the tang zhong and heat over medium-low, stirring continuously until thickened, about 2 minutes. Stir in the sugar. Let cool to room temperature.

Mix thoroughly the starter and the tang zhong. Pour in the water and evaporated milk slowly while stirring at the same time. Combine roughly the flour, vital wheat gluten and salt for the dough with the wet mixture and let ferment overnight for 10 hours.

Stretch and fold the dough for a few times then let rest for 20 minutes. Flour the dough and stretch it lightly into a 30x30cm square. Dot the filling onto the dough, leaving some space on one edge then spread it evenly with a spoon. Roll the dough from one of the edges with filling to the edge with reserved space and pinch the edges together gently. Divide the dough into 4 equal cylinders and place them on a parchment lined baking sheet with the side with fillings exposed facing up. Flatten them slightly and let proof for 1 hour. Meanwhile, combine the honey and water for the glaze and preheat the oven to 400°F.

Bake at 400°F in the middle rack for 30 minutes or until the internal temperature reaches 190°F. Brush the honey mixture over the hot buns and let cool for 30 minutes before serving.

The coconut, condensed milk and butter produce a wonderful aroma which makes this bread addictive and irresistible. As much as we want to cut down on the fats, you just cannot skimp on the butter as it is what gives this bread its signature flavour. This recipe is already a healthified version with very few compromises but any more reduction on the fats or sugar would yield an unpleasant result. The bread is very soft and moist which goes especially well with this somewhat chewy filling.

As this is a pretty heavy kind of bread, this to me is only a once-in-a-while treat but as for my mom…that might be a different story!

Elsie_iu's picture
Elsie_iu

I’m recently on a Japanese kick which you may be able to tell after my recent bake of seaweed shio koji bagels. Miso’s always been one of my favorite condiments. I use them not only for roasting veggies and marinating all kinds of protein, but also for mixing up a savory salad dressing or tossing with pasta so needless to say, it’s my broth base of choice for ultra rich ramen. Incorporating miso into bread seems to be a pretty good idea so why not give it a go?


Umami Bomb Take 2: 10% Buckwheat Yuzu Miso Sourdough with Walnuts


For dough:

256g    90%            Whole wheat flour

28g     10%            Buckwheat flour

229g    80%            Whey

30g     10%            Starter

50g     18%            Miso

10g      3%            Vital wheat gluten

30g     10%            Yuzu juice


Add-ins:

60g     20%            Toasted walnuts (black sesame would be nice as well)

____________

300g   100%            Whole grain

274g    91%            Total hydration (feels like 100% with the miso paste)


Shift out the coarse bran from the flour and soak in equal amount of whey (removed from the 285g) for a minimum of 4 hours. (I used some for the starter)

Roughly combine all dough ingredients and let ferment overnight for 10 hours. Fold in the toasted walnuts and yuzu peel if using then let the dough rest for 20 minutes. Construct 3 sets of stretch and fold over a 1.75 hour proofing period, shape the dough after the last set of stretch and fold and let rise untouched for at least 30 minutes (part of the 1.5 hour). At the same time, preheat the oven at 250°C/480°F and pre-steam at the last ten minutes.

Score the dough and bake at 250°C/480°F with steam for 15 minutes then at 230°C/446°F without steam for 20 minutes more or until the internal temperature reaches a minimum of 205°F. Let cool for at least 3 hours before slicing.

The oven spring of this bread is surprisingly little though it is still moist and soft. I do have a few theories about it: a) I used a different brand of flour this time and the bran flakes are really large that it might weight the dough down, b) the miso paste added weight to the dough, c) the dough was under-proofed (though it didn’t really feel like it’s under-proofed). Any suggestions or ideas?


Though the crumb is a bit disappointing, the flavour really compensates for it. The miso goes so well with the yuzu while the buckwheat takes a back seat but adds a nice depth of flavour. The walnuts contribute both texture and a toasty aroma. Overall, this is a loaf of very complex bread as far as the taste is concerned and I truly enjoy it.


Elsie_iu's picture
Elsie_iu

I have to admit, my love for sourdough and whole grain happened more recently, bagel is the one that stole my heart first. I love it for its chewy and doughy texture that’s much more satisfying than an airy slice of sandwich bread. It’s therefore not difficult to predict at all that I gradually switched from white sandwich bread to more hearty whole wheat bread and finally to whole grain sourdough. My love for bagels still lingers, though after all the flavorful whole grain sourdough, they might taste slightly less exciting. Easy solution: incorporate whole grain, sourdough and new flavours, and you get bagels with both flavour and texture!


Umami Bomb: Seaweed Shio Koji Twisted Sourdough Bagel


Soaker:

20g      7%            Toasted wheat bran

3g        1%            Coarse masa bits

23g      8%            Water


For dough including soaker:

228g    80%            Whole wheat flour (20g bran from the 228g shifted out)

57g      20%            Masa (3g coarse bits from the 57g shifted out)

220g    77%            Water (23g water taken out for soaking)

30g      10%            Starter

30g      10%            Shio koji (Japanese salty fermented rice paste)

10g        3%            Vital wheat gluten

5g        1.8%           Seaweed flakes

 ___________

300g    100%            Whole grain

250g     83%            Total dough hydration (next time I’d down it to 75%)


Combine all ingredients under soaker and let the bran to be fully moistened overnight. Roughly mix all dough ingredients including soaker and let ferment for 8 hours at room temperature.

Stretch and fold for a few times then divide the dough into four equal portions. Let rest for 10 minutes. Take one portion and dust it with flour, roll it into a 40cm strip. Fold it along the middle so you get a U-shaped strip, cross the two strips over each other and pinch the end together so that you have a twisted rope. Connect the two ends of the rope to form a O-shaped dough. Repeat for the rest of the dough.

Let rise for 1 hour at room temperature. Meanwhile, preheat the oven to 250°C/480°F with steam and boil a pot of water. Dissolve a tbsp brown sugar into the boiling water. After the 1 hour rise, boil the bagels for 30 seconds on each side and let a towel soak up excess water before placing on a cornmeal lined baking sheet.

Bake on the upper rack (I use a toaster oven) for 15 minutes with steam than bake without steam for 5 minutes more until the internal temperature reaches 190°F. 

Do note that the shio koji speeds up the fermentation process dramatically. Usually it takes 12 hour for the 10% starter to fully ferment 100-105% hydration whole grain dough yet only 8 hours are needed for this recipe even if the hydration is only 83%.

The dough is easy to handle with a moderate hydration level for 100% whole grain but I’d definitely down the hydration from 83 to 75% for a chewier texture. With this level of hydration, the bagels are a bit too soft for my liking. However, the crust is crispy and nicely developed even though there are no large blisters.

They are not beauties...but the taste compensates.

The aroma of the seaweed shines through with subtle corn sweetness from the masa. I prefer masa to regular cornmeal as the former has a much richer corn taste to me. I’ll up the shio koji to 45g next time as it is not really tasted so the bagels produced lack the complex taste profile of it and are not salty enough. (A word of caution: the shio koji I used is homemade and the salt I put is less than the common practice, do check the salt content if you use store-bought.)

Elsie_iu's picture
Elsie_iu

This bread should be my first post. I don’t know how I could post any other recipes before this one is even shared.

Though I enjoy a stack of pancakes for breakfast from time to time, I’m not one with a sweet tooth and would almost always go the savory route for my bread. The combo of sesame and cheese is a match in heaven and is undoubtedly my all-time-favourite. If you’ve ever had sesame crackers or breadsticks with your cheese board before, you know what I mean.


100% Whole Grain Black Sesame Gruyere Sourdough with Sprouted Millets 

For dough

80% whole wheat

10% buckwheat

10% dark rye

10% toasted powdered black sesame

103% whey

10% starter

1.7% salt

3% vital wheat gluten


Add-ins

20% gruyere

20% sprouted millets

  _______________

Total hydration: 103%

 Whole grain: 100%


Combine all dough ingredients and let sit overnight for 12 hours. Fold in the add-ins gently. Let rest for 20 minutes. Perform 3 sets of stretch and fold over a 1.5-2.5 hour period. Preheat the oven at 250°C.


Score the dough and transfer it to the preheated oven. Bake at a 250°C/480°F oven with steam for 15 minutes. Turn it down to 220°C/430°F and bake for a further 15-25 minutes or until the bread reach a minimum of 205°F

I usually leave the sesame whole but since I decided to toss in sprouted millets for crunch already, I powdered the sesame and mixed it directly into the dough this time. Using black sesame instead of white adds an extra layer of flavour and to be honest, its dyes the bread a stunning black which highlights the white millets and gruyere perfectly.


Though the dough spreads a bit while rising, I suspect it’s more of a consequence of lacking support during its rise (I don’t own a banneton) rather than over-hydration. The crumb is still reasonably open even though the bread is slightly flat. It has a moist interior and thin crispy crust. As for the taste, it definitely smells heavenly when it’s baking and out of the oven.  The buckwheat compliments the strong flavour of the gruyere and black sesame and the sprouted millets provides the pleasing texture otherwise lacked in this bread. 


I like to enjoy it plain and lightly toasted. Nothing else is needed... put that butter down!

Happy baking!

Elsie_iu's picture
Elsie_iu

I’ve been experimenting with different flour combinations lately. The two recipes below are what I baked the last two Saturdays. The onion rye SD was inspired by Ian’s rye porridge recipes and I modified dabrownman’s bran leaven method to put into use in the cinnamon SD.


50% rye with onion and potato


For the dough

50% dark rye

20% whole spelt

30% whole wheat

95% whey

12% starter

1.8% salt

3% vital wheat gluten


Add-ins

15% uncooked barley

50% uncooked potatoes (20% roasted)

2.5% dehydrated onion

cornmeal for rolling


Cook barley in 3 times of water. Season diced potatoes and roast in a little oil at 450°F for 15 minutes or until browned and cooked through. Rehydrate onion in enough water. Let all the above cool completely.

For baking instructions, see below.


Cinnamon morning sourdough


For the dough

50% whole spelt

50% whole wheat

85% whey

12% starter (I used the bran shifted from spelt flour to feed it)

2% salt

3% vital wheat gluten


For the porridge

25% Rolled oats

50% water (60% for extra thick rolled oats)

1/4 tsp cinnamon for every 50g uncooked oats

1/8 tsp salt for every 50g uncooked oats


Put the water to a boil and pour the oats and salt in. Let rest for an hour then stir in the cinnamon. Let cool completely.


Add-ins

10% sunflower seeds+ extra for decoration

7% dried cranberries

3% candied orange peel


Soak the dried fruits overnight in a little water.

under-proofed...again


For both SD, combine all dough ingredients and let sit overnight for 8 hours. Fold in the add-ins (and the porridge) gently. Let rest for 20 minutes. Perform 3 sets of stretch and fold over a 1.5-2.5 hour period. Preheat the oven at 250°C.

Score the dough and transfer it to the preheated oven. Bake at a 250°C/480°F oven with steam for 15 minutes. Turn it down to 220°C/430°F and bake for a further 15 minutes or until the bread reach a minimum of 205°F


I keep the cinnamon to a minimum to prevent it from overpowering, feel free to increase it if you want it to be more pronounced.


The rye loaf and the cinnamon loaf taste very different. The former being chewier and has an crunchy crust with a strong and robust aroma. While the later being very moist but has a thin crispy crust and comforting taste. I would definitely bake the cinnamon SD again soon to see its full potential when it's not under-proofed.  


Happy Baking everyone!

Elsie_iu's picture
Elsie_iu

Ok, full disclaimer here: these are NOT sourdough pancakes (by the way, if anyone have luck producing SD pancakes that don’t spread like crazy but stay super thick, I appreciate it if you could share the recipe), that’s why I hesitated to even share the recipe here. However, they are so good I felt like keeping them from you would be an unforgivable crime. If you are like me that you prefer your pancakes thick and slightly hearty rather than super thin and airy, these pancakes are for you. Seriously, any canned pumpkin pancakes are no competition for them.


So there is a story about them, it starts as I spotted a gorgeous Kabocha squash in the supermarket at early fall. My heart was filled with excitement that I rushed to the cashier to claim it mine…all before I suddenly remembered that I actually HATE pumpkin. Days passed and I had not figured out what to do with it. Yet there was no way I would allow it to go bad nor would I eat it as its original form. That’s when I decided to turn to the internet for inspirations. Browsing through a butternut squash soup recipe from one of my favourite food blogs, Half Baked Harvest, the spice mixed for the soup attracted my attention. Roasted pumpkin soup? Maybe, but I prefer my food with more chew. Then the best ever thought came to my mind, ‘Wait, why not make roasted pumpkin pancakes?’ (Yes, I know pumpkin is only one kind of squash but I like the word pumpkin)


I know roasting pumpkin for pancakes is not a new idea but the spices and fats (just a tiny amount) that the pumpkin gets to be roasted in as well as the flour blend adopted make this recipe stands out. I swapped the butternut squash with kabocha squash and for the first time in my life I actually ate pumpkin (or squash to be accurate) with full enjoyment. They are so moist and thick with a complex flavour yet are 100% healthy and almost fat free. (I thought about mentioning this in the title but was afraid some of you would label it as bland health food).  


Addictive Pumpkin pancakes (yield 6 thick pancakes)


For the roasted squash (spice mix adopted from Half Baked Harvest)


110 g squash, cubed, any variety (I used Japanese Kabocha squash)

1/2 tsp ghee (or clarified butter, try not to substitute other forms of fats or the rich caramel flavour would be less pronounced)

1 tsp maple syrup

1/4 tsp each paprika, cinnamon and black pepper

1 garlic clove

A pinch of salt and chili powder


Combined all the ingredients and roasted in an 400°F oven for 25 minutes or until the squash is tender and caramelized. Let cool to room temperature or keep refrigerated until needed.


For the pancakes 


All of the roasted squash

100g fat free plain yogurt

20g whey/milk/water

1 large egg

0-3 tsp maple syrup (depending on your taste and the sweetness of squash, I omitted)

30g whole rye flour

20g whole spelt flour

1/2 tsp baking soda


Blend the squash, yogurt, whey/milk/water and egg in a blender until smooth. Combine the flour and baking soda and mix it gentle into the squash mixture. The batter should be very thick and NOT drip of a spoon smoothly) Leave a few lumps for fluffy pancakes. Immediately transfer ladles (1/4 cup each) of batter onto a non-stick pan (though I love my cast iron pan, it overheats easily and leads to flat and burnt pancakes) preheated at low-medium heat, spreading it out a bit with the back of a spoon. Cook until the pancakes look fully puffed up and a few bubbles appear (do not rush the process or the pancakes may firm up before reaching their full height), flip and cook the other slide briefly before transferring to a serving plate. Cook in batches if necessary (I cooked in two batches).


Roasting the pumpkin in ghee and maple syrup is not optional as this step is what transforms these pancakes from nice to addictively good. Roasting the pumpkin not only encourages browning and intensifies its sweetness but more importantly avoids an unpleasant cakey texture in the pancakes. The ghee leads to a caramel-like flavour that I crave, the garlic and chili powder adds a savory touch to these otherwise boring, pumpkin-pie-like pancakes. Whole spelt flour offers a subtle sweetness that I enjoy. The whole rye flour compliments the flavour of the pumpkin nicely while making these pancakes lighter at the same time.


Packed full with the goodness of spices, pumpkin, whole spelt, whole rye, yogurt and eggs, this is the best demonstration of how to eat healthy with no scarification of taste.

I like to serve the pancakes with a smear of ghee, a drizzle of maple syrup and a handful of pumpkin seeds. Enjoy!

Elsie_iu's picture
Elsie_iu

After last time’s polenta porridge bake, I find myself having affection for the creamy crumb that is hardly achievable with a non-porridge recipe. That’s why I decided to try subbing oat for cornmeal and play around a bit by incorporating whole grain flour other than whole wheat.

1st attempt:


My first attempt was semi-failed. As you can see in the photo above, despite the moistness of crumb, the oven spring was unimpressive and the gluten was poorly developed. I blamed that to my laziness that I did not allow to flour to autolyse but mixed everything together for an overnight fermentation. However, what made me declare this a failure was the excessive sourness. I usually enjoy a bit of sourness in sourdough but this time the sourness was mouth-puckering that it masked the flavour of oat, spelt and buckwheat. So for the next time, I increased the starter to 22g and reduced the fermentation time from 14 to 10 hours. (By the way, this is the only time in a long while that I used water INSTEAD of yogurt whey as I ran out of it. It is also the first time the bread tasted so sour; do any of u have any idea if they are co-related? It is not because of the fermentation time as I had allowed dough to ferment for much longer in the past. Sour whey=less sour bread?)


Spelt and buckwheat oat porridge sourdough


For the porridge

Rolled oats    50g   25%

Water        100g  50%


Bring the water to a boil and pour the oats to the pot. Take the pot off the fire and let cool to room temperature or refrigerate until needed.


For the dough  

Starter                       22g      12%

Whole wheat flour             137g     72%

Whole spelt flour               48g      25%

Buckwheat flour                6g      3%

Pine nuts/golden flax seed        15g      8%

Water                        160g     84%

salt                          3/4 tsp    2%

vital wheat gluten              1 tbsp

Combine all ingredients except the nuts/seeds in a large bowl with a large spoon util roughly combined, adjust the whey/water added accordingly. Let sit overnight for 10 hours.

Gently take the dough out of the bowl with the help of a scraper and fold it the cooled porridge and nuts/seeds. Let rest for 30 minutes. Perform 3 sets of stretch and fold over a 1.5-3 hour period, depending on the room temperature (mine toke 30+30+45minutes). Preheat the oven at 250°C with a cast iron pan and an additional pan with wet towels.

Score the dough and transfer it to the preheated cast iron pan. Bake at a 250°C/480°F oven with steam (I pour half a cup of hot water to the towels) for 15 minutes. Remove the pan (one for creating steam) from the oven the turn it down to 220°C/430°F and bake for a further 15 minutes or until the bread reach a minimum of 200°F


2nd attempt:


Even though the hydration seems high, with all the whole grain flour, the dough is actually pretty stiff, but it will turn slightly sticky once the porridge is incorporated.

The second attempt is a big improvement from the first though it was slightly under-proofed. The first dough was very sticky and spread like crazy but the stickiness became much more tolerable for the second time even though I upped the water by 10g. It is amazing how the result can vary so much when the ingredients used were almost identical.


The crust is thin and slightly crispy, while the crumb is very moist. The sourness is still detectable but less sharp, allowing the flavour of the grains to come through.

Hope you would give this a try!


Elsie_iu's picture
Elsie_iu

This is my first blog entry and porridge sourdough.

I have started baking bread for less than a year and they are almost all no-knead overnight artisan bread. Since the start of this year, I have been trying my hand at sourdough as I successfully made a starter at the first attempt. Though, as a year 1 student, time is not something I have a lot to sparse so all of my loaf are essentially no-knead, stretch and fold type. 

This is my first trial of porridge sourdough inspired by the Polenta and Rosemary Sourdough from The Perfect Loaf.


100% whole wheat polenta rosemary porridge sourdough


For polenta

40 g stone ground cornmeal (medium grain)

200 g water

Bring the water to a boil and pour the cornmeal to the pot. Take the pot off the fire and let stand covered for an hour. pour the mixture through a sieve and remove as much starchy liquid as possible by swirling it with a spoon. Let cool to room temperature or refrigerate until needed.


For Dough

All of the polenta 

190 g whole wheat flour

190 g water (don't add all at once. I always substitute all with whey since I have leftover from homemade yogurt)

20 g 100% hydration sourdough starter (mine is half whole rye and half whole wheat)

1 tbsp vital wheat gluten (omit at own risk)

3/4 tsp salt

1/2 tsp rosemary

extra cornmeal for dusting

Combine all ingredients in a large bowl with a large spoon util roughly combined, adjust the whey/water added accordingly. Let sit overnight for 14 hours (my house is very warm at the moment at 24°C so your dough may take longer to be ready, alternatively, you may increase the % of starter used). 

Gently take the dough out of the bowl with the help of a scraper and stretch and fold it for 2 rounds. Let rest for 20 minutes. Perform 3 sets of stretch and fold over a 1.5-3 hour period, depending on the room temperature (mine take only 1.5 hours), leaving the dough untouched for at least 0.5 hour. After the last round of stretch and fold, shape it into your desired shape and roll it over a cornmeal dusted table. This dough is more structurally weak than other dough I worked with before so I supported it with a linen cloth. Preheat the oven at 250°C  with a cast iron pan and an additional pan.

Score and mist the dough and transfer it to the preheated cast iron pan. Bake at a 250°C/480°F oven with steam (I pour half a cup of water in a hot baking sheet) for 10-15 minutes. Remove the pan (one for creating steam) from the oven the turn it down to 220°C/430°F and bake for a further 10-20 minutes or util the bread reach a minimum of 200°F.

 The crumb is very moist and chewy with distinctive rosemary aroma. The crust is extra crunchy with the cornmeal.

Since I slightly over hydrated and proofed the dough, my scoring failed so I am not attaching a crust photo.


Pages

Subscribe to RSS - Elsie_iu's blog