happycat's blog

Happycat's Tips for Usable Baking Blogs

Blogs are my favourite part of The Fresh Loaf. I'm delighted to participate in a community of knowledgeable bakers who inspire me. However, writing blogs is challenging because I need to think about "usability" from the readers' perspective. "Usability" means how easily an intended audience can process information to achieve their desired purpose. That purpose might be entertainment, education, or completing a procedure such as a recipe. We run into usability issues all the time when we're confused, lost, or frustrated by writing (or interfaces, or diagrams, etc.).
Regent Buns (a citrusy riff on Chelsea Buns)

Inspiration
Lance (albacore) recently made some Chelsea buns that finally pushed me into making a cinnamon-style bun. My mother used to buy cinnamon buns at the supermarket and they were pretty bad and slathered in icing. She'd heat them up in the toaster oven as a treat. The thing I remember most was their bread part was flavourless and then you'd get a bit of cinnamon and an overly-sweet icing.
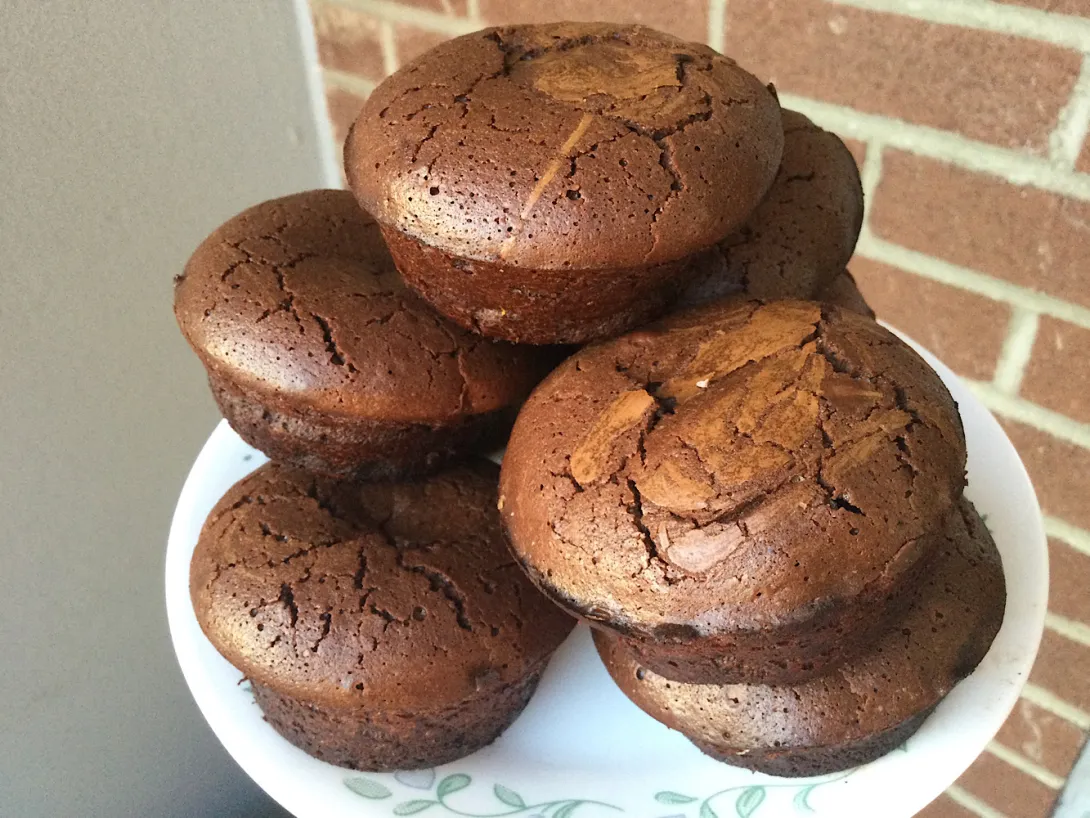
Choc cakes with molten citrus ganache centres
Inspiration
Lava cakes seem to be trendy for Valentine's day. This is more of a little chocolate cake with a slightly crisp shell and molten (but not flowing) orange citrus chocolate ganache centre.
These cakes are mostly chocolate... so I wouldn't rely on chips for the cake or Lindor fillings to replace the ganache as suggested in the original. Blech! Give me deep chocolate, real vanilla and real orange!
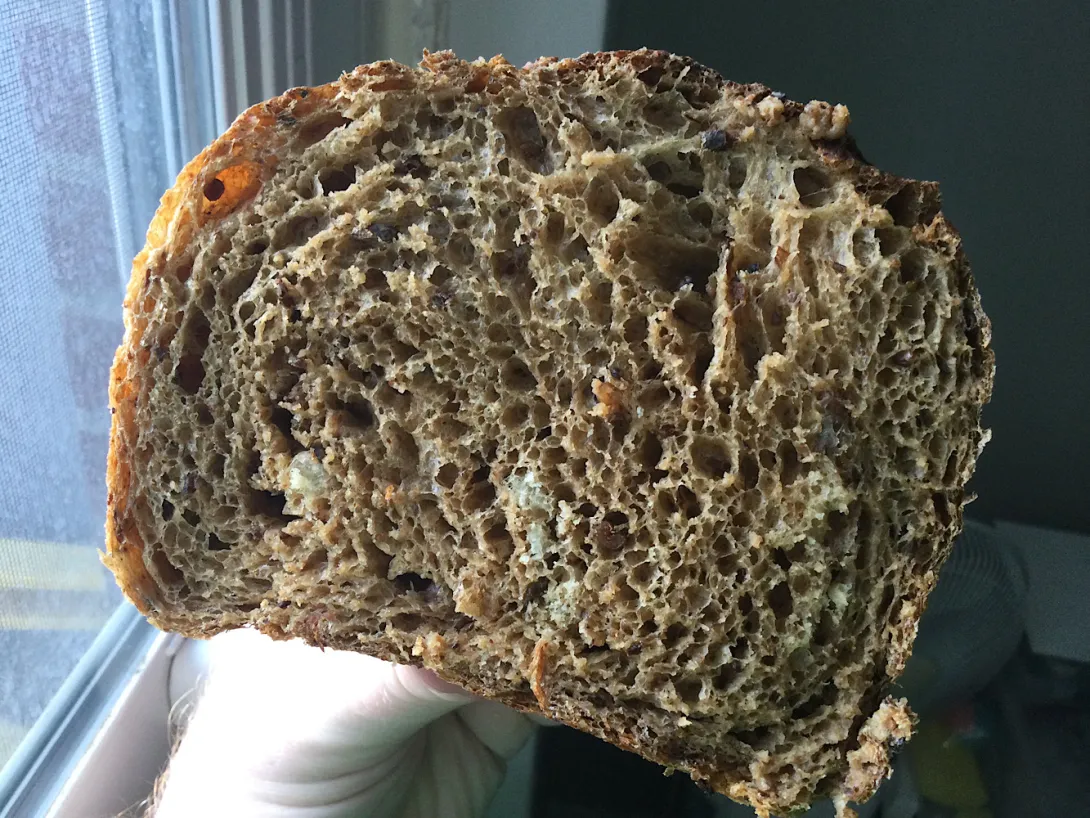
Fluffy altus bread
Inspiration
Altus... old rye bread... sometimes from a baking fail. Well, I had a bunch of altus from a whole grain pumpernickel I made that got dried out during baking. I was curious about incorporating it into a fluffier loaf... using something very dense and chewy to create something fluffy and creamy.
Please... don't bin your "fails"!
Recipe
I worked from Floyd's daily bread recipe https://www.thefreshloaf.com/recipes/mydailybread
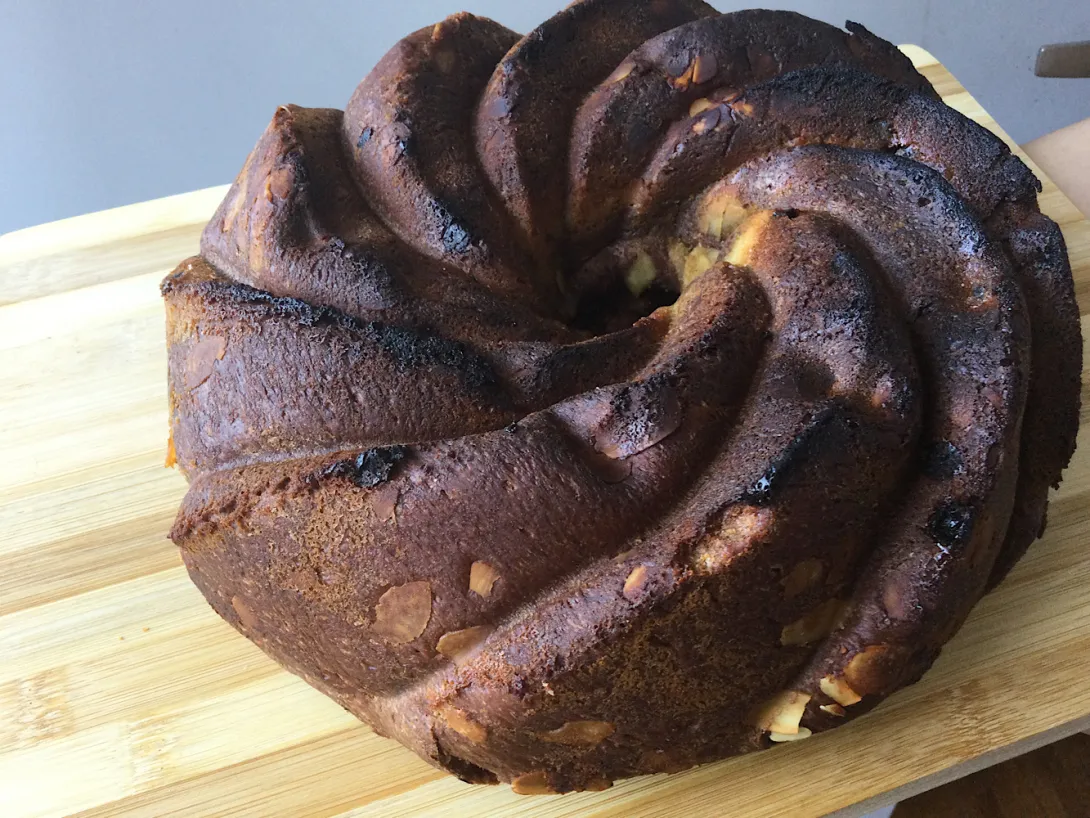
Kugelhopf: choco - citrus frangipane - espresso currant
Inspiration
I made a cranberry lemon kugelhopf two weeks in a row. I was very pleased with it so obviously I needed to blow it up with something crazy. I wondered whether I could make a kugelhopf with a citrus frangipane rolled inside it. And while I was at it, why not make it chocolate with hand-pulled espresso from my home-roasted Ethiopian Yirgacheffe coffee beans? And why not use lots of little currants instead of large cranberries?
Recipe
The recipe comprises two major parts: making the kugelhopf and making the citrus frangipane.
Kugelhof 2 Moister, more lemon cranberry
Version 2.0
Last week I made a lemon cranberry kugelhof and quite enjoyed it. However, Naturaleigh mentioned getting more out of my lemon zest by mashing it with the sugar. I started wondering what other innovations I could try to amplify flavour, loft and richness.
Modifications
I modified last week's recipe as follows:
- Log in or register to post comments
- 8 comments
- View post
- happycat's Blog
Honey butter icecream toasted Kugelhopf
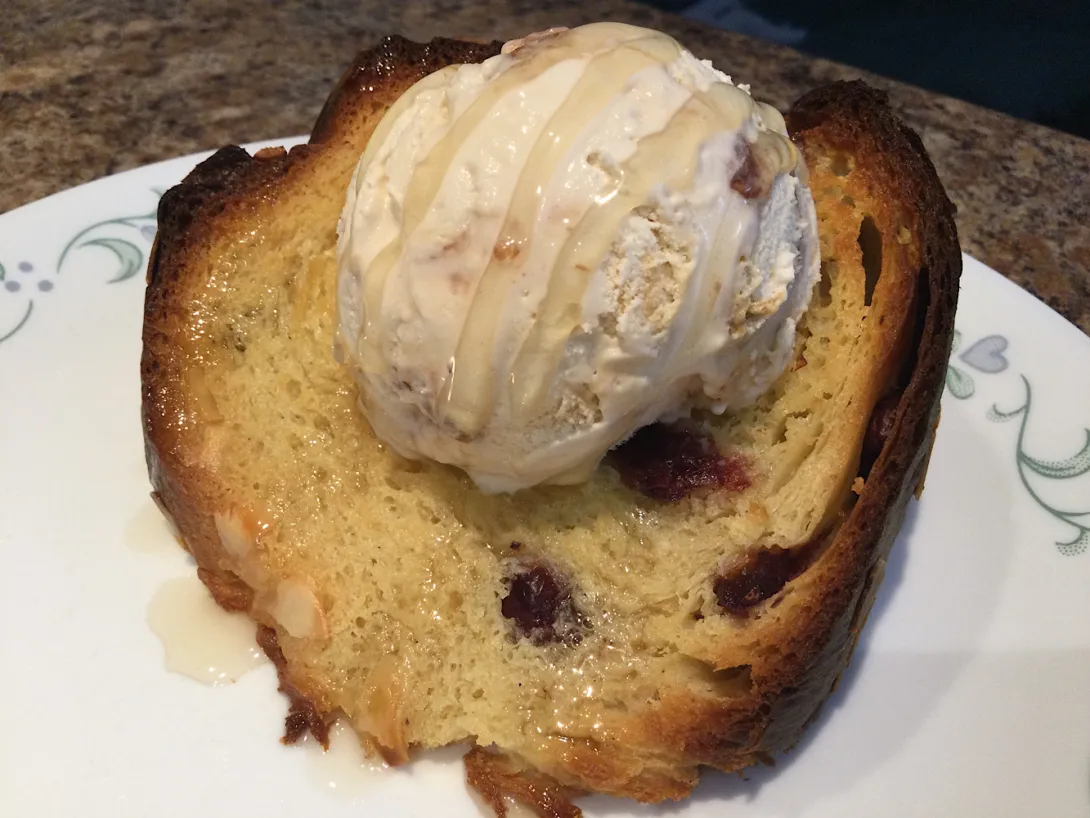
What can you do with brioche breads? Transform them into amazing desserts.
Last month I shared a bostock (brioche with an orange zest frangipane)
This month I share a dessert my wife remembered enjoying many times in her younger days with her sister in Japan. It's simple but the process transforms the brioche into something completely different. She had no name for this. If anyone does, let me know.
INGREDIENTS
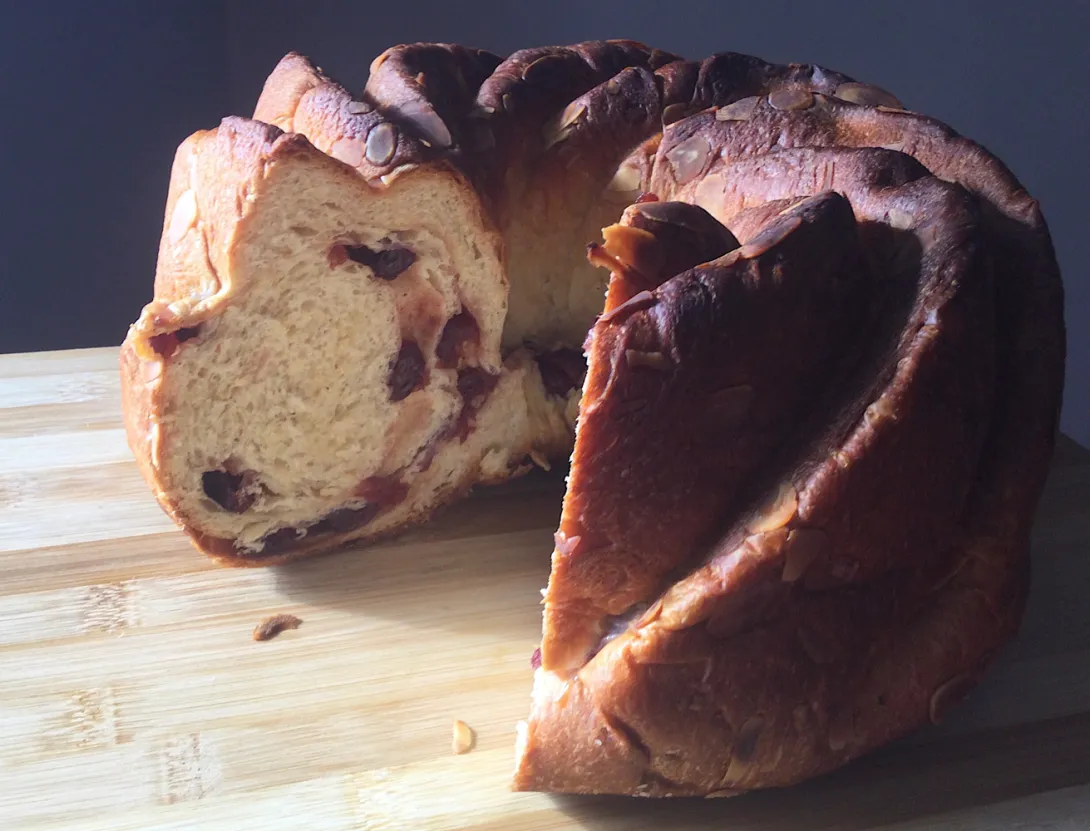
Kugelhopf - lemon cranberry
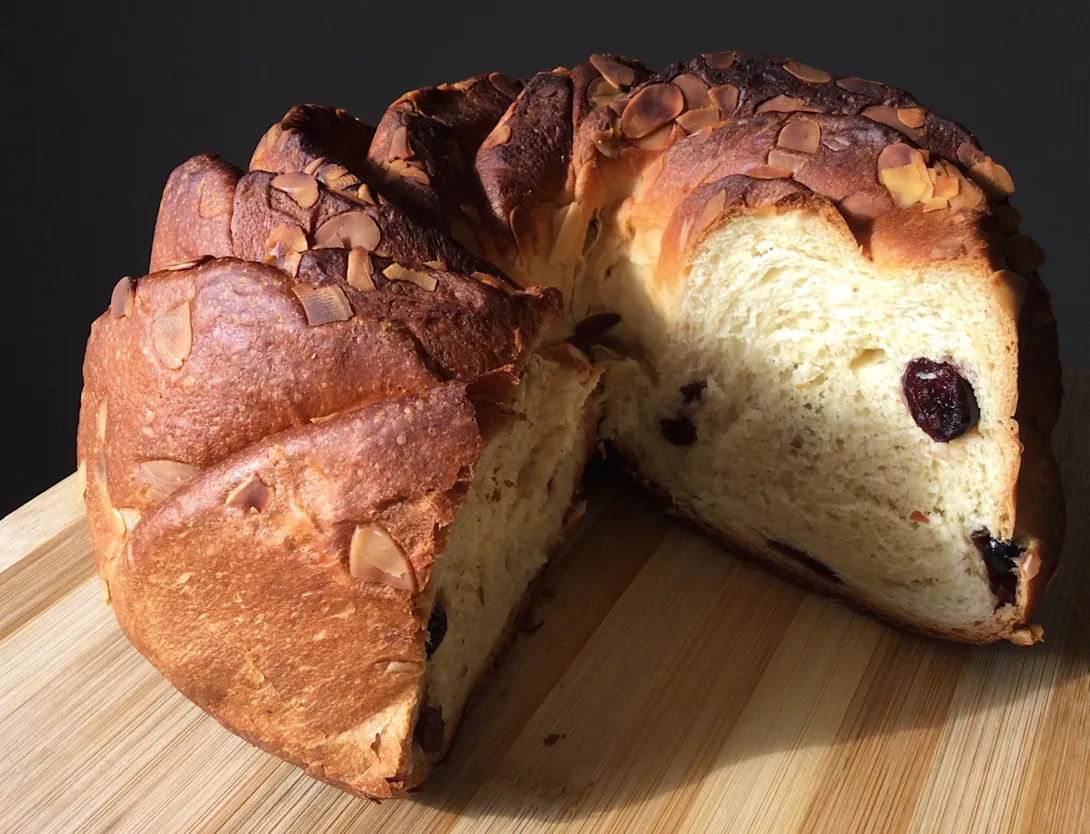
Inspiration
My wife saw Yippee's stunning kouglof and she asked me to bake one.
https://www.thefreshloaf.com/node/69728/20220117-le-cordon-bleu-lemony-kouglof-clas
Having no experience with this kind of bread, I chose a simpler instant-yeast-based version to see if I could pull it off.
Modifications
I modifed the recipe as follows
Plan for halfsize german pumpernickel (simplified)
German Pumpernickel HALF-SIZE
Adapted from: https://www.thebreadshebakes.com/2014/08/baking-traditional-real-german-pumpernickel-bread/
SPOILER: didn't work for me
NOTE: consider sprouting rye kernels
NOTE: for all mentions of cracked rye, use your judgement about using medium to fine milling based on the consistency you desire
INGREDIENTS
Preferment