I have been experimenting with different flours, different bulk fermentations, cold vs room temperature proofs, shaping, banneton vs. no banneton, etc. to see how the various changes would make a difference in the final bread. I also tried different scoring patterns. I really had fun. I used combinations of AP flour, WW flour, rye, spelt and bread flour for the different breads. Most of the time, I used a variation of Classic Sourdough recipe below, often adding more ww, rye and spelt; one time I made five grain levain loaves with the soaker. I baked these during a visit to Milwaukee and when I returned home to my California kitchen. I found that my Milwaukee sourdough starters are so active once revived, more so than my California starters. Perhaps it is because my Milwaukee starters don't get used as much. Not really sure, but the starter certainly does make a difference in the bakes. I got more height in Milwaukee than CA. I did not use bannetons in Milwaukee and only used a banneton briefly for one bake in California. Here are photos of some of the results.

These are the today's bakes. We are invited to dinner, and I am bringing the top loaf for our friends. Used a banter for loaf on top, not the one on the bottom.


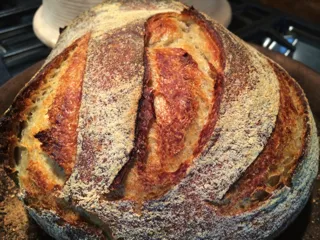
Above is the five grain and the crumb, baked in Milwaukee, no banter.

A Classic Sourdough I baked in Milwaukee.

A sourdough batard I made for my husband in CA, crumb below.


The bake from today.
Classic Sourdough Variation
Makes: One 2 pound loaf.
Method adapted from: Classic Sourdoughs by Ed and Jean Wood.
I varied the recipe by using my active starter that was a 70/20/10 mix of AP flour, WW flour and dark rye at 100% hydration. I really liked this mix, as it added a bit of texture. The original recipe starter has no whole wheat or rye. I also added a cold bulk fermentation to the room temperature fermentation, per the recipe.
Ingredients:
Final Dough:
- 230 grams (about 1 cup or 240 ml) active starter, 70/20/10 mix of AP, WW and Rye flours at 100% hydration
- 300 grams water (Approximately 1 1/2 cups or 360 ml water)
- 10 grams salt (about 2 teaspoons)
- 500 grams unbleached all-purpose flour (about 4 cups)
Method:
- Mixing the dough. Pour the starter into a mixing bowl. Add the water and mix well. Add the flour a little bit at a time until it starts to stiffen. Hold some flour out to knead in a bit later. Let the mix autolyze for 30 minutes and then add then fold in the salt.
- Kneading the dough. Turn the dough out onto a floured surface and knead in some of the remaining flour if the dough is too sticky. Knead for about 10 minutes until it the dough is smooth and easy to handle.
- Bulk fermentation. Lightly coat a glass bowl with olive oil and place the dough ball into the bowl, making sure that the top of the dough ball has a thin coat of oil. Cover and bulk ferment in the refrigerator for about 8 hours. I made the bread during the day and then took it out for 8 hours overnight at room temperature on the counter. The original recipe calls for it to proof at room temperature for 8-12 hours, so I made a major change here.
- Shaping and final proof. Use a spatula to ease the dough out onto a floured surface. Allow the dough to rest for 30 minutes. After 30 minutes, shape it into a rough ball, cover it with a cloth, and let it rest again for 30 minutes. Now, shape the dough into a boule and place it seam-side up into a banneton coated in brown rice flour. Leave it for 30 minutes while the oven preheats.
- Baking the loaf. I used my covered baker, so I preheated it with the cover on at 500 degrees (260 degrees C). When the oven and baker are at temperature, remove the lid and pop the loaf into the bottom tray. Score it in the pattern you desire. I sprayed a light mist of water on the dough, trying to avoid the hot surface, as I was hoping for a really beautiful crust. Bake at 500 degrees with the lid on for 30 minutes, and then take the temperature down to 450 degrees and remove the lid for the final browning, which is another 10-15 minutes, depending on the type of crust you like. We tend to like a bolder crust, so I bake it a bit longer. Watch it closely during this phase. If you do not have a covered baker, you can use a baking stone or tray with parchment paper, but make sure you create steam by using your steaming apparatus or baking tray with boiling water from the start of the bake. Bake the loaf at about 480 (250 C) degrees for the first 25 minutes and then reduce the temperature to 435 for the next 15-20 minutes, depending on how bold you like the crust.
- Cooling and slicing the loaf: Remove the loaf from the covered baker tray or stone and let cool for at least 30 minutes before slicing.
- CAphyl's Blog
- Log in or register to post comments
What a great bunch of bread. Sounds like a fun time withe the experiments. I like that approach of experimentation too. Get a nice formula and just try a little of this or that. Looks like you had nothing but success - well done!
no matter where they were baked. Sadly, several were baked without any good natured conversation like Lucy and I banter about:-) Well done and
Happy baking Phyllis
They look wonderfully scrumptious!
Phyllis, these are beautiful, what fun experimenting with such great results! I made your sage walnut bread last weekend, it went down a storm, thanks!! I am working on my scoring technique and aspire to get the beautiful results you got above.....more practice for me! Hope you're well!
*Thumbs up*
Looks good, Phyllis. I'll have one of each, please. ;)
Zita
It sounds like you are working on being the Johnny Appleseed of sourdough starters - California, Milwaukee, UK - where's next?
My travels with starters has had the principal effect of increasing my appreciation for my own oven at home. You seem to have adapted to borrowed ovens better than I have.
Are you ready to share what you have learned from your experiments?
Happy baking!
David
P.S. The scoring pattern on the top loaf looks vaguely familiar. I like it.
These all look wonderful. Great job Phyllis! Looks like you achieved some wonderful crust and crumbs.
Regards,
Ian
To answer David's question, here are my key learnings. 1. A recipe is a guideline, as you know your dough, the temperature in your environment and the other variables when the dough was assembled, so make your own decisions on the most appropriate steps to achieve the desired results. 2. The right proof is so important (time, temperature and method). Change up the proofing if you must to get the right proof for your dough, don't be afraid to experiment and remember the seasons--a summer counter proof is a lot different than late fall or winter--adjust! 3. Shaping is the difference between an OK loaf and a beautiful one. I had great success with an approximate 8 hour cold proof followed by an overnight counter proof; 30 minute dough rest, shape into a boule, rest 30 minutes and then final shape (no banneton), slight rest and bake. For another bake, I did the same thing, BUT placed the final shaped dough into a banneton for 30 minutes, and that worked great as well. Of course, this was much different than my usual method of overnight proofing in the banneton. I got very good height and crumb both ways, BUT had to be sure I had a tight skin or I got cracks. 4. Changing the flours works very well, just watch the water content as you use more thirsty flours like ww and rye. 5. Learn from the best. I watch what all of you do and how you do it and take the best practices. David: your scoring looks familiar because I was looking for a new pattern to try, and I saw your 75% ww. Perfect! Not sure my scoring will match yours, but I was pleased with the results. 6. I had lots of fun experimenting, but as dabrownman says, it would be more fun with a collaborator like Lucy! Best, Phyllis
Complmenti Phyllis,
vedo che tu sul Pane non scherzi, quello che hai prodotto mi piace tutto, sei molto brava.
Vedo anche dai risultati che il tuo lievito naturale è decisamente molto attivo.
Immagino che tu faccia il pane molto spesso, oppure ogni tanto lo acquisti?
A presto, Anna
Anna - mille grazie. Facio il pane spesso ma devo acquistarlo a volte. La vostra cottura e incredibile e apprezzo i tuoi commenti. Migliori auguri. Phyllis