There's quite a few good tutorials on this on TFL, but tons of lousy ones online, but I thought I would add my own. Mine is a bit different than others in that it focuses on maintaining warm temps throughout the starter creation process. I believe this is key to establishing good yeast and bacterial multiplication and a healthy starter ecosystem. It also focuses on just using flour, water, time and temperature to build a starter. No sugar, potatoes, honey, (heaven forbid) commercial yeast, other fancy stuff. Be patient, pay attention (look, smell, taste, and take good notes) and you will be rewarded with a strong, tasty starter.
You'll need:
- A quart-sized Ziploc bag (or other clear plastic or glass container)
- A bowl (optional, to contain the Ziploc bag in case it leaks)
- An instant read thermometer (that provides accurate temperature between 60 - 110F)
- Whole wheat (or rye) flour (organic is nice but not required)
Day 1
To the Ziploc bag, add:
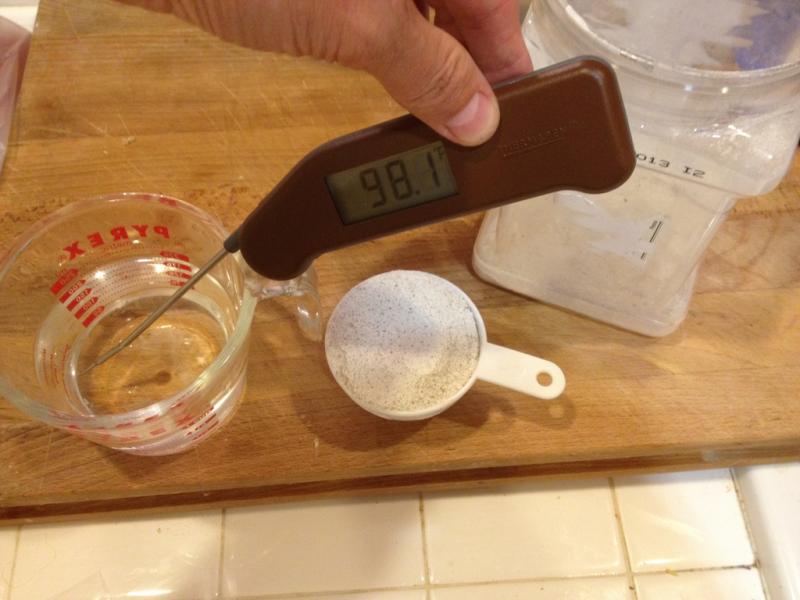
- 1/2c whole wheat (or rye) flour
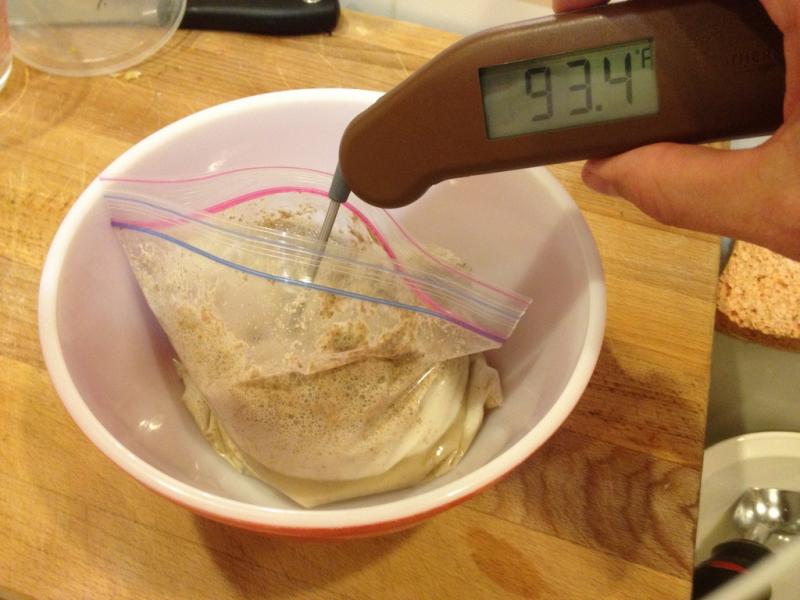
- 1c very warm water (98F)
Get as much air as you can out, zip it up, and squish the mixture around.
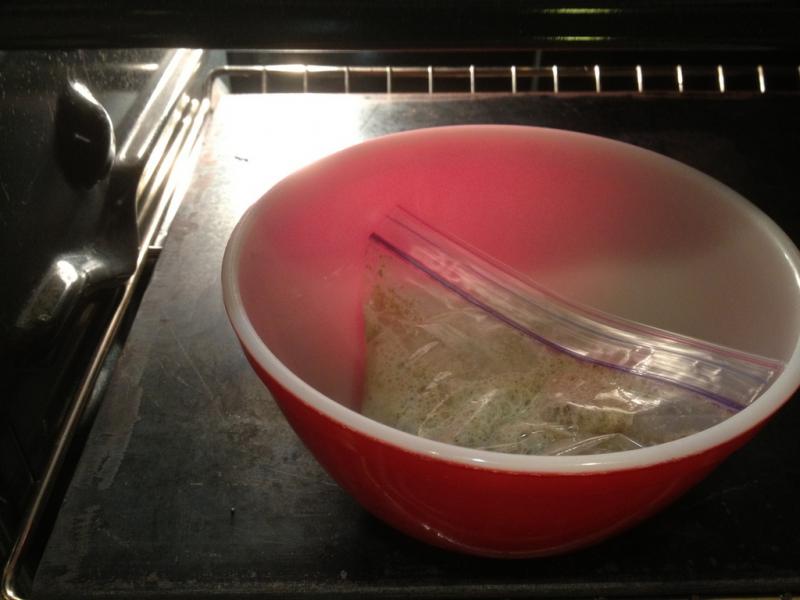
Now put it in a very warm place (but not in direct sunlight!) between 85-99F...this is important. If your house isn't warm enough, you can place your starter in your oven with the oven light on. Or you can use a heating pad. Use your thermometer to check the ambient temperature where you are keeping it. You don't want it to get hotter than 100F, otherwise this has a negative impact on yeast and lactic acid bacteria development: any hotter and you risk killing them.
Let the Ziploc rest in this warm place for 24 hours. Relax and congratulate yourself...you've taken your first steps towards a healthy starter.
Day 2
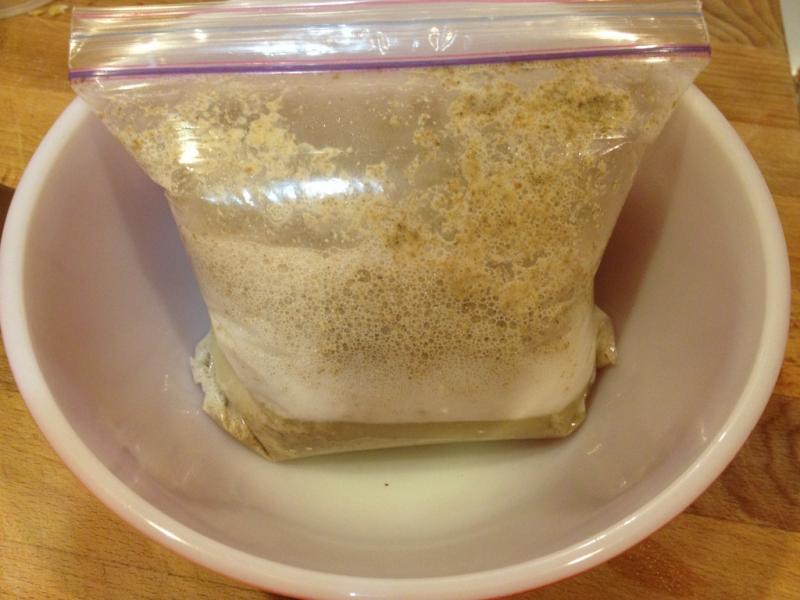
Your starter might look fizzy or foamy today. That's good; if it doesn't, don't worry about it. It's time for its first feed. Beware, it may smell vomit-like and be gag-worthy. Don't sweat it, this is normal; pinch your nose or breathe thru your mouth if it bothers you.
To the Ziploc, add:
- 1/2c whole wheat (or rye) flour
Again, squeeze the air out, seal the bag, then squish the mixture around again. Let it again sit between 80-99F for 24 hours.
Day 3
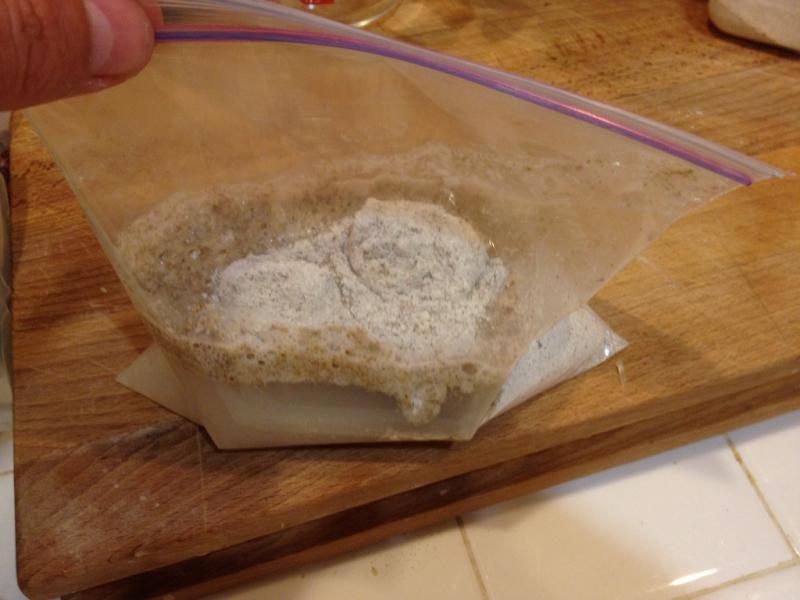
Give the bag 1-2 shakes to distribute mixture. Check how it smells. Should be somewhat less vomit-like at this point. If you're lucky, it may start to smell a little vinegar-like, or like sharp cheese (like Parmigiano), or beer like. If it still smells vomit-y, don't worry about it. Over the next 2-3 days, with subsequent feedings, this smell will pass.
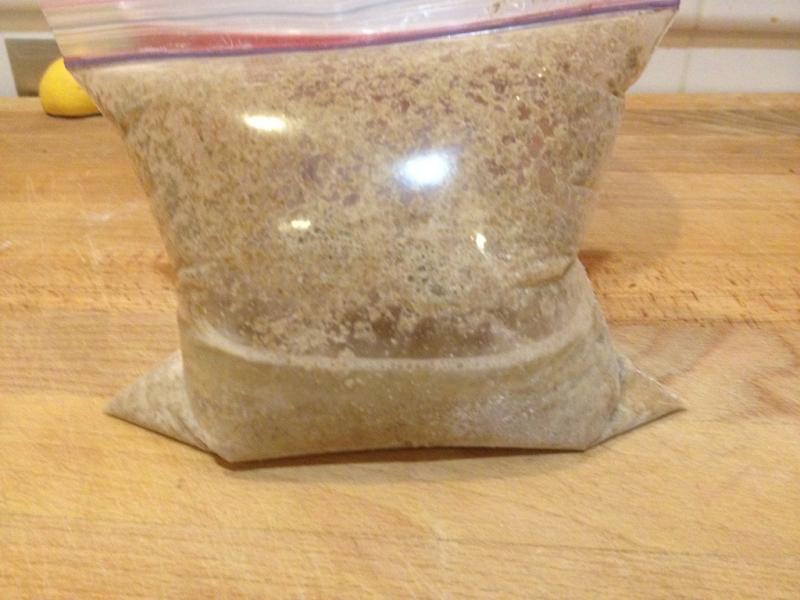

The mixture might look separated, as in the above photo. That's OK, don't sweat it, just give the whole thing a couple of shakes to distribute the mixture again. Now reserve 2 tablespoons of the starter, and dump the rest out down the drain or in the trash.
To the emptied Ziploc, now add:
- 2 tbsp of the reserved starter
- 1/4c. warm water (98F)
- 1/2c. whole wheat flour
Seal the bag again, squish it around, let it sit at a comparatively cooler (but still warm) room temp (75-85F) for 24 hours.

Day 4
Today your starter may be starting to show signs of life. This is when you start your regular feed cycle. It's also a good time to transfer your starter to a new container, like a large mason jar, or a plastic quart deli container, or other plastic container. Just don't seal the lid tight, it could pop!

From here on our, you want to feed once or twice per day, as follows:
- Toss all but 2 tbsp of your starter in the trash
- To your reserved starter, add 1/4 c. warm water (85-90F), and stir to combine
- Feed it 2/3c. whole wheat flour.
- Store it at warm room temp (70-85F)
Always try to feed your starter at the same time of day. For this and subsequent feedings, your starter will look pretty thick and pasty, like this:

Day 5, 6, 7: continue feed in the same way as described in Day 4 above.
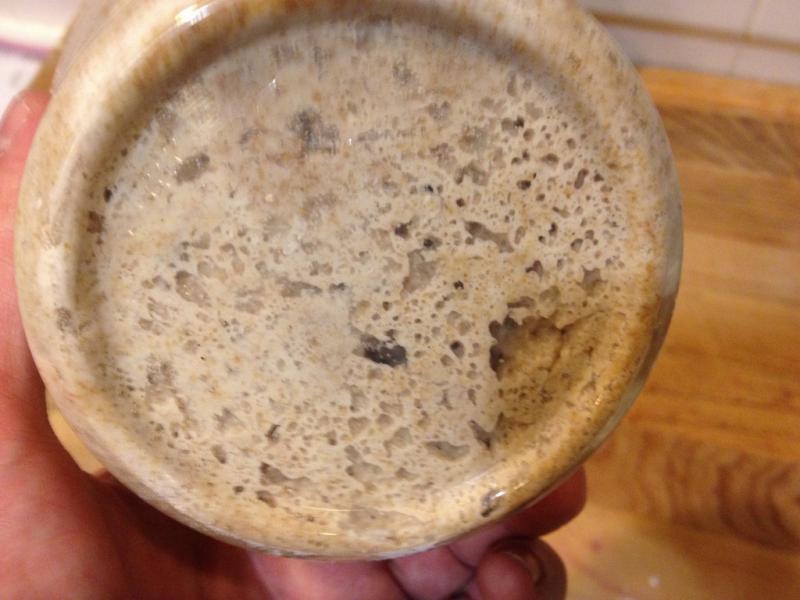
This is what mine looked like on Day 7. Notice the nice air bubbles and pockets visible on the side and bottom of the container: this means your starter is active and ready to use. Don't worry if this doesn't happen for you on Day 7. Be patient, and keep going (as directed) through Day 11, and in that time you will have an active starter that looks like this.

Day 8, 9, 10: feed in the same way as Day 4. Your starter should be pretty active by now. Start keeping track of how long it takes for the starter to double. Record the time you feed, and how much it rises. You are aiming to get it to double within 4-6 hours. When it does this, the starter is ready to use.
Day 11: you can switch to feeding with all-purpose flour or a 50/50 combo of whole wheat and all-purpose flour, if desired. Whole wheat will give a more sour flavor to your starter.
By this point your starter should be quite active and ready to use in your recipes. It will be more active if you feed it 2x per day. It will be more active if you keep it at a warmer room temp (between 75-80F). If you only feed it once per day, it will generally take much longer to leaven your bread.
Frequent Issues or Problems:
If you ever get black or fuzzy mold, scrape it off, and save a tablespoon or two of the clean starter. Then transfer it to a clean container and feed it.
Don't store your starter in the fridge. You can if you have to (it is more convenient if you're not baking), but it will change the flavor. If you do, pull it out of the fridge 2 days before baking, and feed it at least 2x over those 2 days before baking.
After Day 4, you can feed smaller amounts if you're concerned about waste. You can reserve 1 heaping tablespoon of starter, 2 tbsp water, and 1/2c. flour for your daily (or twice daily) feeds.
Problems? Successes? Questions? Comments? Post them here.
- cranbo's Blog
- Log in or register to post comments
is making the initial mix include 1 T of orange juice, a pinch of cumin and sub 1/8th C of rye for the WW - all the grains should be fresh milled too. 82 F is best for yeast and the labs together. Labs, while liking a higher temperature of 88 F,the yeast doesn't. these changes would just speed everything up and insure a successful starter.
Also the only things I have noticed about storing starters in the fridge after they are established is that they require much less maintenance, are not as wasteful and the sour is much better as labs reproduce 3 times faster at 36F then yeast does. If you don't want sour, donlt mind the waste and enjoy feeding it all the time, then keep the starter at room temperature on the counter. I've done it both ways for decades, both liquid and stiff, and I will never keep a starter on the counter except while feeding it and getting it ready for the fridge from now on. Others don'l like sour so the fridge isn't for them.
Happy baking
Thanks dabrownman. The juice and cumin are good suggestions. I haven't read enough about the cumin, I know it's another source to establish yeast & LAB, correct? Can you point me to an article? I don't disagree with the benefits of initial acidification (a la Debra Wink), but I don't think it's absolutely necessary (although it can't hurt, and that can be a benefit for beginners).
I'm not sure I completely agree with the cold storage, although it's commonly expressed, I wonder in practice how much difference it makes. The sour I was able to achieve with this method was significantly more sour stored at room temp then in the fridge. As soon as I stored it in the fridge, even just 12 hours, it changed significantly, and took a while at room temp feedings to spring back.
Here's some research to back up warm weather storage, and a short synopsis of the results:
2 strains of Lactobacillus sanfranciscensis have optimum growth rate at 32-33C (89.6F - 91.4F)
Optimum growth rate for C. milleri yeast was 27°C (80.6F)
So if you are trying to build more LABs, warmer temps might do the trick as well. And starting a new starter at really warm temps should help LABs growth, which should help initial acidification & culture establishment:
Would love to hear some more thoughts on this approach
for reproductive rates of labs and yeast. The optimum temperature for yeast is 82 F and the optimum for labs is 91 F. You will also see that although the rates slow down considerably at 36 F for both labs and yeast the labs are reproducing 3 times faster than the yeast at that temperature. The longer you hold your starter at 36 , within reason since yeast only live 7-8 day, the more labs you will inoculate into your dough. At 36 F You will produce the same amount of labs in 20 hours as you would 1 hour at 72 F but the yeast would need 60 hours to produce the same amount of yeast at 72 F in 1 hour. So if you refrigerate your starter for 3 days, you will be inoculating your dough with roughly 3 times the amount of labs as yeast than you would normally and your bread should be noticeably more sour. My own baking experiments with starters and temperature seems to prove this out.
Additionally, if ypou proof at a high temperature say 86 F the yeast will also slow down as the Labs speed up to make an even more sour bread. Long cold retards of starters levains and dough with a high temp final proof should always make for the most sour bread that your starter is capable of making using the flours and hydration of your choosing.
It's just science and luckily for us, yeast has been experimented on the most my scientists over the years, by a wide margin, so we know much more about yeast than any living thing.
Joe Ortiz uses a little cumin and milk along with whole wheat and water for his starter. I have tried it several times and it always works for me and is the fastest to make bread - 4 days. Not only does the cumin have wonderful natural yeast on the seeds you grind but the cumin supposedly has antiseptic qualities that reduce the bad bacteria population allowing the good stuff a leg up and allowing them to cultivate faster.
Happy baking
Cool chart, thanks for sharing it! Where did you get it?
Also, does it go higher than 90F? The data you shared appears to suggest that higher temp does speed replication while maintaining very similar L/Y ratios as with cold activity. I understand lactic acid bacteria (LAB) replication rates begin to drop after 91-92F.
I guess my point is that for establishing a new starter, wouldn't we want the highest LAB and yeast activity we could achieve, to ensure that there are enough of both to establish a strong culture and outcompete any undesirable/nasty bacteria? IIRC yeasts prefer a neutral or acidic environment in which to grow, so by that measure starting out creating more LABs, and then bringing down the heat will acidify the environment to let yeast replication thrive. And as far as yeast replication goes, ~80F is the optimum temp (still much warmer than room temp for most people).
a Fresh Lofian Doc.Dough who took Ganzle's raw data on sourdough cultures of Labs and Yeast and built the spread sheet. There was another row for 93 F. As you can see the yeast and labs reproductive rates fall off, the yeast more so, over 91 F. but the 13 for the Lab to yeast ration is as high as it gets so 93 F final proof will give you a very sour bread and since the yeast reproductive rates fall off it will take longer to proof too which means more sour as well.
Since you are trying to start both yeast and labs with a new starter the best temperature to establish one is 82 F which is the best for yeast but not bad for labs either. Once established it is best to store starters in the fridge for more sour and on the counter 68F-72F for the least amount of sour. You also don't want to retard the dough or levain nor do a high temperature final proof (85 -90F) if you don't want sour.
There is some data out there that shows the labs may be supplying half the CO2 to raise the bread too! This would change the way we look a t SD cultures where we though yeast supplied the CO2 and the labs supplied the the acid for sour.
13.12651018