It’s just a piece of home kitchen equipment, but it has inspired opinions from “absolutely necessary” to “nearly utterly worthless.”
When one contemplates the seasonal nature of food production – or to be specific, the foods I have tasked myself with producing – one sees that summer and early autumn are not the seasons for bread baking. While the bread can be a stern task master, it is a jovial uncle compared to the tyranny of fresh produce and its preserved forms. The unbreached wheat berry we may lay aside for a month (or a decade), but the blushing peach will move from fullness to rot almost before our eyes. While rises and folds have flexible “windows” where our efforts are rewarded, cooking sugars become substandard in the blink of an eye and the coordination of hot sterile jars, lids, finished jams, and boiling water baths is a taxing discipline, indeed.
As consumers we love our bread and jam, but as a producer of both, I find their production incompatible. Or perhaps doing both is just incompatible with my “real life” – but that’s another story. I do, though, make a few products that are quite popular with friends and family and they would be sorely missed when the winter months are upon us again.
So the summer months always find me spending way too much time wilting over the jam pans and giving myself water bath canner facials. Baking and the heat that an oven would add to this potent mix must generally wait for a better time. However, since I was already curious about these controversial appliances, it seemed like a good time to try automating the bread making process.
I decided on a Zojirushi BBPAC-20 (“Virtuoso”). Not only do Zojirushi appliances remind me of my months spent in Okinawa (where the sole appliance that I had for producing meals was a Zojirushi hot pot), but this particular model promised cakes, jams, gluten free, sourdough, and custom programmable cycles – seemed like the way to go, for me. Frankly, I enjoy the contemplation of how thoughtful design and intelligent engineering can make what could be a mundane tool a joy to use and tend to “vote with my dollars” for companies that embody this ideal.
I set out with a couple of goals:
- Make acceptable/good pain de mie style bread using the bread machine only – no mixing and then baking in the oven.
- Use metric – which puts me very much in mind of negotiating the roads in Finland. One knows that these things are letters and the letters seem familiar, but they are supposed to string together in a way so as to have meaning, yet they don’t.
So I skimmed the directions (how hard could this be – right?) and loaded the machine with the ingredients for a formula that I had successfully produced by conventional means many times.
Epic fail.
The bread was over risen prior to baking and collapsed. It was inedible.
Having experience in the “if at first you don’t succeed…” department, I made a small tweak and tried again.
Not an epic fail, perhaps, but not yet anything I would describe as a success.
Humbled, I really read the directions, took time to understand the timings on the cycles, and determined that I should take one recipe from the owner’s manual and follow it exactly.
My machine cycles for “regular” are as follows:
Rest – 31-41 min
Knead – 22 min
Rise 1 – 27-37 min (91F)
“Punch down” and rise 2 – 20 min (91F)
“Punch down” and rise 3 – 20-30 min (95F)
Bake – 60-70 min (248 – 302F)
The rises are too hot and the bakes are too cool – but the formulas are written for this. And well, yes, the thing did turn out as a respectable looking loaf. But it tasted bland at best and staled faster than an intensive mix baguette. (No wonder there are advocates of “must be eaten right away – or warm.”) Clearly I should be able to do better.
So I stopped to consider many things.
First, I considered what made the bread machine such a nice little toy.
I guess that I have to admit that I have certain disagreements with those who say that bread baking involves a lot of laborious kneading or that it makes a big mess. The advantages of some of the hand mixing methods like “stretch and fold” or “fold in the bowl” have been explored thoroughly on these pages. As for baking making a mess, the “voice in my head” keeps repeating – “you must work clean” at various intervals and since I always obey the voice – I think I’ve gotten that skill covered. After all, if I were in competition (which, I won’t be – because I am too old and I don’t bake well enough) – points would be deducted if I didn’t work clean.
What is great, though, is the fact that I plugged the thing in (and it magically knew the time!) and hit the cycle buttons, to be presented with the completion time. Then I could just walk away.
Once again, many of us know that the actual work involved over the life of our developing loaf is minimal. However, summer yard work chores at the crumbled abode often leave one in a state where one feels that a good scrub and a change of clothes are called for before food is handled. Performing such ablutions each time one must fold or shape or load does burden a busy baker. Or sometimes the errands simply must be run and sometimes they take longer than the time between folds. With the machine taking over these duties, the bread is made and the errands are accomplished.
And there is, of course for me, the preserving to be done. A great tide that blots out most other concerns, until it finally ends – in just a few weeks.
The advantage of automation, though, is also the downfall of the bread. The cycle times are short enough that the subtle tastes of fermentation do not really occur. And for all the effort that I have put into learning to control fermentation so that I can bake to a schedule, I use my senses to make adjustments – a little longer here – a little more forcefulness there – to make the final product come out the way I want. Once set, that cycle marches on. The formula is everything.
It would be possible to add a lot of ingredients to the formula to up the taste factor, but that is not my métier. Of course, the one or two people who read my posts know the answer to bringing fermentation flavor and keeping quality to bread produced in a relatively short amount of time. Yes. A pre ferment. Or maybe two.
My machine has a “sourdough” cycle, but as I studied the process that they advocated and the mix of ingredients that they called “sourdough” – I’ll have to admit that my brain blew a bearing. What I concluded was that my evening routine usually includes mixing up a pre ferment or two, so why not just mix as usual and let them ripen in covered containers to be put in the machine as part of the liquid ingredients? Yes, there are those two containers that will need to be cleaned (two containers – Oh! The humanity!) but this is a small price to pay for inner peace. For those of you who wonder about “all the hard work” involved in mixing the pre ferments, they are simply mixed – literally - by hand to the point where all the flour is wet and the mixture is slightly lumpy. Any remaining on the fingers is simply washed off. If it takes me five minutes to mix up two of them – well, I’m dogging it.
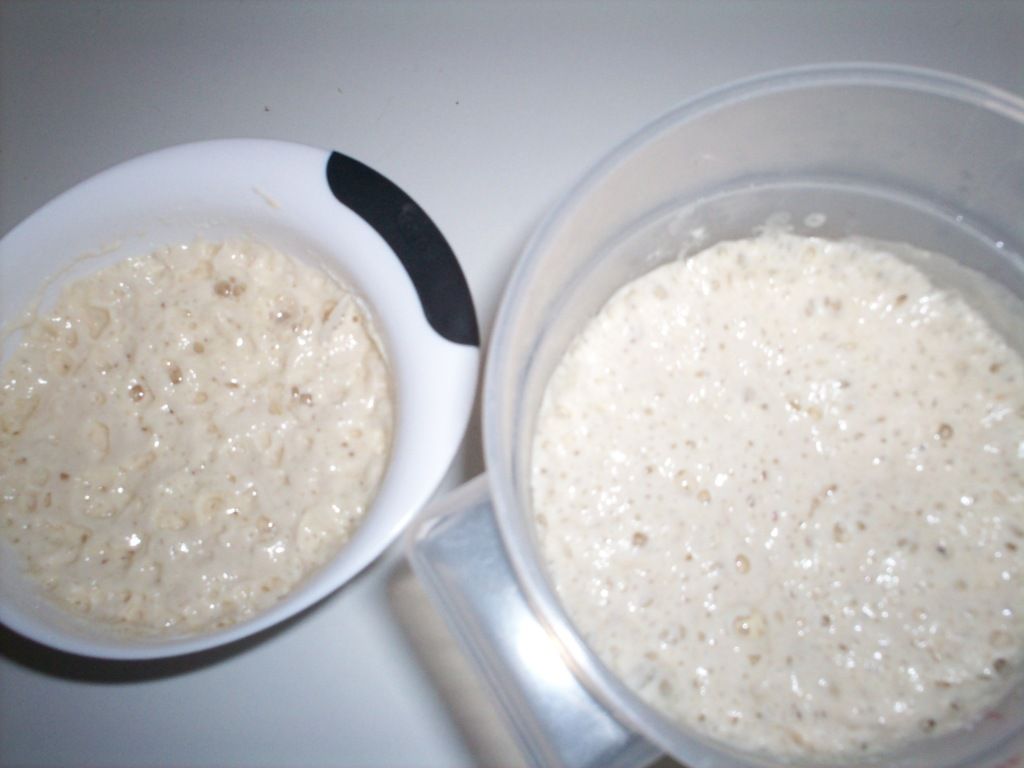
Now, I am not normally the kind of person who takes pictures of the baking process, but while writing this I came to the realization that given that I was writing about bread machines, some reader may have wandered by who doesn’t routinely mix up a poolish or liquid levain. So, as final proof that I should not handle cameras, but in a sincere effort to help, I am including pictures of my poolish and liquid levain both right after mixing and when mature.
Just after mixing:

Fully mature (the liquid levain is in the small bowl)
Of course, if you are mostly a bread machine baker and haven’t glazed over when confronted with the terms “pre ferment”, “poolish” and “liquid levain” – I say good for you. You can find definitions for these things on these pages in the “Handbook” tab. None of it is really difficult – it’s just that bakers use very specific terms for simple little mixtures.
But it gets bumpy from here, because now I’m going to head down the road paved with baker’s math.
What you will see is unusual, for me, is the high percentage of the flour that is pre fermented. This was inspired by the owner’s manual, but makes a lot of sense to me, since this is the only flour that really receives proper fermentation.
I calculated the baker’s percentages from the manufacturer’s formulas and along with my own knowledge set the percentages myself. Again, for those of you who still do not use the BBGA standard – here’s the big payoff – it was simplicity itself to convert to a pre ferment based formula from a straight dough. I used some of the lessons learned from my exploration of sandwich bread a while back – although I had issues doing an exact duplicate.
What I did find, however was that the addition of good, ripe pre ferments, the yeast percentage had to be reduced drastically. The small amounts caused me to recall “my teacher’s” remark about needing to weigh in fractions of grams and its relationship to drug dealing – but working with these very small amounts (remember – one loaf at a time!) did put me in the mind of a scale that measured fractions of grams.
Metric continues to not be my favorite thing. “My teacher” and I agree on that. It is difficult to transition the heuristics of a half a century. But I have been sticking with it.
In true Blaisian fashion, I’m never actually happy with the thing I just made. So I’ll say it’s an OK bread. The crust is a bit thick and lacking in refinement and that will never change – it is being baked in an un preheated oven at low temperatures. A day in a plastic bag softens the crust without degrading the bread – and of course crusts can always be cut off and used for crumbs. And there are holes in the bottom –which bug me (I have since seen a Breville bread maker that makes claims to the paddles folding out of the way so there are no holes – which is tempting, but even I have my limits) – but for some slices and a sandwich – or toast - or eggs in a frame – it is tasty and sturdy. It is miles ahead of any of the manufacturer’s recipes. It lasts a couple/three days before staling. (Of store bought bread, I know so little, but I think this must be better.)
When I look at the loaf I see major shaping flaws. But the cosmos reminds me that the machine did the shaping – it’s not my fault – just let it go…
The loaf.

The crumb.

The formula and method.
Once again my mind wanders and I think about Julia Child – wrestling various “recipes” into a book that most folks could actually use. I use the Bread Baker’s Guild of America’s standards to present formulas – and this is very clear to me. But as I look at it with the eyes of a typical beginning (or even intermediate) home baker, I think, “Well that’s not just a recipe – it’s a recipe for disaster.” So for those who have the standard down – I present it below. I will also add a list of ingredients in more traditional format.

(Oh – and I do mean to specify the water temperature in the Final Dough ingredients. Because my machine has a “wait and heat” cycle – that water needs to be cold. Call the Format Police – but The Guild doesn’t publish too many bread machine formulas…)
Ingredients
Levain
White flour 47gms
Water 47 gms
Seed (sourdough starter) 5 gms
(mix this by hand in a small bowl – allow to ripen overnight: 8-14 hours)
Poolish
White flour 141 gms
Water 141 gms
Instant Yeast Large Pinch
(mix this by hand in a medium bowl – allow to ripen overnight: 8-14 hours)
The next morning you will mix the final dough – the ingredients are:
Levain All that you mixed the night before
Poolish All that you mixed the night before
Cold Water 150 gms
Triticale Flakes 56 gms
Molasses 20 gms
Agave Nectar 20 gms
Dry Milk 7 gms
Salt 9 gms
Butter 30 gms
White flour 118 gms
Whole Wheat Flour 118 gms
Triticale Flour 47 gms
Instant Yeast 2 gms (that’s about a half a teaspoon)
Put (Final Dough)ingredients in the pan of the bread machine (don’t forget the paddles!) in this order:
The water and the pre ferments,
The triticale flakes,

The butter, salt, milk powder, molasses, and the agave nectar
The flours
Make a well in the center of the flour and put the yeast in it.

Bake on “regular” cycle of your bread machine (they vary, but they all have some kind of “regular” cycle). Mine has “crust control” – I like to set it for “dark”.
Take it from the pan to cool…
Some ingredient notes: I have been on a quest to bake good breads with 100% triticale flour. This is a maddening type of quest, but it is my quest and I’m sticking with it. What I have found, though, is that small amounts of triticale can be incorporated in wheat breads and greatly improve the taste. For people who are not losing their grip on reality, whole wheat flour can be substituted for triticale flour (although you can buy it from Bob's Red Mill) and rolled oats for triticale flakes. It won’t be exactly the same, but will still be nice bread. Also, my “all purpose flour” is about – 11.5% protein - folks using lower protein flours might want to switch to “Better for Bread” flours.
Of course if I only baked one type of loaf in the thing all those other cycles would be a waste. Jam has been made and pronounced tasty; although it is not of the quality that I put up (I’m going to hope not because if so, I’m doing a lot of work for nothing.) I’ve also done some lovely cakes (altitude adjusted, of course – and of the “pound cake” variety) a type of cinnamon roll, and a couple other breads. (I’ve also baked stuffing in it – which I think is pretty neat – no need for a “stove top” – or an oven – yea!) (Oh, and while I was writing this I baked some eggplant parmesan…)
But this length of a blog with almost no pictures is enough. I’ll leave those for future installments.
- proth5's Blog
- Log in or register to post comments
Hi Pat,
What a wonderful 'bread' story. A delight to read and I enjoyed your photos too :-) Nice to see what you have been up to in a picture - your pictures beat the ones in my head by a long shot! Almost makes me want to go out and purchase a bread machine....but space, money and old habits keep me from dwelling on thoughts for more than a few fleeting seconds. My brain also would really rebel at learning how to operate a machine that does things it can't do :- O.
Take Care,
Janet
the photos in just for you - I don't think I'll ever do such a photo rich extravaganza again. If you want to buy a machine - the one that has paddles that fold down would be my choice.
I do miss baking in the oven, but as a faute de mieux - the thing has been fun.
Pat
Pat, you have no idea how I enjoyed reading about your new bread machine 'Virtuoso' by Zojurushi : )
I have had my old Zo for about 18 years. It sat on my counter with tiny refrigerator magnets on it..2 cowgirl boots, a 'you are loved mom' magnet given to me ages ago, magnetized measuring spoons 5, vet emergency number card magnetized, another little italian boot magnetized, 1 inch tile with a painting on it magnetized, some decal stickers, magnetized listed measures, I might have forgot some others. I referred to it as reminding me of an old VW hippy bus. I occassionally used it for 'needing' to do kneading with it and such.
Well, it has been hotter than all get out here..hottest it's been in since I moved here. To hot to want to go into the yard and light the WFO and way to hot for me to want to bake indoors. To top it all off, I have been making a few trips out of town for some mini vacations and just haven't had time to bake.
I started seeing Mike looking and asking for 'some bread'. The freezer's last loaf had been eaten.
This called for an emergency fix..I was leaving the next morning early. I would make a 'bread machine bread' for Mike. I filled the Old Zo with ingredients for a sandwich loaf to leave for Mike. Plugged it in and pushed start. Nothing happened...I think it had died from neglect.
I thought this would have been so great to get a loaf without heating up the house with my oven...now I wanted my bread machine. I went online to my favorite shopping site Amazon.com. checked out the new Zo's.....hummmm looked pretty nice..it now had a heating element in the lid and was supposed to brown the top of the loaves.
To make a long story short. It arrived while I was out of town. When I arrived home yesterday. I opened the box..wow, it seemed nearly twice as heavy as my old Zo and a larger foot print...but I didn't care, I have plenty of counter space empty now where the old bus sat. I loved the new color black and stainless steel..matches all my other appliances perfectly.
To make a long story a little shorter. I baked my first test loaves yesterday...following those directions included in the book. I burned up and ruined the video included. I put it in my Mac wrong :/ upside down.
I was amazed.... the loafs one plain first second the cinnamon roll loaf. The raised up beautifully and tall..the new pan is a little larger than the old model's. Oh, I loved how the heated lid browned the top perfectly..I like the medium setting...but I did use the Homemade feature...I love all the 'shaping' timing features available. I can understand how your imagination can go with this : )
Oh yes, You can remove those blades and bake without them : ) I also add a tiny dap of crisco to the posts before putting the blades on.
I thought I needed a bread machine like I needed a hole in my head.....Now I'm so happy I have my new Zo 'Virtuoso'. My how they have improved on things in the last 18 years : ) A new fun gadget. I will definately use not only to knead and bake in with this outrageous heat spell...but who knows what else...well, I made pasta dough in it today, while I did other chores in the kitchen. We had a great pasta dinner. Mike loves his cinnamon roll bread. I have some figs I picked and no time to make jam...hummmm!
Thanks Pat, you made me get such a big smile...I'm so pleased with the Zo. Looking forward to your formula's too!
This happened as I unpacked and went out for the evening 'lol' A little snack bread for Mike and me! 'Shape' feature..I call it my Shape Shifter bread..like magic! Recipe included...with gram measure
Sylvia
Hey! I've made something like that cinnamon roll loaf! (Beautiful, isn't it) but I've gotten busy tweaking the recipe (of course...)
The "Home made" cycle does allow for shaping and baking without padddles, but that was a bit away from my original goal.
Great story. I think I might get out my spare "I "heart" Okinawa" magnet and decorate my new toy.
My strange moment is that I actually use flour ground by hand and then put it in a bread machine...
Thanks again for all the kind words.
And a great read. We've used bread machines for about two decades--our original Zo died this year, we replaced it with the same model you have. I've been in love with the metric system since college years: a long time ago.
However, they're just tools, each has its own annoying quirks.
I won't belabor you with anecdotes of our learning; suffice it to say using it every week to ten days for more than a decade, we've learned. And in the learning we've also learned to like it, warts and all. For the past three years and continuing, while I"ve struggled to learn "artisnal" baking, my wife's assumed the lead with the Zo. She does things with it now, I'd never thought about.
A couple of tips: I offer these since they are specific to "downers" you called attention to in your post.
Rise temperatures: I've attempted to reverse-engineer what the designers used to guide them in their choices. I"m certain it was commercial yeast growth vs. temperature. The preheat cycle step, and the first to rises are nominally at 82.4°F. (pg. 27, operating instructions manual) that's the peak of activity for commercial yeast growth. The third rise is done at 100.4°F ( same ref.). I've two hypotheses why they use that temp, but I'm still uncertain. You, can turn any cycle off (pg 27), i.e., skip it, but you can't change the temperature. When we want to control the fermentation temperature, we simply remove the dough from the pan, put it in a bowl and ferment it at room temperature, refrigerator, wine chiller, or proofing box. Or you can simply raise the lid, and cover the dough with plastic wrap, or a tile. The raised lid stops the machine's clock, but the dough will of course keep fermenting. (I don't know if it also turns off the heater coil.) We preplan the fermentation time, and adjust the amount of yeast accordingly. Also, when using the "dough cycle" cycle you can leave dough to ferment as long as you wish after the cycle completes. (Or until the dough rises enough to stick to the lid;-)
Paddle holes: Like you, I find this super-annoying. When we bake in the machine, after the paddles have deflated the dough just before the Final Rise step begins, we remove the dough--usually just balancing the dough ball in one hand--and remove the paddles (with the other hand). Then we tidy up the dough ball and place it back in the machine. Two, realatively small, holes are still made by the paddle posts, but they're a far cry from the paddle craters.
Homemade Course cycle: If you repeatedly make one bread style in the machine, this is a great place to tweak step times. However, I don't think its worth the bother for any one-time bread.
From your post. you are well on your way to mastering the Zo, and hang in there with metric--you may come to like it.
Regards,
David G
for all your great tips. Yes, I was thinking that I needed to explore the "home made" cycle a bit more.
Good inspiration on removing dough for fermentation and then baking it in the machine. Since I see this mostly as a formula development exercize I hadn't given that much thought - but will now...
Metric - that's hard. :>) I started baking when metric was scarcely discussed - let alone used by home bakers.
Thanks again!
Pat
and one of the first things I'd add to a bread machine recipe would be dried powdered sourdough starter. Another would be sourdough altus. Initially not at the same time, but it wouldn't take me long to bastardize a drab recipe. Smuggle either one fine and dried ahead of time under the flour % for easy dumping into the pail. The beauty of a machine (slave) is not to have many items to mess with, agreed. Throw everything together in the kitchen, park it ready to go sheltered on the patio, plug it in and come back later.
Don't most people with bread machines time their breads to be done when they get up in the morning? Or is this a after the shower in the pajamas sort of thing to plop the bread out onto a rack to cool while the sun sets?
Mini
You always come up with something creative.
I've not used a lot of altus in my recipes, but that is a thought.
I just don't know about dried sourdough and how it would impact taste/rising. OK, now I'll have to try it...
I get home very late on a Thursday night (or very early on a Friday morning) so it is best for me to get the pre ferments (and scaling of the other ingredients) prepared at night. I can then get the ingredients into the machine and have it ready noonish (this is a very fast cycle compared to the conventional breads that I bake.) I've thought about timing the thing for baking overnight but logistics seemed to hard in terms of what the pre ferrments might be doing. I really like this combination of a little poolish and a little levain and they need to mature in separate containers.
Of course, that creative mind of yours will come up with something :>)
Pat
I admire your scientific approach to the bread machine issues, Pat!
My husband had bought a cheap one when I moved here, and, after I realized that my machine baked bread came out with a weird shape, a hole in the bottom, and, worst of all, no nice crust (the sides were too soft and the top too hard), I used it only for kneading and bulk fermenting.
That purpose it served really well, at that time I baked only my mixed wheat/rye sourdough Feinbrot, with a 3/4 cup of old dough as starter. I mixed it in the evening, let the shaped bread rise in a banneton at room temperature overnight, and baked it in my regular oven.
I also had success with making pizza dough and Christmas Stollen dough.
When the machine finally met its maker, I decided not to buy another one, since it seemed a bit of a luxury to use it for just one kind of bread.
Karin
for the kind words.
Although I call the crust lacking in refinement - it is not bad for a standard sandwich bread - I just tend to be picky.
I think machines vary wildly - with some being better at some things than others. As basically a small, portable oven, I'm starting to see some possibilities in the thing year round, but it has served me well over this extraordinarily hot summer.
I'm not about to give up on my real oven - or my standard bread methods. I've been thinking a lot about formula development lately and this seemed like an interesting challenge.
Pat