Every year, in the beginning of summer, my three brothers and I gather for a weekend at our parents' summer cottage to eat, relax, and create something together. As we all love to create things and try out new ideas, we usually end up creating something out of the ordinary.
This year, I suggested creating an oven using materials found in the nature and bake some bread in the oven. Although I have been reading The Bread Builders by Alan Scott and Dan Wing, I can't say I know much about ovens. Just that we need to collect heat in it and then try to keep that heat as well as the steam from the breads inside. That didn't stop us.
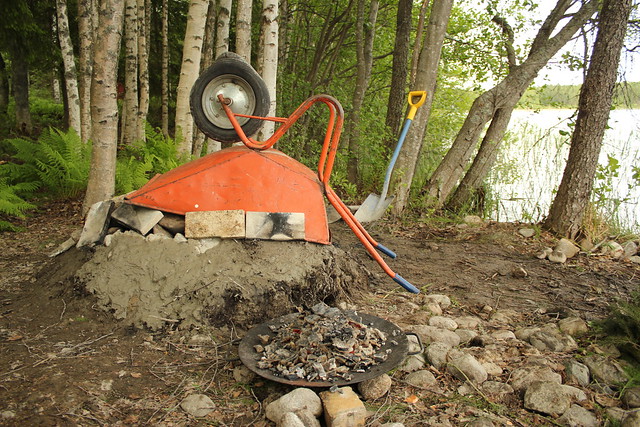
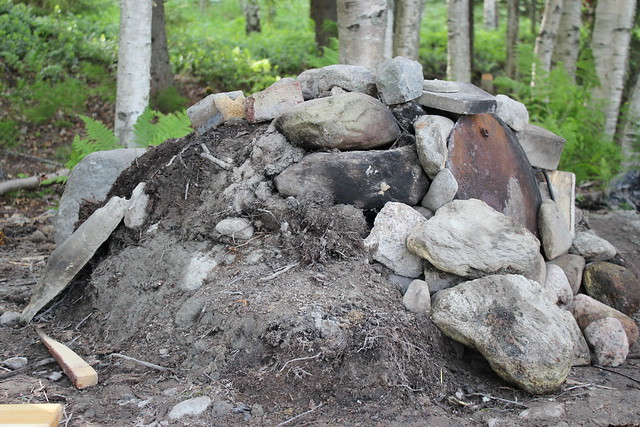
We dug a hole in the ground (had to stop when it started filling with water—we were too close to the lake). Then, we used small rocks to build a small oven inside. Then we heated the oven.
As we were ready to put the bread in, we realized we hadn't planned for an oven door. There was an old wheelbarrow standing next to our oven, so we put it on top of the oven door to keep the heat inside. Not the best of choices, but it does look fun in the photo!
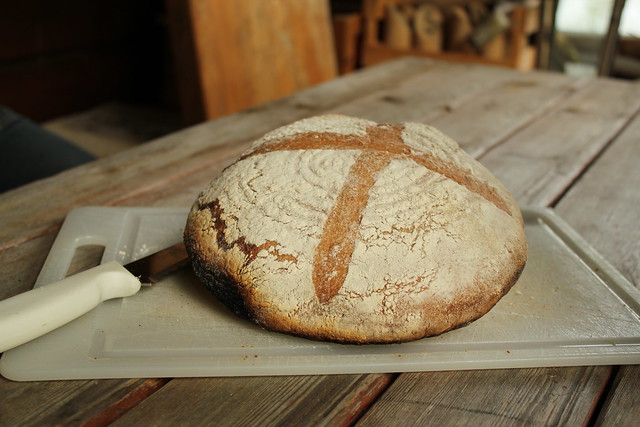
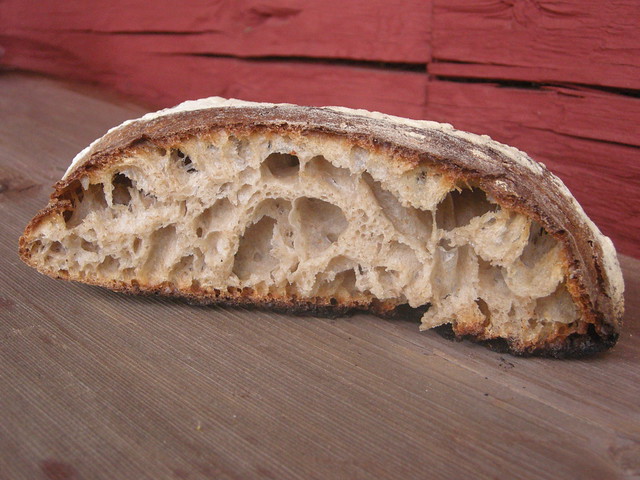
The first version lead to a loaf of bread that baked a bit unevenly, but rose nonetheless and tasted very good.

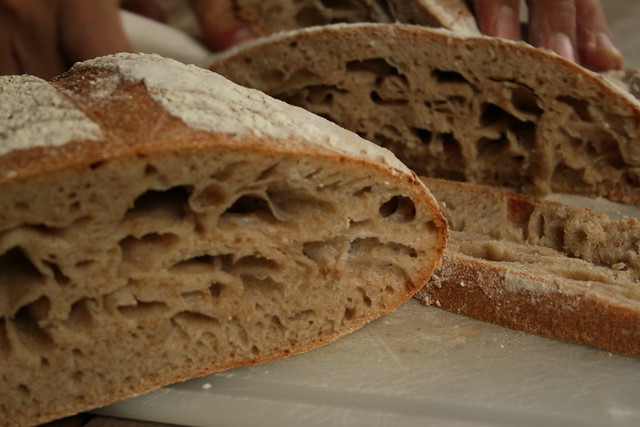
I wasn't very happy with the big holes in the crumb, but I suspect this didn't have anything to do with the oven but rather the fact that I was a bit sloppy with the dough as most of my attention was in creating the oven. My
Last weekend, we went back to the summer cottage, this time taking all of our families with us.
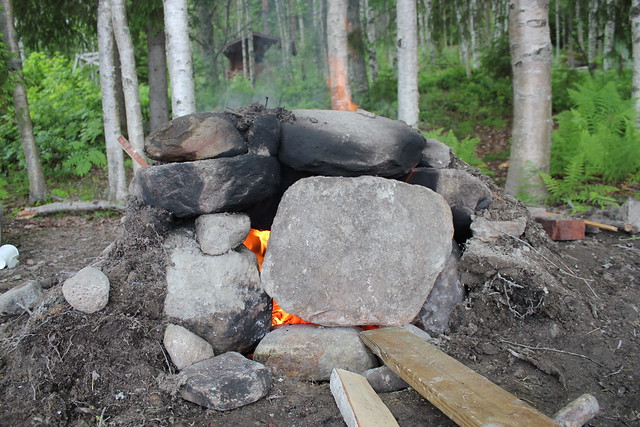
My son, Oiva, was excited about the oven and wanted to bake some bread in the oven, so we heated it up again. But before that, we did some improvements based on the previous weekend's results: we added another big rock on top of the oven to distribute more heat on every side of the bread being baked and changed the structure to be more oven-like with a door and all. After three loads of wood, we baked the first loaf.
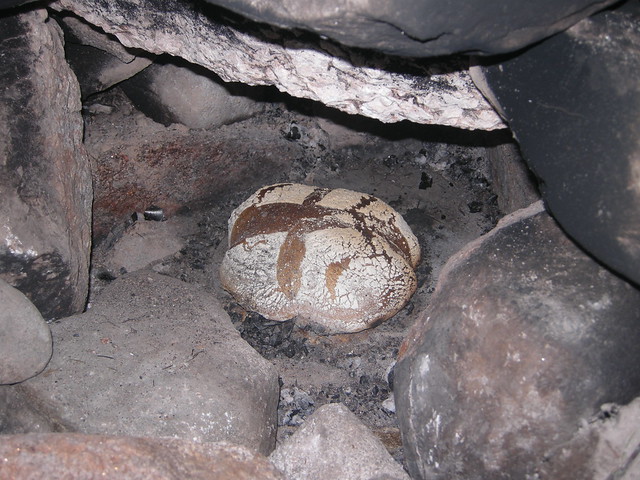
This time, the results were very good, and the loaf of bread disappeared from the kitchen table in less than five minutes! The oven was really hot at the beginning, as you can see from the bottom of the loaf.

Right after taking the loaf out of the oven, I put in another. The heat left in the oven wasn't very strong, but after baking the second loaf for about two hours, out came a loaf that was well worth the effort. It didn't have much crust and it didn't rise quite as much as the first loaf, but tasted good, and everyone liked it too.
What more can a baker ask for? ...except, maybe, a real masonry oven...
- jarkkolaine's Blog
- Log in or register to post comments
So it looks like the loaf in the fourth to last picture there is just sitting in the naked fire pit over the coals, directly. Is that what you did?
I'm very interested in this project, it looks like a lot of fun and I'm considering doing something similar now thanks to this blog post. I go camping every so often, sometimes to established public camping areas and sometimes on private land. I already bake in my dutch oven while out there and for folks who don't have homemade bread it's a , but if I can bake on the coals that might impress the folks I camp with even more. If I could talk the owner of the land into letting me build a makeshift stone oven that would be something.
Is there any advice you could offer for how to do this right? Things to watch out for, pointers, etc.
This is awesome.
Hi G-man!
Actually, I did try a small experiment with baking straight on the coals but didn't get very good results that way. From what I've heard, that should work for flatbreads, though, so I will keep experimenting... :)
When baking in this "oven", we took the embers out of the oven and brushed the bottom quickly with a wet branch of spruce before putting the bread in. Even then, the stone on the bottom was very hot and burned the bottom of the bread a bit. An idea for the future would be to let the oven cool a little before putting the loaf in.
Other than that, I'd say the more and bigger rocks you can gather around the oven the better.
Thanks for the comment, and let me know how it goes when you try this! I'm glad you like the idea :)
You seem to have gotten amazing results with an ad-hoc system... just imagine how much fun it would be to cook in a reliable WFO you could use year after year. (And away from the lake so the water doesn't fill the bottom... I expect that's great for steam but a challenge for maintaining a high temperature.)
I recently completed the wonderful WFO class at King Arthur, taught by Jeffrey Hamelman. Most of the students already had WFOs including one gentleman who had faithfully executed the Quebec method in which you build a dome of twigs, cover that with mud, then fire it and the heat burns away the twigs while curing the inside of the oven. There's a book called "The Bread Ovens of Quebec", out of print but available, that describes this technique in detail. Something for you and your brothers to consider next year!
Thanks for the tip! I'll try to look up the book. We already have a better place planned for a real oven at the summer cottage (far from the lake ;)) if we can only find some time to build it properly. I guess one weekend won't be quite enough...?
Cheers!
Wow! Those look to be sedimentary rocks. I am surprised a few didn't explode. As for the blackened bottom, that's why everybody's kitchen had a bread rasp back in the day. It happens when you have to judge rather than measure the temp.
cheers,
gary
Hi Gary!
I guess we were lucky, then :P
I did notice a crack in one of the rocks after we finished baking the bread. Other than that, everything stayed in place. And yeah, a rasp would have been handy--I like a dark crust, but this was just a bit too dark even for me.
Cheers,
Jarkko