Sourdough Ciabatta
 Sourdough Ciabatta Crust: Sourdough Ciabatta Crust
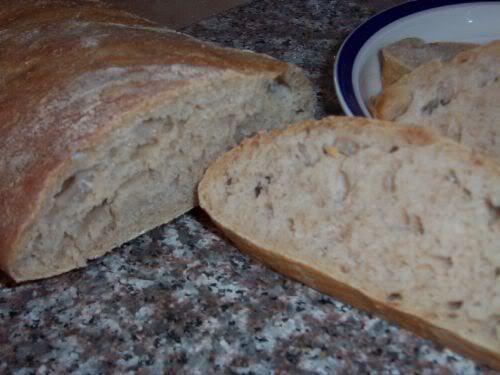
 Sourdough Ciabatta Crumb
") Sourdough Ciabatta Crumb (lengthwise slice)
Sourdough Ciabatta Crumb (lengthwise slice)
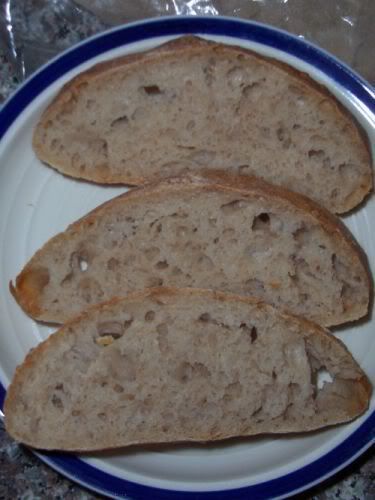
 Sourdough Ciabatta w/Olive Oil
One of the favorite family breads seems to be ciabatta, and this sourdough version is clearly preferred (wolfed down) by my kids for its flavor. I've achieved a little better crust and crumb with yeasted versions, particularly the one in Maggie Glezer's "Artisan Baking", but the sourdough flavor is hard to beat, especially with salty grilled left over meats in sandwiches. The recipe is loosely based on the BBA (Reinhart) "Poolish Ciabatta", as well as incorporating ideas from Maggie Glezer's version in "Artisan Baking".
This is a work in progress, but I like the way this one turned out. The flavor is a little mild, which may mean I need to lengthen and/or retard the fermentation, or maybe use somewhat more ripe starter, an exercise for future attempts.
Many thanks to various contributors to this site as always, and especially in this case to Zolablue, who encouraged me to pay more attention to ciabatta with some just great photos and discussions about how to achieve better holes in ciabatta through hydration, proper handling, and flour choice, all of which were used here.
Photos of process have been posted for this ciabatta and a sourdough raisin focaccia I made at the same time. A spreadsheet is also posted showing weights in ounces or grams.
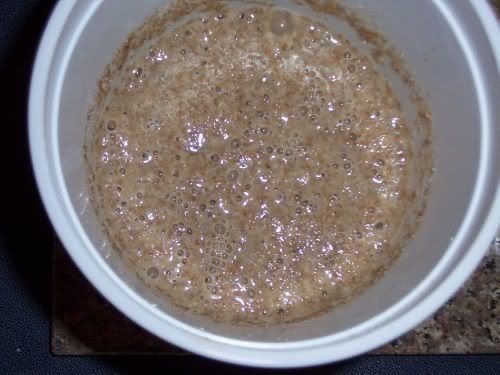
Starter:
- 16 oz BBA style barm fed w/KA organic AP flour (1:1 by weight flour:water)
The day before this bread was baked, I took my "BBA style barm", a 100% hydration starter fed with KA Bread Flour, out of the refrigerator. I fed it 1:2:2 (starter:flour:water) three times over the course of the day at room temperature, which refreshed the starter and built enough starter for this recipe, the sourdough raisin focaccia I also made the next day, as well as some left over to return to storage in the refrigerator. The larger amounts were made by feeding with KA organic AP flour, to convert to KA organic AP flour, a choice of a slightly lower protein flour that should be good for irregular, large holes and artisan style bread.
Dough:
- 16 oz 100% hydration starter using KA organic AP Flour
- 15 oz KA organic AP Flour
- 2 oz KA Rye Blend Flour
- 12 oz water
- 0.5 oz salt (14 grams)
Autolyse:
Mix the flours and water together in a bowl (I used a dough hook for this). Let sit for about 30 minutes.
Mix:
Mix flours and water above with the 16 oz of starter, 0.5 oz salt, and mix for a couple of minutes - just long enough to thoroughly mix the starter and salt with the flour and water from the autolyse step. The dough should be quite "wet", meaning it will not clean the bottom or even much of the sides of the mixer bowl. It should be fairly sticky and already have a fair amount of gluten development.
Bulk Fermentation and Folding: (about 4.5 hours)
Make a fairly thick bed of flour on the counter about 12 inches square. Using a dough scraper, pour the dough out into the middle of the bed of flour. Allow it to rest for a few minutes. Then, fold the dough by flouring or wetting your hands, then grabbing one side of the dough and lifting and stretching it, folding it over itself like a letter. Do this for all 4 sides. Brush flour off the dough as you fold over the sides that were in contact with the bed of flour. You don't want to incorporate much flour into the dough as you fold. After folding, shape it gently back into a rectangle or square, spray it with a light coating of olive oil or some other oil spray, and dust very lightly with flour. Then cover it with plastic wrap, and drop a towel over it. If the dough seems a little stiff at this point, it unfortunately probably already doesn't have enough water in it. You can put it back in the mixer and add 1 oz of water and try again. Or, soldier on and adjust your water next time. Repeat the folds approximately every 45 minutes two more times. If the dough seems very resistant to stretching, only fold it from two directions instead of four. You don't want the dough to get really stiff from too much folding. The amount of folding you will need will be more if you have more water and less if you have less water. Note that even an ounce can make a very big difference in the consistency of the dough. After three folds, let the dough rise for another 2.5 to 3 hours, at which point, the dough should have doubled roughly in volume. Use the "poke test" to get a feel for how long to continue the bulk fermentation.
Shaping:
Divide the dough into four pieces of equal size, roll them in the bed of flour to dust the cut ends, and let them rest a few minutes. To shape, take one of the four pieces, stretch it out and roll it or fold it over itself very gently. With ciabatta this amounts to a gently stretch and fold like a letter. You want to create some tension in the surface of the dough by folding it over itself that way, then if you place the dough folds down on a couche, it will seal up the seams. Use the couche to create folds for the ciabatta and then nestle the folds between supports, such as bags of flour or whatever system you may have similar to what you might do for baguettes.
Final Proof:
Let them rise in the couche for about 2.5 hours, until they are puffy and have increased significantly in volume.
Prepare to Bake:
Preheat oven to 500F (yes, you can probably do it without preheating, as mentioned elsewhere on the site, but it's not what I did this time). While that is going on, take each loaf out of the couche, gently stretch it in one direction by about double, lay it on a peel, maybe with parchment paper underneath, maybe sprinkled with corn meal or similar, and use your fingertips to flatten out the loaf. You can press down fairly firmly to feel the peel underneath. It sounds crazy, but the loaf will bounce back just fine in the oven if it is not overproofed. This step is important to avoid "separation of crust and crumb" or "one gigantic hole" instead of many holes. It also evens out the loaf so it has a nicer shape after baking.
Bake:
Place loaves in the oven and lower temperature to 450F. Bake for about 13 minutes, until the internal temperature is around 207F (I'm near sea level), rotating them after about 9 minutes. You can bake them longer to get a darker, harder crust. Actually, I think this KA organic artisan AP flour may benefit from a little bit of added diastatic malted barley flour, as the breads I baked with this flour today were more pale than previous results with KA AP or KA Bread Flour combinations. I don't think I overproofed them, but maybe that's a factor. The loaves should spring up from their "flattening" with your fingertips, such that not much evidence is left of the dimples you made with your fingers.
Cool:
Let bread completely cool, if you can stand to wait.
This bread is especially good for sandwiches, sliced in half and then sliced along the "flat" direction to open up like a hamburger bun. It is great for burgers, steak sandwiches, ham, or just with olive oil and pepper.


 800 slaps on the bench!!!