The concept for this loaf of bread came from the following video from FoodGeek.
https://www.youtube.com/watch?v=InTqgRYVmh4
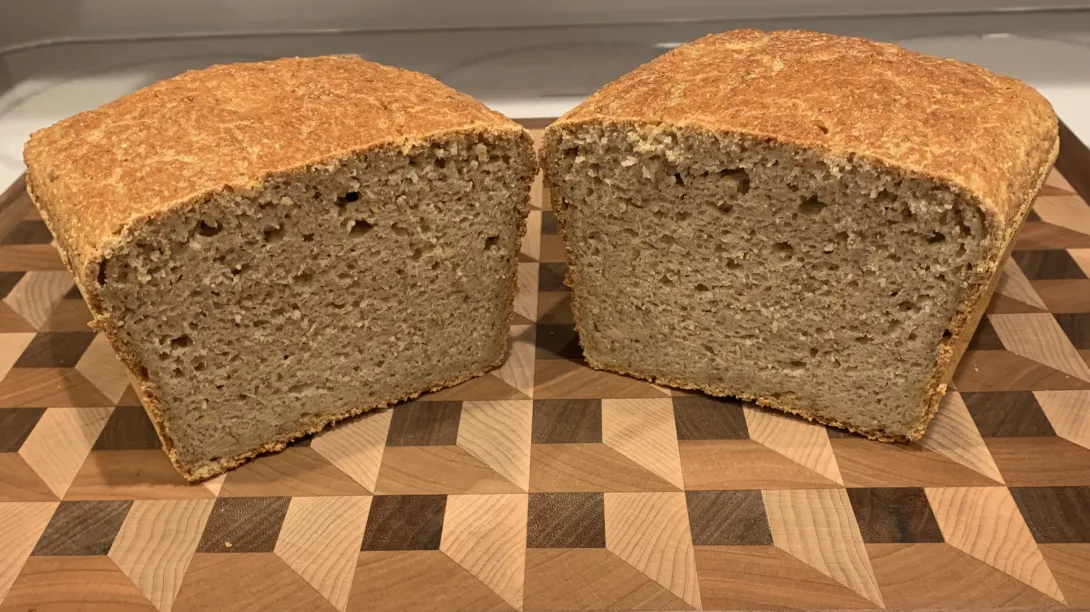
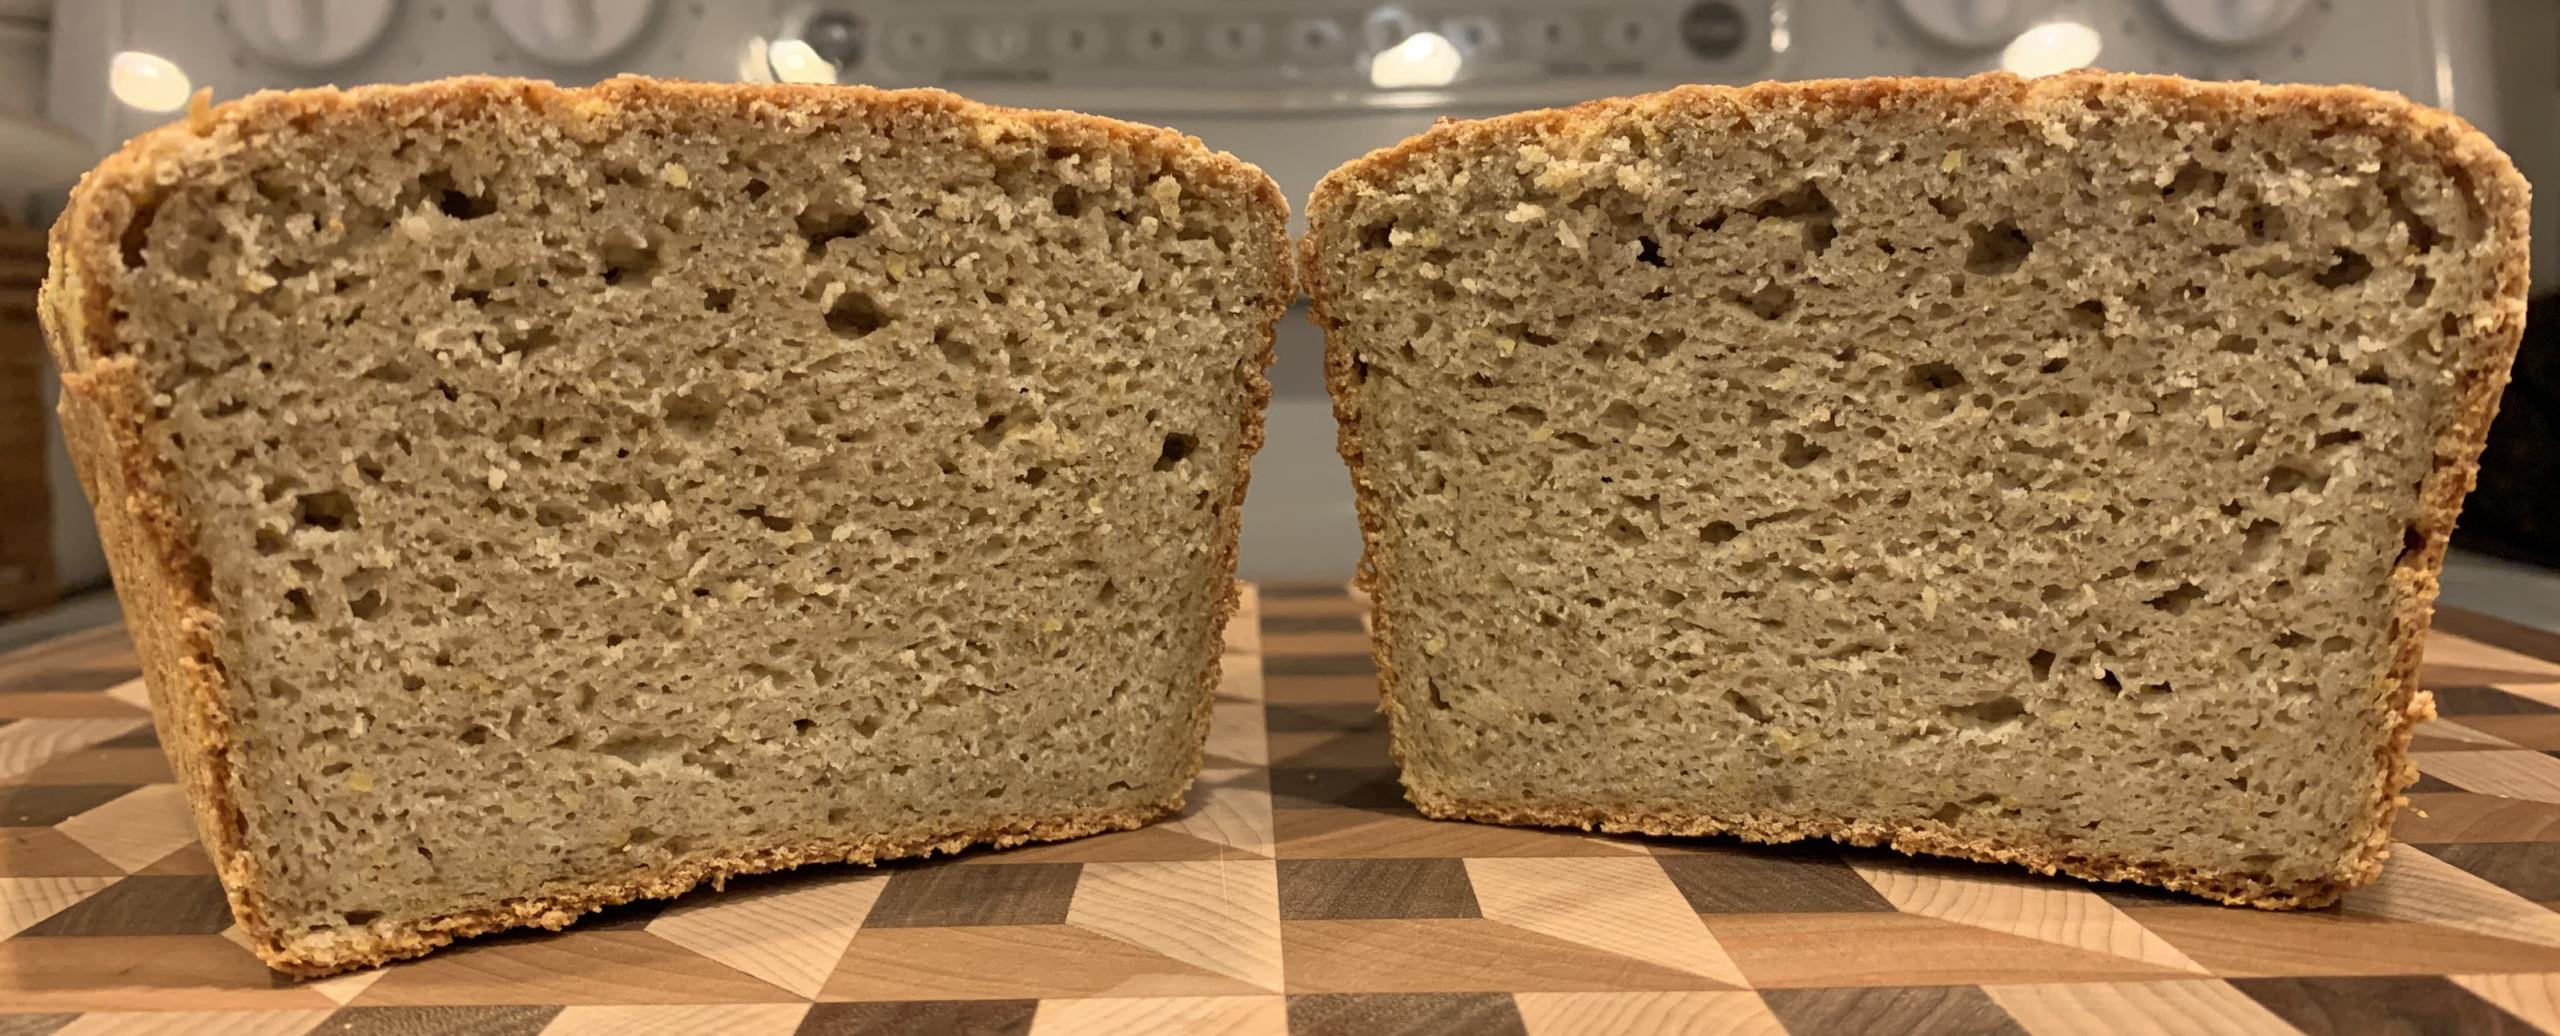
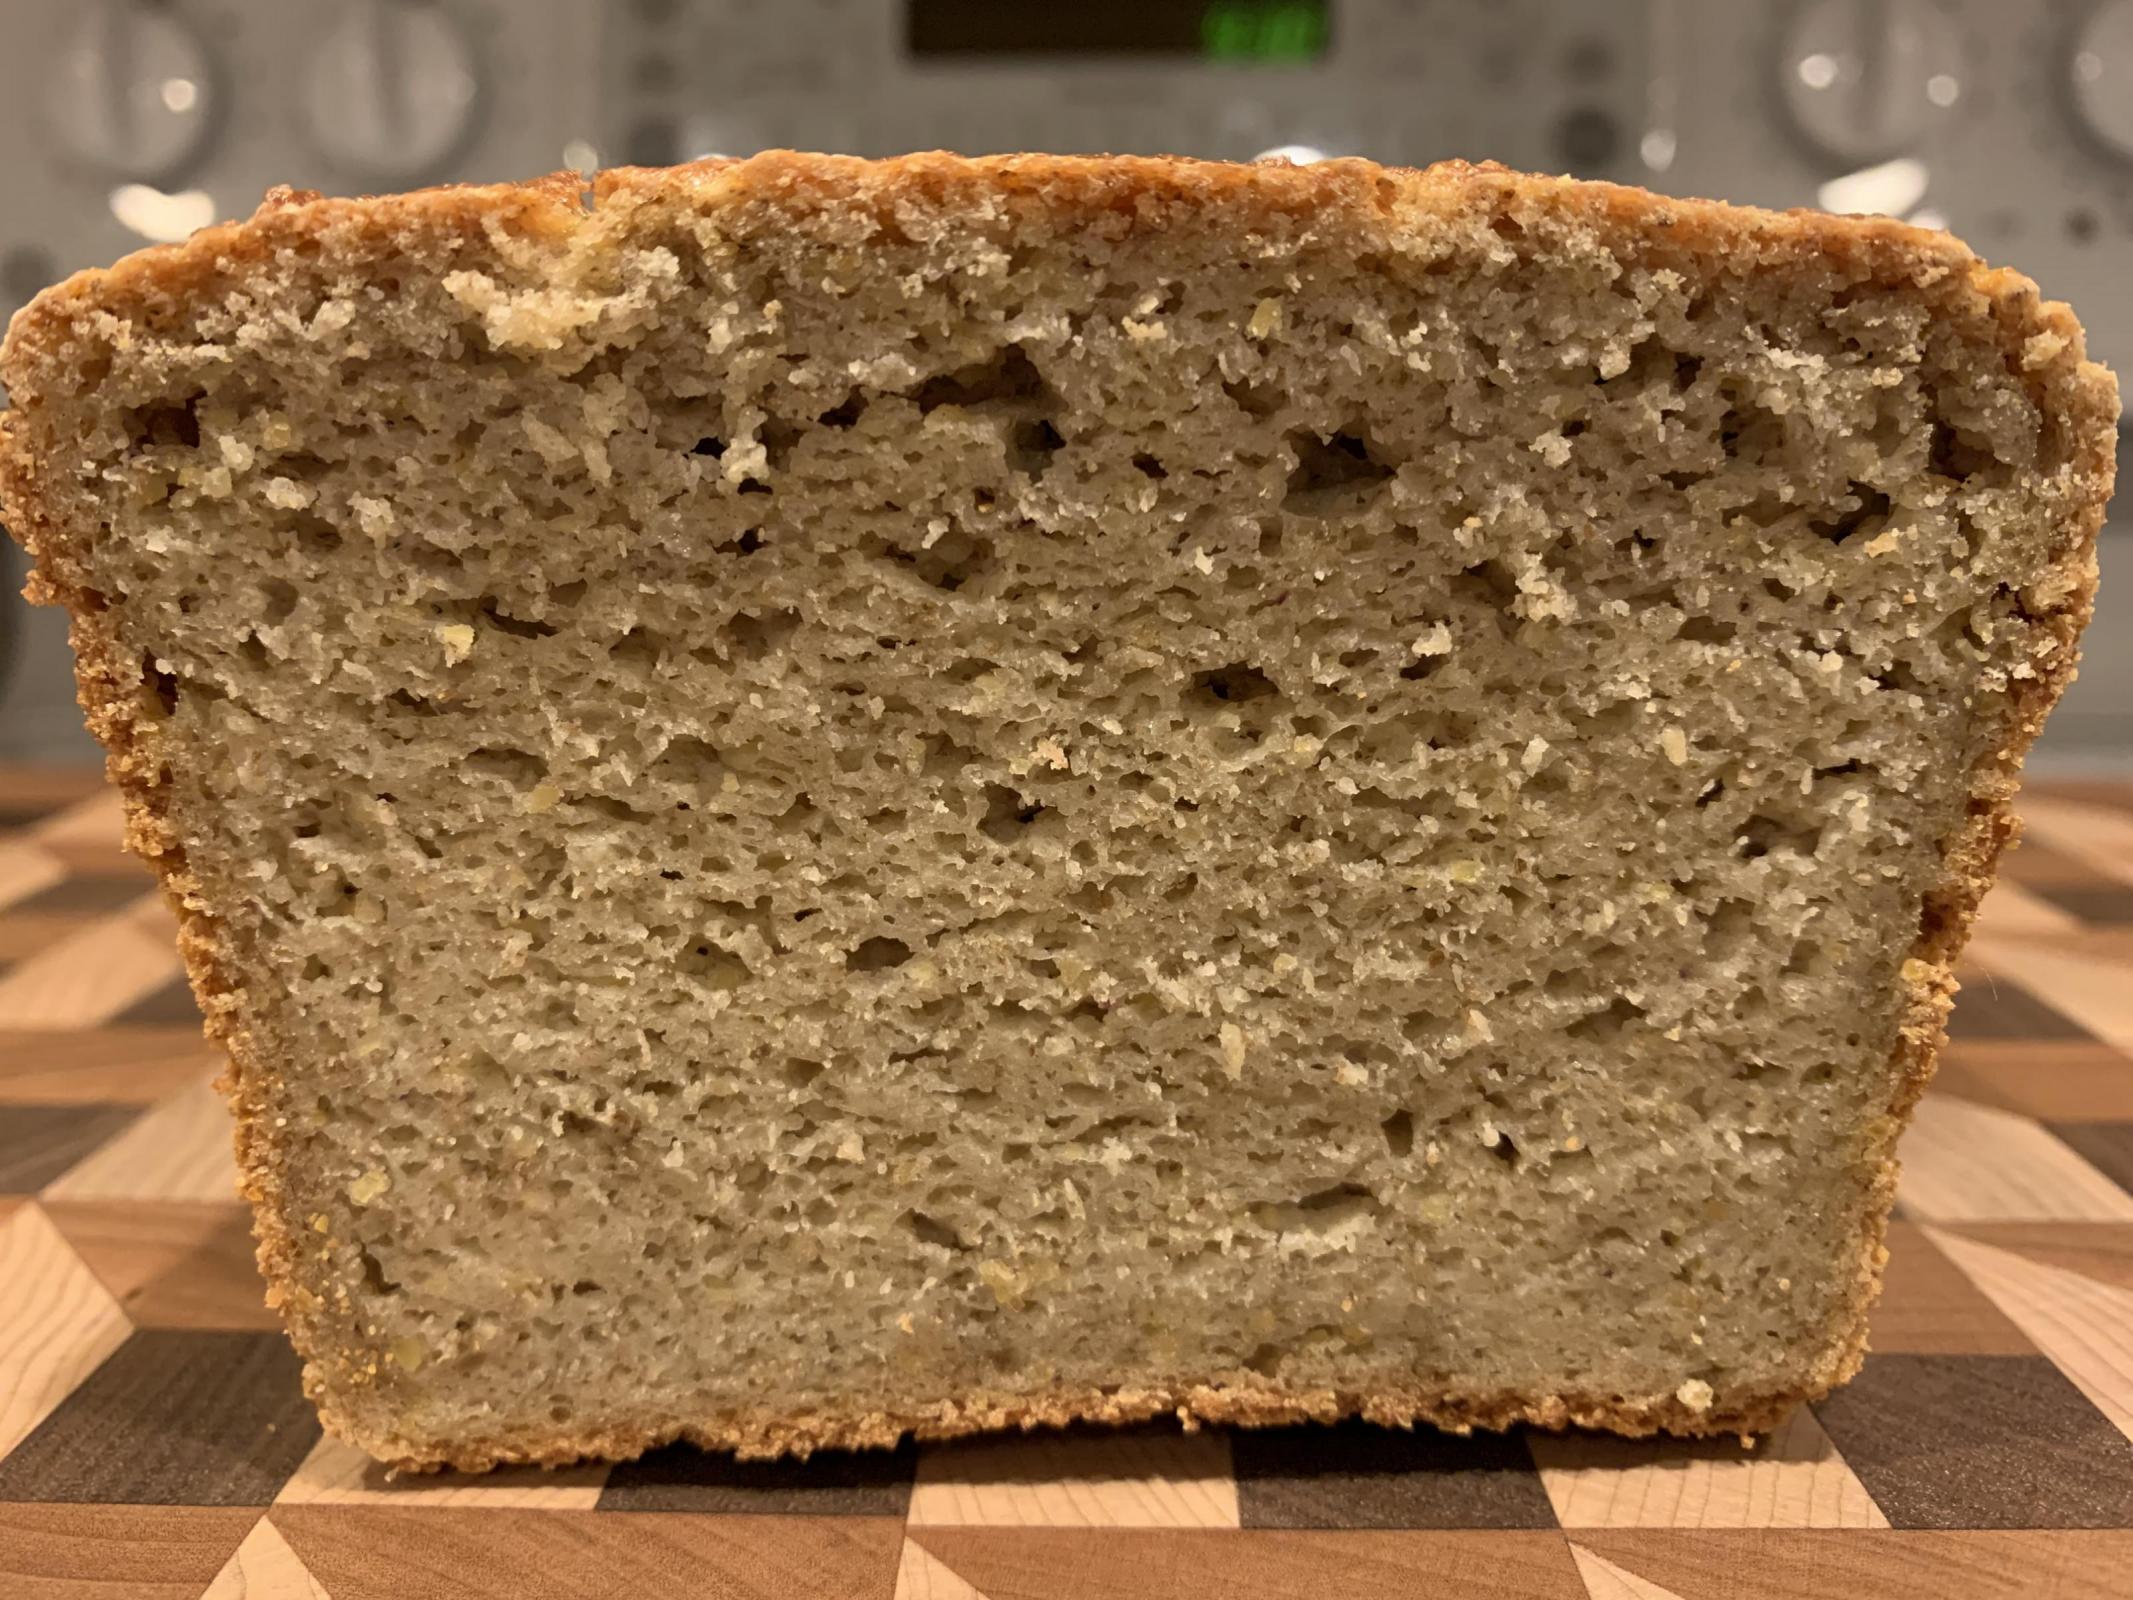
This loaf turned out really nice! Moist but not gummy. The jasmine rice really comes through in the aroma but the oats and corn help give it a whole grain flavor. It has a creamy texture and will be great for grilled sandwiches and toast!
Rice Soaker
112.5g Long Grain White Rice
112.5g Jasmine Rice
258.8g Water
Oat and Corn Soaker
45g Rolled Oats
45g Corn Meal or Polenta (I used Polenta)
112.5g Whole Milk
22.5g Butter
Final Dough
76.5g Brown Rice Flour
22.5g Corn Starch
13.5g Psyllium Husk (coarse or fine. I used coarse)
22.5g Chia Seeds
33.8g Water
3.2g Active Dry Yeast
22.5g Sugar
1 Large Egg
1) Prepare Rice Soaker by heating water to 145 deg F then adding rice and covering. Let sit for 3-6 hours.
2) Prepare Oat Soaker by heating milk and butter to 145 deg F then adding oats and corn. Let sit for 3-6 hours.
3) Add both soakers and water from Final Dough to a blender. Using short bursts (10-20 seconds), blend soakers to a cake batter consistency. Verify temperature is no higher than 110 deg F.
4) Add chia seeds, egg, and yeast. Give 2-3 short bursts to grind seeds and mix yeast. Don't go over 110 deg F. (I finished at about 92 deg F)
5) Empty blender into a large bowl. Add remaining Final Dough ingredients and stir. Batter should be the consistency of a very heavy cake batter. (Consistency of 110-120% hydration white flour starter for the sourdough bakers)
6) Butter (or grease) a 4"x8" bread pan and coat with brown rice flour or corn meal/polenta.
7) Pour batter into bread pan, spread evenly and smooth top with a spatula
8) Put bread pan in a plastic bag and close.
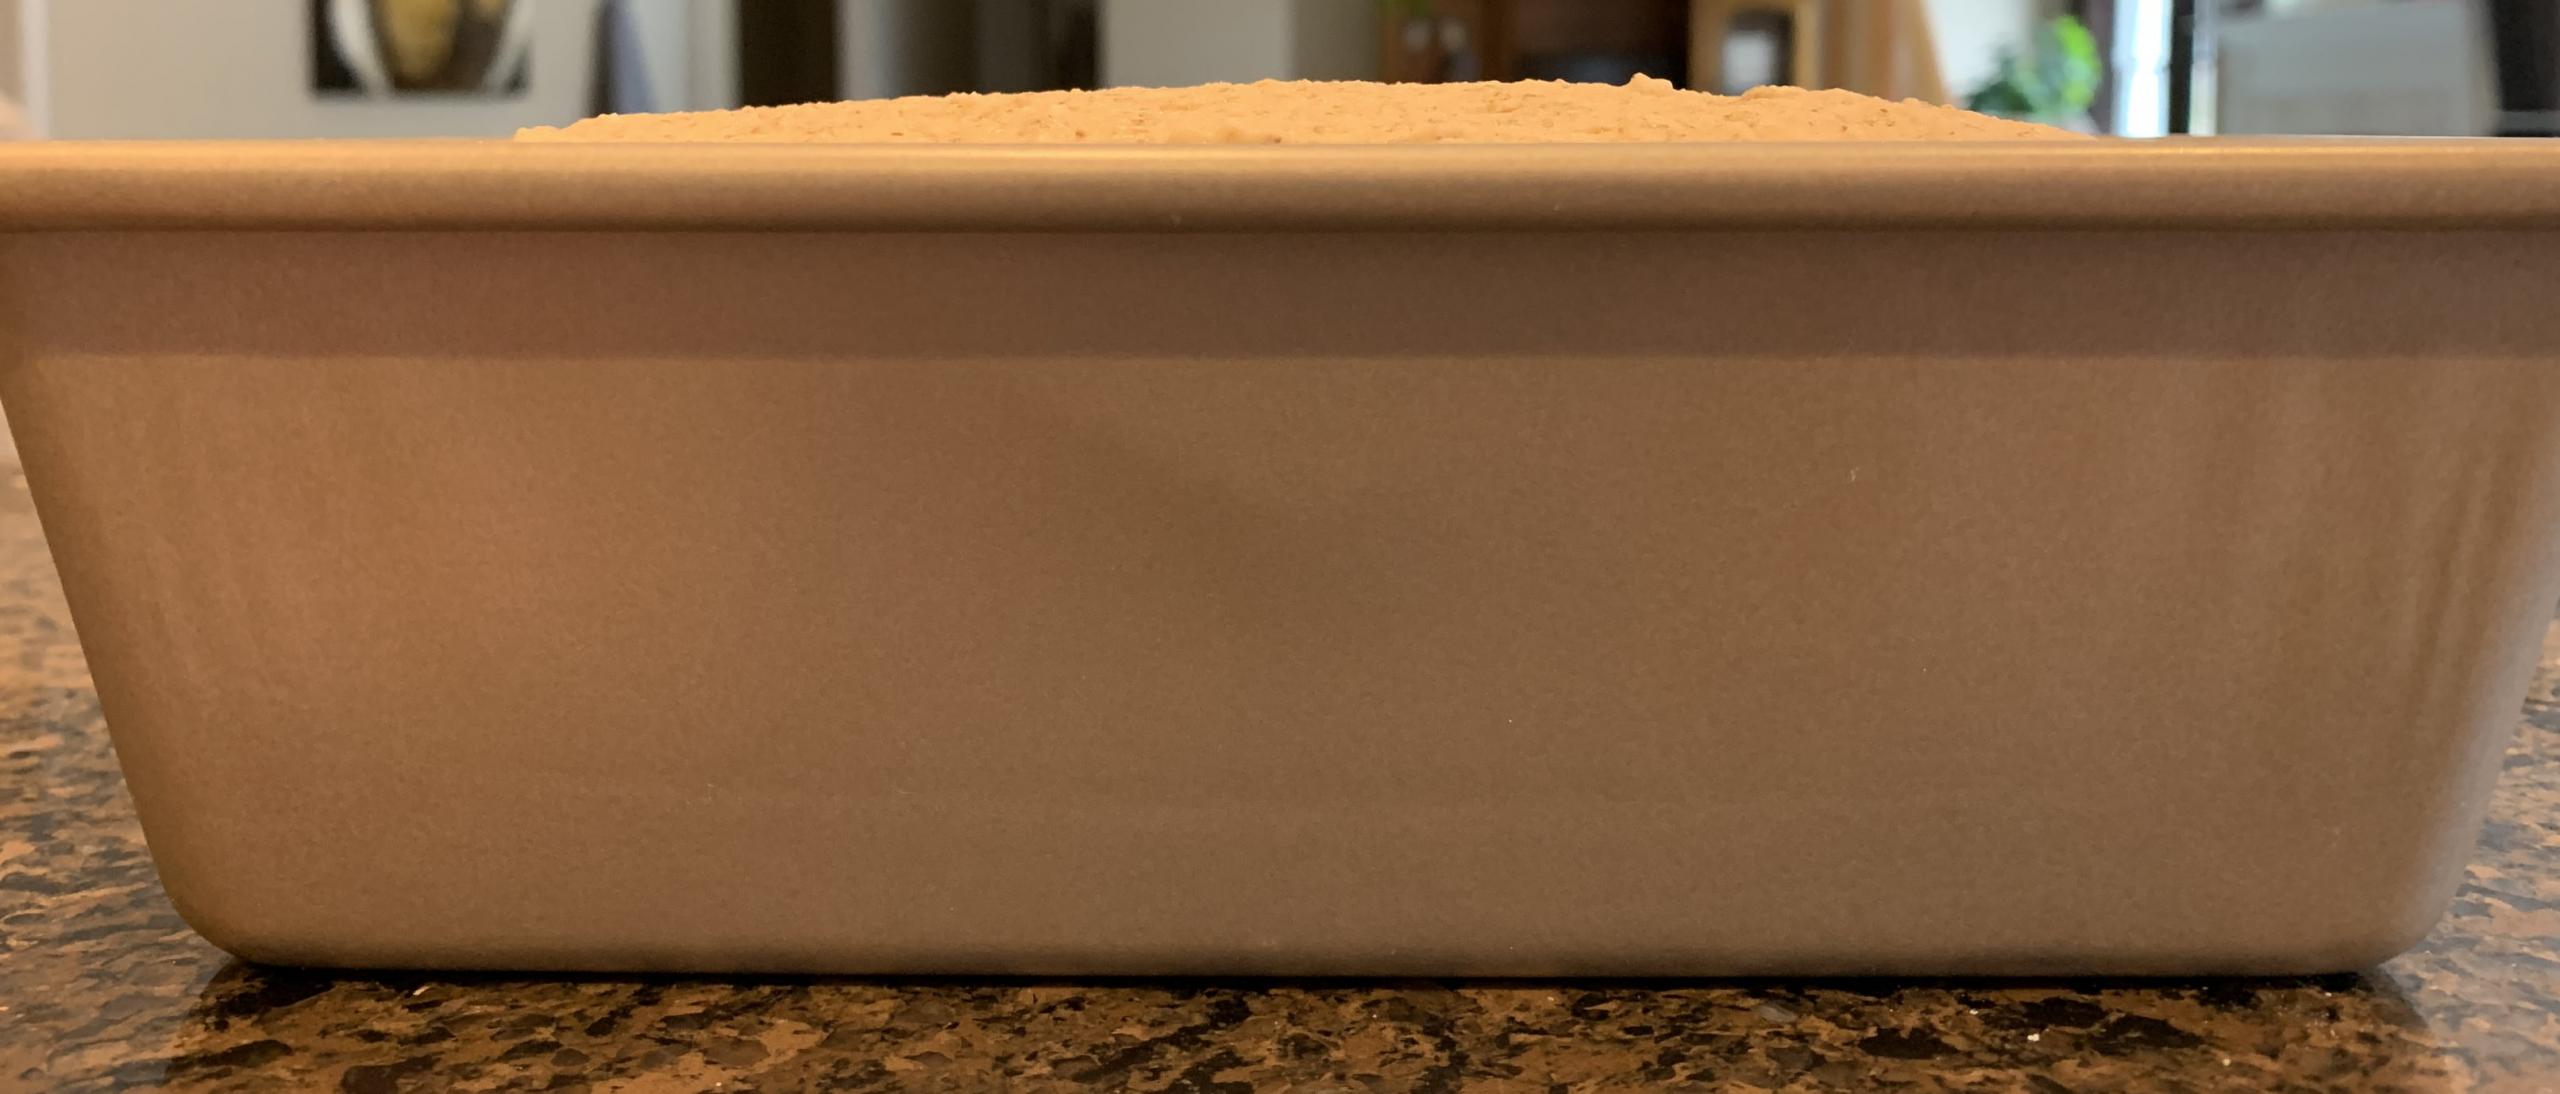
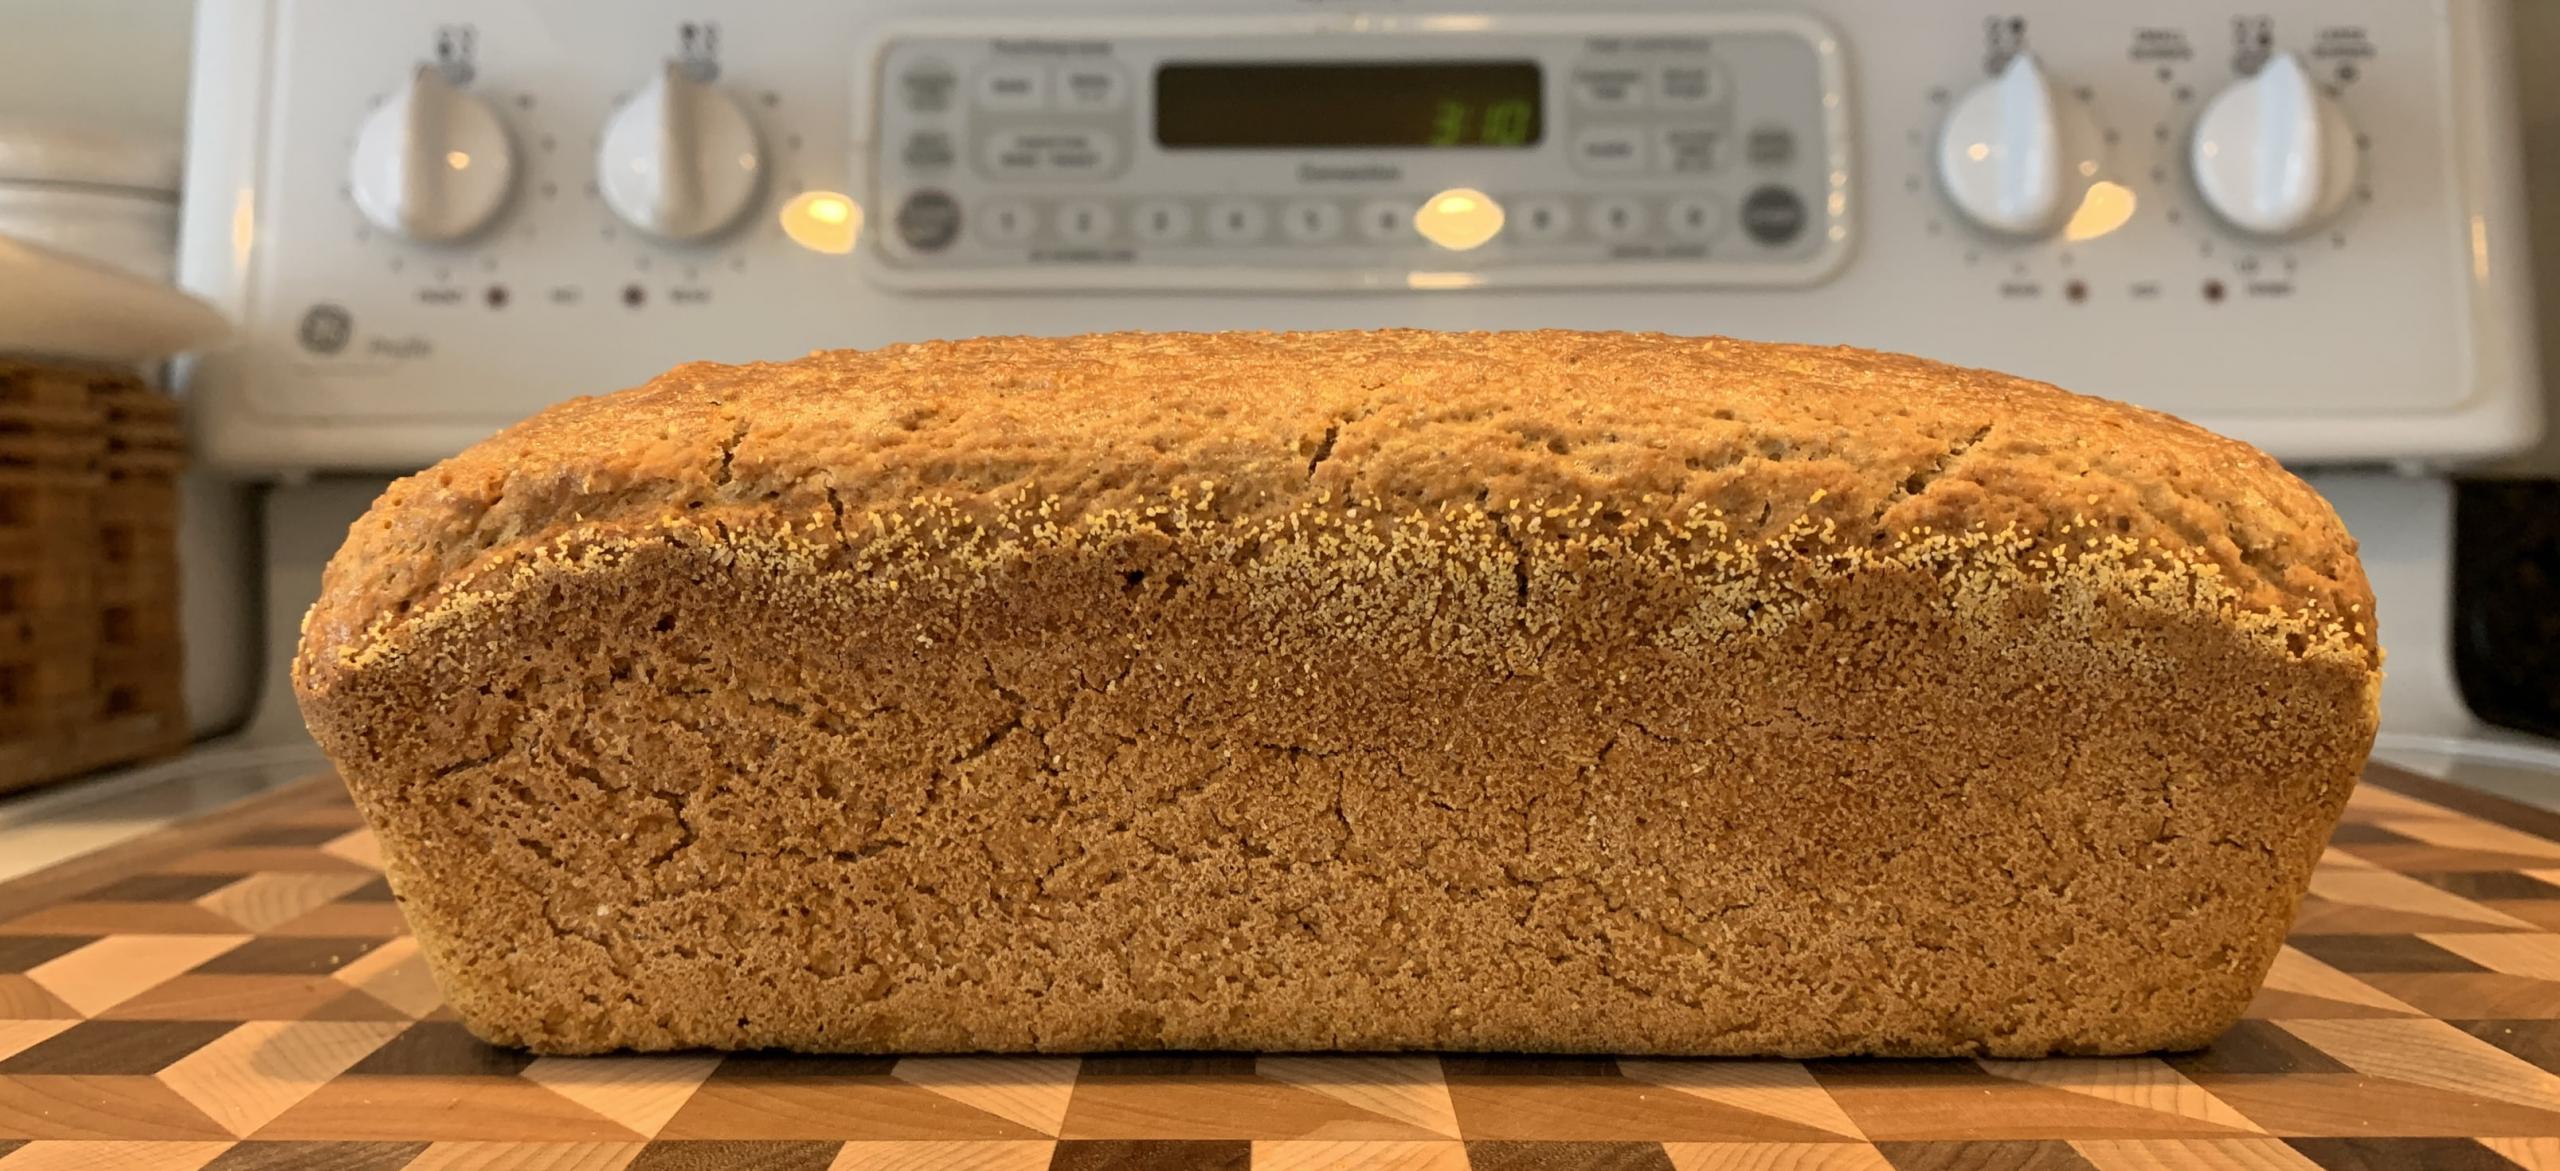
9) Let rise at 74-76 deg F until dough just crests the rim of the pan. If you push it too far, the dough surface will start to crack.
10) Bake at 350 deg F for 30 minutes with steam. Remove steam pan and bake for another 30 minutes at 350 deg F. Remove the loaf from the pan and bake directly on the rack for another 10-15 minutes. Final temp should be at least 205 deg F.
Optional: Carefully egg wash dough before baking and then again 5 minutes before bake is done.
Batter in pan and smoothed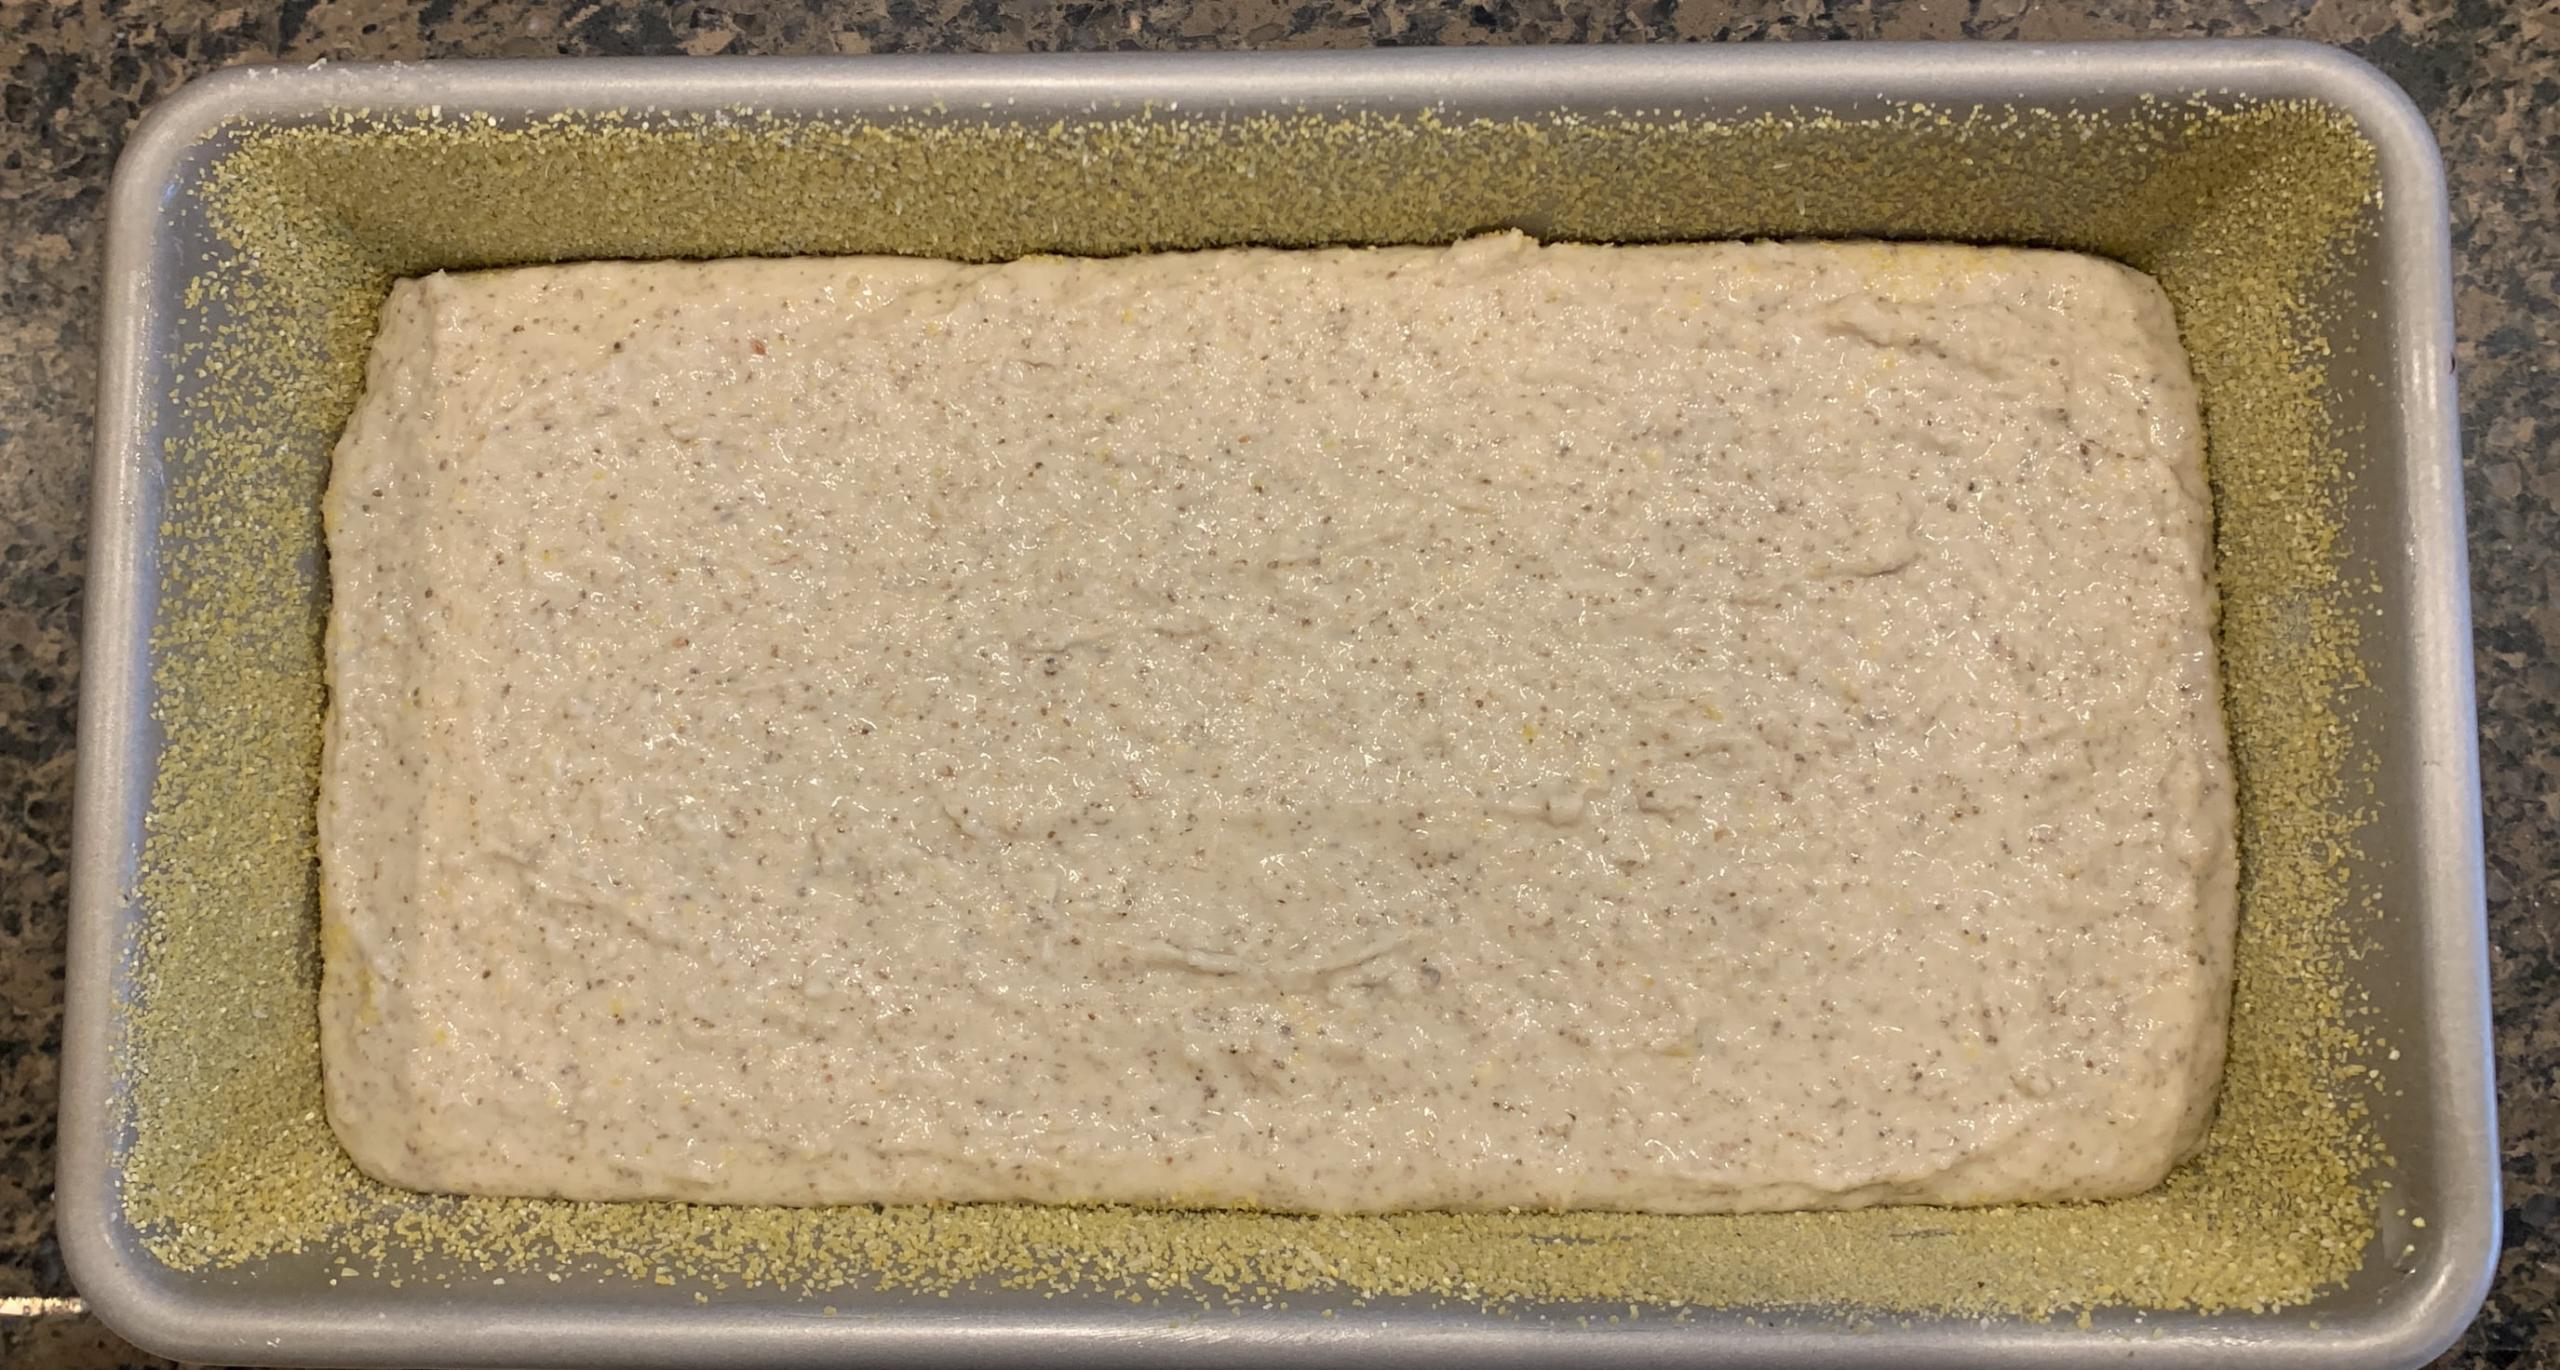
After rising... Surface starting to crack. Think I was a little thin with my batter.
Baked loaf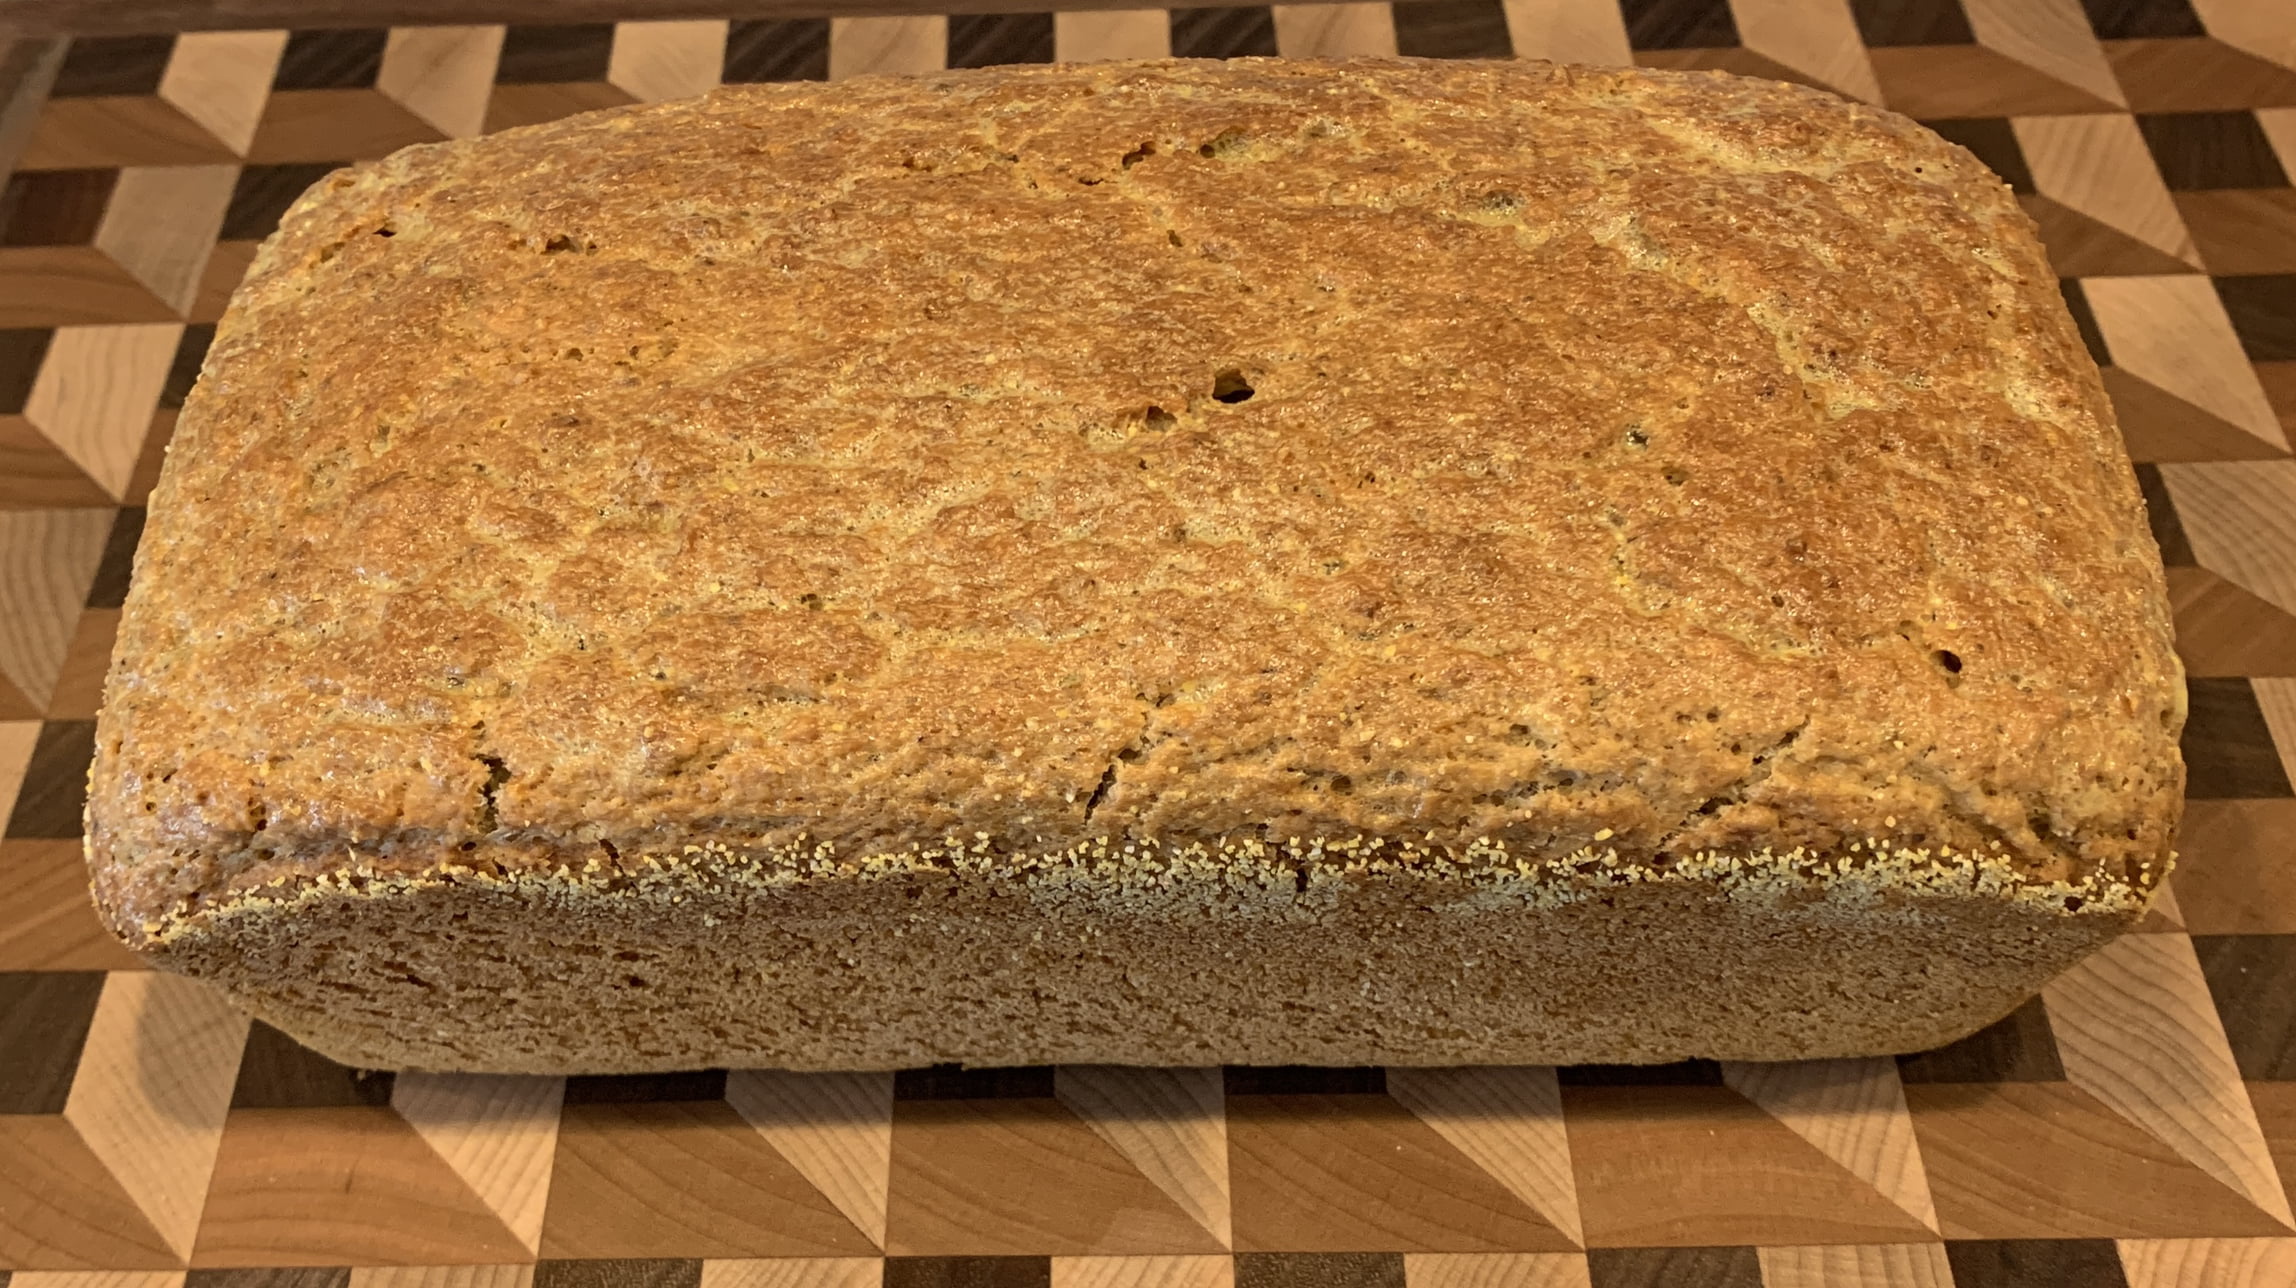
- HeiHei29er's Blog
- Log in or register to post comments
I haven't tried any gluten free bakes yet, but the flavor combination on your listed ingredients (oat, cornmeal, rice) sounds delightful! I can even imagine these being baked, too, in mini bundt tins, as almost a shortbread kind of bake (since it is an enriched dough), with some strawberries and whipped cream! I think Abe was looking for some gluten free posts a few weeks back...I'm sure he would be interested in this recipe!
Nice bake!
EDIT: Oh, jeese...never mind. I'm just now seeing your other post on the gluten free topic, LOL
LoL! I decided to give it a go and create a post. Maybe more will take interest once it's up and going. If not, oh well. I had fun making the loaf!
You could absolutely do the mini bundt pans like you described, and it does have a nice and creamy texture. In fact, we have some strawberries in the fridge. Might have to give that a try. I've made similar GF loaves, and they really do make great toast to go with jams. Thanks for the comments and ideas!
Good for you jumping in with both feet and doing a gluten free bake Troy and a great bake it appears to be, well done. Is the final product good enough that you’d bake this again and not miss gluten?
Benny
Thank you Benny. I've never had an issue with missing gluten in all of my GF bakes. You have to understand the limitations of the bread (can get crumbly when handling it making French Toast for example), but once you do, you can use it just about anywhere you use a wheat based bread. And in all honesty, I find the change in flavor profiles you can get with GF grains a nice change of pace. The breads tend to be more dense in nature but not chewy, if that makes sense. They have the weight and crumb of a whole rye, but a much creamier mouth feel.
For this particular bake, I had a slice of toast with jam this morning. Flavor was a little lacking. Still good, but not exactly where I'd like it to be. Next time, I'll ferment at a lower temp to try and build a little more flavor. Most of my previous GF bakes included a pre-ferment, so I might see if I can work that into the method as well. Either that, or up the enrichments to build flavor that way. I prefer to let the flavor of the grains come out though so will start there.
With this bake, I wanted to do something using things that everyone probably already has in the pantry. Wanted to get something where folks could dabble with a GF bread and not have to be apprehensive about buying a bunch of ingredients they'd maybe never use again.
(and it isn't but) if it was, the crumb appears to be sagging like it needed to go into the oven sooner or perhaps needed to bake longer to set crust more or evaporate more water before cooling the loaf. The top section is looser with irregular spaces. Crumb is more tightly packed heading down to the bottom crust of the loaf. The baked crumb almost appears to delicately smile from corner to corner.
"Pin holing" is apparent on the dough surface before baking which also leads me think it rose a little too long before baking, gas bubbles rising in the dough and breaking on the surface cause those "pin holes." Trapped gas is leaking out of the dough.
Many high % rye loaves benefit from narrow pans for support, the pan walls being closer together. Makes me wonder if this might help to maintain volume.
Good even color crust. Great post! And a good start to this most interesting and elusive topic.
What do you think about beating the egg for about ten minutes (into thick foam) or the egg white (until soft stiff peeks) before folding into the batter/dough?
Thanks for the input Mini! Really appreciate you taking the time to make the observations.
I’ve made maybe 10-15 GF loaves and they’ve all been batter breads. So, I don’t have a ton of experience with them and haven’t deviated from my method a whole lot.
Not all of them end up with a flat top, but more than a few have. You mention baking more…. One consistent observation for my GF loaves…. They’re heavy enough to be a boat anchor! I know the GF flours hold a lot of moisture and the crumb isn’t gummy, so I assumed the weight was just the nature of using GF flours. Maybe I need to try baking it longer….
Regarding pin-holing…. I agree 100% on that. I may have gone a little tall on the rise, but I also think my batter was just a tad too thin. There was no xanthan gum added, so it may have benefited from more egg white.
I’ve whipped the egg whites a little bit before, but I’ve never gone that long. Is that something that you use in some of your bakes? Sounds like it would be an easy step to add.
Thanks again for the observations/comments!