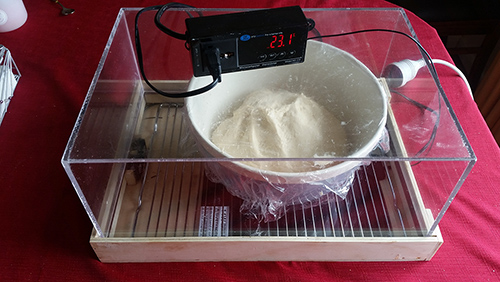
I've recently completed my home proofer. My primary aims were to create a safe, waterproof, inexpensive and functional result. I could not justify a Brod and Taylor, landed here in Australia for $250. The main advantage of a proofer to create a stable environment and bring some predictability to the proofing time.
Melbourne winters are nothing like the ones in Northern Europe or Canada, however we do get close to 0°C and for a few months in winter, the outside temperature is well below 15°C. Finding a warm and stable spot in the house at the correct temperature for proofing is not always easy.
Some time ago I had a perspex box made specifically to cover loaves of bread while rising. The box was not cheap. This proofer uses the perspex box but really any plastic box can be used.
The main components of the proofer are the following:
- Base, made from 6mm ply wood. One of the sides slide out.
- Heating pad
- Grill
- Thermometer and Thermostat
- Fans
- Cover
The plywood cost me around $12. I had the hardware store cut it for me and I glued it at home. The joints are secured with panel pins.
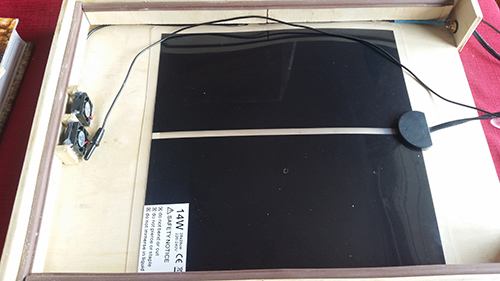
The heating pad cost about $8. It can be found in various sites (eBay) as a waterproof "reptile heating mat". I had previously purchased a 7W pad but it did not have enough power to create a stable temperature environment. The 14W pad works well. I guess, the pad should be as large as possible to fit the base of the box.
The grill is something I already had. So not sure of the cost. I use it so that I don't place the container with the dough to be proofed directly onto the heating pad.
The thermostat was sourced from ebay. There are so many to choose from. I would say around $10 would do. Mine cost a little more. A suction pad is used to secure the thermometer to the cover.
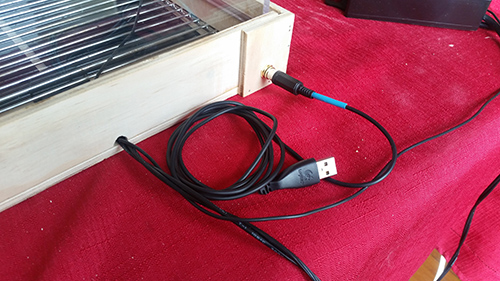
The fans are optional. I put them in but don't need to use them. I thought that air blowing over the pad would distribute the heat evenly. It does, but the heat in the box appears to be even when measuring using three sensors (one from the thermostat and 2 from a digital thermometer). They are 2 x 2.54cm (one inch if you must) 5V computer fans. The 2 fans are wired to a RCA plug (because I already had one) secured to the base. I made up a cable with a RCA male on one end and a USB plug on the other. A standard low amp (say 500mA) USB charger is used to power the fans. Its low voltage, low amp and therefore quite safe. The fans cost around a $1 each.
The cover as I said earlier is a bespoke perspex box. During summer, I use the box without the base to cover the bread loaves. It seems to quite adequately create a humid environment. You don't have to use perspex, You can use a store bought plastic box for a few dollars.
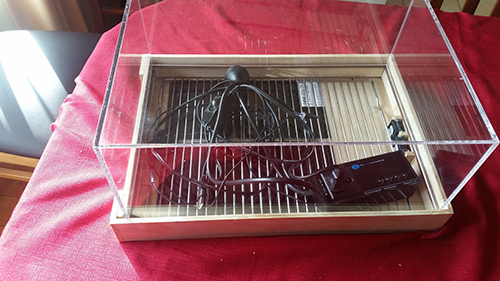
The wires can all be placed into the box for storage. The one end of the box slides out so the wires can be removed.
Nicely done.
..build a chiller to cope with those intense Melbourne summers. :)
BTW, how much did the perspex box and USB charger cost? Is the latter just an old cell phone charger?
The Perspex box was $80 made. I did get a quote for the cut pieces for about $30. The USB charger was one of the many cell phone chargers I have lying around.