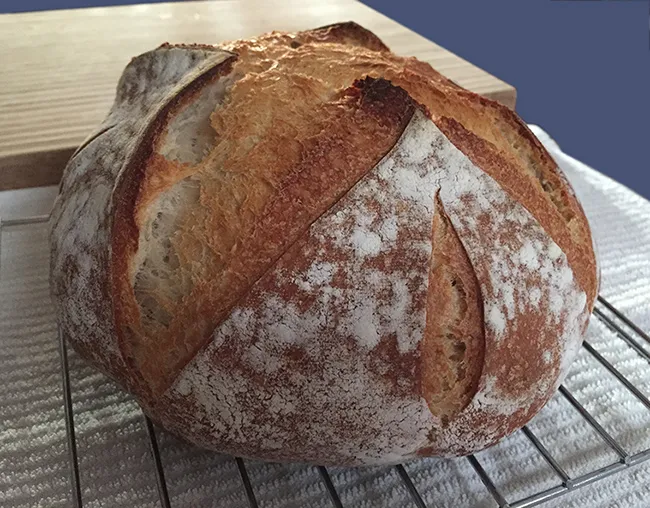
Looking at my picture, I am realizing that my boules are starting to look all the same! I am going to have to start practicing different scoring patterns for variation.
Anyways, this is my take on the 1-2-3 sourdough recipe. I had a bit of leftover stiff starter from my experiments with the SFSD from Crust and Crumb and decided to use some of it up today. So instead of using 100% starter I used the stiff starter which is approx. 58% hydration. By my calculations that puts my dough at around 65% hydration which is what I prefer. I also used a small amount of white whole wheat, a teaspoon of diastatic malt, and a tablespoon of butter.
I started this morning taking the starter out to warm up. Meanwhile I combined the flour and water and let it autolyze for 30 minutes. I then combined all the ingredients in my bread machine to knead until I got a medium window pane. I then put it in a bowl for the bulk rise on the counter for about 4 hours. I did stretch and folds at the first hour and second hour. Then I pre-shaped, let rest for 15 minutes, then did the final shape and put in the banneton. I let it sit on the counter for about and hour and then put it in the fridge for over 2 hours. Took it out again for another hour and a half and then baked it.
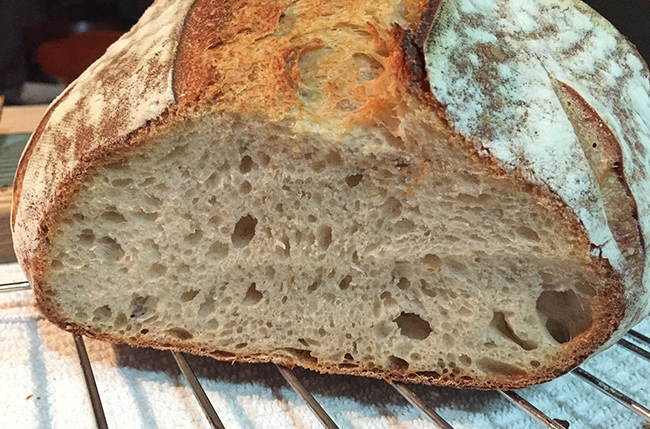
Here is the crumb shot:

I am really happy at how this turned out. I think this is the best crust I have managed so far. Thin and crispy with no tough and chewy areas. And I am happy with how the crumb turned out too.
Trying to do it in one day was a bit of a mistake. Turned out hotter today than I expected and ended up baking during the hot part of the day. Next time I will start the process a little later in the day and let the formed loaves retard in the fridge overnight so I can bake in the morning.
- KathyF's Blog
- Log in or register to post comments
This looks like a beautiful loaf. Would you be willing to post ingredient weights you used, including your modifications, temperatures and times? I have a good idea what a 123 Sourdough is, but it would help newbies like me to get the whole picture when we see a loaf and think "I'd like to be able to bake something that good".
I used 140 grams of starter (at about 58% hydration), 280 grams warm water, 400 grams all-purpose flour, 20 grams of white whole wheat flour, 11 grams salt, 1 teaspoon diastatic malt powder, 1 tablespoon butter.
Combine flours and warm water (90F). Cover and let sit on counter for 30 minutes to autolyze.
Combine all ingredients and knead just until you start to get a window pane. This only took a few minutes in my bread maker. Don't over knead. Take out, put in an oiled bowl, cover with plastic and leave on counter to bulk rise.
During the bulk rise do a couple of sets of stretch and folds. Let it rise for about 3 to 4 hours. My house was starting to get pretty warm. Around 75F?
When done with the bulk rise, take out dough, lightly pre-shape your boule, cover with plastic and let it rest for 15 minutes. Then do your final shaping and place in floured banneton. I then let it rise for about an hour. The room temperature was steadily rising and was getting close to 80F. Since I wanted to wait until it started to cool off in the evening, I put the loaf in the fridge for 2 to 3 hours. You also get the benefit of developing more flavor and the dough is easier to handle when chilled. I then took it out and set it on the counter for another hour to warm up and finish rising.
I baked it in a enameled dutch oven. Pre-heated the oven to 475F. Flipped the dough out onto parchment paper, slashed it and then, using the paper as a sling, put it into the dutch oven. Covered it and let it cook for 5 minutes at 475F and then turned it down to 450F and cooked it for 20 more minutes. Took the cover off, turned the temp down to 425F and cooked for 10 more minutes. Took the loaf out of the pan and set on the oven rack for 10 minutes. Turned off the oven, cracked the door open and left the loaf in there for 5 more minutes.
The reason for taking the loaf out of the pan is because of how I set up my dutch oven. I had found that putting the dough directly on the bottom of the pan caused it to cook too dark for my taste. So I elevate it with a foil covered steaming rack. Down side is then the bottom is now slightly undercooked. So taking it out and letting it bake on the oven rack browns it just right for me.
That's it!
Hi Kathyf,
Thanks so much for taking the time to write such a good description of the method you used. That's so helpful and I really appreciate it.
I loved the slashing pattern on this loaf, by the way, and will try it soon.
Thanks for being a star :-)))
Best wishes, Colin
And if you do try the recipe, be sure to post it. I want to see how it turns out!
Many thanks, Kathyf. I've just started a loaf from another inspiring contributor, but bookmarked this to look forward to baking next week, when I'm back from visiting friends. Thanks so much once again.
bake and great scoring Kathy...a job well done again!
Lovely!
can be the best! Doesn't get any better than that! Well done and
Happy baking
FrugalBaker, Palwithnoove, and dabrownman... thanks so much for the encouragement! I really appreciate it.
Beautiful looking loaf Kathy. Great looking crumb and must have tasted wonderful.
a wholesomely appetising looking loaf, wonderful