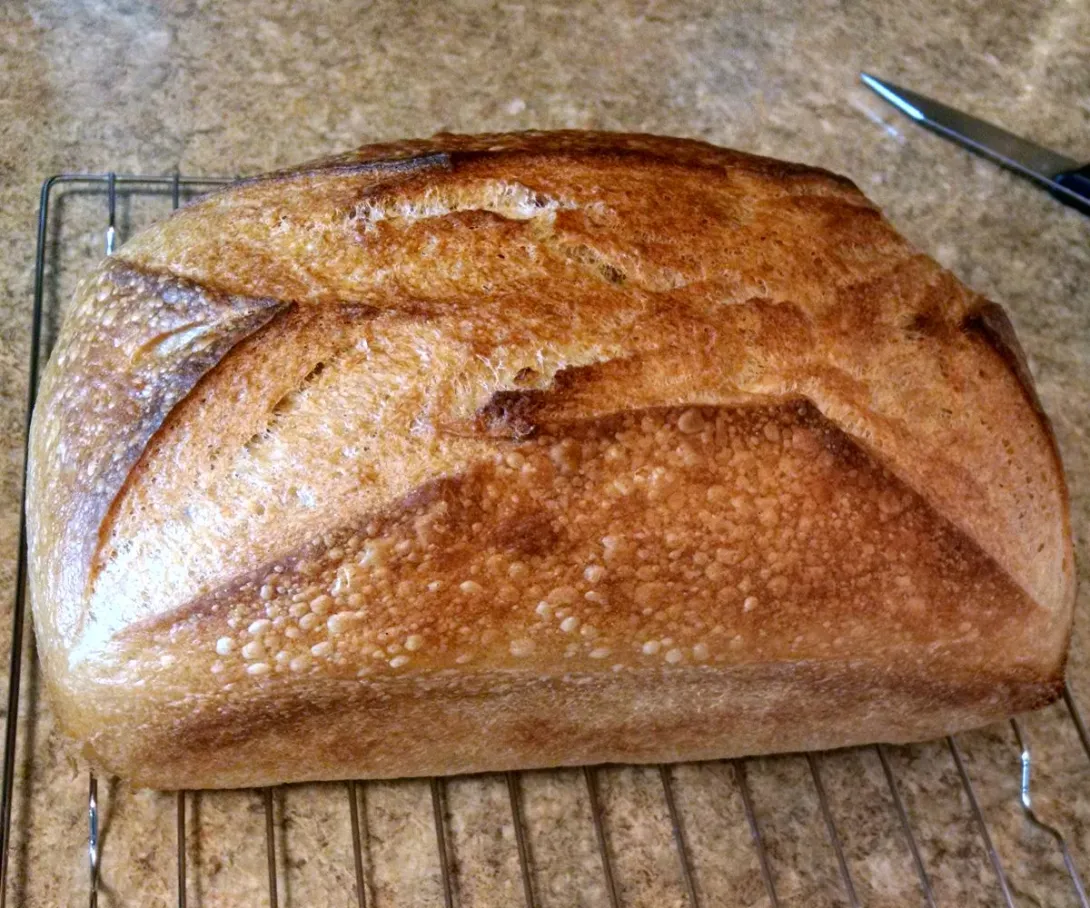
Hello! I'm new here, but I've been reading TFL for months as I learn how to make good (and fix not-as-good) sourdough. I've been tinkering with everyday wheat breads for a while, and have something that works reliably now. As an old Free Software hand, I know that the best way to get better from here is to give back to the community.
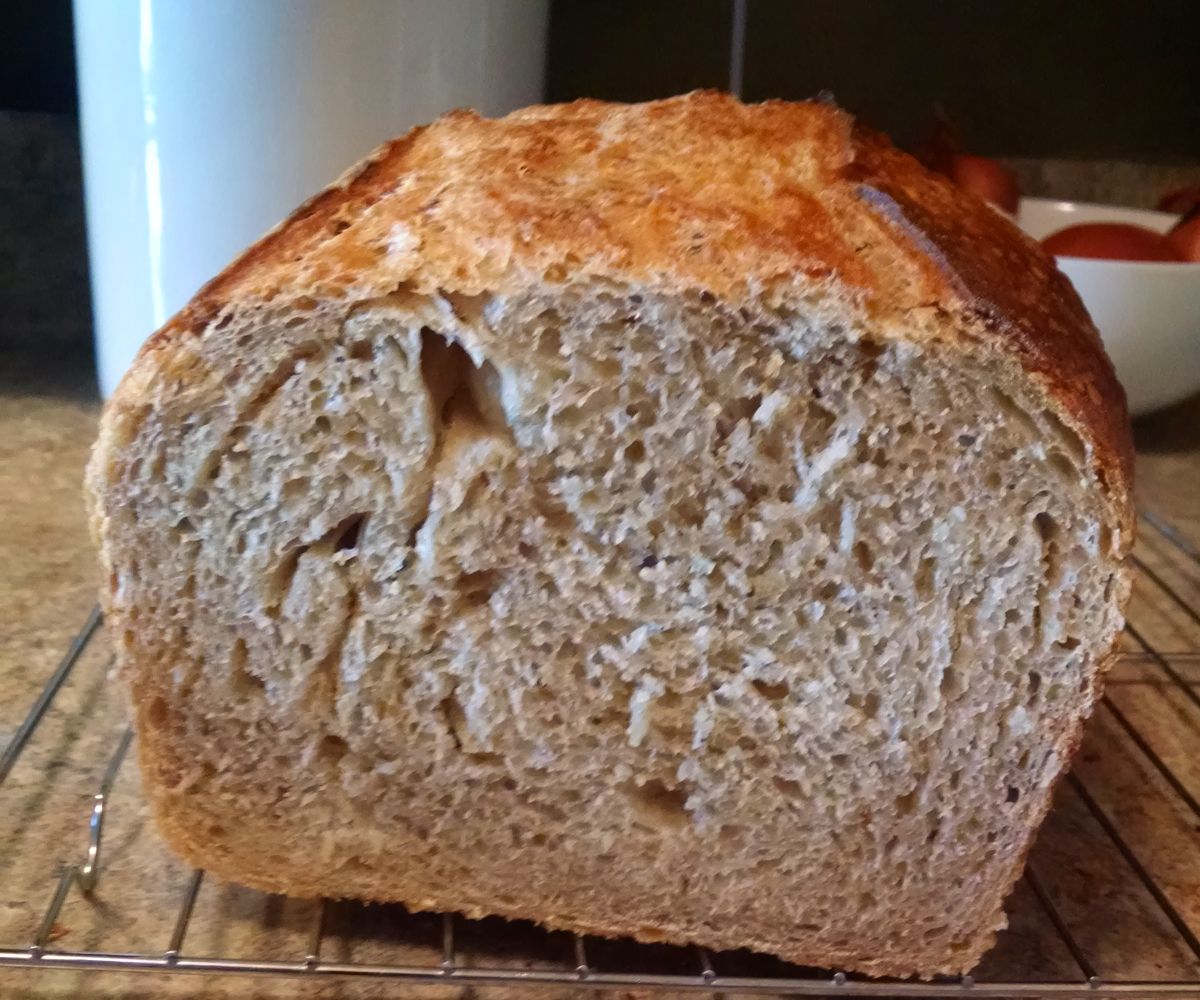
What I've got is a moderately "sour" (I think of it as more "rounded" in flavor), soft and chewy 11% whole wheat sandwich bread. It usually winds up between 66 and 68% hydration, depending on the weather and the feel of the dough. I keep trying to push that up toward 70, but I knead by hand, and my hands are used to the feel of a "sweet spot" closer to 65%. Which is basically fine by me, since I don't need big rustic holes in sandwich bread. On the other hand, I'm trying to avoid the overprocessed uniformity of what my wife calls "industrial pain" (pain industriel as opposed to pain au levain). With this recipe, I'm finally starting to get the shiny, gelatinized texture the mie is supposed to have, though it's hard to tell with such a dense crumb:

My mother culture is a 100% hydration white, fed on organic unbleached AP because that was what the wee beasties seemed to like best. I keep a big jar of it in the fridge, feed it a bit less than once a week, and refresh it a bit less than once a month. (I used to feed it with the leftovers of my active starter for baking, but with this recipe I now only make exactly as much as the recipe needs.) I like a fuller, rounder "sour" flavor, so I tend to keep a fair amount of what Forkish calls "spent fuel" in my big jar.
The baker's math is relatively simple, but I'm a process-intensive kind of guy, and I'm new at this, so I'm going to start with the whole recipe and break it down from there. The basic numbers are as follows:
49 AP flour
40 bread flour
11 whole wheat (I use white whole wheat to avoid the nutty flavor)
67.5 water
4 starter
2 salt
Now, that hasn't been perfectly true, because I sometimes need between 2–4% extra flour at the end, when I'm kneading. On the other hand, in the winter I would sometimes have extra flour left over, so it may just be a temperature and humidity issue. On the other other hand, this is all the flour in the entire recipe, including what goes on the kneading and shaping surfaces, and I don't see that accounted in many recipes, so I don't feel that bad about occasionally having more than 100% total flour in the recipe. Bread is a living thing, and YMMV.
There are two of us at home, so I make an 8x version of this recipe (by gram weight) about once or twice a week. It winds up being about 3 lbs when it goes into the oven, and loses about 5 oz while baking.
Step 1: activation
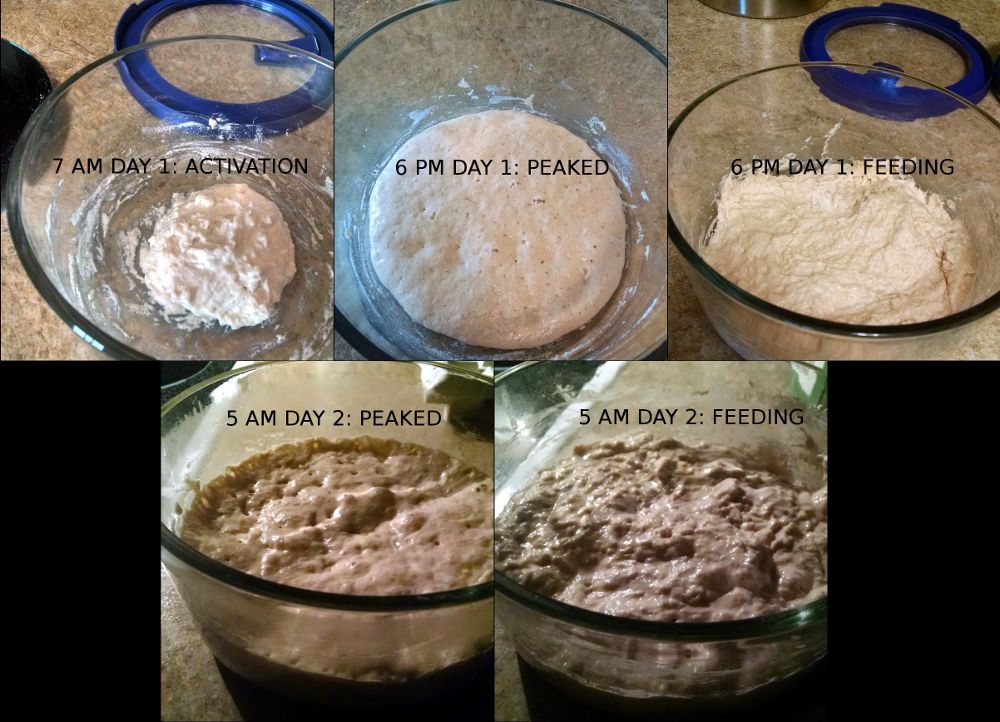
32 g starter + 20 g water + 20 g AP + 8 g whole wheat = 82% hydrationStep 2: first feeding (10–12 hours later)
… + 80 g water + 52 g AP + 40 g whole wheat = 85% hydrationStep 3: second feeding (10–12 hours later)
… + 200 g water + 160 g AP + 40 g whole wheat = 94% hydrationStep 4: building the dough (4 hours later)
… + 240 g water + 96 g AP + 256 g bread flour = 81% hydrationStep 5: kneading (after 30 mins autolyse)
… + 16 g salt + 64 g AP + 64 g bread flour = 68% hydration
The starter is at 100% hydration, but the recipe kind of boomerangs from stiff in the beginning back out to better than 90% hydration in the middle, to bread dough at the end. I think that this push toward biga texture in the early preferments might be why I've finally gotten a nicely gelatinized crumb, though the boost that the whole wheat flour gives to fermentation also seems to have some effect. (The whole wheat is also spread out across the preferments in order to make sure it gets metabolized into useful and more intestinally-friendly forms.)
I say "preferments," plural, because Reinhart's Crust and Crumb encouraged me to turn the activation of my starter into a building process. Since I keep my refrigerated starter reasonably active and happy, it doesn't take all day just to get it going at room temperature. So now I only spoon out a small portion, feed it, give it 10-12 hours, then feed it again and give it another 10-12 hours, keeping the flour-to-water ratio reasonably stiff and letting it peak both times. So that's day 1, steps 1 and 2. This is kind of a "Clean Plate Club" strategy; every time the culture maxes out its use of what I gave it, I give it more. The following morning it gets another feeding (step 3), much looser in texture, followed by 4 hours of what I officially call "prefermentation."

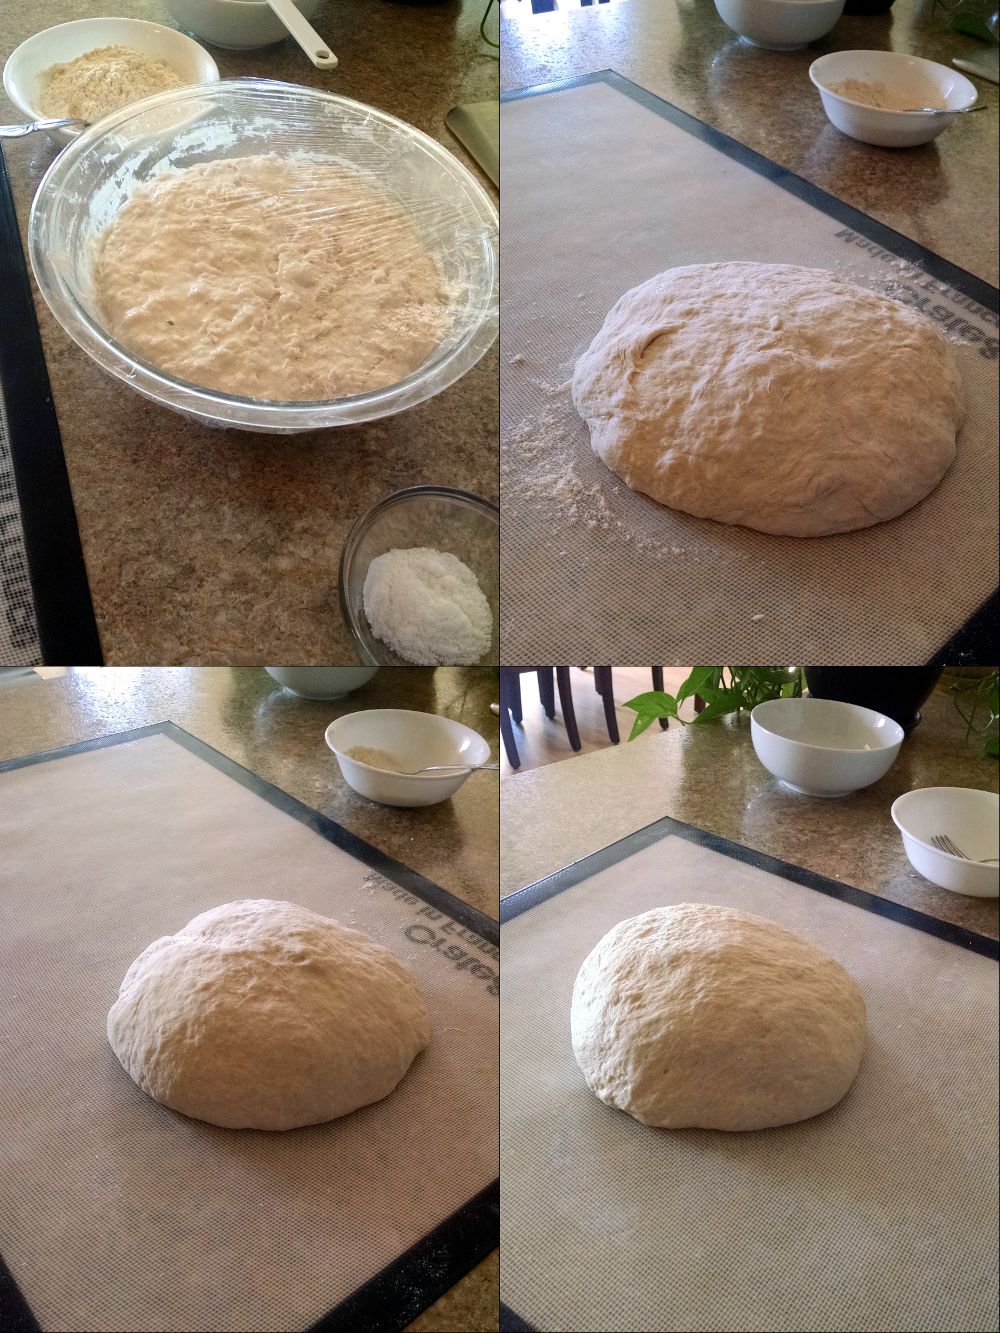
Step 4 is where I shift from AP-with-a-little-whole-wheat to bread-flour-with-a-little-AP, and start building the dough. After incorporating that flour and water, I generally let the ragged mass autolyse for half an hour, sometimes more, before adding the salt and turning it out onto my floured silpat for kneading (step 5). The rest of the flour (plus maybe 2–4% extra depending on humidity) gets incorporated gradually through kneading. I do three 5-minute kneads, with 10-minute rests in between, and every time I return to the dough it's clear the rest has been beneficial.

Each rest is like another little autolyse, which is good since more flour keeps going in. (Besides, it also gives time to do the washing up!) At the end, the mass goes into a large oiled bowl (the biggest I have), and gets about 4 hours bulk fermentation at room temperature. I have to punch it down in this warm weather, because after 2 hours it has usually filled the bowl, so I've taken to doing stretch-and-fold in the bowl and inverting the mass each time, rather than preshaping after fermentation is done.
Since the stretch-and-fold in the bowl has given me a relatively well-shaped mass already, I just turn the mass out onto my silpat for final shaping, and pop it in my buttered 9x5 loaf pan. (It'll do a freeform loaf just fine, whether boule or batard, but for even slices the loaf pan is better—and the buttery crust is delicious!) Since I have two loaf pans, I just invert the clean one over the top to keep the moisture in and give room to rise. There's no way in this weather for me to get a properly-proofed loaf at room temperature, so this contraption goes into the fridge for a few hours before slashing and spritzing the loaf for baking.
The crust I've managed to get right basically from day 1, with my 12" cast iron pan on the bottom rack, the oven at 430 dF, and a combination of spritzing the loaf and pouring a cup of hot water into the pan for steam. It could go darker, at a higher temperature, but I'm content with the dark amber color I'm getting, and about 45 minutes bake time.
- eleutheros's Blog
- Log in or register to post comments
The crust looks great! Thanks for posting the recipe. I am going to have to try it. Your bread looks yummy!
If you do, please let me know how it turns out! Your boules have great shape, crust, and crumb texture. Different handling, I think. I'm still easing myself away from a rather "muscular" kneading style toward something that can allow more openness.
You might try a 1.2.3 loaf and see which one you kike best. This would get you to 71.4 % but might improve the openness, lightness and moistness of the crumb without getting the big holes. Well done and happy baking
The 1.2.3 recipe looks remarkably like where I started my journey. A simple recipe. But then I have to activate enough cold starter, and so I started writing that into the recipe. And then I decided I wanted more acid production, so I went drier than 100%—though I haven't yet committed to changing my refrigerated starter from poolish to anything more solid. Fiddlier and fiddlier! (Even though I know more acid production isn't going to happen right now, in a house that can't get below 75 degrees, unless I set up a cooler for rest and fermentation stages. Much easier in winter!)
I have been thinking that I basically need to follow a recipe designed to make open, higher-hydration bread and accept what it feels like as data. The problem really is me; I can't seem to ease my way into dealing with sticky dough as sticky dough instead of as a problem. Just have to jump into the pool!