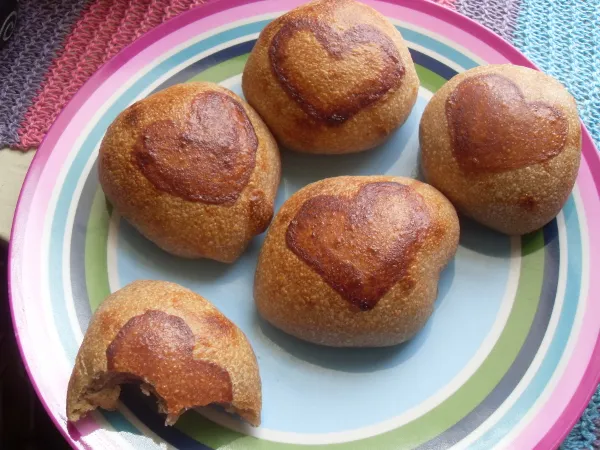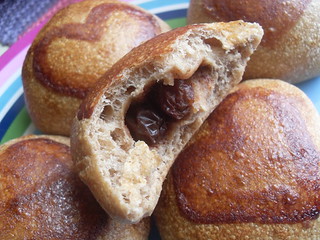
So I wanted to make cinnamon rolls. And I wanted to make sourdough dinner rolls. And I wanted to learn to paint bread. And I love baking, but I can't do it every day. Then inspiration hit, and I did it all at once. These have sugar in the filling, but just a touch and they aren't so sweet that I would call them a dessert. The raisins were soaked, so they are soft and yummy.
I used the recipe from Peter Reinhart's Whole Grain Breads for the transitional cinnamon raisin bread (fantabulous book). I used olive oil for the fat, whole milk in the bread flour sourdough biga and water from soaking the raisins in the whole wheat soaker (saved some water to keep soaking the raisins in), and brown sugar for the sweetener. I used KA flours for whole wheat and bread flour.
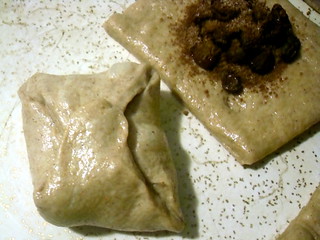
Now, I'm sure there's a better way. Or with experience my rolls will look more even and rounded or somesuch, but I don't seem to have on hand (or it's lost in the muddle) directions for making a baked filled roll. I have an Asian dumpling book, I have directions for jelly-roll style filled breads, but I had to wing it here. So, feel free to critique the technique. After the first rise, I gently rolled the dough to about a quarter of an inch thick. I used a pizza cutter to divide the dough into fairly equal pieces (um, kind of. Pretty much. Better than a three year old would have done, anyway).
I dropped soaked raisins into the middle of each piece, then sprinkled with a brown sugar/cinnamon mixture. Then I brought up the corners and pinched them together and pinched the seams shut. I picked up the rolls and gently rounded them somewhat in my hand. The process reminded me of making steamed filled dumplings, and a little too late I realized some of the shaping techniques used with that would also make something pretty neat (perhaps next time). Then I placed them seam side down to rise 45 minutes to an hour.
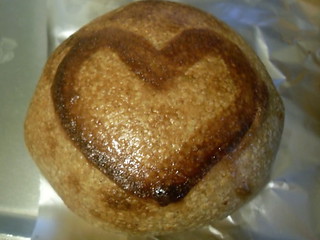
I glazed with a whole egg and a little milk whisked in, then mixed leftover glaze into some Ovaltine powder to make a paste (no cocoa or dehydrated coffee on hand) while the rolls baked. I baked with the clear glaze on, just until they were a little golden, then painted them with Ovaltine and put them back in the oven until they were done baking. Five minutes with steam while glazed, five minutes (no steam) after the painting. I'd say they were baked at 325°F after preheating at 400°F, but gremlins live in my oven and it's probably somewhere around twenty five degrees more than that, give or take.
They look like they were painted by an amateur, and that is entirely appropriate. They taste like they were made by an amateur, but one who has been passionately studying bread for a couple of years and totally can make a great tasting roll. The texture is good, but I wouldn't mind a little bit more thickness to the crumb, probably more experience shaping this kind of thing will work that out.
- saradippity's Blog
- Log in or register to post comments


Those look fantastic. What a great idea.
Thanks for sharing.
Ian
very much. I can imagine all kinds of interesting buns made this way.
Well done and happy baking
Hi,
What lovely painting on these rolls - very cute!
Ciril Hitz, in his book Baking Artisan Pastries and Breads, shows a technique for filling, sealing and shaping round rolls...here is the link (scroll to page 103)...in case this may be of interest to you.
Happy baking,
:^) breadsong