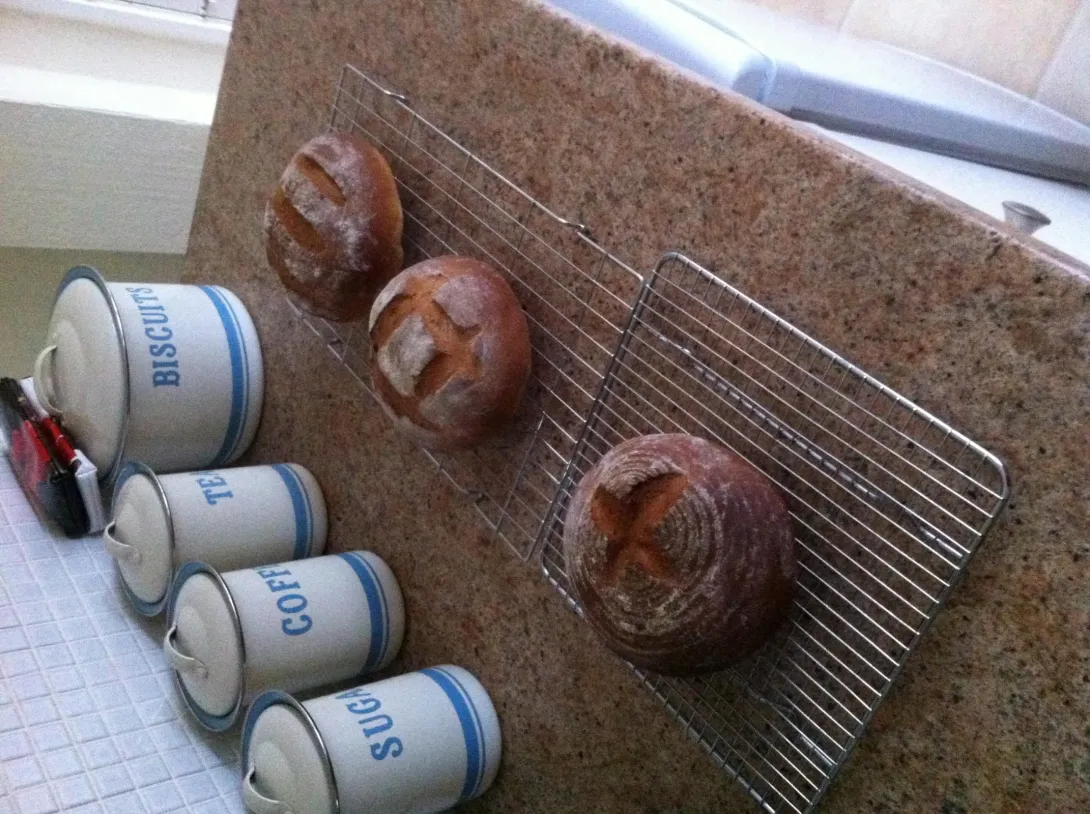
I've been playing about with my enriched direct dough formula. I reduced the enrichment and the result was a lighter, springier texture to the crumb whilst maintaining a good crust and flavour. I wish I could post a picture but I don't know how to post more than 1 on a post. I would go as far as to say the flavour was slightly improved by the reduced enrichment. I think next time I will reduce the butter & sugar a little more. I also want to try not just finishing them off on the shelf to crust up the bottom but finish the baking upside down for a crustier bottom to the loaf and see which one works best. I'm aiming for the best texture with the fuller flavour. This is the 5th bake I've done since rediscovering my passion for bread making again. I love the feel of the dough and the excitement and anticipation between each stage of making bread. Overall a very successful bake and I managed to get a loaf for the freezer. I am one very happy chappy with the results. Especially with my Banneton. I love the lines on the finished boule. With a bit more practice I should get an even nicer looking loaf. And with the other 2 on order all my loaves will soon all have the 'banneton look'. My baking leaves a lot to be desired with a lot of room for improvement but I'm hoping I will with practice get even better than I was when I baked almost everyday and my loaves look as good as the others posted on this site (Gotta aim high). My scoring still needs work. It's messy. I have ordered a lame to see if having the proper tool helps. But I think it's a confidence thing. Iron hand in a velvet glove as they say. I just need practice. Practice is a good excuse to bake. I plan on giving my starter 'Susie' a try soon with my first adventure in to sourdough. I have previously when I baked bread all the time dabbled in sourdough but never much more and this time I want to really see where the dough leads me. Cheerio for now & Happy Baking Krisps I'm not sure why the picture has uploaded upside down?!
- yeasty-loaf's Blog
- Log in or register to post comments
These look wonderful! I would to have a slice. I can not wait to see the crumb.
Warm regards,
Casey
Hi Casey,
Thank you, it's great getting feedback on my baking. The only way to improve. There is a picture of the crumb under the photo forum. I didn't know how to add it to my blog entry.
Kindest regards
Kris
A suggestion. If you want to get a crustier bottom try using a preheated baking stone in your oven. With the baking stone you can finish your loaves, during the final minutes of the baking cycle, directly on the stone and that should solve your problem.
Howard
Hi Howard,
thanks for your kind comment and for the tip regarding a baking stone.
Ive heard you can leave them in the bottom if a conventional home gas oven and then use them when you need. I will have to look in to getting one as I do like a crust all the way round.
I understand that although not ideal if you can't get a baking stone a pizza stone can be used as an alternative?
Kindest regards,
Kris
Kris,
What I did was purchase 2 large square pizza/baking stones. Then measured the width of the stone (14.5 inches), then measured the difference between where the full size stone ended and the edge of the oven rack (8 inches). I took one of the stones to Home Depot where they have a water saw for cutting ceramic tile. I think they charged me $1.00. I had them cut my second stone to 8 inches width. I placed the cut stone beside the full stone and it covers the entire baking rack. I leave my stones on the oven rack all the time. As you can see in the photo I also keep a cast iron skillet filled with lava rocks for creating steam during the first ten minutes of the baking cycle. Anyway, take a look at the photo of the open oven door in this link that I recently posted and you will see the stone and the skillet.
http://www.thefreshloaf.com/node/35341/dutch-oven-baking-atta-durum-flour-and-ka-bread-flour
Best wishes,
Howard
Kris,
My stone(s) are 1/2 inch thick. They really deflect the heat from the heating element in the bottom of the oven, spreading the heat evenly over the stone, thus onto whatever is sitting on the stone.
Howard
Hi Kris. Pizza stone works very well. Just heat it in the oven for about 30minutes before you bake and put your loaf directly on the stone. You can use baking paper to protect the stone from soil if you want... that also works. All my early loaves were done that way but then I started messing with higher hydration - now I'm into my pots!!!!! If you need help on the photos go to my blog and scroll through till you find comments from Janet Cook. I also could not figure out how to do it and I always considered myself reasonably computer literate! Once you know how - it's easy!
Thank you so much Maureen you have been a fantastic help. I really appreciate it. No more upside down photos for me.
regards
Kris