I still find it a funny experience to bake and then display small snippets of my life. Over the past fortnight I have perhaps pondered too deeply on this and my relationship with baking and bread … driven poor Nat to distraction I am sure.
So what do I want my bread to be like?
This question only found its way to me at the end of a long week. A long week with too much time spent looking at what other bakers/bakeries were doing. A week with too much time spent on other people’s lives and not my own. A week with too much time spent on wondering what I could possibly bake for the blog … and of course this is an endless ever-growing list.
[url=http://www.flickr.com/photos/67856223@N06/6901578189/]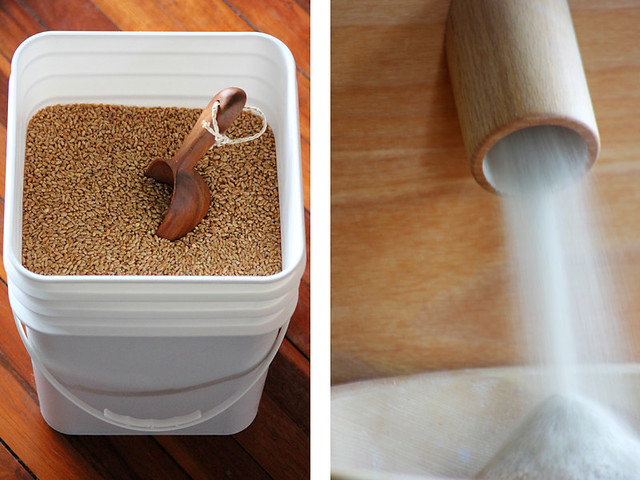 [/url]
[url=http://www.flickr.com/photos/67856223@N06/6901525171/]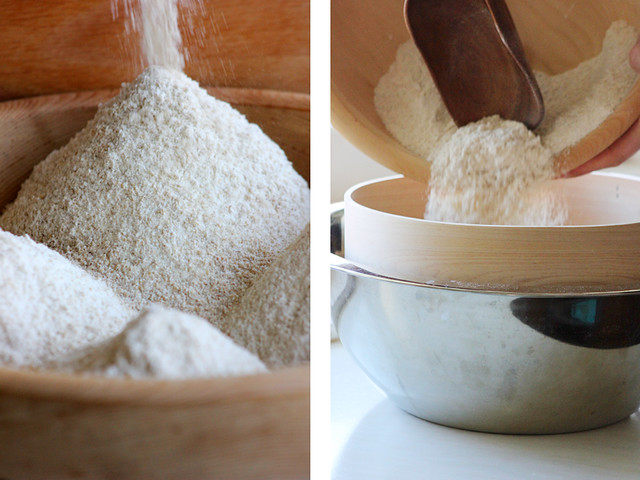 [/url]
For me, this seems to be the wrong way to go about it. Better to bake for my life and show the results, whether they are same and mundane or new and exciting. Even the same and mundane is never really the same and can be quite a challenge as we all know.
As the week finally came to an end, everything fell into place for a Saturday bake. I would bake and deliver my favourite bread, the Country Bread with two Starters to a small group of friends. This gave me a purpose, a timeline to stick to and just the right amount of pressure. And with any luck we would have a loaf left over for us to enjoy on a picnic the following day.
[url=http://www.flickr.com/photos/67856223@N06/6901525679/]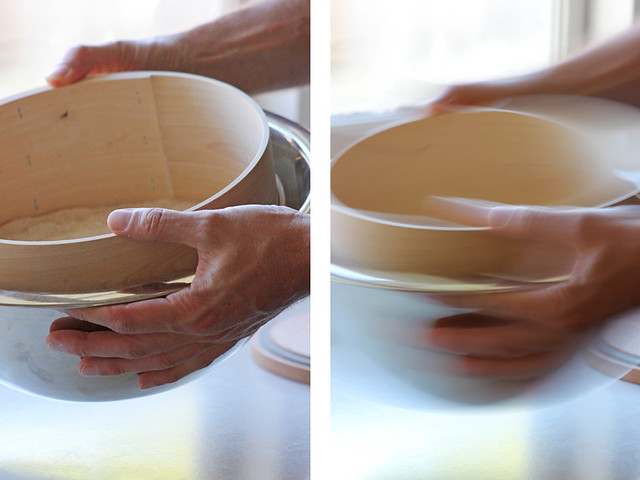 [/url]
[url=http://www.flickr.com/photos/67856223@N06/6901526745/]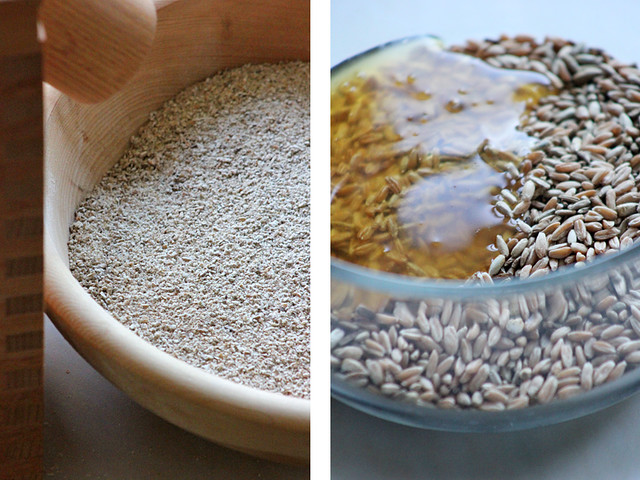 [/url]
Along with the Country Bread I wanted to bake a 100% Rye Vollkornbrot with a meal so coarse that with every two grains into the mill I wanted three pieces out. This meant an afternoon of milling and preparation the day before. I took my time and approached it all a little differently. The wheat was milled finely and sifted once catching approx 17% of its weight with the caught material set aside for dusting peels and baskets.
The rye grains went through the mill with the stones set a wide distance apart which produced lovely cracked grains and also a proportion of fine flour. Throughout the milling process I had to manage the mill so the stones had time to cool between passes. The desem starter was then expanded directly from the fridge and left outside in the cool night air. The rye sour was built for both breads using very coarsely milled meal … this would be an interesting inclusion to the Country Bread formula.
The next morning I woke early to beat the heat and keep to the timeline. As the Country Bread autolysed the vollkornbrot was mixed and mixed and mixed. With a few minutes to spare I sat quietly as the oven preheated and sipped a cup of tea in apricot light amidst the chatter of morning birds. Two hours later the Vollkornbrot was in the oven as the Country Bread bulk fermented and I spent a morning making french toast for the family.
[url=http://www.flickr.com/photos/67856223@N06/6901527329/]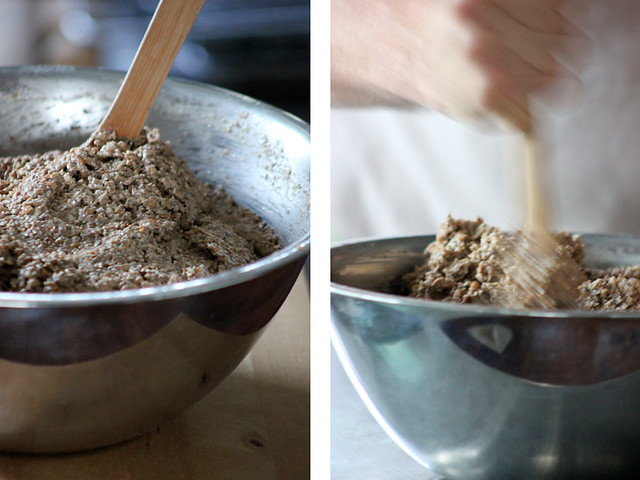 [/url]
[url=http://www.flickr.com/photos/67856223@N06/6901527777/]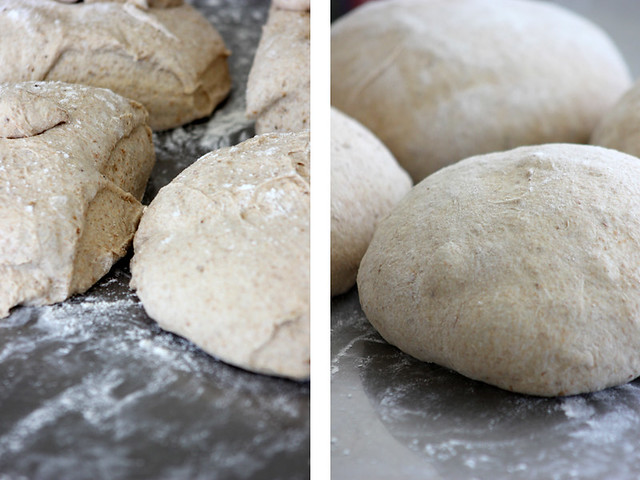 [/url]
[url=http://www.flickr.com/photos/67856223@N06/6901528215/]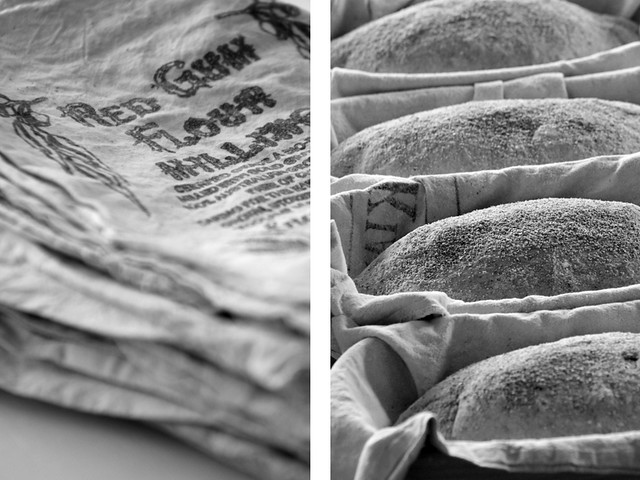 [/url]
The Vollkornbrot was removed from the oven in time for me to boost up the heat in preparation for the two loads of Country Breads. A warm day greatly assisted their final proofing with fridge doing the opposite for one of the batches as they waited for the oven. The warm loaves were soon bundled into a basket for an afternoon of deliveries and errands in a glorious sunny day. Perfect!
The day after I finally had the chance to slice into and taste both of the breads. The Country Bread was brought to a family picnic by the water where it was topped with mashed banana … a treat for kids and adults alike! So many childhood memories tied up in that flavour combination. The translucent crumb was softer than I remember from past bakes which was most likely from the different sifting method used and possibly the cracked rye used in the starter. The flavour was mild and fresh and even with the rye starter there was very little hint of sour. … plus it has my favourite coloured crust!
[url=http://www.flickr.com/photos/67856223@N06/6901528753/]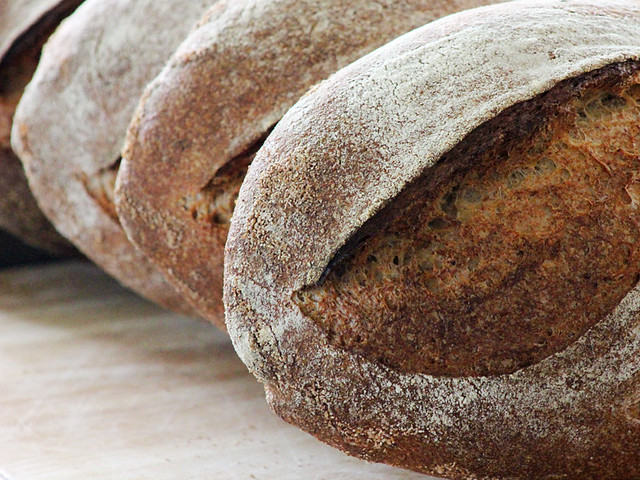 [/url]
[url=http://www.flickr.com/photos/67856223@N06/6901529353/]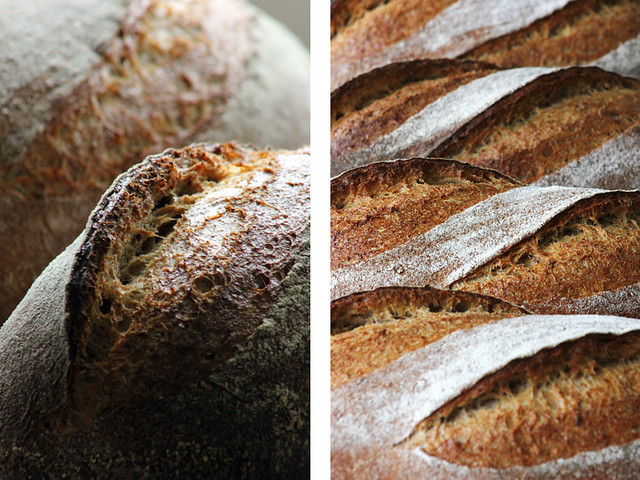 [/url]
[url=http://www.flickr.com/photos/67856223@N06/6901530117/]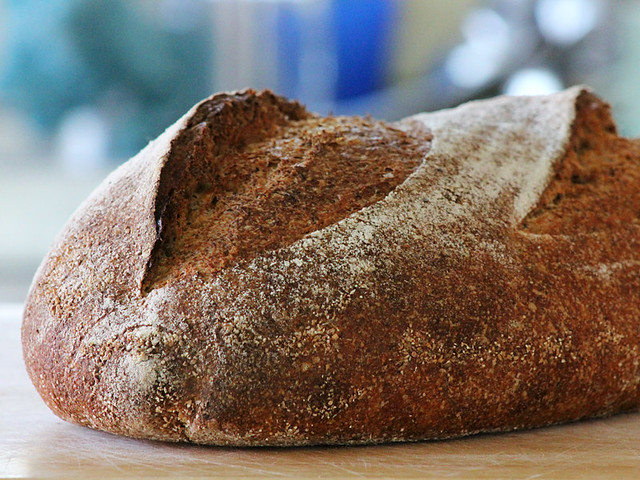 [/url]
[url=http://www.flickr.com/photos/67856223@N06/6901530805/]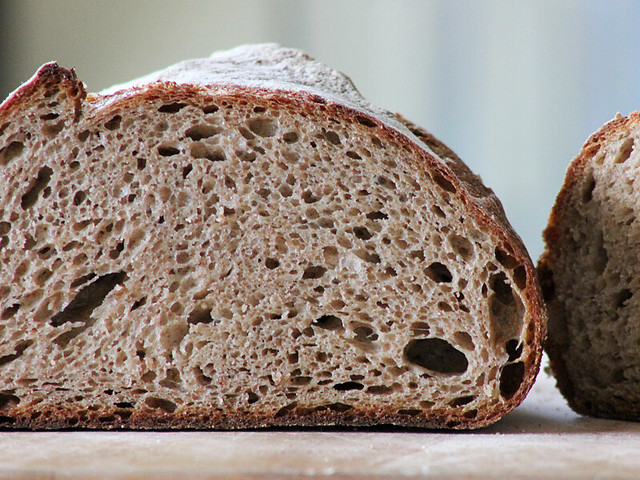 [/url]
[url=http://www.flickr.com/photos/67856223@N06/6901531511/]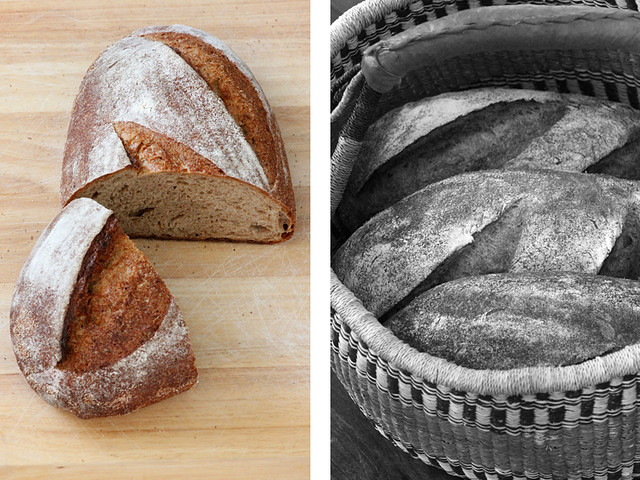 [/url]
[url=http://www.flickr.com/photos/67856223@N06/6901532165/] [/url]
I had to wait for breakfast the next day before slicing into the Vollkornbrot. I think the crumb is still setting but it held together well for thin slicing. The flavour is smooth and deep with a creamy texture. The grains are apparent but not chewy or uncomfortable. I would love to bake this even longer next time and perhaps ferment the sour a little longer … I am just a little cautious knowing how fast the fresh milled grains seem to ferment.
Vollkornbrot
Overview | Weight | % of total flour |
Total flour/grain | 915g | 100% |
Total water | 730g | 80% |
Prefermented flour | 320g | 35% |
Desired dough temperature 24°C |
|
|
|
|
|
1. Rye sour – 12 hrs 24°C |
|
|
Starter (Not used in final dough) | 32g | 3% |
Coarsely milled cracked rye | 320g | 35% |
Water | 320g | 35% |
Total | 640g |
|
|
|
|
2. Soaker |
|
|
Coarsely milled cracked rye | 100g | 11% |
Altus | 40g | 4% |
Water | 200g | 22% |
Salt | 14g | 1.5% |
Total | 354g |
|
|
|
|
3. Soaked grains |
|
|
Ryegrain | 70g | 8% |
Spelt grain | 70g | 8% |
Honey | 2 tbsp |
|
Boiling Water | 272g | 30% |
|
|
|
Final paste @ 24°C |
|
|
Sour (1.) | 640g | 70% |
Soaker (2.) | 354g | 39% |
Soaked grains drained (3.) | 160g (approx) | 17% |
Coarsely milled cracked rye | 322g | 35% |
Water | 210g | 23% |
Total | 1680g |
|
Method
- 5:30pm the day before prepare the rye sour (1.) soaker (2.) and soaked grains (3.)
- 5:30 am the following day. Drain soaked grains and combine with rye sour, soaker and remaining cracked grains and water.
- Mix thoroughly with a wooden spoon for 20-30 minutes (basically stir/mix until tired. Rest then begin stirring again)
- Shape and place into greased tin (mine are 8 x 4 x 4 pullman) seam side down.
- I proved it for one hour before docking, covering with lid and placing into oven preheated to 270°C on a baking stone. I immediately dropped the temperature to 200°C for one hour. I then reduced the temperature to 150°C and baked a further hour before removing from the oven.
[url=http://www.flickr.com/photos/67856223@N06/6901612843/]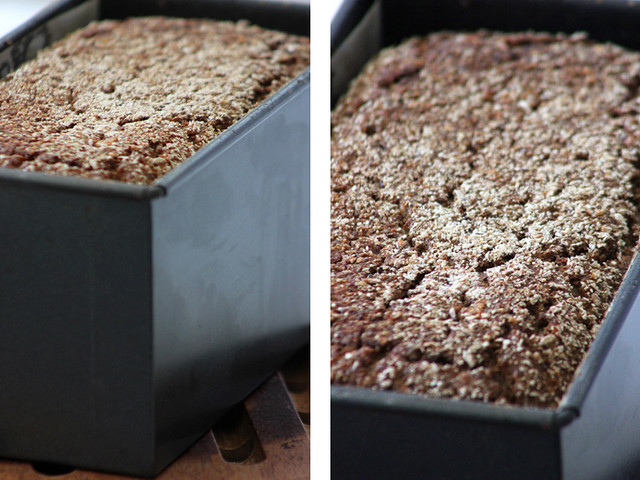 [/url]
[url=http://www.flickr.com/photos/67856223@N06/6901533371/] [/url]
[url=http://www.flickr.com/photos/67856223@N06/6901535219/] [/url]
[url=http://www.flickr.com/photos/67856223@N06/6901533935/]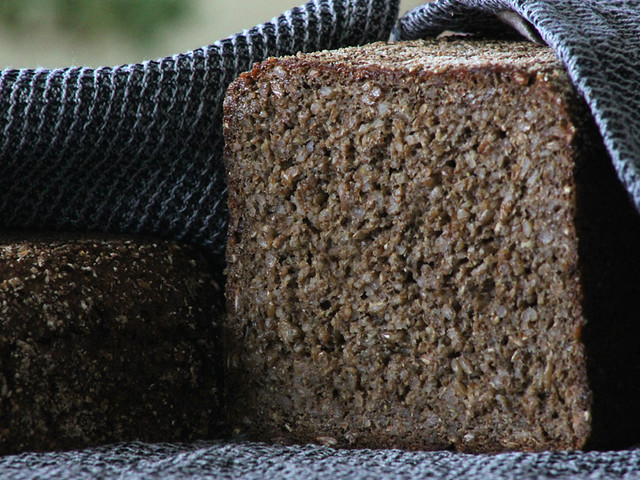 [/url]
[url=http://www.flickr.com/photos/67856223@N06/6901534299/]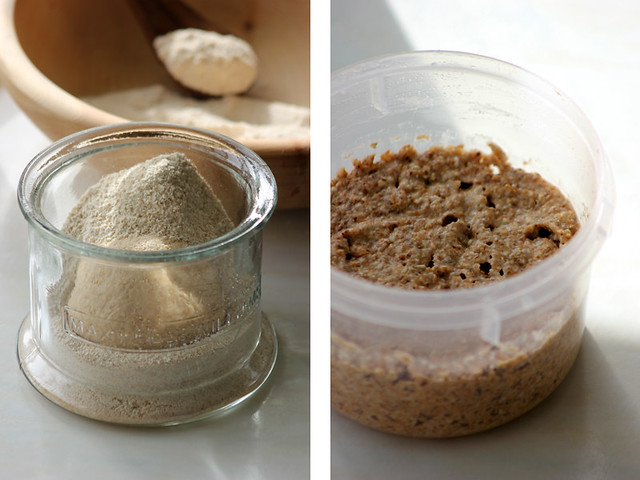 [/url]
So this is what I baked on my weekend … and now the starters are happy and well fed, we are happy and well fed and it’s nice to have found my path and purpose.
Cheers,
Phil
- PiPs's Blog
- Log in or register to post comments
are like nothing seen before, at least not by me. Ok, Ok, so you're not an alien. But, you're not from around here either are ya? Just outstanding work plain and simple like banana on bread as a treat. Nat has much to be proud of in what you chose to do. You have chosen wisely Phil. Very nice indeed.
Hey thanks dabrownman,
I do enjoy the simplicity of these breads. Quite often you see Vollkornbrot with a mix of seeds but I went for grains only on this bake. Simple :)
... I love banana sandwiches SO much ... childhood memories of road trip holidays having lunch parked on the side of a road in the middle of woop woop somewhere.
Cheers,
Phil
It's 5:50 PM here now. At 5;30 I had everything done for tomorrow's bake of your great Vollkornbrot. I told Varda I was going to start going dark and think that I am ready for it experience wise - since your recipe is simple baking and that suits my skill level at this point.
I cut your recipe by a factor of 4, used a little farro instead of spelt and used barley malt for the honey. I don't have a covered Pullman but Julia Child said not to let that ever stop you from baking and to use a loaf pan covered with heavy foil and put an iron skillet on top to steam the bread inside. Her recipes always worked too.
It is my first real rye bread - how exciting - thanks to you. Your descriptions for the milling and sifting were certainly good enough to get me close to your recipe - I think. This is the kind of bread I have always wanted to bake.
Your bread speaks for itself and it shows itself off with just a little help of your easy, honest words and simple expression of what you are all about. Very refreshing and inspirational. Here's to tomorrow then and cheers with beer in hand!
Good luck dabrownman,
Watch the final proof ... It's probably the most critical part. (+ having a strong rye sour). I dust the top of my proofing bread lightly with rye flour. As the bread finishes its rise and starts to dome, the floured surface starts to crack and you perhaps see little bubbles opening on the surface ... that's the time to load it in the oven ... don't wait. Nothing sadder than overproofed rye :(
Use the search feature and find some of mini ovens descriptions of proofing rye breads ... really informative.
The covered pan should work nicely ... The other trick is filling the pan with right amount.
cheers,
Phil
I will follow your advice and check minioven's blog for rye proofing. The rye flour on top of the final proof is very subtle, sounds fool proof and ........since I'm a baking fool....... just perfect :-) My rye sour is always ready and working well of late. Thanks again.
Wow, Phil. Looks incredible. That Vollkornbrot must be intense. Does it bonk ya over the head with rye flavor? When I have milled rye berries and also "chunky rye stuff" (at the very coarsest of my fidibus to approximate a rye chops), the rye flavor is so strong, it's almost a bit too much for me.
Beautiful pictures too. When does the bakery open? :)
Thanks gvz
The Vollkornbrot is beautiful ... luscious crumb :)
I love these kinds of breads so the flavour was spot on for my tastes. Perhaps with peanut butter on top??? :)
I found the flavour less intense than my previous dark rye breads and I think I prefer this. I fermented the sour for less time and I also think the coarse grain seemed to ferment at a more manageable rate. Perhaps less starch damage with the milling?
Oh the bakery? ... yeah, that's still a way off :) Don't tease me though ... there is not a day when I don't think about something small and sustainable :)
Cheers,
Phil
umm... not sure about a pb+rye. ;-)
Question -- do you feed any of your whole-milled goodness to your starter? I began my starter over a year ago with plain ole AP flour (per Hamelman), worked fine... then after a while, I feed it combinations of AP + unsifted whole grain flour that I mill here. Sometimes it is rye, sometimes w.w., sometimes spelt, sometimes barley, sometimes einkorn -- whatever I have on-hand. I think it improves flavor in the breads made from the starter, but I have no scientific evidence to back it up.
Yeah both of them get all the goodness :)
The rye starter has been fed coarse rye meal for the past week and seems very happy. The wheat starter is a "desem" starter so it is fed fresh milled wholewheat and kept at cool temperatures in a stiff ball (50% hydration at 1:1:2 ratio) This makes for a sweet smelling starter. It lives in the fridge during summer and is refreshed once during the week (ie it is allowed outside at night in the cool for a feed before it goes back in the fridge until the end of the week)
For this bake I built the levain for the Country Bread as follows. I took 100g of desem starter from the fridge and dissolved in 100g of water. I milled 200g of wheat and allowed it to cool before adding it to the liquid. Knead it for a minute or two then cover and place in a container outside at roughly 21-23C for about 8 hours. I use what I need for the bread formula and mix the remaining as previous and place directly into the fridge in a jar filled with fresh flour. I use room temperature flour in the jar as it gives the desem starter some time to develop before it cools too much.
Cheers,
Phil
Nice baking Phil. I particularly like the look of that vollkornbrot. Looks delicious. :)
Syd
Thanks syd,
I am pretty excited about the vollkornbrot. It's the first successful 100% rye I have had using freshly milled rye flour.
Cheers,
Phil
Phil,
Oh goodie - another one of your rye creations to give a try. Yours turned out beautifully. Great color and crumb looks delectable. I will see my biggest rye fan this week so maybe I will be able to shoot this formula to the front of my 'to bake' list so she can have some to take home with her...but that would mean holding off on your sage and walnut loaf for a week.....decisions, decisions, decisions....Think I will turn in for the night and see what happens in the morning....decisions always seem easier in the morning.
Your call for purpose for your day has sparked movement in mine. Thanks for another wonderful formula and, as always, for the outstanding pictures that capture the progression of your baking so gloriously. If you can't open a bakery - for God's sake - publish a book of your photos :-) :-) :-) In your spare time...of course!
Take Care,
Janet
P.S. On bananas and bread...Have your given Shiao-Ping's 'Banana Pain Au Levain' loaf a try? Tis a splendid loaf and a favorite here.
http://www.thefreshloaf.com/node/14432/banana-pain-au-levain
Hey Janet,
I am really chuffed with the vollkornbrot ... please give it a go :) Somethings to take note of. I had the Komo set around 3/4 of the way round to 'grob' for the coarse milling. I would also bake it longer next time ... perhaps 4 hours dropping the temp to 100C in the last hour? Have a look through Andy's posts on long baking rye breads. Would make it even better!!
Oh for a little micro bakery to play in :)
I had a banana sourdough that a friend of mine baked ... was beautifully soft with subtle flavour.
Cheers,
Phil
Phil,
Thanks for the milling specifics and the baking times. I asked Andy about bake times in one of his recent posts and he was very kind to spell it all out very clearly for me. I printed the thread out and it is stored with my 'rye notes' so I will pull it out when I give the Vollkornbrot a go.
I have been having fun lately with baking temps. following something Karin (Hanseata) blogged about. I am tarting with a high temp. and then dropping it several times throughout the bake to mimic the temp. fluctuation in a WFO.
A milling question. I find for most of my breads I am milling on the finest setting I can set the stones on without having them touch. I do use coarser settings for the leaven I store long term in my refrig. or when I am making grains for recipes that call for steel cut grains. I just haven't experimented a lot with the settings in between the 2 extremes and am wondering if you do???? If you do, what differences do you find in the final loaves? I would imagine a bit more 'chew' to the crumb....but don't know...
Take Care,
Janet
Beautiful, gourgeous breads, Phil.
Country breads, and the Rye.. oh the Rye! you are a very talented and skillful baker, Phil.
Question: did you baked the country breads in casseroles, or bare on stone? The grignes you've achieved is spectacular! Looks like repeating your formulas over and over paid off, you are now an expert in your own formula.
I mill my wheat finer than yours, usually through two passes. First passing goes to the refrigerator, and milled once more when chilled, to reduce excessive heating of stone, and flour. I find you mill rather coarser than mine, and get great results.
I admire your dedication to milling, sifting , baking, then blogging!
Thanks so much Khalid,
The country Breads were baked on a stone. I am lucky that I have an oven that is producing really nice crusts when baking this way. In the past using other ovens I have not had as much success and was forced into baking a lot of boules in dutch ovens.
The Komo I am using has a smaller stone and a bigger motor than some of the Hawos mills and thus grinds quicker but also warmer so I am hesitant to remill ... especially when milling large quantities. I store the grains in the fridge before milling to help keep the temperatures down. I am getting really nice flour in one pass and this was the nicest flour I've produced yet.
Milling, sifting , baking, then blogging certainly does keep me busy :)
Cheers,
Phil
Thanks for the reply, Phil.
What is your oven setup? ie. at what position do you place your stone? what is your steaming device, and where do you place it? What type of stone do you have? what thickness.
Thanks in advance.
No problems,
The oven is a fairly large westinghouse that is fan forced. Unfortunately I am unable to turn off the fan feature so this dictates the way that I go about my baking - especially for batards.
For the oven setup when baking batards I have a cast-iron skillet loaded with really heavy nuts and bolts sitting on the floor of the oven. I have my main stone which happens to be a large piece of granite/marble (approx 2-3cm thick) and then another thin pizza stone which I place above the other with enough room for the bread to spring without hitting it. Does that make sense? I am loading the bread between the two stones.
I place these as high in the oven as possible. The thin pizza stone is just below the roof of the oven. I also have a oven thermometer hanging off one of the racks as well.I preheat the oven to its maximum temperature as I am trying to retain as much heat in the oven as possible. This is where baking the rye before the country breads works so well because I gain heaps of retained heat and I can give the oven a really good preheat.
Seconds before I load the bread I switch off the oven and wait for the fan to spin down then quickly open the door load the breads and drop a ladle of ice cubes onto the skillet and quickly shut the door. Massive amounts of steam! I will usually apply some pressure to the door for the first ten minutes to stop any steam escaping.
So for the first 10 minutes I am baking with retained heat only. I watch the oven thermometer drop slowly from approx 270C to 200C in about ten minutes and then I switch on the oven and set it to 200C and bake as normal with the fan on. I use ice cubes as I found that boiling/hot water on the skillet way to dangerous for my liking. Adrenaline kick every time I did it ... I was sure to shatter some oven glass sooner or later. The ice is much more controlled but you need the heavy loaded skillet to shock them into steam :)
Hope this makes sense ...
cheers,
Phil
Phil, Your breads are beautiful - the bloom on your country loaves are awesome. When you get focused, you get focused! I found your reflections quite interesting. I don't feel like I bake FOR TFL so much as bake something interesting or new frequently inspired by TFL, and then want to share it - and who better to share it with than fellow breadheads. In any case your rye is amazing and I love your control of the process from milling forward. I think your Komo or Khalid's Hawos mills are the way to go for this type of baking, so I'm going to start saving my pennies. -Varda
Thanks Varda,
When I started the blog here I had no idea I would enjoy doing it so much :) I just wanted to give a little back to TFL after years of lurking in the background - just don't want to come across as a showoff you know?
It was a really great bake of Country Breads ... very happy but they are all gone now :(
Just got an order for some more too ... one of our friends wants some to give to a friend of theirs :)
Yes, save your pennies for a mill! You don't have to bake using exclusively fresh milled flour (though it is great) but it will also give you so much versatility with how you want to prepare grains or wholegrain flours. Things to look for depends on the amount you will be milling and the types of grains. I am only milling dry grains so a stone mill was perfect for me. Look at the stone diameter and motor sizes. My Fathers Hawos mill has a larger stone and smaller motor than my Komo. This means it mills slower, but it is also mills at a cooler temperature and a lot quieter. The Komo has a high shrill sound while the Hawos is more of a grumble. For the amount I mill though I needed the larger motor size of the Komo ... so I am very happy :)
cheers,
Phil
to such a beguiling post? It seems that most of the superlatives have been used. Repeatedly. And deservedly.
Instead, let me say "Thank you, Phil, for such an engaging essay in words and pictures."
Paul
Thank you Paul,
It's a pleasure.
Cheers,
Phil
Hi Phil,
Wonderful to read your reflections and to enjoy sharing in your bread. It leaves me very happy, just to be a baker. A great place to be!
Two fabulous breads
All good wishes
Andy
Thanks Andy,
I am happy to be a baker as well ... Can a happy baker be a happier baker with a better oven?
cheers,
Phil
and a mill too perhaps, Phil?
Best wishes
Andy
Ha Ha, I guess,
I would feel quite lost without my little mill ...
Cheers,
Phil
Marvelous post Phil,
Your breads, particularly the Vollkornbrot are smashing! Lovely photography of course, something I always look forward to in your blog.
I think your "path and purpose" have been clearly evident to anyone that's been following your blog since you've begun posting. Your blog is inspirational to many of us, so bake bread, enjoy the process, and have fun. Share the results of your talents with family and friends at home as well as those of us here on TFL and we'll all be richer for it...including yourself.
Very best wishes,
Franko
Thank you Franko ... that means a lot coming from a fab baker like yourself ... many thanks.
I swear my little blog does have a life of its own sometimes :)
Cheers,
Phil
Phil,
Once again I am struck by the beauty of your photography, and of the breads themselves.
I see so much texture in these photos - the grains, flours and siftings; the woodgrain and basket surfaces; the crust and crumb of both breads (especially that Vollkornbrot!).
Always a joy to see your work.
:^) from breadsong
Hi breadsong,
Thanks for your kind words on the photos. I am so infatuated by the textures and contrasts in a simple crusty loaf of bread. There is just so much to see and appreciate.
btw ... your tamari roasted seed bread looks sensational!
Cheers,
Phil
Oh, you saw that?! Thanks so much! Andy's formula makes such delicious bread, and those seeds, quite yummy...
:^) breadsong
Wow!
Those are absolutely lovely - and lovingly photographed.
Beautiful!
Jay
Thanks Jay,
Cheers,
Phil
A couple od questions........Does the Vollkornbrot ever really become a dough that can be shaped? I mixed it 30 min but still very sticky and wet. And how much will it rise in the pan ? Thanks for your help.
I mix mine fairly wet and I still hand shape. My last batch sagged a bit but I knew it was wetter than normal so I should have used an alternative proofing method (folded parchment). Think of it as a lesson in learning to deal with sticky, wet dough. Use wet hands and use rye flour or rye bran to coat the surface to prevent sticking.
As an aside I mainly make small loaves to use with appetizers - about 1 1/2 inches square in profile.
Good Luck!
Jay
Well, that is what I did. I used some rye flour to keep the dough from sticking and tried to shape it but..... I can't say that it took to any particular shape I was trying to make it into :-)
Now I need to know how much this beast is going to rise in pan. I don't think it will rise much. I sprinkled some flour on top to see when it starts to crack because that is s tip Phil gave me. It has been proofing a little less than 2 hours and no cracks yet. It usually takes at least twice as long for my doughs to proof as Phil's since he is in Australia where it is summer and I am in AZ where it is winter. I have learned to e patient with the rise of doughs or don'ts. :-)
I usually shape my loaves to near square and they only sag a little during the rise - but I typically use an IDY kicker to make the dough more predictable. From my experience the extra flavor from pure sourdough is not substantial (already really flavorful with a presoak and the sourdough starter) and the predictability is far less. So...
It basically won't rise - just barely crack, though I occasionally do things right and get a bit of a rip (or did I lose track of the seam?)
You should get some cracks in 3-4 hours.
Good luck!
Jay
to 2 1/2 hours it shot up about and inch in the pan and started to crack so I covered it with foil and put it in to bake. Since my pan was not a 4 x 4 x8 but only 4 x 2 1/2 x 8 I baked it at 375 F for 45 min only and then turned it down to 275 F for another 45 min only - where it is now. Since Phil said he wishes he would have cooked it a tad longer, I think I will turn it down to 225 F and cook it for another 30 minutes at least. It is smelling wonderful in my kitchen right now though. Thanks to you and Phil, I'm feeling a little better about this bread.
Hey dabrownman,
Sorry it's been a busy morning here ... saw your posting on my phone, but I can't post replies on it. The shaping of high percentage ryes can be a but messy. There seems to be a few ways that people do it. I use wet hands and a wet bench to avoid sticking. Work quickly ... for the Vollkornbrot I did most of the shaping of the bench ... get it close to the tin shape then drop it in, press it down and smooth the top.
The proofing is funny thing too. You have to watch them. They appear to be doing nothing then spring into action suddenly. Can catch you unawares :) Hope your first 100% rye bake wasn't too scary or messy. Rye really is a totally different beast to work with. Look through ananada's (Andy's) posts on high ryes for some great tips and formulas.
Take your time baking it if you can ... 4 hours could be a nice start :) ... then once it's out of the oven and cool, I wrap mine in a clean tea towel, pop it in a bag on the bench and wait 1-2 days before slicing. The waiting can be the hardest part :)
Cheers,
Phil
I pretty much followed your post except since my pan was 4 x 2 3/8 x 8. I baked it 45 min at 375 F, 45 min at 300 F and 30 min at 225 F. When I checked the middle of this small loaf was 210 F so I called it quits. It smells great, not a dark as yours due to my rye not being a very dark one. When it rose and inch in 30 min at the end of 2 hrs proofing and started to crack I put it in the oven as you suggested. I'm not sure I can wait 2 days to try a slice - it smells very nice and looks pretty good. I am happy with it as a first try - thanks for all of your help. It was really not bad at all. Since no high temps required I baked it in my mini oven on a sheet pan, with a larger loaf pan over the top of the aluminum foil covered smaller pan that had the bread in it. Here are some pix's.
Again Phil I just wanted to say how exquisite your photos are! Let alone the baking / recipes / breads / stories, the photos you provide are just out of this world.
When do you do the book deal?????
S
Hi Salilah,
Thanks so much. No plans apart from baking at this moment ... that keeps me busy enough :)
Cheers,
Phil
Hi Phil.
I just stumbled upon this post. Holy volkornbrot batman! This looks amazing. I really like how you made it ala-danish rye, to put it simplistically. Do you remember how this one tasted? Was it worth making again since?
I would love to try this one.
John