Well, my last post was all about my new WFO, and I said I would keep everyone posted on how things go as I complete the oven and learn to bake in it. Some of the lessons have been hard to learn. Having finally recovered (mostly) from the internet connectivity disaster my ISP wrought a couple of weeks ago, I'm now able to post some progress.
I did bake in the oven, on September 29th. I got three very nice loaves of Beth Hensperger's Pain Ordinaire, from her book "The Bread Bible". I chose this recipe because it is a straight dough that can be completed start to finish in about 2-2 1/2 hours so it made my timing very simple for my first wfo bake.
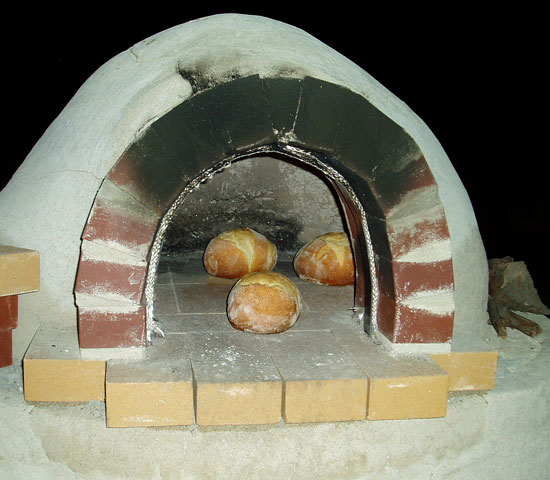
This bread was very exciting, if only because it came out of the WFO and confirmed all of my hopes for how the concept of a wood fired oven would perform. I was pleased with how well I was able to coordinate the dough and the oven, having both ready at nearly the same time. Truth is I rushed the bread. It could have used another 20-30 minutes to rise, but I wanted to bake! The results were not at all bad, and the bread came out very well. (I took and processed these shots myself, so blame me not my photographer-wife!)
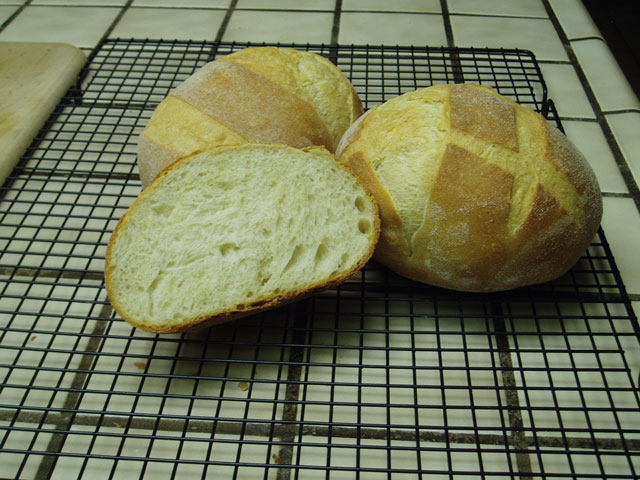
We ate two loaves, and I gave one to the neighbor that helped me so much in finishing off the dome build a couple of weeks earlier.
That, though, is the end of the good news. In fact, it was the end of the oven (sob). I said the first bake was on Sept. 29th, and on October 2nd we pulled the oven down.
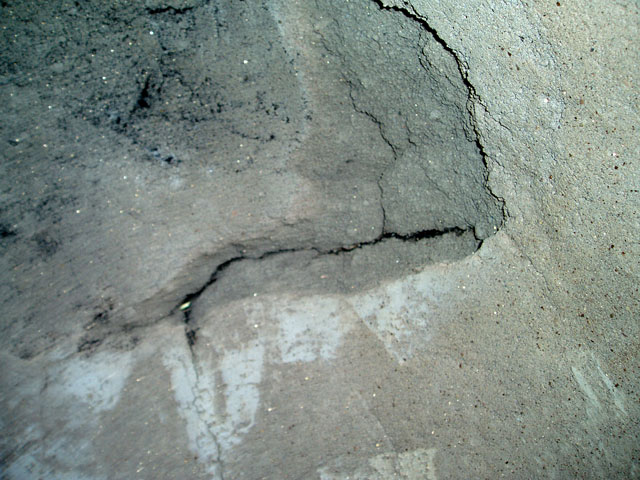
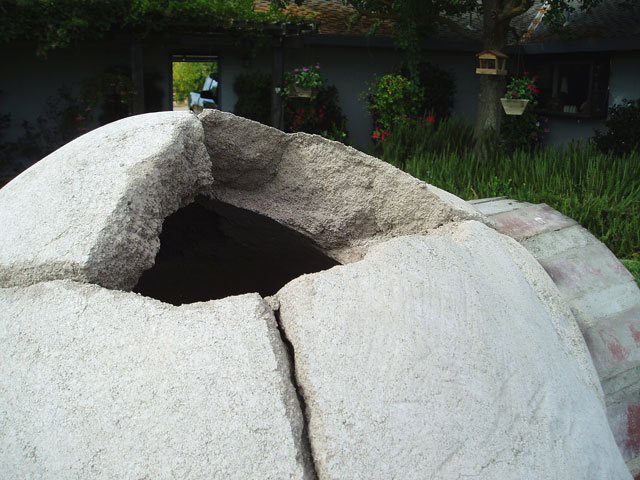
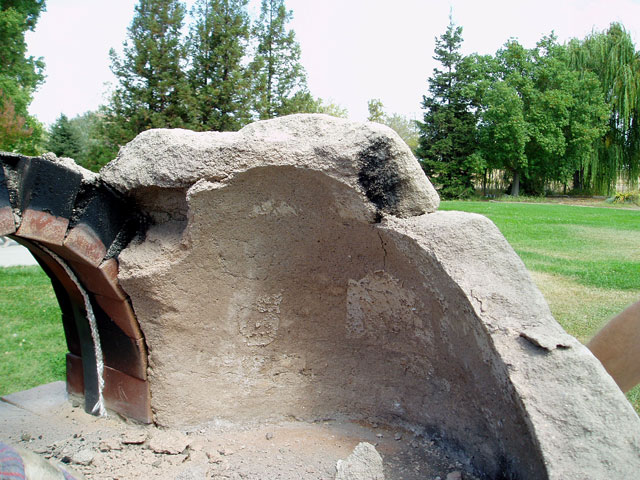
The above is a shot from inside the dome of one of several through-cracks in the dome. And here is the outside.
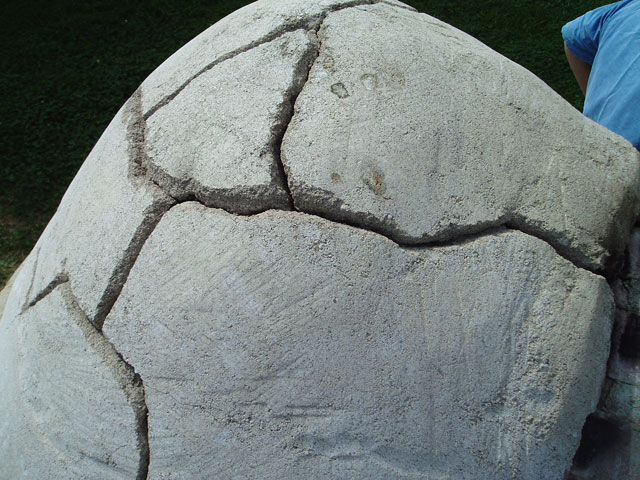
They were not originally this wide, but I was expanding them so I could patch them, then I found the through-cracks, and the roof fell in, almost literally.
These pictures speak pretty well for themselves, and I have not much to add...
And finally...
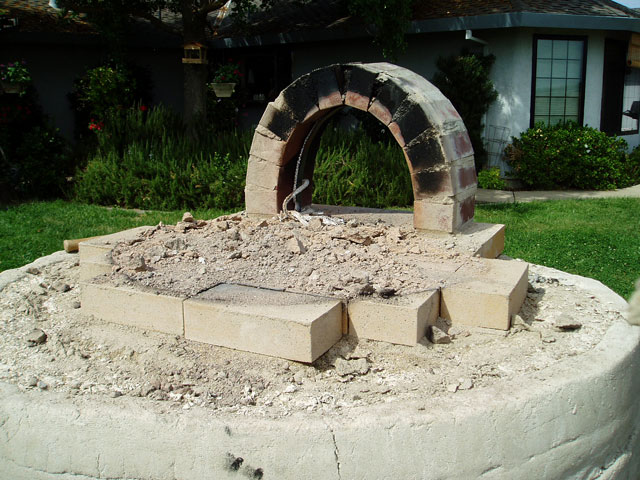
What can I say, but that it was my fault. We did a good job of building the dome, and I ruined it by over-firing it in one of the very first "small drying fires" (see my earlier blog post for the original admission of this sad truth). I called my neighbor that helped me put it up and he came over and helped me pull it down. His words of greeting were, "So, when do we do it again?". My answer was "Soon!" and my wife's was "Start today!". We did, but the starting was in cleaning up the mess and hauling away the first try. I have a huge pile of busted up oven dome in a ditch behind the woodpile. The winter rains will melt it down and I'll add it gradually to the garden where clay and sand will be welcome additions to the complete lack of topsoil around here (It seems like everything growing around here is in hauled-in soil).
So, I began again. I learned from my first oven that this time I want a chimmney because I am tired already of getting covered with soot just by going near the oven door. I also learned that my clay-sand mix was way too short on clay and long on sand. I learned lots of lessons about patience in waiting for natural drying (no more "drying fires" till the oven is already dry!) and about how it is not as hard as it seems to put one of these domes up. Next time I'll be better prepared, and more relaxed about it. There is much less need to hurry than I thought the first time out.
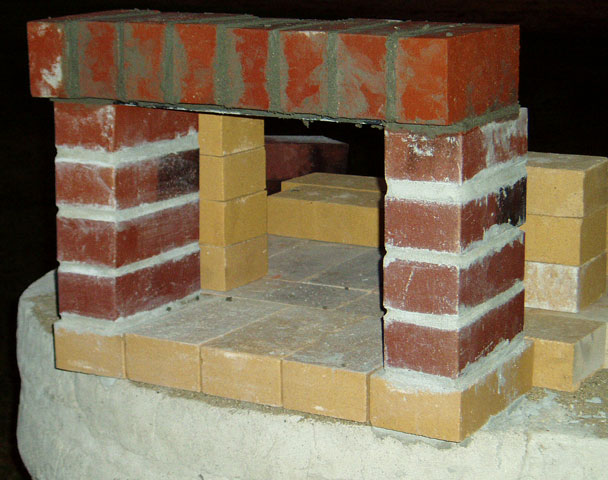
I spent a couple of weeks researching design options to add a chimmney, on materials, and on trying out mock up designs to see how they looked and how they fit my somewhat odd eliptical basic shape. And now I have started to rebuild, beginning with a new, square arch. I concluded that the square arch, while much less romantic, is (imho) more practical in form, function, and fits my skill set better. I can build a square arch that will stand. My track record for the curved arch is less sterling, to say the least. So here I go again, rebuilding my wood fired oven from (almost) scratch. I have had to partially reset the oven floor, but not entirely. I have moved everything forward toward the mouth of the oven to preserve space inside for baking. Here is what I have so far, beginning with the new arch vertical columns.
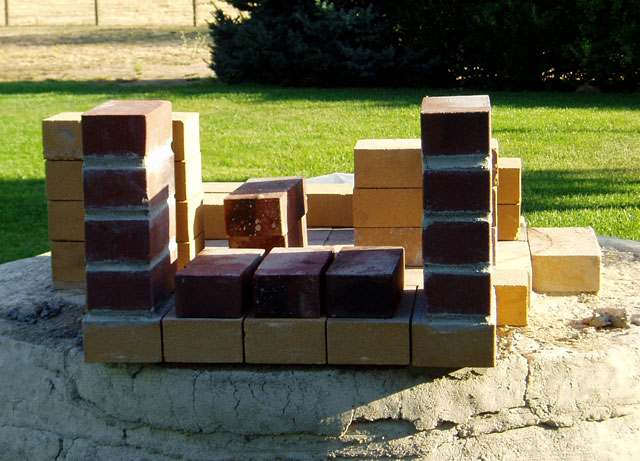
Next I added the top row of cap-bricks on the arch as you see here.
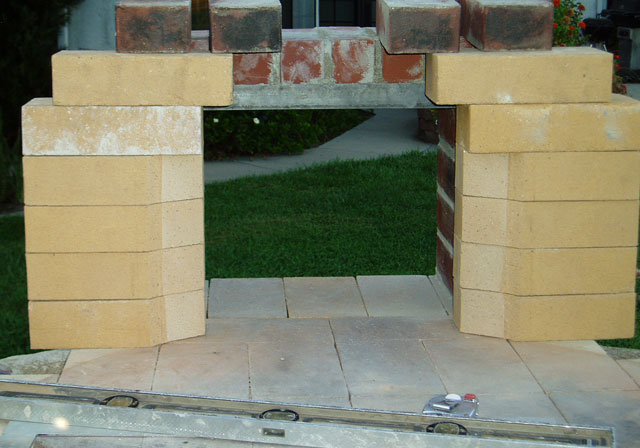
Finally, so far, I've started cutting and laying out the "inner firewall" that will be the face of the oven itself. I'll post more about this later, but for now I'll just say that when I saw the concept it made instant sense to me, and using the basic idea I was able create a plan that gives me a chimmeny, an insulated gap between the heat sensitive front arch structure, and a solid face for the dome itself. As I said, more on all that later. For now, here is what it looks like (from the back, inside-the-oven view) with the bricks cut but just laid in place for now. Mortar will come this weekend.
So out of the disappointment of my first failure I press on, with determination to be more patient this time, and to end up with an even better oven. Mean time, I'll just keep baking in the kitchen!
Still hanging in there
OldWoodenSpoon
- OldWoodenSpoon's Blog
- Log in or register to post comments
2 Bad, the oven had some serious potential!
Press on, you should be able to erect a nicer, hardier one soon!
Did you steam in your WFO oven?
Thanks mebake. I am determined to push forward, but with more discipline this time. I already know this try will be better because of the revisions in design. I cetainly expect it to last longer than one bake this time!
I did not add steam to the oven when I baked in it. I wanted to see what it would produce without that added step. I was very pleased with the crust and spring on these loaves, allowing for the fact that I did push them in before they were really ready. The crust was thin and crispy, and very tastey. We thoroughly enjoyed it, and look forward to more extensive experiments in the next oven.
OldWoodenSpoon
I loved the answer's you, your wife and neighbor had about starting over. I wish you all the best and thank you for sharing. I'm sure many will benefit from your posts.
Sylvia
Thank you Sylvia. We are all very positive about this, although it is quite disappointing. I have posted this here precisely so that others may learn from my hard experience.
OldWoodenSpoon
Since I built my mud oven in June, I've had to do a lot of rebuilding to fix one problem and another. Each time I learn something. But enough already. I am curious about your mud mix. Your dome looks very white. Is that just the color of the clay you are using? Did you buy your clay or dig it up? Anyhow, I'm curious, since it seems that taking care of the oven is as much of a hobby as bread making. Good luck to you on your next try. -Varda
Yes, I had to buy my clay. We have no soil up here where I live, and the hardpan is only inches below the surface, so I bought HC Muddox Fireclay (mortar mix). It is pure fireclay (same thing the bricks are made of) in dry powder form. It dries/cures out to a white/grey color and sun bleaching whitens it even more.
My mud mix was way too long on sand. The first attempt was at 1:3 clay to sand, and I should have tested it more thoroughly. The mix was very sandy, although at the right water content and mixing duration it made good stout clay balls that passed the drop test prescribed by Kiko Denzer in his "Earth Oven" book. In the finished oven it was very gritty though, and next time I will use 1 : 1 sand to clay. It will shrink more when dry due to the richer clay mix, but I'll just have to allow for that. It will also take longer to dry, but that will just have to be. I will wait it out, and even plan on draping the dome with damp towels/cloths to slow the drying down, in order to make sure it does not develop a surface crust too quickly.
Thanks for the good wishes, and I sincerely hope that caring, as in patching and repairing, for the oven is not too significant an undertaking. I'd much rather be baking!
OldWoodenSpoon
Unfornuate that you have to rebuild. Bear in mind that there seems to be an amost universal view that a dome height is more flat rather than igloo like. Almost like an egg shell that has been cut in half length wise rather than a tennis ball cut in half.
And once that is accomplished, the perfect door height is approx 62-63% of the ceiling height, any larger and too much heat escapes and the oven is not efficient. Suggest you research this more before you start and you may find that your rebuild makes an oven that is not nearly as high, with a door that ends up at the above percentage. This is meant to be helpful, not critical, best of luck! I am envious that I cannot have same given I live in a town home!!
Yes, we're disappointed, but determined to learn and improve, and move forward. You might be surprised to know that the first oven adhered strictly to the principles you quote. I too read those "rules of thumb" in "The Bread Builders" and in "Earth Oven" and did my best to follow them. I buried a stick in the sand form exactly the height I wanted, and actually, came in a little low. There was a neat little dimple inside the oven where the dome surrounded the top of the stick.
The shape of the dome ended up being determined by my decision to force the door height to fit our typical turkey roaster and then to build to the dome height dictated by that 63% rule. The somewhat odd eliptical shape of my oven floor brought on the rest. It is long, laterally, and narrow front to back. That makes for a somewhat odd shaped dome if you try to keep the wall thickness uniform.
Those formulae for roof : door height ratios are all about draft and even baking. My original oven drew beautifully. Starting a fire in it was dirt simple. I wish my indoor fireplace drew as cleanly as that oven did. And, while it is not real evident from the bread pictures, the oven had truly even heat. The loaves, with no adjustment during the bake, came out uniformly golden all over. No evidence of hot or cool spots in the dome from that first bake anyway. I really hope the next effort measures up to that original.
Thanks for the advice and good wishes.
OldWoodenSpoon