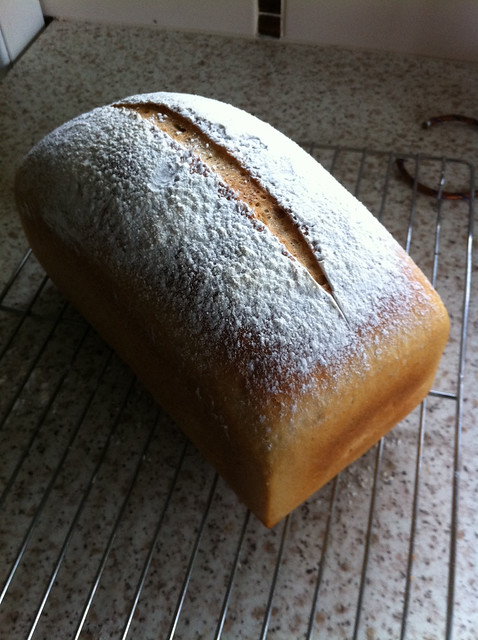
The Fresh Loaf

A Community of Amateur Bakers and Artisan Bread Enthusiasts.

Sheblom's blog

Sheblom's picture
Sheblom

Hi

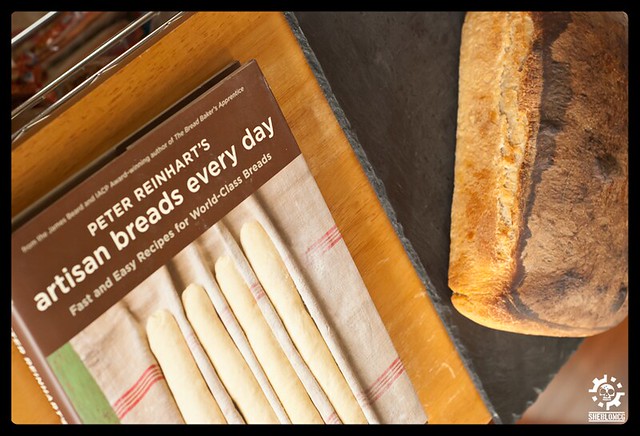
I haven't been able to bake any bread for a while as I have recently shifted house, and still in the process of unpacking. But I did have a quick go at the same simple recipe that can be found here.

The only difference with this loaf is that i managed to get some multi seed mix from the pick and mix at the local grocery store and added them in.

And here is how the loaf game out. Please let me know what you think.

Sheblom's picture
Sheblom

As stated in a past blog[LINK]. I am taking things back to basics. I am going to do the same simple recipe and try and take in what I have learned from each bake, and improve on my baking skills.

So, here I go. I have not added anything to this recipe like last time. This is just going to be a basic loaf.

The recipe is the same:

3 cups of all purpose flour

2 teaspoons of yeast

2 teaspoons of salt

1 1/8 cup water

This is how I went about making this loaf:

First off I need the essential tools

Measure out the flour

Wait for the water to reach optimum temperature

add yeast to the warm water and leave fro 5 min for the yeast to react

I then add a bit of the flour to the yeasty water to make a past

Then leave for 20min for the yeast to be come frothy

I then add in the rest of the water, flour and salt to make a rough dough ball. I then knead on a floured surface to it becomes a smooth texture

I then write down the time and tempreture of the dough, and leave to proof for 40min

After 40 min, I fold the dough and leave for a further 25min.

After the 25min, i punch down the dough and shape in to a boule for the final proof

I preheat the oven to 230c with Pizza stone and empty roasting dish.

Once the oven has come up to temp, I transfer the dough onto the pizza stone, slash and place in the oven. I also add half a cup hot water to steam the loaf.

After 10 min I turn the loaf and take out the roasting dish.

After another 10 - 15min I take out the loaf and leave to cool for an hour.

The loaf came out quite nicely, decent shape and good flavour. 

I am thinking next time to tighten up the boule a bit on the final proof and to bake for a bit longer as the crust was a bit thin and soft to me.

Enjoyed baking this loaf and learned alot.

Please let me know hat you think!

I also received a new book to read over

And a shot of some of the tomatoes from my garden

Sheblom's picture
Sheblom

After my go at the San Francisco Sourdough[Link], I though I would have another go with my sourdough but go in a more European recipe. I decided to go French and bake the Pain Au Levain, but the purist version, no commercial yeast used at all.

One thing I did fine with the san Fran loaf that it was not as sour as I would liked it to have been. So with this recipe, I decided to do the whole process over 4 day, the fourth day being the baking day. 

So here is my process, Day 01

On day one I mix the starter as started in the recipe

Day 02

Take the starter out of the fridge and allow to warm up

Get all my equipment ready

Add starter to the bowl and add the warm water and allow 5 minutes to soften the starter.

Just a quick shot of my new toy for the kitchen. Don't know how accurate it is, but least it will be handy

One the started has softened. I add the rest of the flour and salt and Mix until I get a rough dough ball. I then knead the dough for a short time. I then leave the dough for 5 min to rest.

I then use the stretch and fold technique as the dough is quite wet and sticky

Then let the dough rest for 10 min

I do this another three times, stretch and fold, rest, stretch and fold and rest, etc

I then shape it into a boule and leave it overnight to proof.

Day 03

This is the easiest day, just punch the dough down, stretch and fold and leave over night.

Day 04

Baking day! Now to see the result of all this work! 

I punch down the dough, shape into a tight boule and then leave to rise in my banneton

After 4 hours I pre-heat my oven and pizza stone to 230c, with a old roasting dish at the bottom as well.

One the oven has come up to tempresure. I transfer the dough to may baking stone and place in the oven. I also place half a cup pf hot water in the pan to create steam.

After 10 min, I remove the tray and turn the loaf.

After about 20min you really get a decent sourdough smell wafting through the house.

After about 35- 40 min for baking from intially instertion into the oven. The loaf has changed to a nice dark brown colour.

I take the loaf out of the oven and leave to cool for an hour.

I was very happy with how the loaf came out. It has a beautiful texture and chewy crust.

I do think I have to work on my proofing with a banneton and the transfer from the banneton to the baking stone. 

Please let me know waht you think!

Also here is a shot of some fresh ricotta cheese that me made last week as well!


Sheblom's picture
Sheblom

Hi

A while back I baked a raisin and rosemary loaf and it came out quite well, and the flavour was quite excellent. I have only been baking for a year now and from that year I have gather one opinion. I have still lots to learn.

So I am going back to basics. Just have one simple recipe and tweak that recipe to learn all the ins and outs of getting a decent loaf of bread. Don't get me wrong I will be baking with different recipes that I find here on fresh loaf and in Various books. My major aim though is to stick with one basic recipe and learn all the ins and outs. What temperature to bake at, when to add the salt, what temperature the water must be, how long to proof the loaf, what will happen if I have a high hydration loaf, etc

This is all in aid for me to learn and know when and where certain elements will happen. So that it will be less hit and miss if it going to be a good loaf and be more certain that a loaf will come out how it should.

The basic recipe I will be following is the same one from the lesson found on this website [LINK]

3 cups of all purpose flour

2 teaspoons of yeast

2 teaspoons of salt

1 1/8 cup water

In the loaf I will be showing today I have added about 1/4 cup of raisin and 2 Tablespoons of rosemary. I just love the combination of these two ingredients.

So now for some pictures:

As always start with the recipe:

Then the required utensils and ingredients [I do all my bread baking by hand as I do not have a mixer of yet]

Add the Yeast to the warm water to activate 

Add the flour, at this point I have held back the salt and let the flour and water and yeast sit for about 10min to Autolyse

I then add the salt and then Knead for 10 - 15 min, I then leave the dough to rest for about 15 min

While the dough is resting I cut up the fresh rosemary to be added to the dough

I then add the raisins and rosemary and knead for another 5min. I then tighten up my boule and let proof for about 45min. I then fold the dough and least proof for another 30min

After it has proofed, I then punch down and reshape into the final boule shape. 

I preheat my oven to 230c and place in my pizza stone to heat up as well. I also place an old roasting dish to water up at the bottom of the oven.

Once the loaf has been proofing for about an hour, I place the boule onto the pizza stone and slice in a cross. As I place boule in the oven I reduce the heat to 200c and though some ice blocks in the heated roasting dish to create steam.

I bake the loaf for about 15min then turn the loaf and back for a further 10 - 15min. 

and here is the end result:

and crumb

I am quite happy with how the loaf came out, the crust was nice and crispy and the flavour was good. I think the crumb is still a bit dense and spongy. This might be due to the salt being added later. Aslo it looks like it "blew out on one side, I am not sure why this happen, maybe my slicing was not up to par.

Next I will try this recipe without the raisin and rosemary and try it with out the autolysis and a different slicing pattern and see what will happen. Hopefully this will rectify some of the issues that I have had.

Please let me know what you think or if I must try something out at different stages of my bake.

Thanks

Please excuse any spelling or grammar mistakes, it is not my strongest strength.

I have also submitted this post to YeastSpotting : http://www.wildyeastblog.com/category/yeastspotting/

Sheblom's picture
Sheblom

Hi

Here my first go at an all sourdough loaf. No commercial yeast to be seen. I baked this loaf using the San Francisco Sourdough Loaf recipe from Peter Reinhart Artisan Bread Everyday book. This is my first go at a just soughtdough recipe and I am quite happy with the results. I think then time I wont use a loaf pan and try a boule shape or batard shape. Please have a look and let me know what you think. Cheers


Loaf:


Crust CloseUp Crust


Crumb:

I have also submitted this post to YeastSpotting : http://www.wildyeastblog.com/category/yeastspotting/

Sheblom's picture
Sheblom

Hi Guys

Just wanted to pop and in show you a loaf I baked the other day. Its an enriched bread with raisin's and fresh rosmary added.

I should have let it proof a bit more but it came out quite well I think. The flavour is brilliant. What I would change is the amout of proofing it had and what tempreture that I will bake the laof at as the cumb is a bit soft, but this might be the result of using butter in the recipe or cutting the bread too soon.. 

Please let me know what you think and if anyone would like to have the recipe.

Churs

Loaf:

Crumb:

Best way to eat it:

Sheblom's picture
Sheblom

Hi everybody!

I did my normal weekend baking and unfortunately either my brain wasn't with it or i was not paying the proper attention. My loafs didn't come out that great.. I think my first mistake was making my dough to wet therefore it was very sticky when it came to shaping. Which in turn stuck more to my hands than actually getting in to a nice tight shape, and being still pretty new to this, I got very frustrated.. so my shaping was of poor form. My sourdough came out alright-ish, I think it would have been a bit better if it was a more tacky dough than sticky and having a benneton would have been good to keep a nice tight shape. Plus with it being sticky when I tried to slice it its just came out wrong. My other sourdough loaf...well lets just say i am having a flat bread tonight for supper..

Same issue with my enriched white loafs, too sticky a dough and over proofing.. they are eatable and the flavour will be good, but look wise needs alot of work..

So at the end of the day I was very dissapointed with my baking this weekend. I still need to learn loads and need lots and lots of practive. PLuse if anyone can give any advice or an article on proofing that would be great, that one area where it is always hit and miss with me.

But here are my photos from the weekend. Please be kind!


Sheblom's picture
Sheblom

Hi

I am prettty new to baking, i have only been doing it since about January of this year. I am still learning the ins and outs and all the little secrets of making a decent loaf.

Please have a look at some of the loafs that I have here and let me know what you think. I am very open to feedback.

Thanks

Allan

Subscribe to RSS - Sheblom's blog