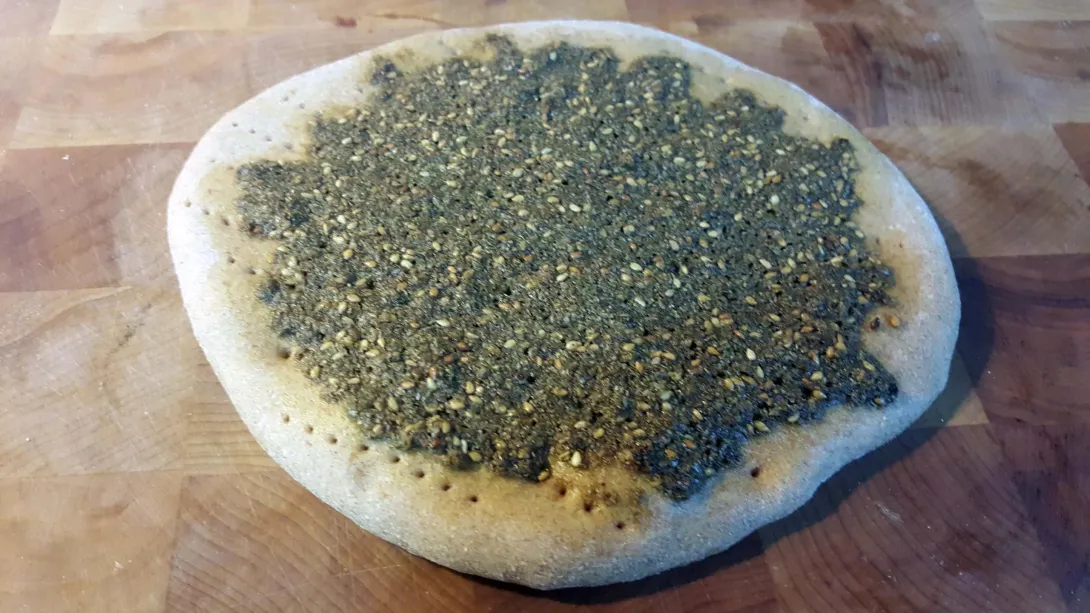
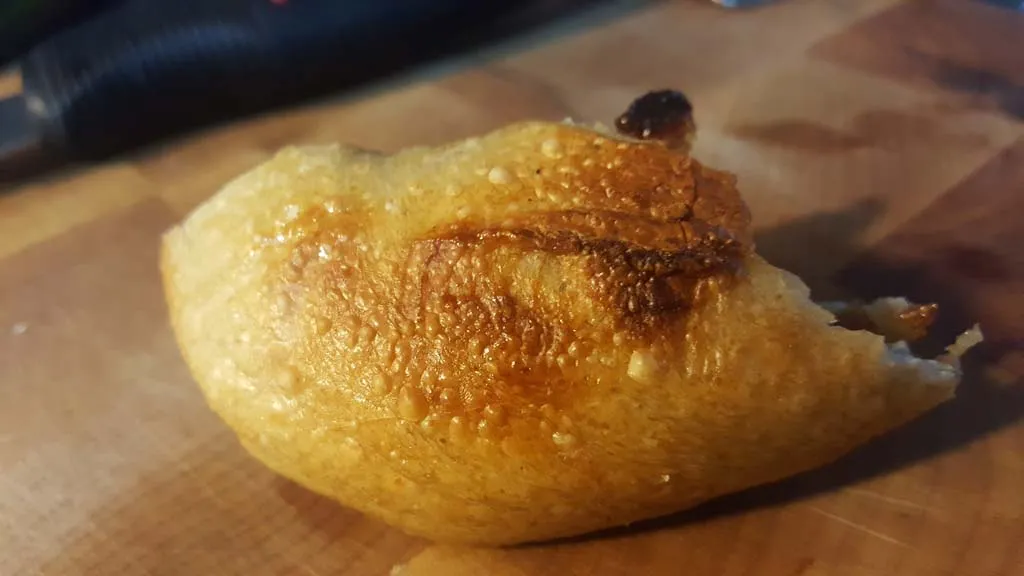
The Fresh Loaf

A Community of Amateur Bakers and Artisan Bread Enthusiasts.

Quantum's blog

Quantum's picture
Quantum

Had a bunch of errands to run this weekend, and not a lot of time to prep for a bake--- perfect time to make some pita. It's 100% whole grain wheat flour, tastes great.

Hrmmm, it might be time to clean the inside of my oven window.

Beginning to deflate.

And the best for last--- I like to do a few of my pita as zaatar bread. For the uninitiated, zaatar is a blend of herbs and spices (primarily sesame seeds, sumac, thyme, and oregano, though infinite variations exist) that's ubiquitous in the Arab world. It's used as a general condiment (particularly as a garnish to a plate of hummus), but in particular as a topping for different breads. My best friend from my undergraduate years is Lebanese, and introduced me to the wonders of zaatar bread--- we'd often wake up early on a Saturday morning to buy the stuff fresh from the oven. Making it is easy: after rolling out the pitas, dock them to prevent a pocket from forming and spread them generously with a thick paste of olive oil and zaatar (you can find the latter at any middle eastern grocery, or order it online!). It's delicious!

Quantum's picture
Quantum


For my first blog post (on what my girlfriend refers to as "the bread facebook"), I'd like to share my recipe for sourdough bagels. I started with Hamelman's bagel recipe from Bread (a fantastic technical book, as I'm sure many of you know!), adapted for sourdough starter in lieu of commercial yeast. The end result is lightly sour and wonderfully chewy, and pairs exceptionally well with savory spreads. This recipe makes a dozen ~~120g bagels.

A note on ingredients: I used King Arthur brand Bread Flour (blue and white bag), and my sourdough starter is fed exclusively with King Arthur Whole Wheat (red and brown bag). Hamelman's recipe calls for a high gluten flour (e.g. KA Sir Lancelot), which I do not have ready access to--- I've instead added a small amount of vital wheat gluten to the recipe in order to bring the protein level of the bread flour up to that of Sir Lancelot. If you have access to high gluten flour, I'd imagine you can substitute the vital wheat gluten for an equivalent weight of high gluten flour.

I've tried to include as many photos as possible, but I'm limited to using my cell phone's camera so I apologize for any quality issues/the aspect ratio!


Preferment:

84g bread flour

84g water

171g 100% hydration sourdough starter


Bulk dough:

753g bread flour

20g vital wheat gluten

19g salt

1/2 teaspoon diastatic malt powder

377g water


The recipe also requires 4oz of malt syrup (or honey) per gallon of water used to boil the bagels prior to baking.

Mix the preferment ingredients in a plastic covered bowl, and allow to ferment at room temperature for 10-12 hours. After this period of fermentation, the preferment should be very bubbly--- you should see bubbles on the surface and gently knocking the bowl on a countertop should liberate more bubbles.

Dissolve the preferment in the bulk dough water in a large mixing bowl. Add the rest of the bulk dough ingredients and stir together to form a shaggy mass.

Knead for 20 to 25 minutes if kneading by hand--- when I first developed this recipe, I didn't have a stand mixer and kneaded this dough by hand exclusively. It's a stiff, strong dough, and is a heck of an upper body workout. I gifted myself a Kitchenaid model 7581 mixer, and used it to knead this batch of bagels (I've included some thoughts on its performance at the end of this post). Using a stand mixer, knead for 15-17 minutes on speed 1. The gluten should be very well developed, and the dough should feel strong and heavy.

Let rest a few minutes and form into a ball. Cover with plastic wrap and allow to rest at room temperature for 1 hour (it was a chilly day in the SF bay, and my kitchen was quite cold, so this particular batch of dough rested for an hour and a half). These two pictures show before and after--- note that the dough has not really visibly risen:

Scale and divide the dough into approximately 120g portions. When I scale the bagels, the portions I cut using a bench knife usually come off in a "log" shape--- the next step in shaping this log will determine the size of the hole at the center of the bagel. Option 1: roll the log out as is to a length of 10" to 12". Option 2: fold the log back onto itself (like a horseshoe) and then roll out to a length of 10" to 12". Option 2 stretches the gluten in the dough more than option 1, and will result in a bagel with a smaller hole (and a rounder bagel overall) since the gluten will snap back after forming the bagel, while the relaxed gluten in option 1 will yield a bagel with a larger hole. Note: shaping bagels requires a decent amount of work space--- I often just work directly on my (well cleaned) countertop.

Take the rolled out log and wrap it around your palm like so:

Now roll the ring of dough (palm down) on your work surface to seal the two ends of the bagel together:

Place each formed bagel on a sheet of parchment paper sprayed with Pam:

Note: the bagel in the right column and second row was formed as per option 1 above, while the bagel right below it was formed as per option 2.

Cover with plastic wrap, and allow to rest at room temperature for an hour (since my kitchen was cold, I again lengthened the rest to 90 minutes). Note the bagels have risen visibly, but just barely:

I've only ever tried this once, but at this point the bagels should pass the "float test"--- they should float in a bowl of cold water.

Place the sheet of bagels in the refrigerator and allow to cold ferment for 12-24 hours (the longer the ferment the better the flavor!).

Preheat your oven to 500 degrees Fahrenheit, and move a rack to the middle position. Bring a large pot of water to a boil, and stir in your malt syrup/honey (4oz of syrup/honey per gallon of water, I generally use 7-8 quarts of water).

Boil the bagels four at a time for 1-2 minutes (the longer the boil, the chewier the crust of the bagel--- I generally boil mine for the full 2 minutes). The bagels tend to sink at first, and can stick to the bottom of the pot if you're not careful. Stir them around at first to keep them from settling onto the bottom. The bagels should float by the end of the boil. Remove the boiled bagels to a wire rack placed over a baking sheet to drain.

While the next set of bagels is boiling, press the drained bagels into a plate of poppy seeds, sesame seeds, etc. My personal favorite topping is a sprinkling of kosher salt and fresh ground telicherry peppercorns. Place the topped bagels topping side down on a sheet pan.

Once all the bagels have been topped and placed on the baking sheet, put the sheet in the oven and bake (topping side down) at 500F for 10 minutes. Flip the bagels (topping side up now), and bake for another 6-8 minutes (or until bagels are golden brown.

Note the untopped bagels on the bottom row have browned quite a bit--- I like the color, but if the bagels brown too deeply for your taste, bake with a second baking sheet underneath the first.

The crumb looks great--- plenty of nooks and crannies for cream cheese! My favorite spread is a little butter mixed with marmite.

The bagels toast extremely well, and will keep fresh for a few days in a breadbox. They keep well in the freezer--- wrap in a paper sack and place in a plastic freezer bag. Thaw, toast and enjoy!

A special thanks to dmsnyder, whose San Joaquin Sourdough inspired me to experiment in naturally leavened breads.

A note re: my Kitchenaid Mixer's performance:

I know that KA mixers are somewhat... contentious... 'round these parts, but sadly a Hobart mixer is beyond the means of my PhD student teaching stipend. I ordered a refurbished Kitchenaid model 7851 7 quart stand mixer for just over 300 USD, and hoped that it would hold up to stiff low hydration dough. The mixer performed impeccably in this respect--- it was able to handle a full batch of bagel dough on speed 1 with no difficulties whatsoever, and the top of the mixer was not even perceptibly warm after 15 minutes of kneading. The mixer head itself was warm to the touch, but I would not call it "hot". I did try to knead the dough on speed 2 for a few minutes (the mixer manual warns not to knead dough at speeds higher than 2), but at points the mixer seemed to strain slightly, probably not enough to damage the motor in any way unless kneading for hours at a time. I should say as well that I have used my mother's 6 quart KA mixer to make this same recipe, and while it was capable of kneading the dough, the top of the mixer was quite warm afterwards and it seemed to strain even at speed 1. The more powerful motor in the 7 quart series mixers seems to make the difference. In short, the 7 quart series of KA mixers can easily handle a batch of a dozen bagels. 

Subscribe to RSS - Quantum's blog