The Fresh Loaf

A Community of Amateur Bakers and Artisan Bread Enthusiasts.

liza2's blog

liza2's picture
liza2

This was my third attempt at this bread and my best result.

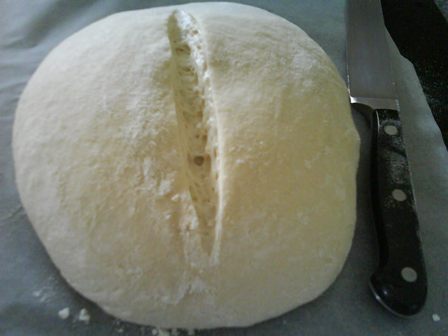
I again followed Susan's recipe exactly, except I used a 100% hydration starter rather than a firm one. I used 300 grams of Pam's flour (New Zealand - 11.0% protein). I followed Eric's recommendation to lightly slash once across the top of the bread. Instead of using scissors I used my newly sharpened knife. I think that was good advice about the slashing; thanks Eric.

I retarded the loaf in the fridge for 8 hours. After taking it out of the fridge I let it sit at room temperature for 1 hour and 45 minutes. I baked the loaf for 40 minutes at 190 degrees celsius (fan bake). I used two cookie sheets - one pre-heated in the oven and then the second one with the loaf on it on top of the pre-heated one. I followed Susan's advice and covered the loaf with a pyrex bowl for the first 20 minutes. The oven spring was very good this time.

I was very pleased with the way this loaf turned out. The crust was crispy and slightly blistered. Once again the texture was light, springy and spongy and the flavour was very good with a slightly sour after-taste.


liza2's picture
liza2

I remembered the salt this time!

The programme won't let me paste the link to the recipe, but search on "simple_sourdough_909"

I did everything the same as in my saltless version with two exceptions: I substituted 1 tablespoon of olive oil for 1 tbsp water and I steamed the oven instead of covering the loaf for the first 20 minutes of baking.

I also tried a different slashing design. I made a mess of the slashing - I used scissors and I think I got the angle wrong. As soon as I cut into it the dough deflated and spread outwards a bit. Or is that meant to happen?

I didn't get much oven spring and I wonder if that is due to the slashing or to having used Pam's flour, Pam's being a budget grocery products brand here in New Zealand. Or due to my oven only having a fan-bake function. Or not using a baking stone? Or over-proofing? (so many variables!) The recipe itself only calls for 300 g of flour, so would result in a small loaf, but I think there should have been more oven spring.

The flavour was excellent and I was pleased with the crumb. The texture was light, springy and spongy. The crust was just the right degree of crispness. The flavour was slightly tangy but not too sour. This is a delicious bread. Thank you, Susan.

If there are any other "lurkers" out there not too confident about contributing to this site I would say give this bread a go. This is a simple recipe which gives a delicious initial result and then makes a good basic starting point for making modifications to suit your own baking circumstances.

I would be grateful for any advice on how to get better oven spring. Thanks and season's greetings from Liz.


liza2's picture
liza2

Hello everyone, this is my first contribution. I've been lurking on this site for a while and have spent many hours reading and digesting the wealth of information here.  Now that I'm on holiday and have some spare time I can finally seriously get stuck into improving my breadmaking techniques and contributing my own experiences to this amazing site. I've had a sourdough starter for a few years but have never been entirely happy with my results.  The bread I've made with it has always had good flavour, but has been dense and heavy. For any New Zealanders reading this, I used the method described in Dean Brettschneider's "The NZ Baker" to capture the wild yeast and to develop the starter. I did this one year in early January (in Auckland) when the temperature was warm but not humid. I'd recommend this method as the starter has turned out very strong and enduring, even once when I'd forgotten to feed it for 3 months. 

Reading through the blogs and lessons here I realised that the problem could be that I've always kneaded my dough for 10-15 minutes. I discovered the stretch and fold technique and thought I should give that a try in order to get those nice big holes. I liked the sound (and look) of Susan's Simple Sourdough (9/09). I liked the way she keeps it simple, such as using a sheet of cardboard for a peel and a colander for a banneton. This is because I don't have the tools and its difficult and expensive to access the specialized equipment from New Zealand. If there are any New Zealanders reading this and can tell me about any NZ firms selling breadmaking equipment to home bakers I'd be grateful. Also any NZ suppliers of good quality bread flours as my local store only sells "Pam's" flour.

I mostly followed Susan's recipe apart from the following variations:  I wasn't sure how to turn my 100% hydration starter into a firm starter, so I left it at 100%, the same consistency as pancake batter. The dough ended up a nice soft consistency but not wet. I used 275 g of Pam's high-grade flour plus 25 g of Healtheries high-gluten flour. I then followed Susan's instructions exactly. I was surprised how smooth and silky the dough was after minimally mixing it and then stretching and folding it only 3 times. I couldn't find my colander so used a sieve.

One question - the instructions said to pre-shape, then rest it for 15 mins, then shape it.  What's the difference between pre-shaping and shaping?

Here's the dough just before scoring. I placed the egg next to it to show size :

I used scissors for scoring and decided on the square shape. I think I need to practise scoring as i wasn't totally happy with the final result. But all will become clear. This photo was taken a few minutes after scoring:

I used "baking paper" instead of parchment. The instructions said to cover the loaf for the first 20 mins of baking, so I used my crockpot for that:

I have an old very average electric stove/oven in my kitchen. I would convert 450F to 210C, but since my oven only has a fan-bake function I set it at 190C. This is how the loaf appeared when it came out of the oven. I still have the egg in the photo to compare size, as the loaf seems quite small. But then it only used 300g of flour.

I was so anxious to cut it to see how the crumb would be. In the end i forced myself to go outside to do 90 minutes of gardening so I wouldn't be tempted to cut it before it had cooled down sufficiently.

Finally it was time. I was pleasedwith the holes and the look of the crumb:

By now it was lunchtime and I was hungry from all that gardening. I couldn't wait to taste it. Well, the crust was just right, the texture was light, spongy and creamy, there was a slight tang to the taste.  BUT.....  as I chewed it I realised that right at the start of the process I had forgotten to add the salt to the mixture!!

I still had it for lunch - with salted butter and salty cheese. Although the taste wasn't quite right I really liked the texture and lightness of this bread.

I'm going to prepare another batch this afternoon - with salt this time-  to bake tomorrow morning and will report how it turns out.


Subscribe to RSS - liza2's blog