Hello!
I've been wanting to get into baking bread for a while, and coming across the Fresh Loaf site gave me the final push to have a go and get my hands dirty (doughy)! So here is my first report in baking "artisan" bread from the point of view of a complete novice.
After looking around numerous sites for good beginner loaf recipes, I finally bought Floyd's handbook from the Amazon Kindle Store. Its a great little book, and I think I will be doing quite a number of the recipes he features in it - but first I went for the introductory loaf - French-style bread.
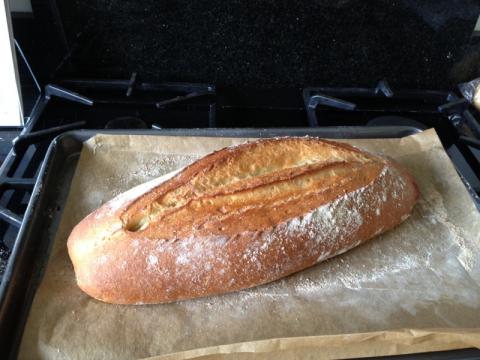
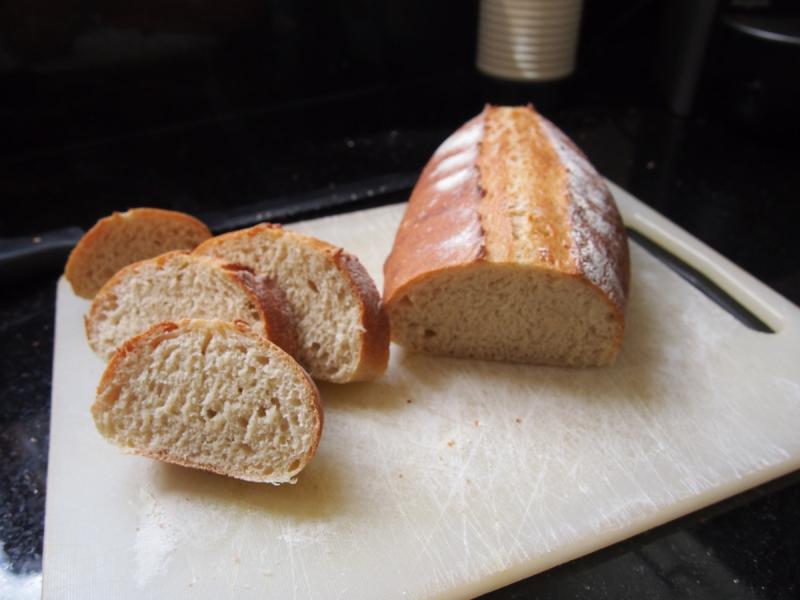
As you can see from the picture above, it didn't turn out too bad for a first attempt - I'm pretty proud of my efforts!
Baking Floyd's French Loaf
Living in the UK, I don't have measuring cups, so after some research I went with a 120g flour to 1 cup raito - See my comments later on what I'll do next time.
I used 300g Strong White Bread Flour (Waitrose Leckford Estate), and 240ml of warm water, with the salt and sugar as stated in the original recipe. I currently have some instant fast-yeast sachets (Allinsons), and so used half a packet.
Once all mixed together the dough was pretty wet, and a lot of it started sticking to my fingers (slightly stress inducing). I found sprinkling flour on the work surface (granite) and directly onto the dough helped (as Floyd states) for a short time, but as I kept kneading, the dough would quickly become over-sticky again. I'm wondering whether the granite work surface has anything to do with this? Things became easier after repeating the sprinking of the work surface about 4 times (using a tablespoon of flour each time). I also tried a small amount of oil of the work surface, and again it helped for a short period of time, but the dough soon became quite sticky again.
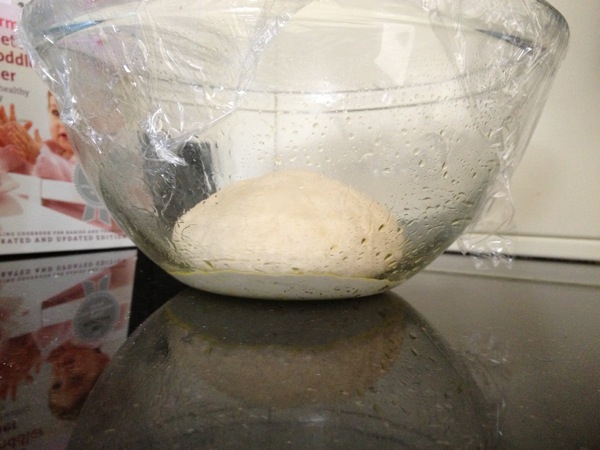
On reflection, I think my hydration percentages might have been a bit high? (see, I've been reading lots of books about the subject!). However, I did end up with quite a nice light silky dough which looked like this after "rising" for 2 hours - I smaller bowl is needed for a more impressive rise I think!
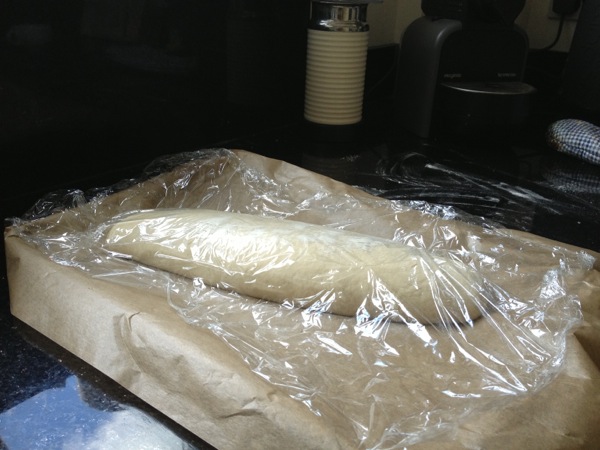
I didn't find shaping the loaf as difficult as I thought it would be - again Floyd's instructions are really easy to follow. I left the shaped dough to rise for another hour, although to me it didn't really look any different between the first shaping and leaving it for an hour.
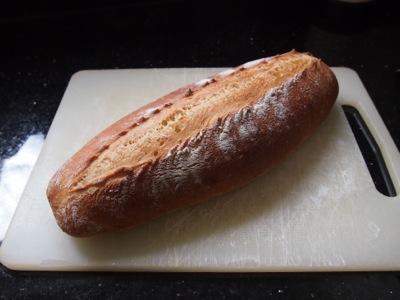
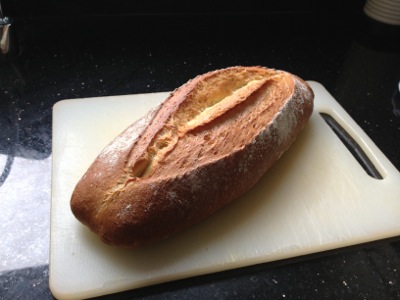
I have a fan assisted oven, and pre-heated it to 220C. A bread knife worked well to score the loaf, although I think I could cut it a little deeper next time. I also added a cup of hot water to a roasting pan as a put the loaf into the oven on the middle shelf. After 5 minutes I turned the temperature down to 200C and then after another 5 minutes I rotated the baking sheet. The oven-spring was impressive, the loaf really ballooned up nicely.
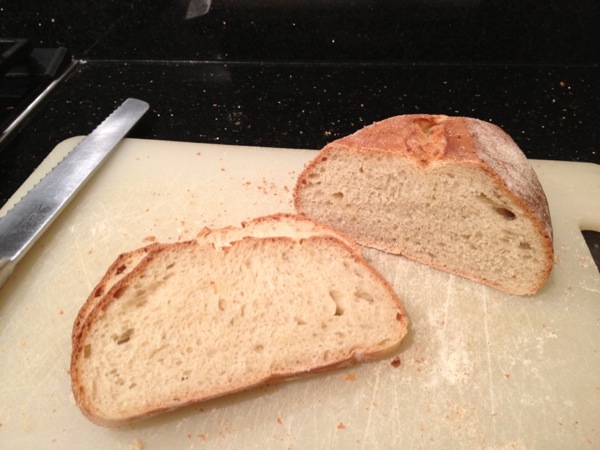
The loaf was then left in the oven for another 10 minutes (total time 20 minutes). We couldn't wait for it to cool very much before trying it out, and it tasted pretty good!
Changes for Loaf #2
The loaf turned out much better than I could have hoped for, and its given me the inspiration to keep on practicising - I think I'm hooked! For loaf #2 I think I'm going to make a few tweaks:
- Increase the total baking time by an extra 5 minutes - the bread was a little doughy in the centre
- Increase the amount of flour to something like 330g (133g per cup) to try and reduce the wetness of the dough
- Really make sure I use no more than 240ml water
- Use a chopping board, rather than granite for the kneading surface - would this be easier or not?
- Knead the bread for longer (I need the practice) - I assume more kneading can make a "lighter" loaf?
- Score the bread a little deeper
Loaf #2 will be baked tomorrow so hopefully I'll continue reporting my adventures in "proper" breadmaking then.
Comments and suggestions always welcome! Cheers for now!