The Fresh Loaf

A Community of Amateur Bakers and Artisan Bread Enthusiasts.

Recent Blog Entries

ehanner's picture
ehanner

Is anyone else having issues with how the forum is displaying? It looks like the server reverted to an earlier point and changed the image space allocation. Floyd isn't logged in so he probably isn't aware.

Eric

zainaba22's picture
zainaba22

Ulrike (Küchenlatein) will host BBD #03, and she is asking everyone to make a sourdough-leavened bread, preferably rye.

it is my first time baked bread with starter and rye , my bread came out great!

My first starter

756 g rye starter.

2 cups cup dried dates.

2 Tablespoon Anise seeds.

4 cups  white flour.

1 2\3 cups whole wheat flour.

1 2\3 cups rye flour.

2 2\3 cups water.

1 teaspoon salt.

2 Tablespoon olive oil.

1)In the bowl of mixer, mix the flours, dates, Anise seeds, water, and starter until just combined, about one minute.

2)Allow the dough to rest for 30 minutes.

3)Add the salt and oil and continue mixing about 4 minutes.

4)Cover and let rise for 1-2 hour.

5)Divide dough into 2 pieces.

6)With lightly floured hands, shape each piece into a rough oval.

7)Cover loaves loosely with plastic wrap and let rise for 1 hour.

8)Bake at 400 for 30-40 minutes.

zainab 

http://arabicbites.blogspot.com/


zolablue's picture
zolablue

Also known as Baguette aux lardons.


This is fabulous bread!  I baked it yesterday from Daniel Leader’s new book, Local Breads.  It is a very easy recipe, absolutely delicious fresh from the oven and today it made incredible toast.  The incorporation of slightly browned bacon and his recommendation to retard the shaped loaves overnight to infuse the dough with more of that great smoky bacon flavor is a winner.


His recipe calls for making four 316g baguettes but for some reason I only ended up with about 1100g total dough so I made 3 roughly 366g baguettes.  The dough was supple and slashed really well which I was concerned about with the bacon.  No problem though.


His method of using floured parchment and then making your own couche worked really well for this.  I was able to fit all three baguettes perfectly on a quarter-sheet restaurant style pan with rolled up dish cloths on each side to keep the loaves from spreading.  You make the troughs for the dough creasing the parchment between each loaf and then tuck the rolled cloths against them and the rim of the sheet pan. 


The next day I removed from the fridge and slid the entire thing onto the counter, took off the plastic wrap and covered with a cotton flour-sack towel.  I let them warm up and finish proofing for about 2 hours and then baked.  Even in my small oven all three loaves fit perfectly on my smaller-than-normal baking stone.  I steamed the oven and baked them about 25 minutes at 450°F and was really happy with the way they rose and actually grew ears.  (chuckle)  That is always welcome and always surprising for my breads, it seems but I’m getting better. 


I have not typed up this recipe yet.  I encourage you all to go buy Daniel Leader’s new book.  This is the first of his two books I have purchased so others are way ahead of me in the knowledge of his great breads and first book.  Mountaindog is lucky enough to live close to his bakery – wow!  That would be a treat.  So far in what I’ve read I’m very impressed with this book although since I use a firm starter I do have a couple thoughts that may differ from what his instructions are only by means of my own experience.  All in all it is a wonderful book and I’m thrilled to have it.  Can’t wait to try more new recipes.

Baguettes aux lardons

Great crisp crust and you can see how the bacon bits on the exterior crisp when baked. (yum)

Crumb was creamy with bacon infused throughout in little bits.  He doesn't show a photo of the crumb so I'm hoping this is how it is supposed to look.  He does have you beat the tar out of the dough and with a mixer it does break down the already small cooked pieces.  I didn't mind. :o)

zolablue's picture
zolablue

I'm posting this recipe for discussion as we have been talking about it on the Glezer firm starter thread.  I have made this bread often with variations because I did not have the high-extraction flour yet.  I recently purchased the Golden Buffalo flour from Heartland Mill in Kansas and it was superb.  I didn’t take photos of those so will next time I make it.


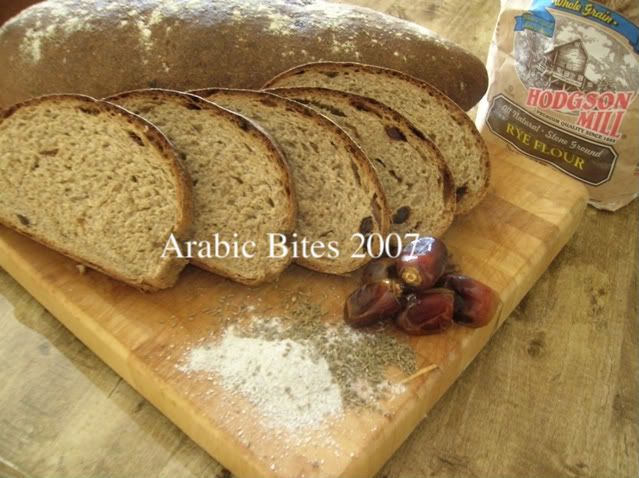
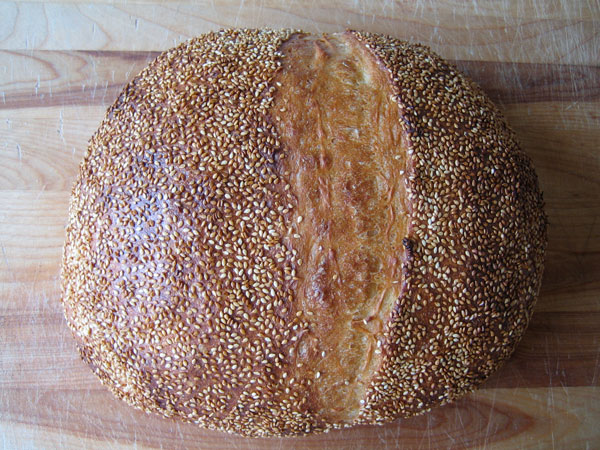
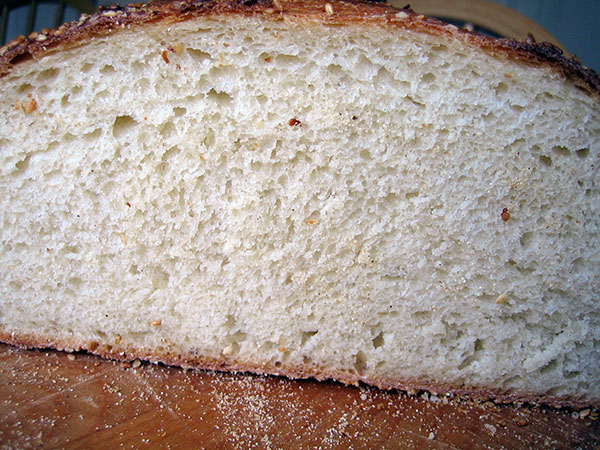
The one pictured here was made using Hodgson Mill WW graham flour sifted for the WW portion (250g) and mixed with the 750g King Arthur bread flour.  I’ve also made it sifting the King Arthur traditional and organic WW flours but I like the sweetness of the graham flour.  Still, I think after using that high-extraction flour the flavor was so extraordinary I would choose to make it that way more often.


Mountaindog has also posted her variation on this bread here and she makes beautiful loaves of it. 

http://www.thefreshloaf.com/node/1806/thom-leonard-country-french-boule-recipe

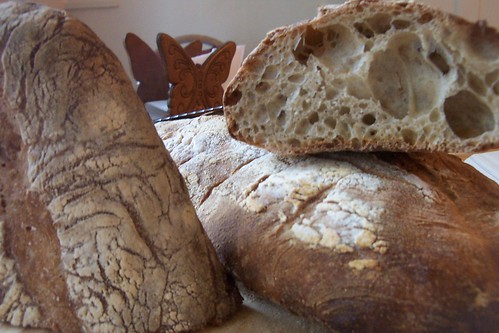
This is a great recipe to play around with and it always comes out fabulous bread.  Another note – I generally like to make four smaller boules but when I made them with the high-extraction flour I made two boules and they were large and fantastic. 


Here are the some photos of the ones I made a few months ago (more photos here: http://zolablue.smugmug.com/gallery/2671417#141408937 ) and the recipe follows:

Thom Leonard’s Country French Bread - © Maggie Glezer, Artisan Baking  

Makes one 4 pound (1.8-kilo) loafTime: At least 18 hours with about 30 minutes of active work 

Much of what makes this bread so special is the high-extraction flour used in it.  This is a bolted whole-wheat flour much lighter in color and sweeter in flavor than a whole-wheat flour (at 100% extraction), but much darker and more flavorful than a white flour (at 72% extraction).


The method I give here for making your own high-extraction flour will work best on coarsely ground whole wheat flour.  If you already have a good high-extraction flour, substitute it for the whole-wheat and bread flour in the final recipe.  Thom also includes a little of his sourdough rye starter in the dough, but it is such a small amount that I have bumped up the levain slightly and added rye flour to the final dough instead.

RECIPE SYNOPSIS The evening before baking - making the Levain: 

25 grams (1 1/2 tablespoons or 0.8 oz) fermented firm sourdough starter refreshed 8 hrs before (17%)

140 grams (2/3 cup or 4.9 oz) water, lukewarm (100%)

140 grams (1 cup minus 1 tablespoon or 4.9 oz) unbleached bread flour (100%)


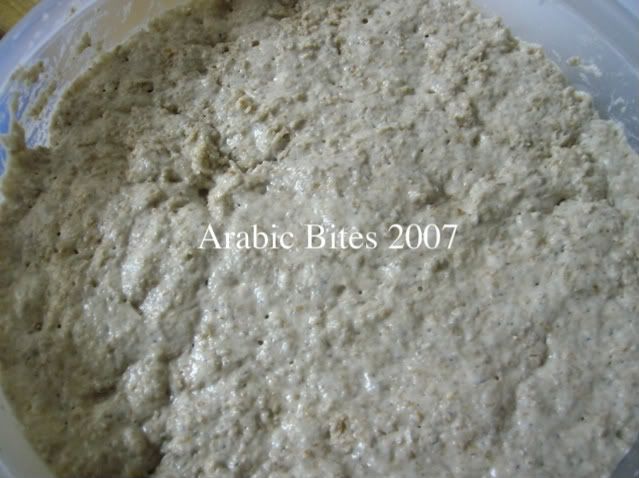
Dissolve the sourdough starter in the water in a small bowl.  Add the flour and beat this batter-like dough until very smooth. Place in a covered container and let it ferment overnight for 8 hours, or until fully risen and just starting to sink in the middle.

Bake Day – Mixing the Dough: 

350 grams (about 12 oz or about 2 1/2 cups) Coarsely ground whole-wheat flour, preferably milled from an organic, hard winter wheat (eventually 25%)

750 grams (26.5 oz or 5 cups) unbleached bread flour, preferably organic (75%)

30 grams (1 oz or 1/4 cup) organic whole-rye flour (3%)

660 grams (24 oz or 3 cups) water (66%)

Fermented levain (30%)

23 grams (0.8 oz or 1 tablespoon plus 1 1/2 teaspoons) salt (2.3%)

Preparing the flour: 

Sift the whole-wheat through your finest sieve or flour sifter.  The large flakes of bran should be caught in the sieve (use them for flouring your peel or for muffins).  Measure out 2 cups 3 tablespoons (8.8 ounces, 250 grams) sifted flour.  Mix this dark flour with the bread flour and the rye flour in a large bowl or in the work bowl of your mixer.


Add the water to the fermented levain to loosen it from the container.


Mixing the dough: 

By hand:  Pour the watered levain into the flours and stir with your hands or a wooden spoon just until a rough dough forms.  Turn the dough out onto the unfloured work surface and continue kneading until the dough is very smooth and shiny, about 10 minutes.  This is a lot of dough and will take some muscle.  Sprinkle on the salt and continue to knead the bread until the salt has fully dissolved and the dough is very smooth and shiny.


By stand mixer:  Add the watered levain to the flours in the work bowl and stir the dough together with a wooden spoon or your hand (this will make the mixing go more quickly).  Using the dough hook, mix the dough on medium speed for about 10 to 15 minutes, or until the dough is very smooth and almost cleans the bowl.  Add the salt and continue mixing until the dough is much tighter and cleans the bowl, about 5 more minutes.

This should be a soft, sticky, and extensible dough.  

Fermenting and turning the dough:  

Place the dough in a container at least 3 times its size and cover it tightly with plastic wrap. Let it ferment until it is airy and well expanded but not yet double in bulk, about 3 hours.  Turn the dough 3 times at 30-minute intervals, that is, after 30, 60, and 90 minutes of fermenting, then leave the dough undisturbed for the remaining time.

Rounding and resting the dough: 

Flour the surface of the dough and your work surface and turn the dough out.  Tuck the edges of the dough in to tighten it, round it, and cover it loosely with plastic wrap.  Let it rest until well relaxed, 10 to 15 minutes.  While the dough is resting, sift flour over a linen-lined basket or line a large colander with a well-floured tea towel.

Shaping and proofing the dough: 

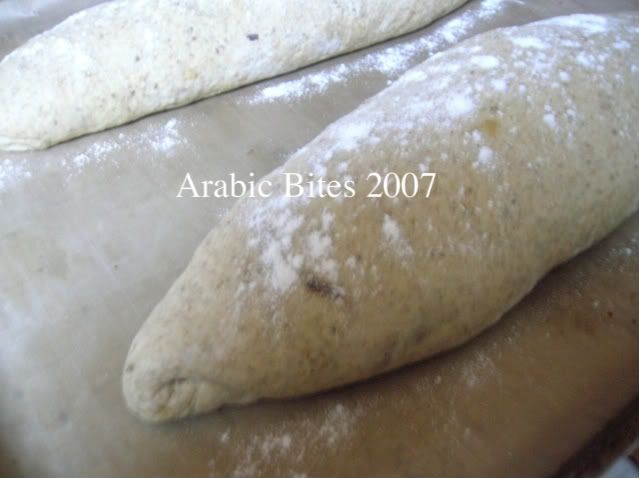
Shape the dough into an even and tight round loaf without deflating it.  Place the dough topside down in a linen-lined basket or large colander, lightly sprinkle it with flour, and cover it well with plastic wrap.  Proof the dough until it is well expanded, about doubled in volume and remains indented when lightly pressed with a floured finger, after about 4 hours.

Preheating the oven: 

At least 45 minutes before the dough is fully proofed, arrange a rack on the oven’s second-to-top shelf and place a baking stone on it.  Clear away all racks above the one being used Preheat the oven to 450°F (230°C).

Baking the bread: 

If desired, just before baking the bread, fill the oven with steam.  Turn the bread out onto a sheet of parchment paper or a floured peel and slash 3 to 4 diagonal slashes and 3 to 4 horizontal slashes into the top.  It will look like a skewed grid with diamond-shaped openings.  Slide the bread, still on the paper, onto the hot stone and bake until the bread is dark and evenly browned all around and sounds hollow when thumped on the bottom, 70 to 80 minutes, rotating it halfway into the bake.  If the bread is browning too quickly, reduce the oven temperature to 400°F (205°C), but still bake the bread for at least 70 minutes.  Let the bread cool on a rack.


susanfnp's picture
susanfnp

If you love to bake rye sourdough, or, like me, are intimidated by it and need a kick in the pants to help you overcome that, you should enter BreadBaking Day #3. Come on, you know you want to...

I made this rye-ww sourdough, and it was actually fun.


Rye Whole Wheat Sourdough

Susanfnp

http://www.wildyeastblog.com


beenjamming's picture
beenjamming

So for the second time this summer, I moved this past weekend. I decided to given my oven a test run just to get a feel for it. First, I baked a bunch of 75% hydration rustic loaves with ~20% whole wheat. The dough was built on a 12 hr poolish. I usually don't use such a high percent of whole wheat flour and as a result the bread tasted a bit earthier than mine usual pain sur poolish. Oven performed well; it only got up to 450F, which was just enough.


I also baked a potato pizza,inspired by the Sullivan St potato pizza in Artisan baking, with some friends tonight. On top are some red creamer tots(salted, drained) sauteed with red onions in rosemary olive oil, roasted garlic and some montasio cheese. I got the crust exactly how I wanted it, but the topping combination could use a little work. I think I need to add either more potatoes or something creamy; with a hard cheese it tasted a bit too dry. It was still tasty enough for me to eat!

and the underside:


This weekend is looking pretty exciting as well. I have gotten some folks together here at Cornell to create an artisan baking club: Better Bread, Better World. A few of us know how to bake decently well, and a few are new to the game, but I'm very excited to get things off the ground.This weekend everyone is in town and we're going to get together and bake, eat and talk about our plan for this year. Hopefully by the spring we will have a stand at the Ithaca Farmer's Market to sell bread and donate the profits some where in Thompkins county. Have any of you taught others how to bake? I've shown a few curious friends how to make bread, and I like to start with challah because it can be made pretty easy and looks and tastes great, then start with a basic hearth loaf and move on. As kind of the leader of this club I think it's going to mostly on my shoulders to come up with things to do and if any ideas come to mind, please do share them!

Floydm's picture
Floydm

Weighing in at 2 pounds 8 ounces, is the mega semonlina loaf.

semolina bread

semolina bread

This was a sourdough w/ a half a teaspoon of instant yeast thrown in. About... 65% hydration with about 40% of the flour semolina. It turned out pretty good.

I've been meaning to mention that I have been using the Steam Maker Bread Kit when I bake something like this. In fact it is part of the reason I baked such a monster loaf: the small sized kit I have makes it very difficult to steam two small rounds or baguettes longer than about 12 inches long, but one large round fits quite well. I find the size extremely frustrating and would not recommend purchasing the kit in that size, but I have to admit that when I do make loaves that fit into it the resulting crust I get is very, very good. Very thin and crackly. I stand by my opinion that the larger stone and kit are a worthwhile investment if you are a crust junky and you don't have a steaming solution that you are satisfied with yet.

Previous discussions of the Steam Maker kit is here and here.

AnnieT's picture
AnnieT

I have been wanting to make the White thyme bread from Dan Lepard's "The art of handmade bread", and today was the day. I bought some fresh thyme last week at the farmer's market but didn't buy olives until this last Friday. Naturally the store didn't have the picholine olives this week, so I bought kalamatas because all of the others had "stuff" in them. DL calls for fresh yeast which I have never seen here and although he gives a way to replace it I decided to use my instant yeast along with the starter and it worked just fine. I learned it isn't easy to do the French fold with a dough full of olives so I tried his oiled counter method. Thumbs down. Ended up with a dusting of flour and the dough was much easier to manage. Several stretch and folds later I had a nice soft dough to dimple on an oiled baking sheet. Cornmeal on the sheet and on top of the loaf so the crust was crisp. I will definitely make it again and hopefully with the picholine olives as the kalamatas hid the flavor of the thyme. Some friends went home with a chunk of the loaf - I figured they could snack on it if the ferry line was too awful, A

cabbagehead's picture
cabbagehead

Well I made the most amazing  4 loaves of whole wheat bread today. It was quite hot out and I was expecting company so I decided to turn on the air conditioning. I then realized it would be better for the bread if I had a warmer and more humid environment so I placed the rising dough out on the patio under the umbrella and covered with a damp towel.  That must have been a perfect scenario for the bread because it rose like crazy. I also think it had something to do with the actual recipe. For the first time I used my Five Roses cookbook which called for a lot more yeast than I was used to (16 grams for 4 loaves). I also prepared a mixture of the yeast, some sugar, some scalded milk and water before hand then mixed eveything together. I've never seen yeast froth up so much! The result was 4 wonderful large loaves of delicious bread that had soft crusts (coated with melted butter just before oven time). The flavour is quite intense and perfect for sandwiches a well as toast (with jam or honey). Tonight my supper consisted of fresh bread, ancient cheddar cheese, red wine and great music. Life is pretty good.

Christina's picture
Christina

I haven't been making bread much lately so I decided to start again with pizza dough. I didn't have the time to let it rise as much as I wanted but it came out really well regardless. The dough was much slacker than I have done in the past and that's why it turned out so wonderfully this time.

Rising dough:

Pizza dough

Ready to form crusts:

Balls of dough

Crusts, ready to top:

Ready to top

Turkey meatball and olive-spinach:

Pizza, pizza

This is my favorite part:

Looky the hole!

Pages

Subscribe to Recent Blog Entries