
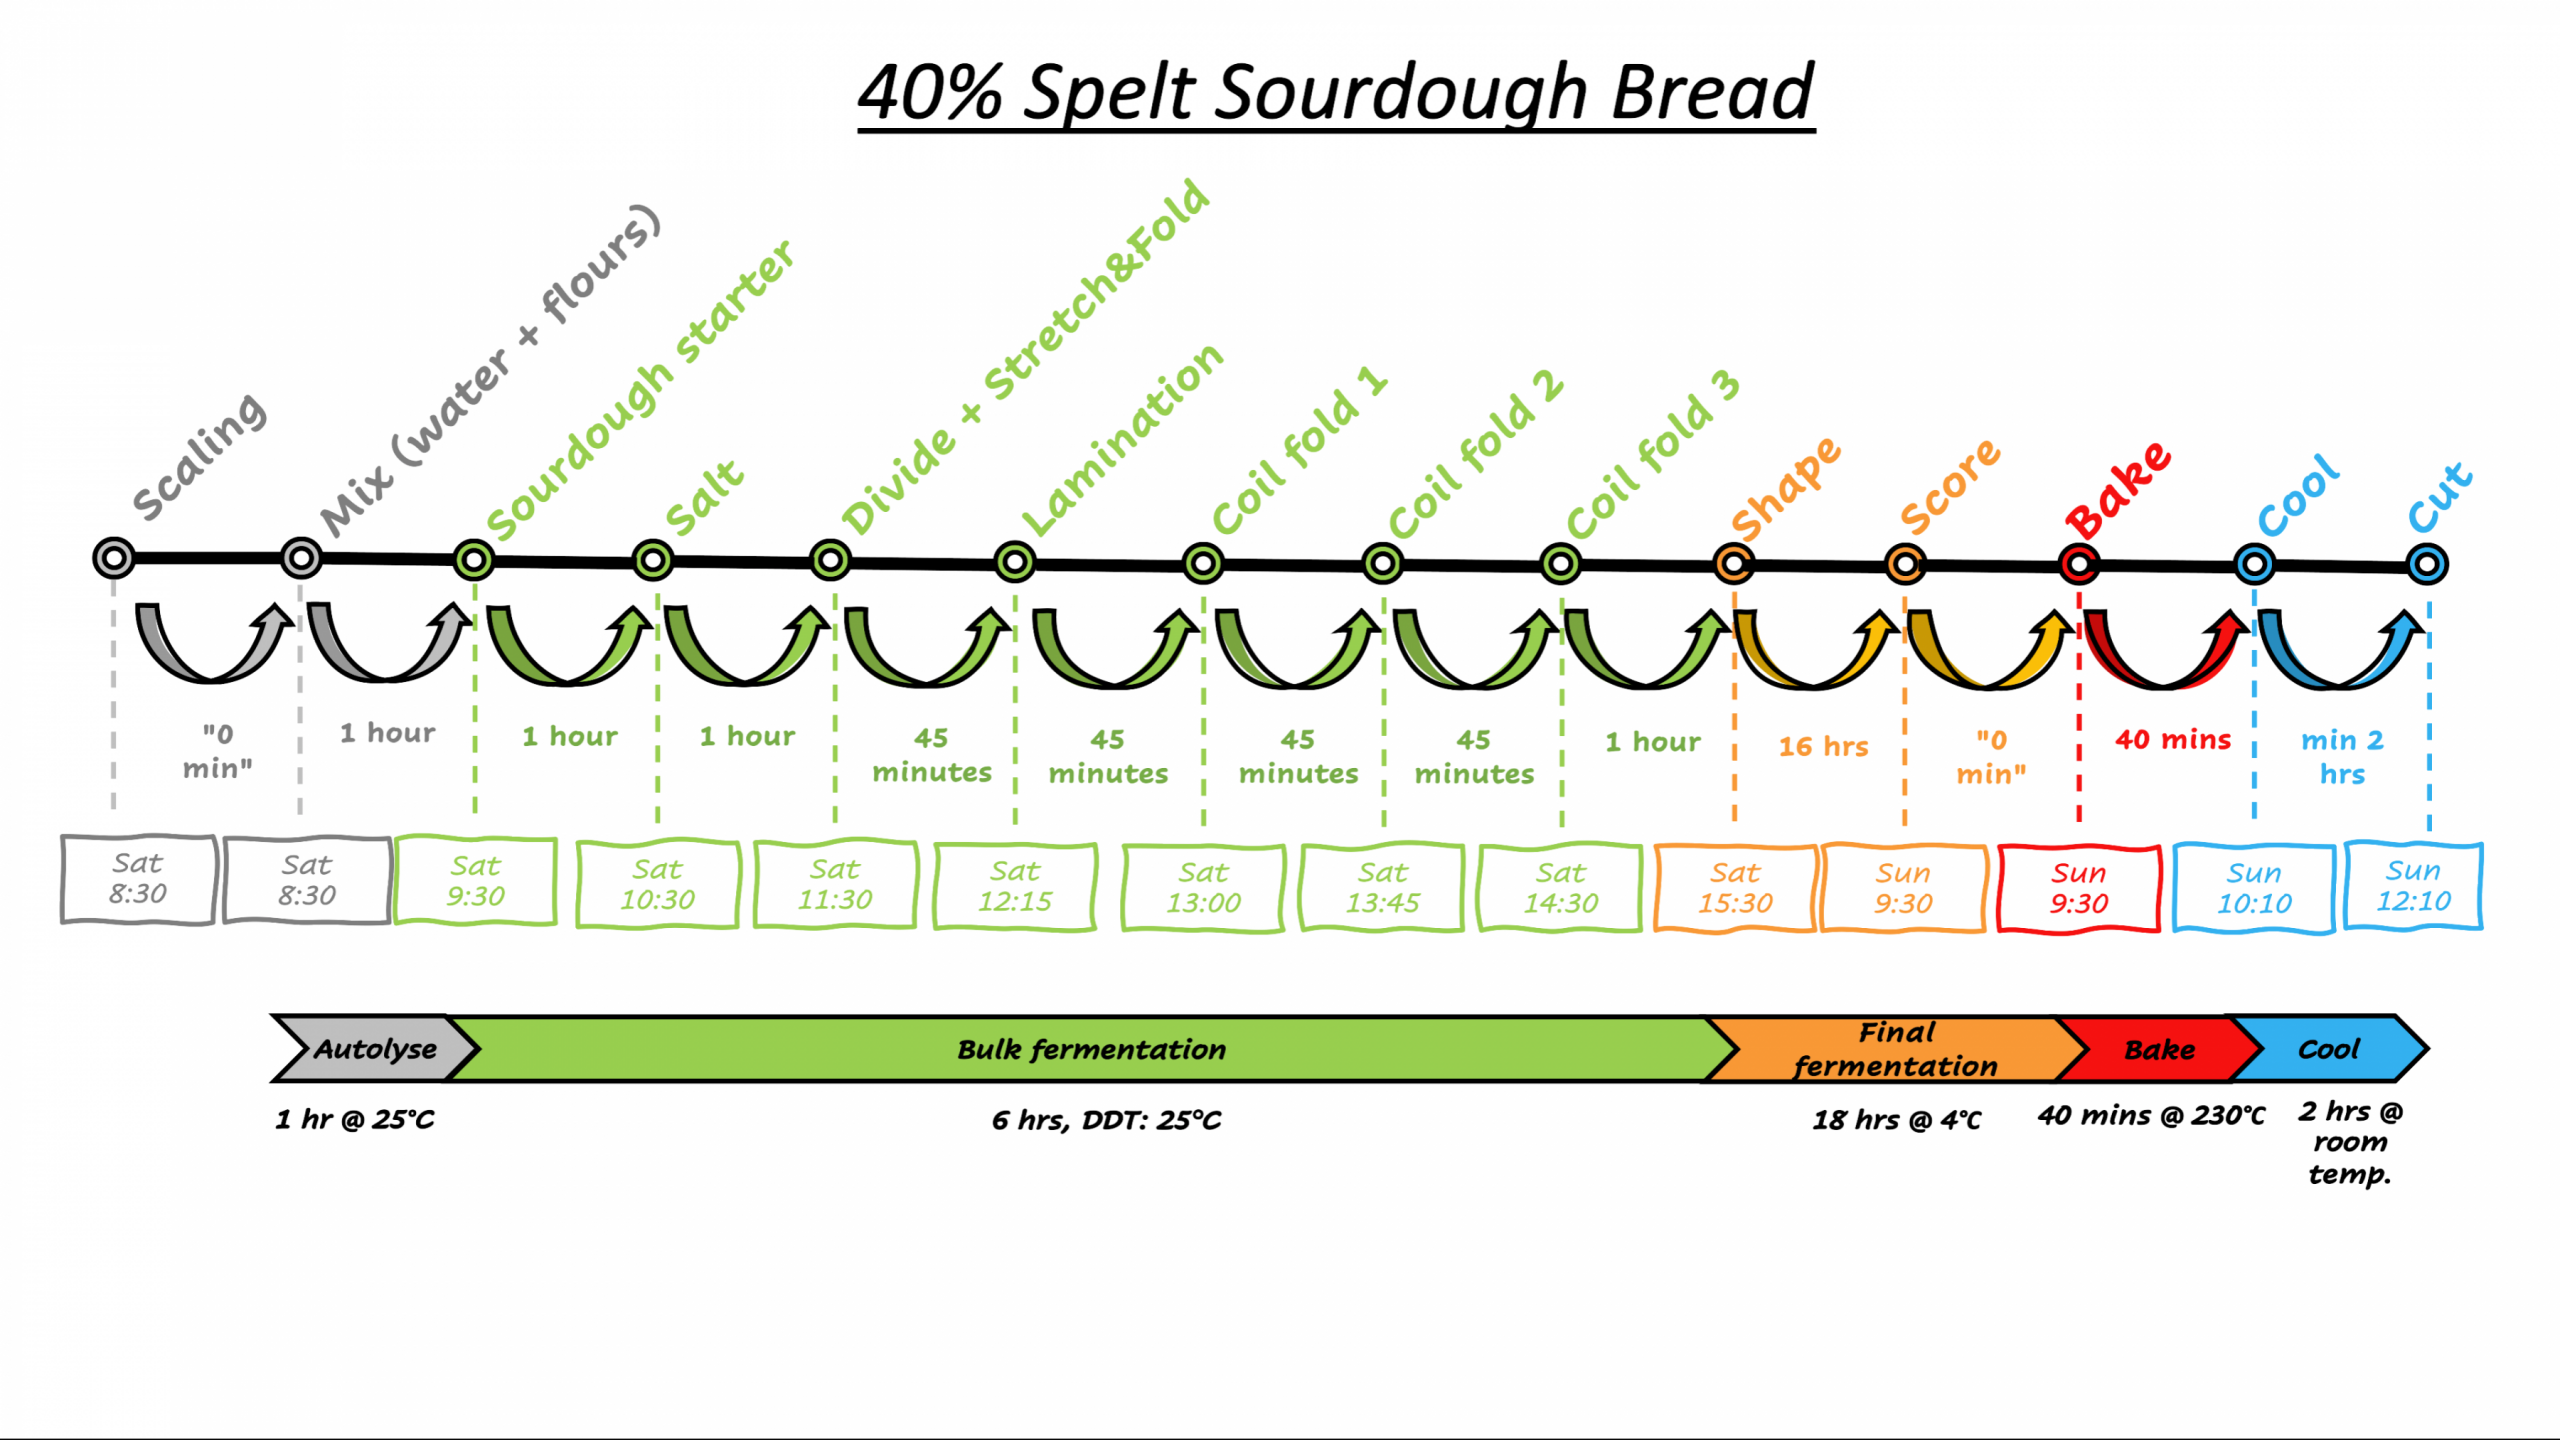
40% Spelt Sourdough Bread
Before arriving at this recipe I made 3 more attempts and I treasure more the journey than the final success. Yes, my 4th attempt was the one that I was looking for, but the first 3 taught me more.
The final recipe (the 4th attempt) was:
- 180g sourdough starter (100% hydration). The starter was refreshed the evening before with 12g mother sourdough starter + 84g water + 34g spelt flour + 50g strong wheat flour.
- 600g strong wheat flour (14% proteins)
- 400g spelt flour
- 673g water
- 20g salt
The method:
1. The first attempt
I knew few things about spelt flour and what to expect from it. But it is only when you try it that you really feel the difference.
Spelt flour, compared to wheat flour:
- does not work well in the very hydrated dough. The spelt flour has less water absorbency.
- it is very extensible
- it has a low % of gluten while high protein content.
- ii has a weak gluten quality (The 2 components from gluten are unbalanced. Gluten in spelt flour is high in gliadins, meaning that its stretching is improved and is low in glutenin, meaning that the elasticity suffers and the structure to hold its shape is affected.)
- it rises quickly and over proofs at a lower volume increase
For this initial attempt, I tested first the recipe at 75% hydration (meaning 730g water). I performed 4 coil folds, shaped the bread at 50% volume increase but let the dough rise up until 75% before the overnight fridge retard.
The result showed that even with 4 coil folds, the structure was a challenge; the hydration was too high and I've got a very wet dough feeling when shaping; 75% volume increase looked over-proofed; the loaves were flat despite the above, the taste was fantastic.
2. The second attempt
3. The third attempt

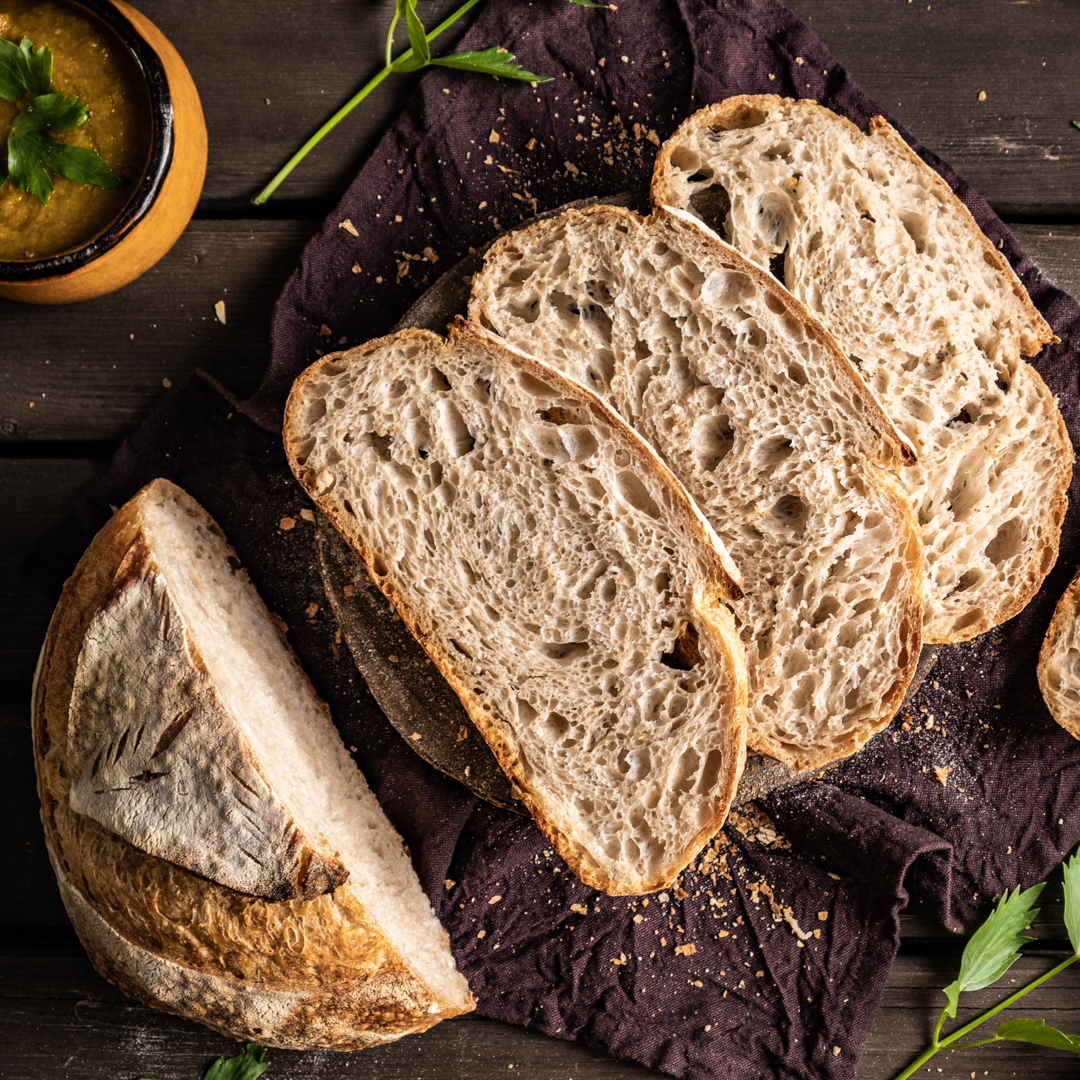
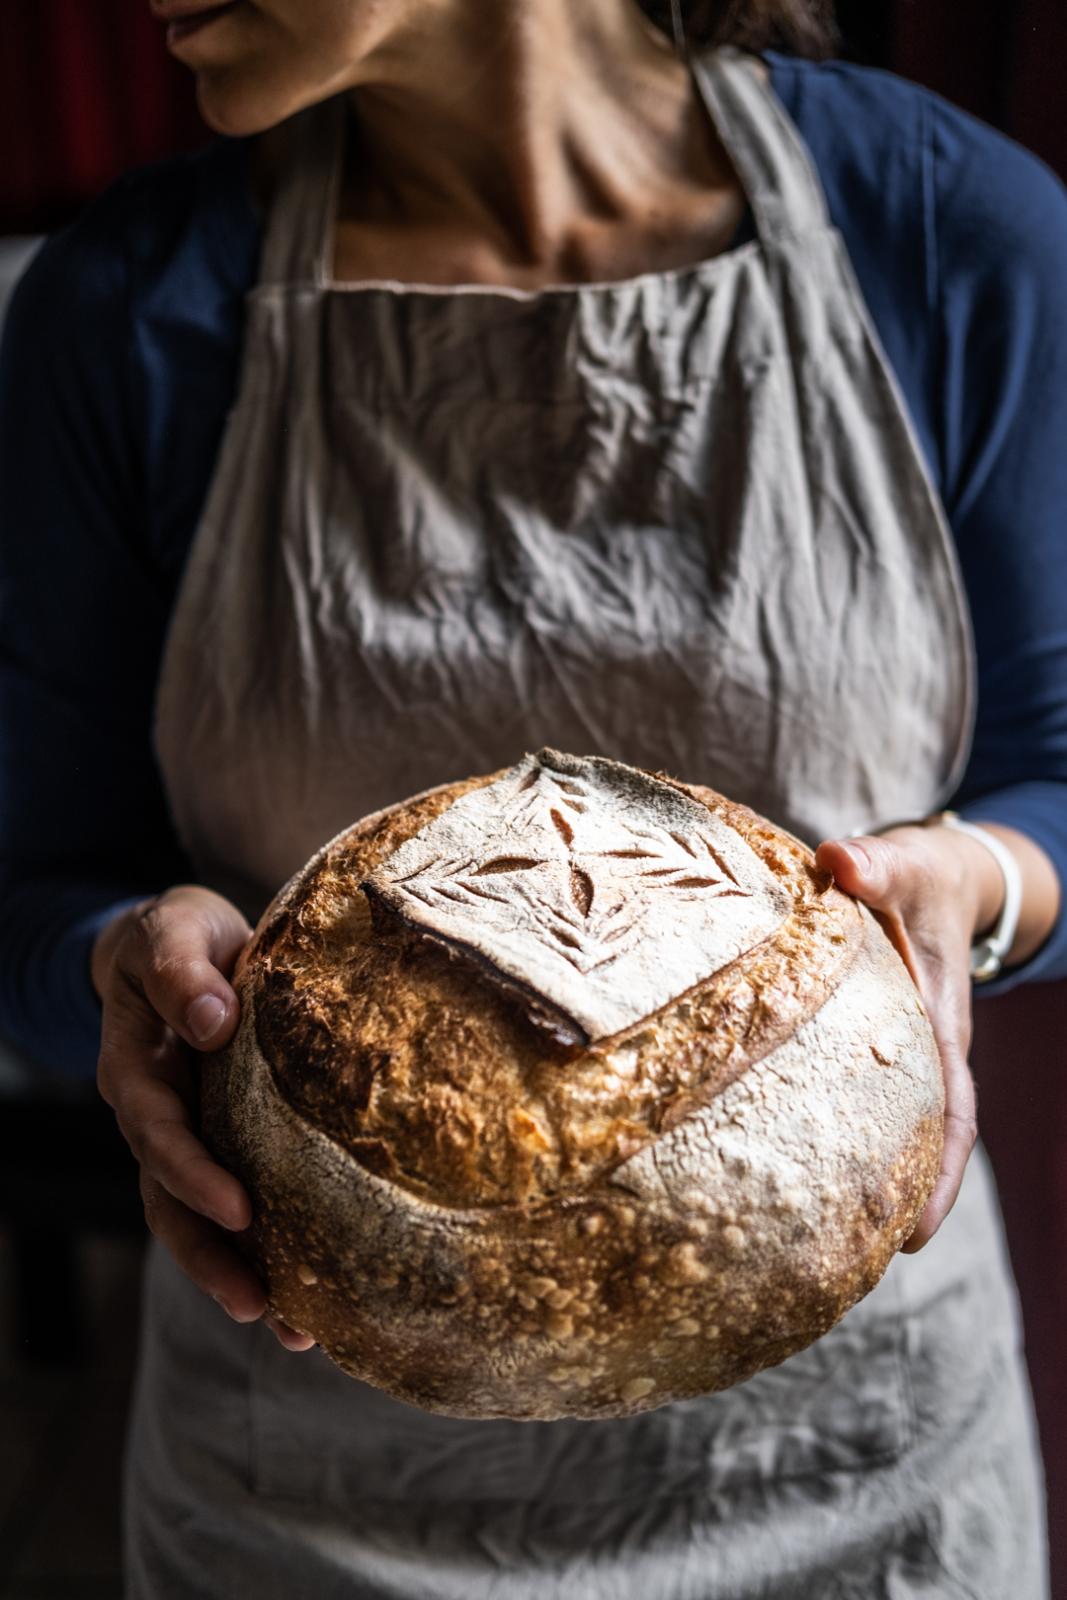
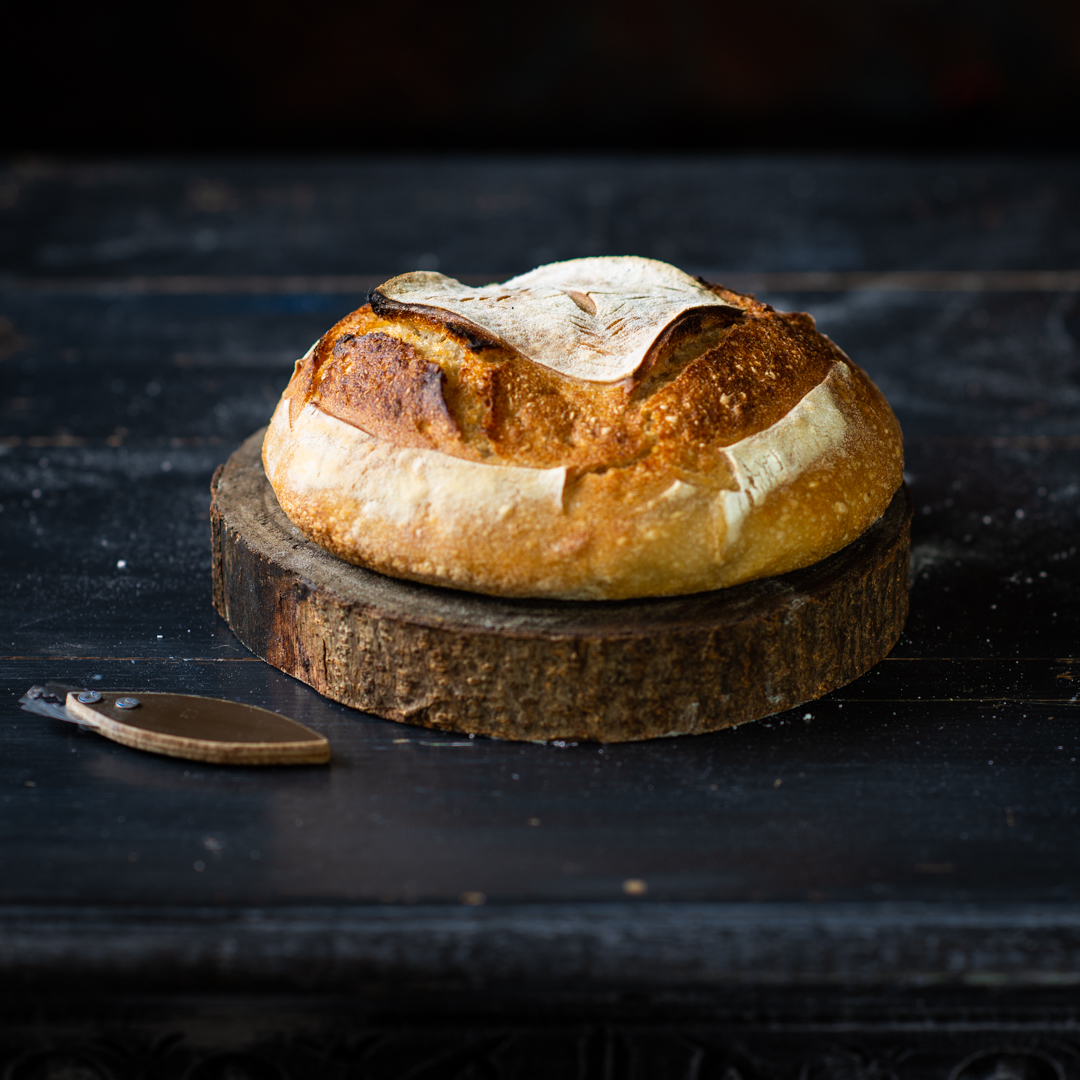
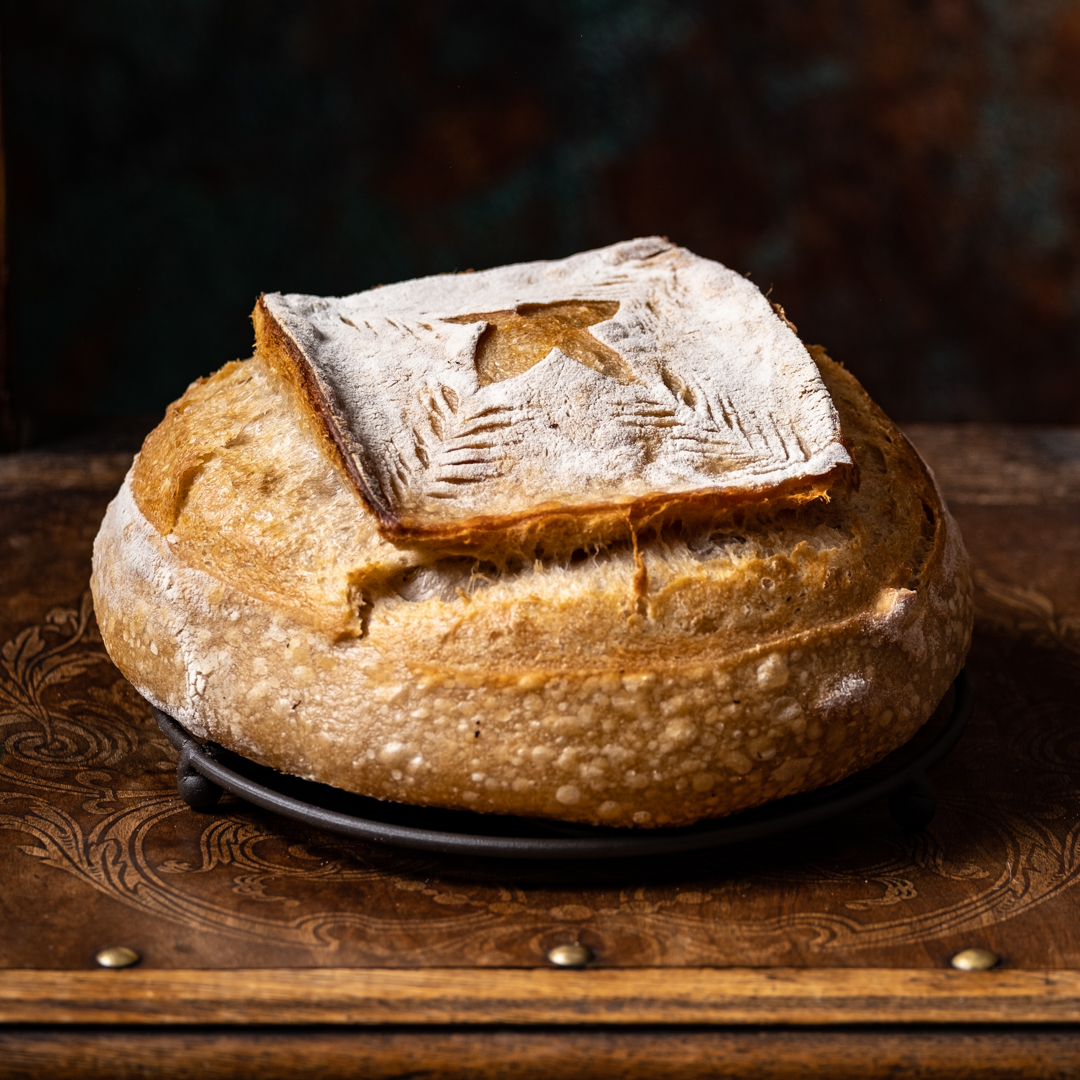
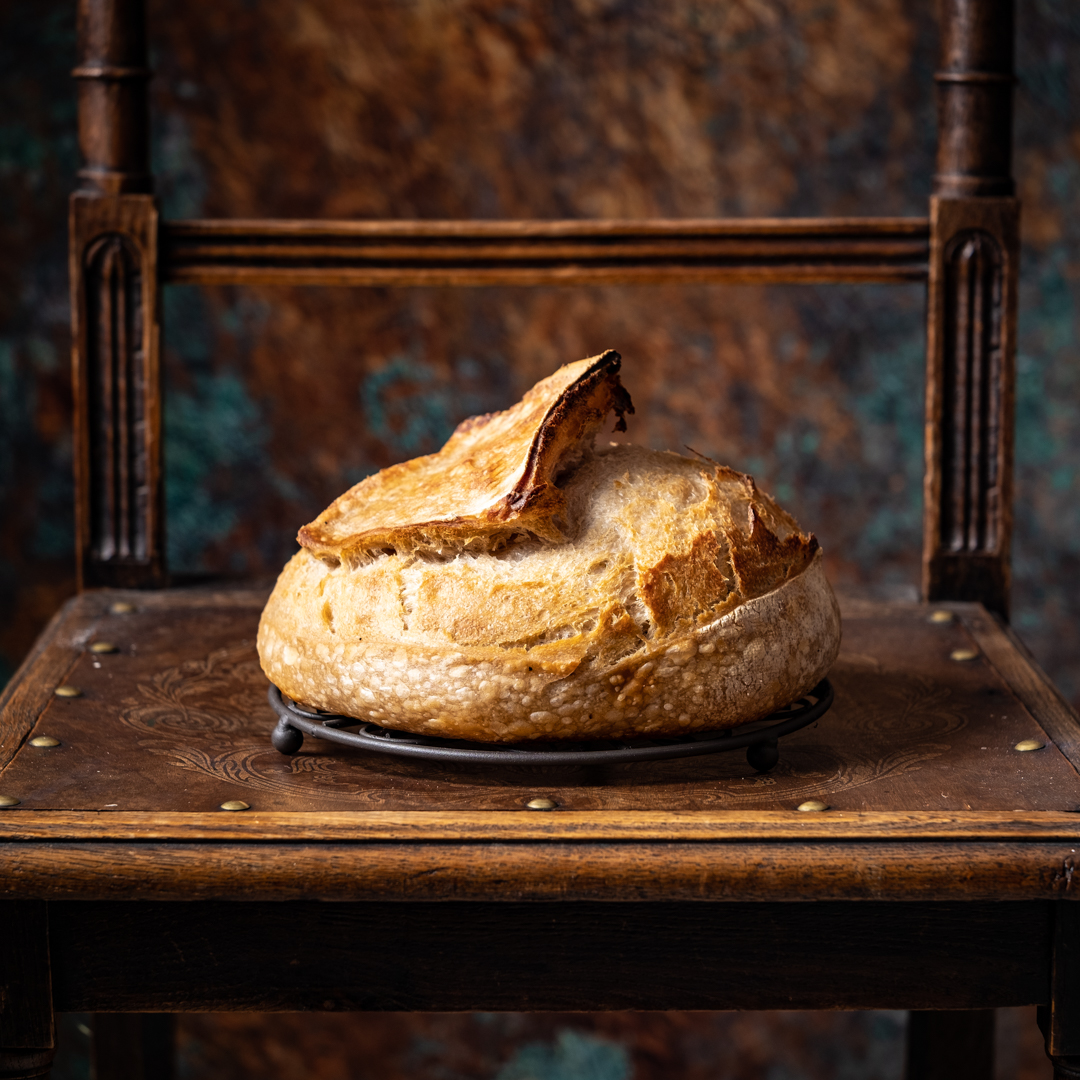
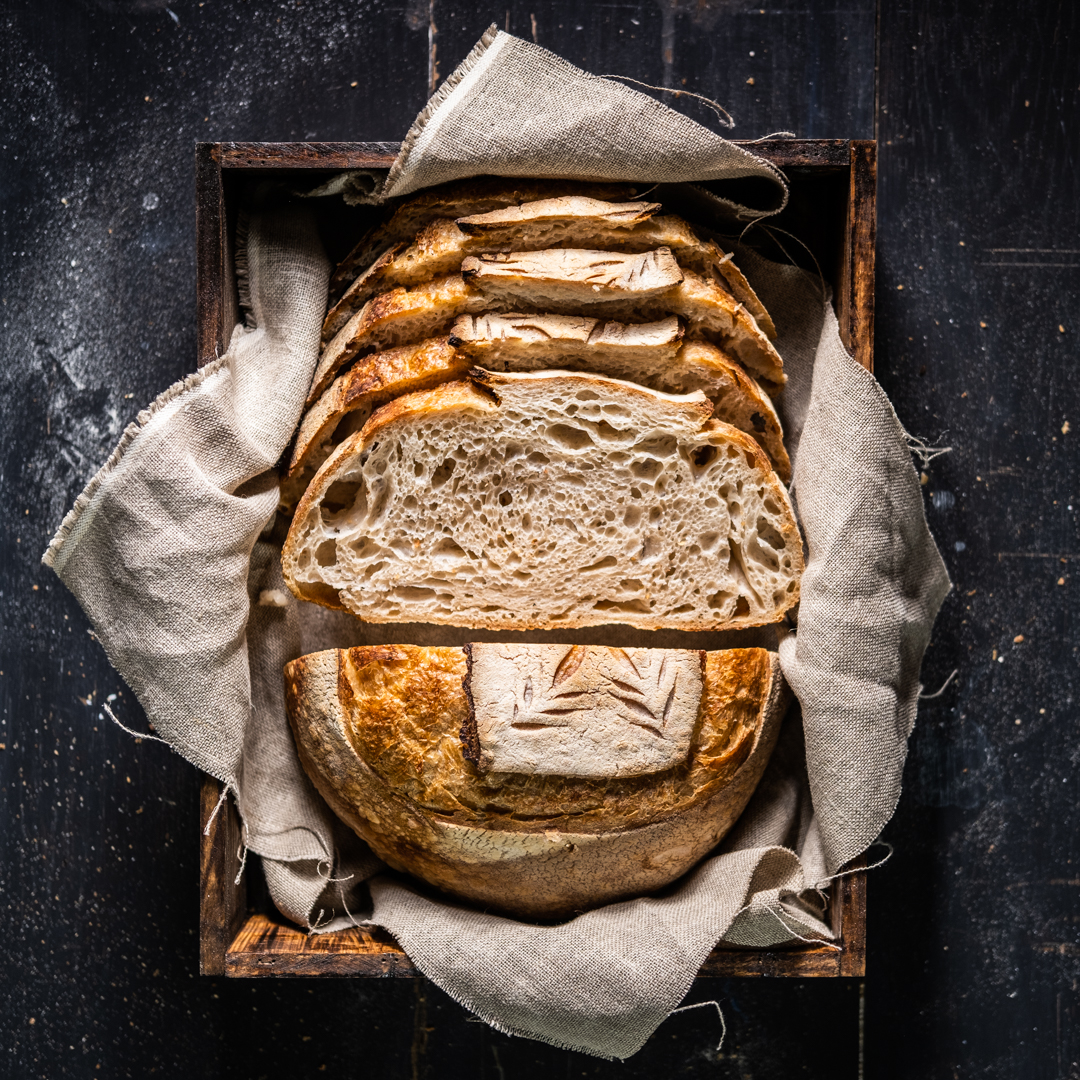
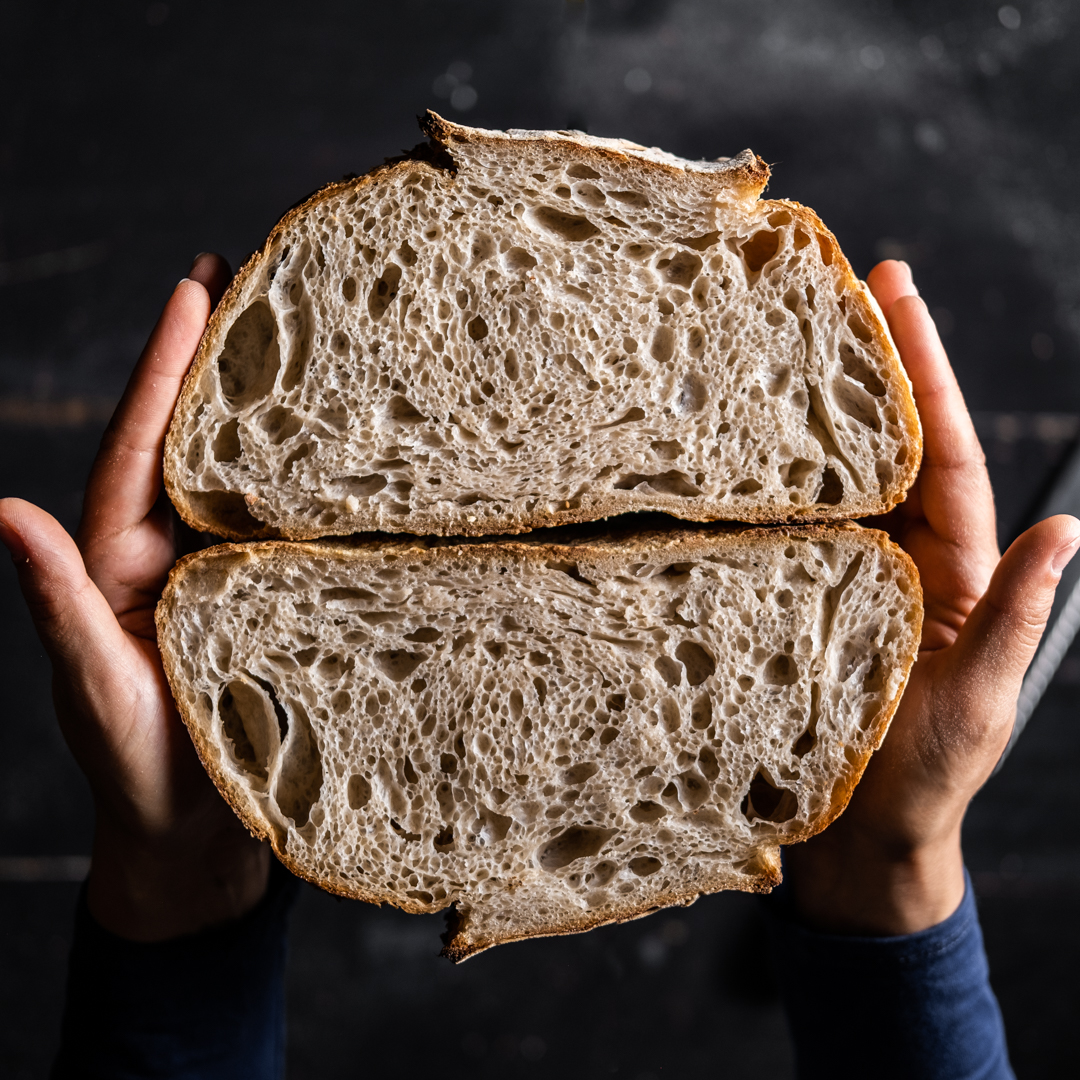
As you may notice, the result was a lovely risen bread, with an impressive height. The ear in this case was less dramatically opened because the dough expanded to a good state internally during the proofing stage rather than in the oven and had very little power to push the ear up.The second loaf (not in these photos) was flatter with a less height than this one, making me think that passed a bit on the over-proofed side.Without even seeing the crumb, I could have easily guessed that this bread had an open crumb inside and I caught to bake it in the very last moments before starting to collapse.Oh, yes, this is what you can call an open crumb bread. The loaf is super light in your hands and you can guess even without cutting it that you get an airy crumb.For a round loaf, this is quite a nice crumb as usually, you get more chances of an open crumb using oval bannetons rather than round/squared.If my target was just the open crumb, then I would have stopped here with the recipe development. I love open crumb bread but I also know that this is a risky business. You need to extend the fermentation to the maximum and catch the dough at the very right moment to get it like this. The first loaf was great but I cannot say the same with the second one from the batch. It was flatter and less open crumb than the first one, although still a lovely loaf. What was the difference? Well, could have stayed more closer to the door of the fridge and it fermented faster. I would have then preferred to stay more on the safe side. I tried this bread at 50% volume rise and it was under proofed. At 75%, it was to the over-proofed limit. A perfect bread should have been fermented somewhere in the middle.
4. The fourth attempt (this recipe)
With my second attempt at this recipe, I saw that a 50% volume increase was not enough and bread turn out under proofed. With my 3rd attempt, I saw that 75% was at the limit of collapsing due to over proofing. I've learned my lesson and I had only to ferment it in a range of 50-75%. I picked 65%, but this may be a matter of preference. I wanted an open crumb (not a super open crumb) and I've got it. Spelt dough reaches the over proofing stage faster than wheat flour so then I had to find the sweet spot.There are some things I cannot show you with photos: the taste and flavour. There is a sweet taste and a nutty flavour that the spelt flour brings to bread. It reminds me of rustic/medieval loaves. I put together the process of the 4th attempt and the experiences I've got on the first 3 attempts in a video on youtube: I am sure that most of you making your own recipes have similar baking journeys. Is mainly when you try them yourself can really learn to bake amazing loaves. Denisa.