
Upcycled proofing box
Our house is quite large, old and difficult to insulate, so we don't keep it all warm all day in the winter. Consequently nowhere in it has a constant temperature, not even the airing cupboard where the hot water tank lives. Room temp. might get as low as 16C at times, and this has made proofing bread a bit of a faff (turning on the hot water just to make a loaf seems disproportionate). So, just in time for the warmer weather we now have here in Wales, I have made a thermostatically controlled proofing box.
Originally I was interested in using peltier heating/cooling plates to make a heating and cooling one, but it became apparent that this would require a lot of electronics - a fun project, but it would take some time. So I went for something simpler. I had thought of using two plastic tubs, one inside the other with insulation, but then thought I should be more environmental so re-used a cardboard box. I had considered those heating pads for vivaria, but I have one of those in a seed propagator and that seems to struggle to get above 22C in cold weather, so I found these very small space heaters [1]. I also found these nifty two channel thermostatic controllers [2] (from eBay, available from various places). (Though some makes of similar heater have built in thermostats.)
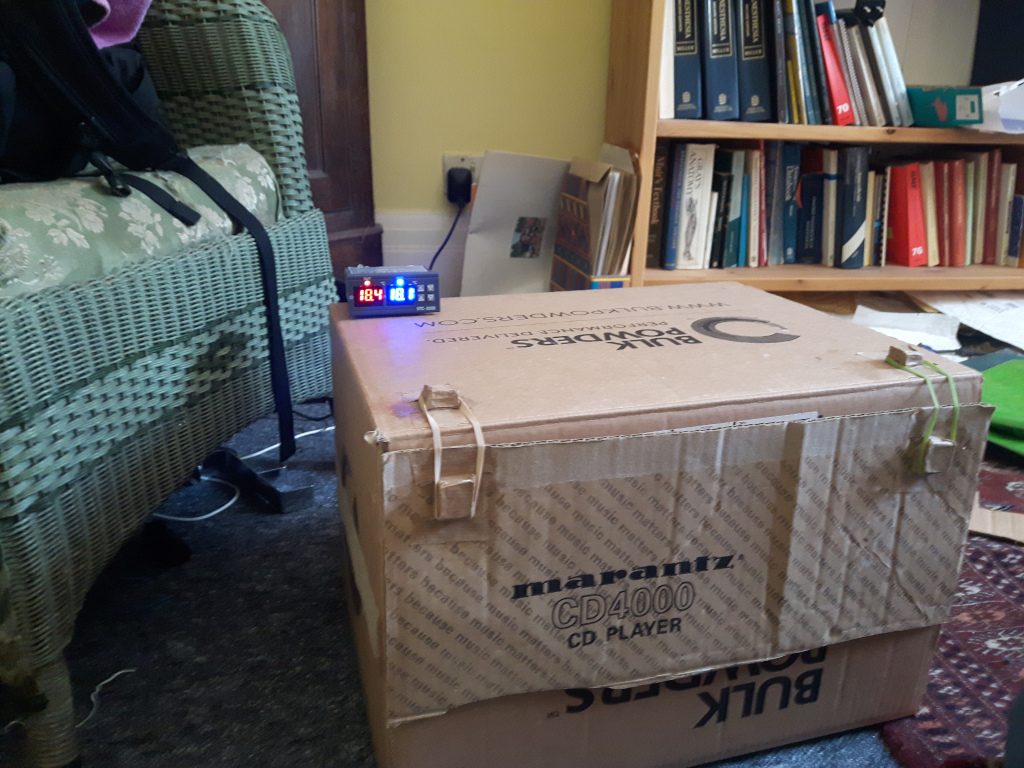
The outside view is the main picture. I found the heater too powerful, or at any rate it had too high a thermal capacity and it would overshoot way past the target temperature. Fortunately I could cure this using the second channel of the thermostat. In the photo below of the inside, the main sensor is the one dangling from the top, the second one is zip-tied to the top of the heater with some thermal paste. By setting that to 65C I can get a decent rate of heating without too much overshoot - the main sensor records the temperature fluctuating over a range of about 2C as the heater kicks in and out, which is acceptable I think. (How does one get inline images to work?)
I decided to silver the inside for some heat retention by dismantling the box, gluing foil on with diluted pva and then gluing the box back together. There is a baffle to stop the contents being heated directly by radiant heat from the heater, though that is probably not going to be a problem. The table on the bottom is to keep the bowl off the floor and allow air to circulate all around it. All made out of re-cycled cardboard glued together.
Inside 2 [3]
I find that, in the cold weather we have been having until recently, I need to set the box to a couple of degrees above the desired dough temperature to take into account the cooling that occurs every time I take the dough out for a stretch and fold. Being able to keep a consistent dough temperature has been really useful in developing my baking as I can concentrate on tweaking other aspects of a recipe and plan timing a little more predictably.
I need to make a proper housing for the controller and tidy up the wiring, also some insulation around the outside would be beneficial I think, but Covid lockdown happened since getting this far so I will have to wait until I can womble some discarded insulating material and/or more cardboard from somewhere. Also, a separate thermal cut-out might be a good idea if I am to leave it unattended, though the heater claims to have one.
But overall I am really happy with this, just need to finish it off.
TIM