
Smoked Pastrami-A Reason to Bake Deli Rye
Smoked Pastrami
While we bake bread for many purposes, few could be considered more noble than to aid in the creation of an outstanding Pastrami sandwich. Corned beef is a close second in my opinion but also a nice topping for deli rye breads. I have made this recipe many times and suggest you might consider smoking all you can get in your smoker at one time. It freezes well, sliced, and you will enjoy knowing you have a bag at hand if the need arises to feed special friends on the quick.
A few years ago, a fellow at Kenny and Zuke's Deli in Portland OR , took pity on me and showed me how to make what has been described by many as the best Pastrami in the USA. Many food writers from all over have marveled at the flavor and texture of the absolutely marvelous Brisket done Pastrami style in their restaurant. Even the food writers in NY have waxed on about how there may be better but they haven’t found it yet. Everything I write here, in fact everything I know about the fine craft of creating this delicious and tender indulgence, I learned from Nick which I think is Zuke. I scaled the quantities back and fooled with the process for a home cook but it is essentially the original recipe. I have read they are now back to curing their own meats and have changed the recipe slightly to improve the flavors. For a time they sub contracted the curing because it takes up so much space and is a pain to keep track of, in the quantity they go through. I can’t help but to trust these guys to have made it better, hard as it might be to believe. If you find yourself near Portland, please do stop in for a real treat. They serve the very best of everything in this unusual Deli.
There are many ways to cook or smoke Pastrami. As I understand it, the term applies more to the process than the actual meat used. I have read of pastrami turkey and other poultry. However for me the only real pastrami starts off life as a beef brisket that is first cured and marinated in special preservative (pink) salt, sugar and spices for at least 5 days and as long as 12. The combination of ingredients in the brine has a major impact on the finished product and while I am suggesting below that you start by buying an already cured piece of brisket sold as “Corned Beef” in the grocery, that product was intended to be boiled and consumed as corned beef. It will produce a very good Pastrami but the best flavor will come from starting with a raw, fresh brisket and curing your own. If you want to cure your own, start by finding some curing or “pink” salt. This is available on line and is added at around 1 Tablespoon per gallon of water. You MUST have the proper salt. You MUST have the ability to refrigerate and rotate the meat daily during the days of curing time. The following pastrami demo was done with pre cured corned beef and it’s delicious.
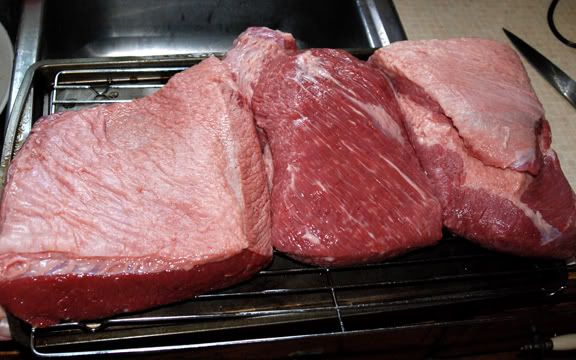
A full Packer Cut of Brisket consists of a flat and a point, once it is separated and I find them at Sam's or any real butcher between 9-11 Lbs. Your butcher will be able to remove the point from the flat and leave a 1/8-1/4 inch fat cap remaining. The flat is the more lean piece and usually the larger of the two. When done properly, the point is my favorite. It has more fat and connective tissues so it’s not for those on a diet. To be clear, you definitely want to separate the point from the flat before curing. When I have purchased full Packer cuts of whole brisket that have been cured for corned beef, I always separate them. The cooking (smoking time) and evenness is much better with two smaller pieces. If you have a real butcher, ask him to let you watch how he splits the brisket into a flat and a point. It isn't hard but you need to know how to do it. I don't think I could describe the process well enough in words to make it meaningful. So ether get a cured piece of flat or find a real butcher and order what you want or need. I like the butcher personally. It's a dying art and I like to support them.
Let’s get started.
Equipment needed:
Smoker
Stock pot
1 gallon Zip Lock bags with gusset
roasting pan
sheet pans
Sharp Carving Knife
Ingredients:
I’m going to include the home curing ingredients now. If you are starting with a cured corn beef, ignore this list of ingredients and skip to the rub ingredients, which is the same for both procedures. The amounts listed for the curing brine is enough for 6 full briskets. Scale down for home use as necessary.
Brine:
6 gallons of water
7 cups kosher salt
1 1/8 cup pink salt
5 cups white sugar
2 cups brown sugar
3/4 cup honey
1/2 cup pickling spice
1/4 cup coriander seed
1/4 cup mustard seed
1/3 cup minced garlic
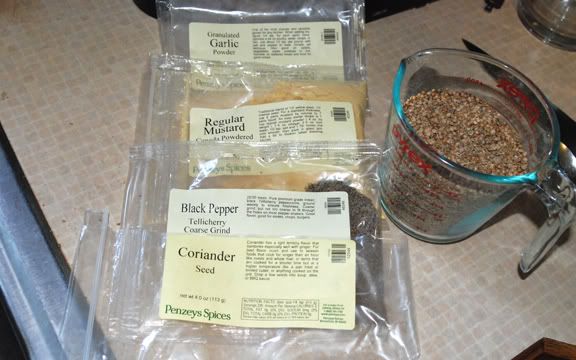
Rub:
Ground Coriander
Course crushed Black Pepper
Mustard seed ground
Garlic powder or granules.
I don’t think you can hold a slow steady 225-250F indirect heat on any grill I have seen or used. You have to have some kind of smoker where there is a heat source, wood chip shelf, water bath and grill racks. These fall into categories of fuel type and size. The purist types might opt for a wood or coal fired unit but that means you have to tend a finicky fire for 12 hours. I’ve done that a few times but the convenience of a gas or electric heater makes this smoking far easier and the final product is barely any different than if you stayed up all night singing to yourself. Weber has a couple models that will hold a decent size Turkey that work well for this. I have a Smoke Vault by Camp Chef. You can find it near $220 on sale around or online. I see Brinkman has a less expensive gas model for $149 that looks like it would get the job done, at Home Depot. Get the biggest one your budget will afford. The world of smoked meats is addictive and there are plenty of ways to use your smoker. Turkey breast and salmon are our other smoked favorites. This process doesn’t impart so much of a smoky flavor that you taste the smoke. It should be a mild and subtle enhancement. Any Low and Slow pit master will tell you it is easy to ruin a Q by over smoking. You are looking for a little smoke during all the cooking time. I’ll include a photo but your nose is the best guide. You can just see the smoke as it drifts out the top. Perfect.
Regardless of your smoker you should be able to get two flats on the rack with space between or on 2 layers. My smoker will hold 6 large flats at one time but then I tend to do things on a larger scale for parties and such. The smoking process shrinks the meats considerably so I suggest getting the largest flat portion usually about 4 lbs each. By the time the meat is done, you will be wishing you had done 2. Left over’s freeze well, double wrapped in plastic or vac-u-packed.
The process:
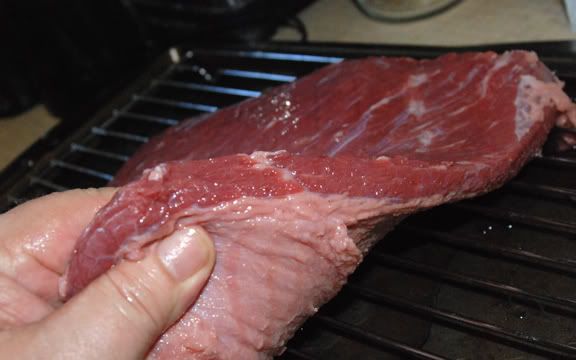
First, purchase the largest one or two corned beef flats from your grocery store. I have to look around to find two the same size above 4 pounds so they cook at the same rate. It is hard to know what a brisket flat will look like out of the bag. It pays to take a little time to find quality and hopefully get a piece that isn’t tapered down to a small flap and thinner on one side than the other. Look at the piece I’m holding below and see how I was moaning I didn’t see the thin side at the store. This meat cooks a long time. You’re looking for even cooking which comes from even thickness. Ultimately you have to cook for the thickest part of the meat so the thinner part will be more well done at the end. Not the end of the world but a perfect piece is better.
Start by rinsing the meet off under cold water and letting it soak in cold water for 2 hours. After 2 hours, dump the water and replace with fresh cold water. I add ice to keep it cooler. After the second rinse, pat dry and let it drip over the sink on a wire rack for a few minutes. This soaking will remove some of the salt from the commercial curing process which is usually too salty for our purposes. Additionally, the smoking process will concentrate the remaining salt so it’s good to remove some now.
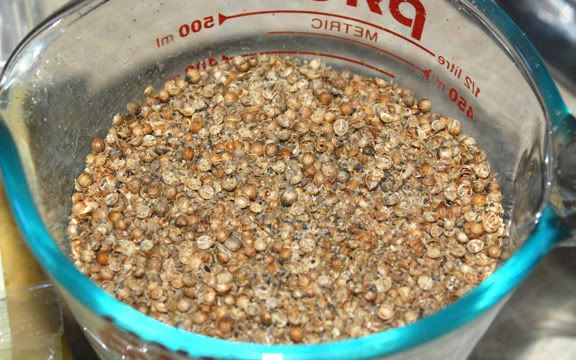
While the meat is soaking, prepare the spices. I buy the whole coriander seeds and run them through my spice mill. Some are ground more finely and some are more like crushed. I usually buy course crushed or cracked black pepper since my spice mill (coffee grinder) has a hard time with whole pepper corns. I use Coriander as the primary spice with black pepper as the secondary. I also use granulated garlic and a small amount of ground mustard. You want the Coriander to be the prominent flavor with the pepper in the second seat. Mix it all together and have it handy for application. I’m not giving exact amounts because the size and number of meats varies. Mostly Coriander, then pepper, then garlic, then mustard. The spice coating and the fat below it become what is known as the “Bark” or “Mr. Brown” in Southern BBQ circles. The bark is my favorite part but it is an acquired taste, thankfully. You can see in the photo I started with 1-1/2 Cups of spice mixture. I had ½ Cup remaining after covering 3 brisket flats.
I like to pat the meat dry with paper towels and place it on a wire rack over a sheet pan to set for a while and come to room temperature for a bit. Then, remove the rack, dry further and set the meat on the pan. The idea is to apply as much spice as will stay in place, covering all sides completely. I like to wrap the meat in plastic wrap or a gallon bag and refrigerate it overnight if possible. I have started the smoker immediately and started the cooking but it’s better if you can give it an overnight dry marinade.
Smoke Day:
Remove the meat from the cooler a couple hours before you plan to put it on the smoker. Start your smoker and get it prepared with a water bath below the cooking rack filled with hot water. Pre heat the heater and fill the wood chip tray with some hardwood. I don’t use musquiet which is popular in Texas for BBQ due to it’s pungent flavor. Any other hardwood will be fine. Set your heat adjustments to 225-250F and find yourself an adult beverage. It takes a while for the smoker to come to a stable temperature. The meat is cool the water is cool and the wood chips haven’t started to smoke yet. After an hour, make sure you check the thermometer and start making changes to stay between the range of 225-250. Plan on this taking at least 11 hours and maybe more. The larger your meats are, the longer it will take to get them to 175F. If you can hold a stable 250F all through the 11 hours, your internal temp probe should be near 175F. You can over run the 175 to 190F so don’t concern yourself if you do. I always go to 190F for a darker bark (outside crust) and less remaining fats and connective tissue. The next step is to braise the meat in a baking pan in water so the warmer it is here, the shorter the braising time will be.
Braising:
Pre heat the oven to 350F.
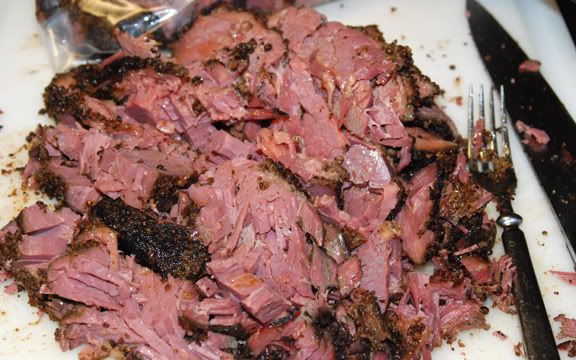
I try to plan the smoking process so I am done around 4 or 5 hours before I want to serve the meat. Remove the smoked pastrami to a large roasting pan with an inch of hot water in the bottom. Using a double layer of foil, cover and seal the top of the roasting pan. Place in a pre heated 350F oven to braise and make the meat fork tender. If you removed the meat from the smoker at 175, the braising will take 3 or more hours. If you waited and smoked to an internal temperature of 190F, about 1-1/2 hours or so will do. After 3 hours of braising, check for fork tender. Be sure to check the most lean portion of the meat. The fatty part will be soft regardless. The problem is that it is hard to check the meat for fork tender and then re cover the top with foil so, do your best. You shouldn’t need to add water if you get a reasonable seal. Once the meat is fork tender, remove from the oven and let it start to cool. If I’m planning to serve right away, I let the meat cool in the pan for about an hour to absorb some juices back in. I’ll set it on a cutting board to cool further and carve on an angle across the grain after it has cooled to warm. This is hard to cut in thin slices so I generally cut ¼ inch or thicker slices. If you simmered it to soft, it will be hard to impossible to cut into small pieces. So wait until the meat has cooled to a nice warm plate temperature before carving with your just sharpened knife. A stack of smoked Pastrami is the perfect topping to a slice of Jewish Deli Rye bread. Enjoy!
NOTES:
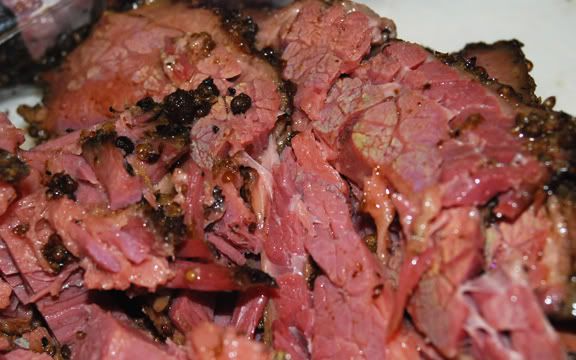
Notice the photo of 2 slices below. This was cut before the braising was complete. I mistakenly removed the piece and cut a couple slices. Notice how the meat looks like the grain is long. You have to be very careful to check the bottom of the meat for grain direction and cut across the grain. You would think the grain would be along the longest side but, it usually doesn’t. The first cut should have been on a corner. It makes a big difference in how tender the meat is, pay attention. Notice the end grain in the close up photos. This is a critical consideration you need to get right. Brisket is a tough stringy meat that becomes soft and deliciously tender when cooked properly AND cut correctly.
One thing to remember. I started with 3 bags of cured corned beef that weighed 12.5 Lbs.. That included the brine. After smoking and braising the total package weighs only 7.5 Lbs. Shrinkage.
Make sure your knife is as sharp as you can get it. Because you are cutting across the grain, I start the cut by drawing back across the piece first so the end doesn’t spit off on the grain. I usually do a better job of cutting stack-able pieces than I did in the close up shot but that’s the idea. I tried to make this clear but if there are questions, fire away.
Enjoy!
Eric

This is to be avoided if possible. Try to find evenly thick pieces.
After soaking they need to be patted dry.
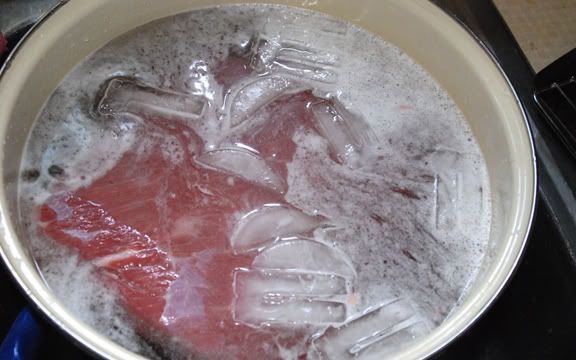
Soaking the excess salt out of the cured Brisket.
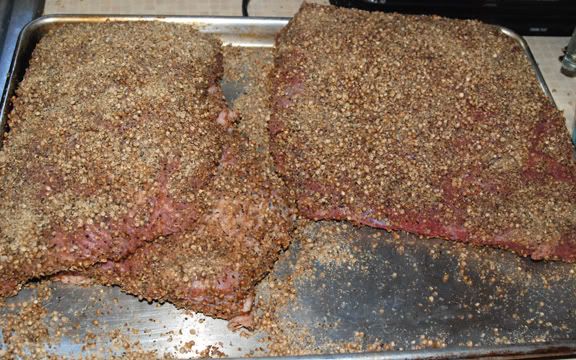
After each piece is spiced heavily, they should sit out for a while to warm to room temperature. The spices
will stay on better if you wait a while. Optionally you can wrap them in plastic wrap overnight in the refrigerator.
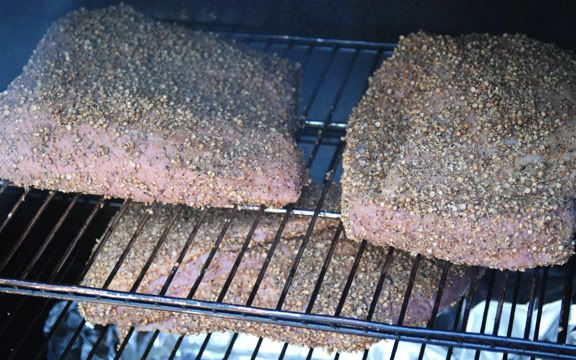
Loaded and ready to go. The smoker is warmed up to temperature already.

Just a small amount of smoke is all you need. I leave the top vents wide open.
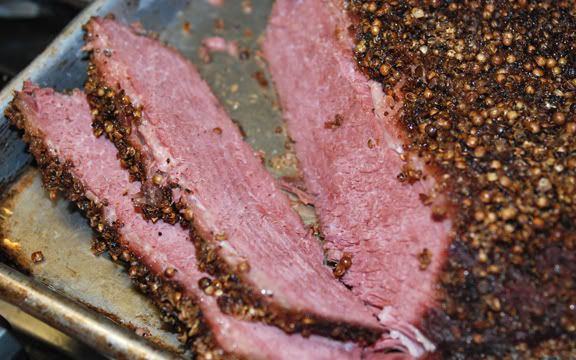
Notice I cut the first slices on the grain and not across the grain. This is a common error.
Be sure to check the grain on the bottom and cut across (at 90 degrees).


Comments
Thanks breadsong!
As soon as I had my first taste of the sandwich I realized the time spent had been worth it. Brisket is such tough piece of meat to tenderize using low heat and smoke. It takes a lot of time. The cooking time for this was relatively short compared some I've cooked when I was doing competition BBQ, but none of those had been brined for 5-6 days either.
I've had Dimuzio's book since Dec 2010 and this is the first bread I've baked from it, so it's great to hear that you think it turned out well.:^))
Franko
Nice bread, nice meat.
Congrats on a successful smoke!
Glenn
Thanks Glenn!
I'm looking forward to doing this one again.
Franko
Pages