The Fresh Loaf

A Community of Amateur Bakers and Artisan Bread Enthusiasts.

Most bookmarked

zorgclyde's picture
zorgclyde

Recommendation for beginner who likes whole grain breads?

I just recently started got into baking breads, and I want to get a book that's suitable for me. 

One thing I found out is that the breads that I like to eat are slightly dense, multi-grain breads -except for quickbreads- but these are also trickier to make especially for beginners.

So my question, which book would be good for this purpose? I would like one that's beginner accessible, have hand making instructions (I don't have a mixer and won't get one soon), and have good number of recipes that won't take 3 days to make. I've read the book reviews online but am still a little undecided so I thought to get more feedback here.

Thanks and I appreciate your suggestions.

medex's picture
medex

If no-knead is so good, why bother with anything else?

I had a bread machine I had to return because it was defective twice.  I then thought it a good idea to get a mixer, which I haven't gotten yet, but I still may.  Anyway, people keep raving about no-knead bread and how it's the end all be all of bread.  If this is true then what's the point of kneading in general?  it is certainly a lot of work.

Is it better to just forget the mixer and buy a dutch oven?

cranbo's picture
cranbo

Effect of yeast on autolyse

So I've been poring over some older TFL posts on autolyse, as well as other web sites. 

The traditional definition of autolyse means that only flour and water are combined to enhance flour hydration and gluten formation, with a host of other benefits. 

One post I found said that yeast should not be included in an autolyse because it can potentially form too acidic of an environment, which may not be conducive to flavor (or possibly to gluten development). I can imagine that the addition of lots of leaven (yeast, preferement, etc) could cause problems with autolyse, but I have never experienced this myself.  

My question is:

In your own experience, have you tried autolyse with yeast, as well as without? If so, what difference did it make in the final product for the same recipe? Note I'm not looking for theoretical answers here, i want to know if you were able to perceive a significant difference in the resulting bread. 

For me, I guess my next step will be to run some experiments, and compare the results of autolysed doughs which contain levain vs. those which don't. Considering doughs are autolysed 20 min to 1 hour, those are the intervals that I will be working with. 


earth3rd's picture
earth3rd

Ciabatta - No Knead Bread

I found this recipe for Ciabatta No Knead Bread on the internet at this site: 

http://www.5min.com/Video/How-to-Make-No-Knead-Ciabatta-Bread-213126958

Watch the video... I followed every step as seen in the video.

I converted the recipe to weight measurment... here it is...

     Ciabatta -no knead bread 1 loaf

455 gr APF (all purpose flour)

64 gr WF (whole wheat flour)

0.9 gr yeast (active dry yeast)

9.5 gr salt (table salt)

473 gr warm water 100 - 105F  


The bread smelled and tasted fantastic, I would definatly make it again. Very easy to make. Here are a couple of pictures of the finished product.

By the way... it went very nicely with the Moroccan Lentil Soup I made as well!!!!

The soup recipe can be found at this site:

http://allrecipes.com/Recipe/Moroccan-Lentil-Soup/Detail.aspx


hanseata's picture
hanseata

Walnut Poppy Seed Spelt Bread and a Trick to "Wood Fire" Your Loaves

One of my favorite stores in Portland is Micucci's, an Italian whole and retail grocery. They don't only have Südtiroler Speck and the best Fontina, they also carry nice wines at reasonable prices (I'm too cheap to spend more than 7 - 10 dollars for a bottle - and choosing European wine is easy because of the standardized labeling).  There I purchase Italian 00 flour and spices in bulk, and such items as Marzano tomatoes, cooked chestnuts and gooseberry jam.

Micucci's also has a little bakery, selling pizza by the slice, sfogliatelle with ricotta filling, ciabatta and fluffy "Luna" breads. But what enticed me to show up last Friday at 8:00 sharp was their special "Wheat Walnut Poppy Seed Bread", cut in quarters from a large boule. You have to be there when it comes out of the oven - an hour later it may be already snatched up by customers waiting eagerly in line.

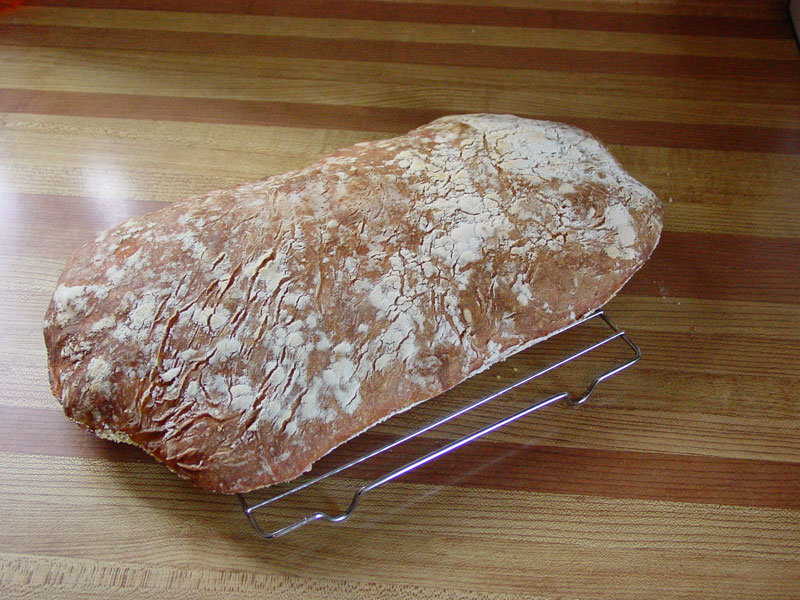
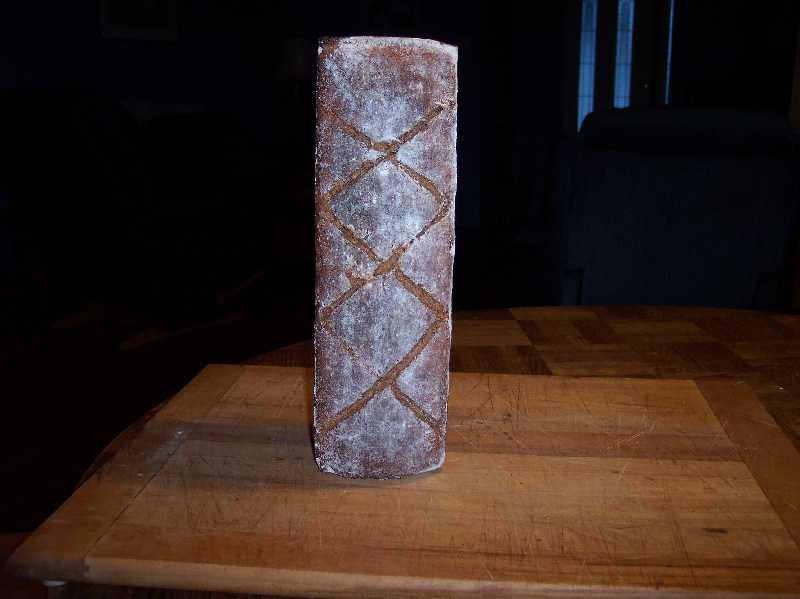
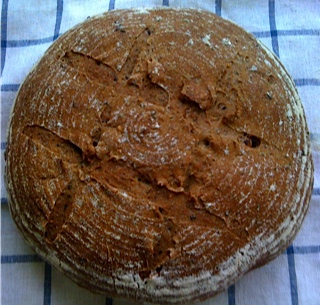
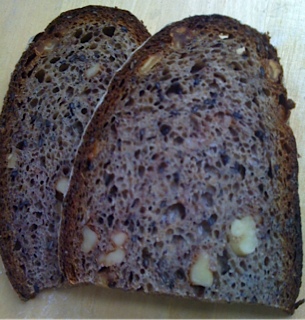
Micucci's Wheat Walnut Poppy Seed Bread

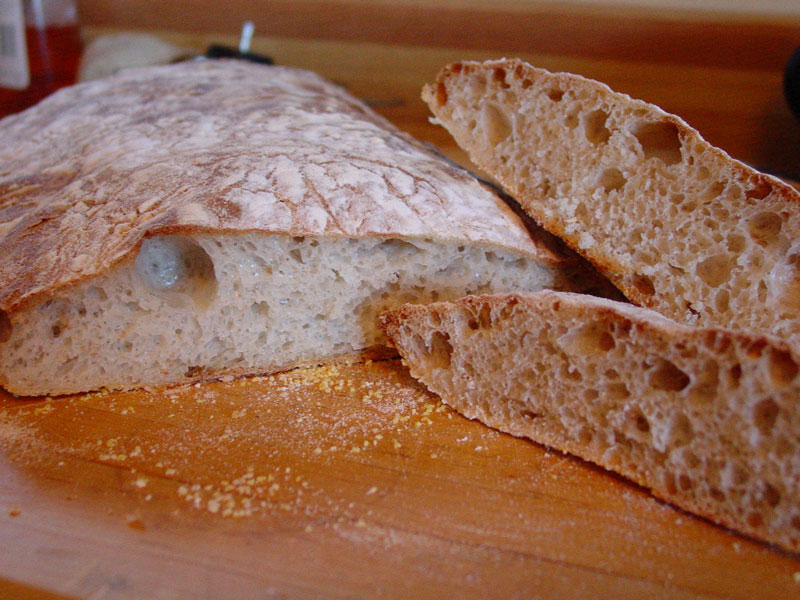
I really like this bread, but since we're in Portland perhaps once a month, and not necessarily on Fridays, I wanted to re-create this specialty at home. I also thought I could probably even improve it - it's slightly sweet than necessary. Looking closely at the crumb I realized that these dark spots were not all poppy seeds but some other black seeds, too. Smaller than flax, and darker: black sesame.

The dark reddish color of the slices must come from the walnuts, there are plenty in the bread. I don't know how it is leavened, but the tag doesn't specially mention sourdough. The crumb is fairly open - the dough must be well hydrated, and I doubt that it is 100% whole wheat. I wanted to try a spelt version, prefering its nuttier taste to wheat.

How large is the percentage of seeds? I measured walnuts, poppy and black sesame seeds, and eyeballed the amounts. Walnuts with 80 g/510 g flour, and poppy and sesame with 10 g each. Using a basic formula from Reinhart's "Whole Grain Breads" ("Transitional Country Hearth Bread"), I came up with this formula, exchanging spelt for wheat, and adding nuts and seeds. Since it was already afternoon, I didn't work with pre-doughs, but used the stretch & fold technique (from Artisan Bread Every Day").

Usually I bake these kinds of lean bread like my German Feinbrot (preheat to 500 F, bake 10 minutes at 475 and 30 minutes at 425 F) - the crust is thinner and crisper than the one from the original recipe), but I wanted to try a technique I learned from Martin Pöt Stoldt (www.der-Sauerteig.de), falling temperatures to imitate the slowly diminishing heat in a wood fired oven.

WALNUT POPPY SEED SPELT BREAD

312 g water, at 95 F
    6 g instant yeast
284 g spelt flour
227 g bread flour
    9 g salt
  80 g walnuts, slightly toasted
  10 g black sesame
  10 g poppy seeds

DAY 1

Dissolve yeast in warm water. Add to all other dough ingredients (except for walnuts) in mixing bowl. Mix together for 1 - 2 min. by hand or with mixer at low speed, until ingredients come together in sticky, coarse ball. Let dough rest for 5 min.

Knead dough for 2 min. at medium-low speed, feeding the nuts slowly in it, and adjusting with some more water as needed, dough should be smoother but still sticky. Continue kneading for another 4 min., the last 20 sec. at medium-high speed (or more vigorously by hand). Dough should be still somewhat sticky. Prepare clean, lightly oiled bowl.

Transfer dough to lightly floured work surface. With wet or oiled hands, stretch dough gently into rectangle. Fold it like a business letter. Turn folded dough around and fold it from the sides again in 3 layers like a letter. Pick dough ball up, tucking sides under, and place it into clean bowl. Cover and let rest for 10 min.

Repeat those stretches and folds 3 times, with 10 min. intervals (total time 40 min.) After last stretch and fold maneuver, cover and immediately place into refrigerator for overnight fermentation.


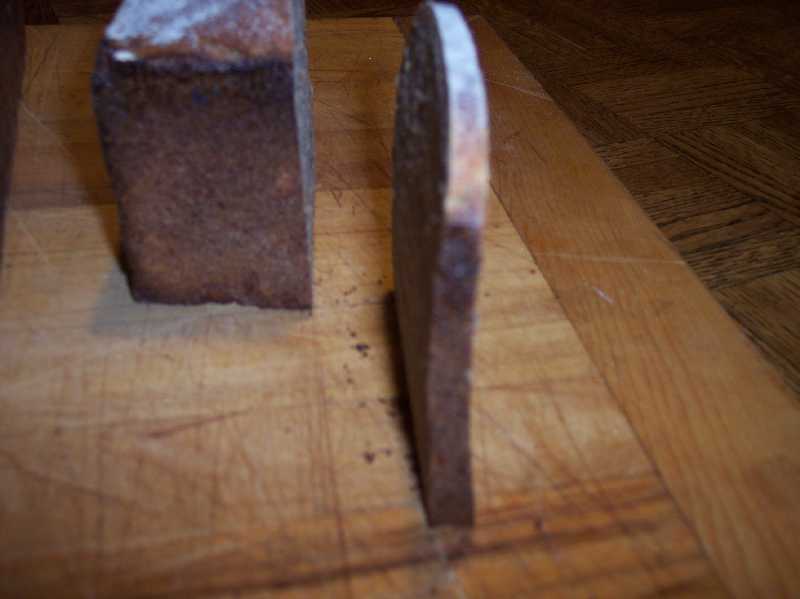
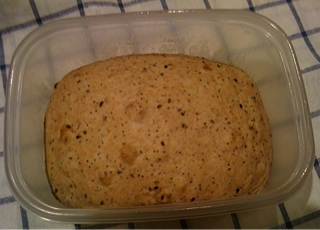
The dough handled really well, was very smooth and elastic. - That's what it looked like after the final S & F. (a bit more orangey because of the artificial light). The next morning it had considerably darkened with a purplish hue, thanks to the walnuts, and risen to almost double its original size.

DAY 2

Remove dough 2 hrs. before using.

Preheat oven to 480 F/250 C, including steam pan.

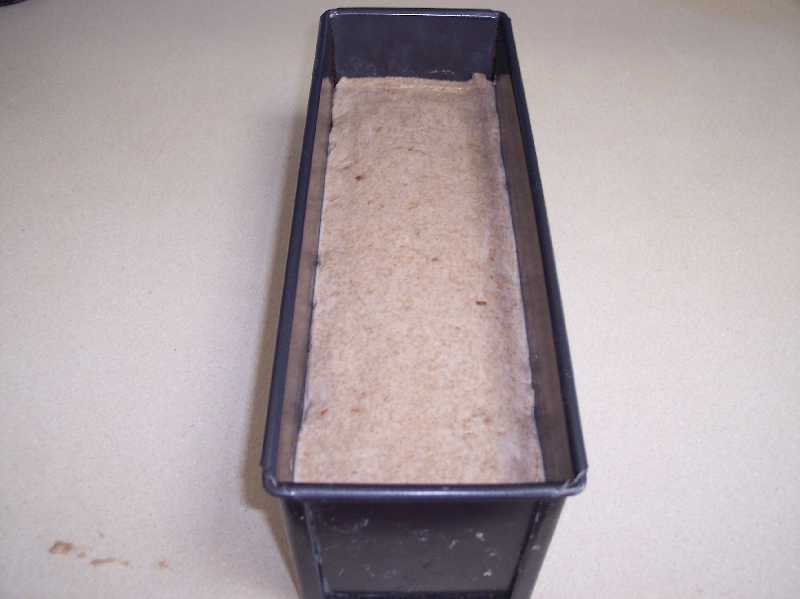
Shape boule and place in banneton. Proof for 45 - 60 min., or until it has grown 1 1/2 times to almost double its original size. Turn out onto peel. Slash.

Bake with steam (1 cup boiling water) at falling temperatures:

10 minutes at 480 F/250 C, 10 minutes at 445 F/230 C, remove steam pan, rotate bread 180 degrees. Continue baking
10 minutes at 410 F/210 C, 10 minutes at 375 F/190 C, 5 - 10 min at 355 F/180 C (internal temperature should be at least 205, better 210 F/96 - 99 C). Bread should sound hollow when thumped on bottom.

Let cool on wire rack.


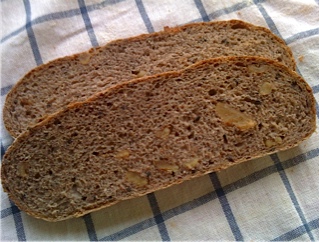
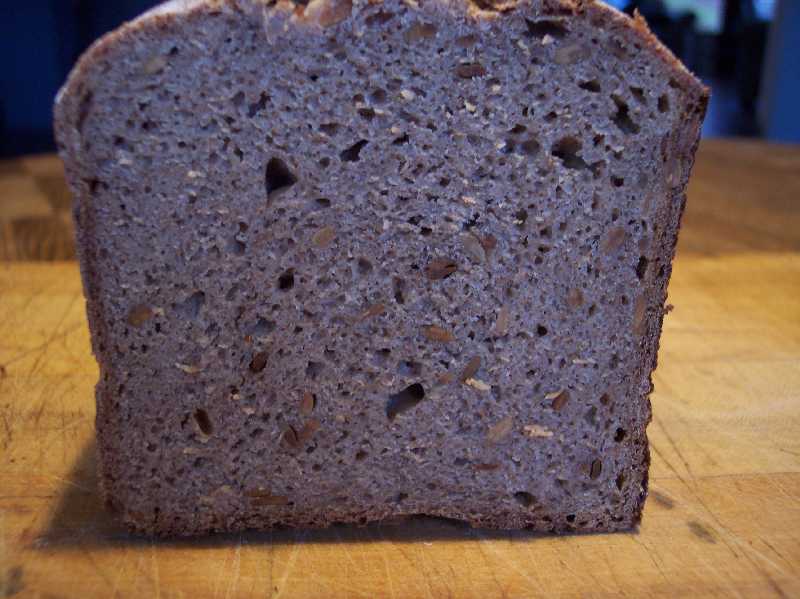
Walnut Poppy Seed Spelt Bread                                                 Crumb: not quite as dark as the Micucci version

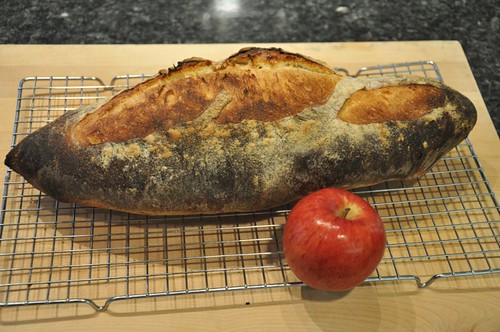
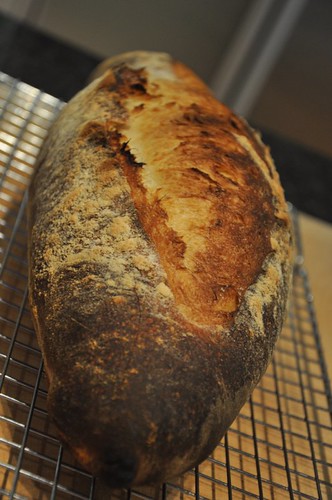
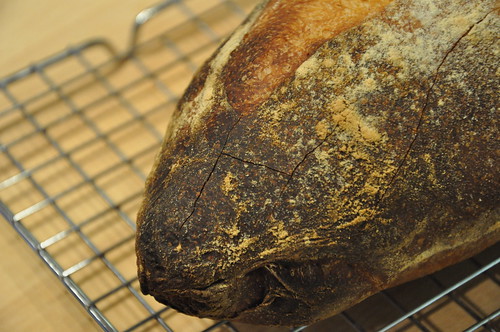
The falling temperatures create a really amazing crust!! The bread tasted very good, but next time I would rather make it with a white sourdough starter - we love the little more tang.


Boboshempy's picture
Boboshempy

Best Overnight Proofing Temperature

I am able to control the temperature of my sourdough loaves for overnight retarding and proofing and I wanted to get everyone's opinion of what you think the best temperature is and why. There has been a bunch of recent thoughts and discussion on this circulating in books and whatnot and I wanted to put this question out there to the masters.

Thanks!

Nick


Elagins's picture
Elagins

Bakebook Chronicles - Continued

Actually, I posted this elsewhere, but am not sure how many have seen it, so I'm reposting under its own heading.

It's been a good while since I last chronicled our adventures and misadventures in the world of publishing, and a lot has happened in the interim.

Many of you know that our publisher wasn't entirely happy with our original title -- The New York Bakers Jewish Bakery Book -- and so after putting out several suggestions for informal feedback, we finally settled on Inside the Jewish Bakery: Recipes and Memories from the Golden Age of Jewish Baking. Looking back at it, Norm and I both agree (as does the publisher) that this title is much more indicative of the contents of the book and leaves a lot more room for Norm's stories and reminiscences of how it was back in the day.

It's also amazing how content inflation works: originally, our contract called for a 70,000 word book, which translates into about 250 pages. In September, when the manuscript was due, it came to about 90,000 words, but the publisher didn't make an issue of it. With additions -- more Norm stories and a whole section on Passover baking -- and revisions, we suddenly found that we had 100,000 words -- about 350 pages -- and the publisher freaked.

Someone once asked Ernest Hemingway to name toe most important quality of great writing, and he answered, "a willingness to murder your children." And so I murdered about 28,000 of my kids and got the book down to around 72,500 words -- which probably isn't a bad thing, since the discipline of self-editing made me think about what was really essential -- the must-includes versus the nice to includes. So basically, most of the background info in ingredients, techniques and equipment went bye-bye, along with redundant recipes and those that people can find elsewhere.

I expect that a lot of the cut material will end up on the NYB website at some point. Norm suggested that we try to sell it as Volume 2 -- The Lost Chapters. We'll see ....

Also, it looks at this point like the pub date will be more like July than the March-April timeframe Camino Books was thinking about before ... understandable, given the complexities of editing, design, marketing, etc etc.

And speaking of marketing, one of the things we're also learning is that being an author is different from being a writer. Writers write and get paid for it; authors become public personas and have to go out and do signings, shows, media, etc etc. More than that, if you're an unknown at a small publishing house, you have to pay for it yourself. Fortunately, we found this terrific publicist who not only has done a bunch of cookbook work, but whose father owned a Jewish bakery in West LA in the 50s and 60s. So not only did we get a great professional; we also got a member of the family, so to speak ... and we even got a great photo of her dad rolling bagels that's gonna appear in the book.

So that's what's been going on ... except for one more great thing.

We had to re-shoot a bunch of the photos, including rainbow slices and French cookies, and Norm was having some health issues (all resolved now), so it was up to me to do the baking. Unfortunately, I couldn't find glace cherries, needed for the French cookies, in quantities less than 30#, so I went to a local bakery and asked if I could buy some. The woman at the counter went in the back and came back out, telling me there was no problem with that. The baker himself followed, with 1/2 a pound of the cherries and told me "no charge."

I thanked him, introduced myself and told him what I was doing and we talked shop for a bit, then his wife came out. "Ooooh, rainbow slices, I love them. He made me a tray for my birthday!" Jerry, the baker, smiled. "A lot of work," he said. So cherries in hand, I went home and baked. You can see the results here: http://www.thefreshloaf.com/node/21485/some-recent-baking-and-book-update.

After the cookies were finished and photographed, I took a plate over to the bakery and got huge smiles and thank you's from both Jerry and his wife -- talk about positive reinforcement: I floated on air for days!

So okay, that's where we stand coming into Valentine's Day weekend. Stay tuned!

Stan Ginsberg
www.nybakers.com


sharonk's picture
sharonk

Gluten-Free Sourdough and Perfect Loaves, Yeah Right!

HI All,
Lately I've been asked many questions about various technical aspects of making my bread. It seems the universe decided to remind me of some of the challenges so I could answer your questions from the best experience possible.

I'm preparing to vendor at a conference in a few short weeks.

Let's set aside that I decided to revise my book so the books I sell will be the most current and needed to have that done in time to self-print many books.

Let's set aside that my editor had to let go of my project about 10 pages into the book.
(My wonderful daughter took over the editing while she was preparing to move out of my house. The first night in her new apartment she stared at her computer for many hours, faithfully editing my book. I owe her big time)

Let's set aside that the ink I bought, at a good price online, has been delayed. When it finally arrived, I wasn't home and the delivery people needed a human to sign for it so it is still in their truck. (got ink from different site, not the best price, no shipping, next day delivered. I'm printing books as we speak, or as I write)

Let's set aside the logistics of packing my car for the conference: books, bread samples, humans, our own food, (we're all on special diets) rice cooker, toaster, hot pot, special pillows.

Now we come to what I wanted to really write about: I'm making samples, Mock Rye Bread. I froze some starter last week, took it out on Friday and planned to bake on Monday. The starter was sluggish, minimal bubbles, not much ferment smell at all.
Gave it an extra dose of water kefir but it didn't really help. (someone just wrote to me about just that).
Then I had to be out for a whole day so fed the starter and refrigerated it. (someone asked about that recently).
Still sluggish, no smell. I kept feeding it worrying it wouldn't be ready or perhaps it was never going to ferment properly. (Now that it's Fall the ambient temp in the house is cooler, probably part of the problem)  (3 cold aspects, frozen starter, refrigerated starter, cool house)

Monday morning comes, I hoped to have Peggy videotape a Mock Rye Bread demo for the online course but the starter is just sitting there. We switch gears and do a Feeding Technique #1 and #2 video.

Early Monday evening I feed it once more rather than dump the whole thing in the compost.
Late Monday night the starter starts rumbling and quaking and is in danger of overflowing its 16 cup bowl. (someone just asked about batters overflowing their pans)

I divide it into quart measuring cups, feed, cover and plan to bake on Tuesday morning. I'm left with 5 batches, a lot to do at once but hey, a baker's work is never done.

As I assemble the ingredients for the first loaf I see the starter is a bit too thick, so I add a little water to the next 4. They seem to be alright but instead of a slow pour into the pan, they plop in to the pan. Nowhere in my book do I mention "plop" as a batter texture.

Of course, my schedule for Tuesday does not allow for a proper rise. I will get home one and a half hours later than a 7 hour rise but I really can't get around it. As I'm driving home I visualize that the breads should stay nice and risen, hold their texture, be tall but when I come home they've fallen quite a bit. (someone just wrote about too short and too long rise times).

I bake them, they seem okay. I cut them open using a hacksaw (like someone just wrote about) Although they rose they're not fully cooked through on the top in the center of the loaf. (some wrote about that, too) I would have cooked them longer but they started to get a scorched smell.

A lot of it was usable, though, I cut off the uncooked pieces, hacksawed the rest into slices and froze them for the conference. I feel 99% sure they will be fine after thawing and toasting.
Luckily I also have some perfect loaves I made a few weeks ago.

I saved the uncooked parts and will see if they respond to double toasting. (more info for future questions)

So, All, if you thought I made perfect loaves all the time, you now know the truth. I'm still working with this fluid animal called Sourdough.
And Loving It.

Sjadad's picture
Sjadad

Tartine Baguette

I've baked many loaves of the Basic Country Bread out of the Tartine Bread book and they have all come out very good to great. Many friends and family members have told me it's their favorite of all the breads I bake. So I decided to try the Tartine baguette, and my expectations were very high. Either I screwed up (a distinct possibility) or this recipe/formula has some issues. First of all, it makes a huge batch of dough. The directions say to form it into two or three loaves. Perhaps if I had a commercial oven and could make 24 inch baguettes, three would be the right number of loaves, but limited by a 16 inch baking stone, my loaves are not what one would consider to be proper baguettes.Baguette of Unusual Size! The timing and manner of the salt addition is also a bit awkward. About 40 minutes into the bulk fermentation you are directed to add the salt when you do the first S&F. I didn't think the salt got incorporated very uniformly.

The loaves proofed up like balloons in the Macy*s parade and exhibited prodigious oven spring (I use Sylvia's wet towel steaming technique).

Big Oven Spring

The loaves came out of the oven looking like edible zeppelins. The crumb was not as airy as I would have expected, but that is probably my failing.

Crumb Shot As for the eating - Tasty, but not the best baguette I've eaten by a long shot. These are my baguettes a l'ancienne, which are of proper size and are much tastier:Baguettes a l'Ancienne To be fair, the crust is very good; thin and crackling. You should have heard how it sang when it first came out of the oven.DSC_0133

Has anyone else made this Tartine baguette?

Franko's picture
Franko

80% Sourdough Rye Bread- adapted from Jeffrey Hamelman's 'Bread'


This bake started out with two things in mind. I wanted to make an 80% sour rye bread and to bake it in my Pullman pan, which I’ve used only once since I bought it this past summer. While I was looking through Hamelman's 'Bread' for a recipe to use, I stopped on the photo page showing the assorted rye breads from Chapter 6, and not for the first time thought what a marvellous display of craftsmanship it was. The one in particular that has always stood out among the others for me is the Pullman loaf at the back, sitting vertically with a series of diagonally crossed slashes the length of the loaf. I've wanted to try that slashing pattern ever since seeing it, so now I had a third thing I wanted to do, but first I needed to find a recipe to use. Unfortunately the photo in the book doesn't say what particular bread the Pullman loaf is. The only rye in the chapter other than the Horst Bandel Pumpernickel that calls for a Pullman pan is the 70% Rye with a Rye Flour Soaker and Whole Wheat Flour, and that didn't fit with what I had in mind. I decided to make Hamelman's 80% Sourdough Rye with a Rye Flour Soaker, but to make it using only natural leavening rather than the combination of sour and bakers yeast called for in his formula, and to substitute dark rye for whole rye in the soaker and final mix. Somewhere along the line I decided to throw some toasted sunflower seeds into the mix as well for a bit of added flavour and texture.

When I was making the sour/levain the night before the final mix and looking at the tiny little portion of mature sour expected to convert all that raw rye flour into the only source of leavening for this bread, I must admit I had some doubts. 18 hrs later it was clear that I had underestimated just how active my starter was. It had just about popped the lid off the container, looking more like a ripe, dark, poolish than any rye sour I've made before. Simply amazing how voracious natural yeast can be in the right environment.

Three hours before the final mix the seeds were toasted in a 350F oven for 10 minutes before I checked them for colour. I was looking for a medium to dark colour to bring out a rich nutty flavour, which I think is a key component of the overall flavour of this loaf. The time will vary for different ovens, but the smell and colour of the toasted seeds is the best indicator to watch for.

The mix was started in the stand mixer and finished by hand. In retrospect I should have done the entire thing by hand and saved myself the trouble of cleaning sticky rye paste out of every possible space it could get into on my mixer. It was just too large for my small KA to handle properly through to a finished mix, but it did get it off to a good start, needing only 2-3 minutes of handwork to develop it into a cohesive paste. Final ferment, rise and bake notes are included in the recipe to follow. Molding the bread into the pan properly is a fairly critical step to have a symmetrical finished loaf, and I spent enough time with this stage to ensure the baked loaf would be level on top and that the corners would be as even and square as possible. One thing I should point out to anyone who might make this loaf or something similar. When you place the paste in the pan, make sure that the bottom and sides of the paste are dry by blotting off any excess water from the initial molding with a towel of some kind. I didn't, and had a bit of a sticking problem in one spot when it came time to unmold the loaf. Once it had cooled a bit, along with some very gentle persuasion, it did release cleanly, but a word of caution on this point. The loaf was set to cool, wrapped in linen, for 16 hrs before slicing.

I have to say this is the best tasting hi ratio rye bread I've made so far, largely due to the sour itself, but also how well the flavour of the toasted seeds compliments not only the sour, but the dark rye flour. A thin slice of this bread has that level of flavour that lasts in the mouth for the better part of an hour and makes you want to come back for more. The crumb itself is moist and dense, and even after 6 days shows no sign of staling, due to the soaker and pan baking I'm sure. The bread is a dream to slice, yielding slices just about as thin as you could possibly want them without crumbling. Although I didn't get the nice definition on the slashing as pictured in Hamelman's 'Bread' it's a fact I can easily live with when the bread tastes as good as this one does. My favourite rye? No doubt in my mind this one is it for quite some time to come.

Franko


80% Sourdough Rye with a Rye-Flour Soaker and Sunflower Seeds-adapted from Hamelman's 'Bread'


Ingredients

%

Kg/Grams

Sourdough/Starter


Whole Rye Flour

100

390

Water

83

315

Mature Sourdough Rye culture @ 100%

5.1

20

Total


725


Soaker


Dark Rye Flour

100

200

Water-boiling

118

236

Total


436


Final Dough


Dark Rye Flour


200

High Gluten flour


200

Water


197

Sea Salt


20

Soaker


436

Sourdough


725

Toasted sunflower seeds


90

Total weight


2143


Overall Formula


Whole rye flour

40

400

Dark rye Flour

40

400

High gluten Flour

20

200

Water

72

720

Salt

1.8

18

Sunflower seeds

9

90


Notes: The total weight of this mix is scaled a little heavier than what you need for a 13x4x4 Pullman pan. Scaling weight for these pans is 2.050kg. Because the dough is very sticky, I found I lost some of the dough to my hands, paddle etc. The final weight of this formula should be more than enough to compensate for that. Scaling weight for the bread pictured was 29 grams short of 2.050 .


PROCEDURE:

Before final mixing:

Mix the sourdough and leave for 17-18 hours to ripen at 65-70F.

Next mix the soaker, cover with a lid or plastic wrap and leave over night at room temperature.


Final mixing:

DDT -80F

Mix all the ingredients except the sunflower seeds on 1st speed for 3 minutes. Adjust the hydration so that the mix is loose and sticky.

Add the sunflower seeds and mix on 2nd speed for 3 minutes. The mix should resemble a paste rather than a typical wheat based 'dough'. It should be soft and sticky.


  • Depending on the size of the mixer you may need to turn the dough out on to the counter and finish mixing by hand. If so, have your hands wet, and use a scraper to help fold the dough over itself several times until it's uniformly mixed.


Place in a bowl, cover, and let bulk ferment for 30 minutes.My dough was cool after mixing and at 74F. It was given a slightly longer 45 minute bulk ferment.


Shaping:

Using wet hands, form the paste into a log and place in the pullman pan.


  • the pan I used has only been used once previous and the glaze is intact. Because of this I didn't oil or dust the pan with flour. My preferance is that the sides of the loaf look smooth and free of flour if possible. With an older pan it should be either oiled and dusted, or lined with parchment to prevent sticking.

Press the paste into the corners of the pan with wet hands, then using a wet plastic scraper pressed flat on top of the paste, press down firmly, working the paste so that it's even along the edges of the pan on all sides. Try to get the corners as square as possible and then use the scraper to smooth and flatten the top so that it's level across the entire surface.


Final rise and baking:

Final rise of 2- 2 ½ hrs at 70-72F, covered with a clear plastic box if possible or a plastic sheet. Keep the paste damp on top if needed by spraying with water. The bread does not need to be scored, but if scoring do it just a few minutes before loading in the oven to allow the slashes open cleanly.

Bake at 465F for 15 minutes then at 435 for 45 minutes. The loaf should have pulled away from the sides of the pan, similar to the way a cake does when it's baked. Allow the loaf to cool in the pan for a few minutes before tipping it out. Cool on a wire rack, wrapped in linen, for 12 hrs before slicing.


Pages