The Fresh Loaf

A Community of Amateur Bakers and Artisan Bread Enthusiasts.

rye bread

linder's picture
linder

I finally got around to making Eric's Rye Bread.  I've been wanting to try out this formula ever since I saw it posted here on TFL.  It is a wonderfully fragrant loaf of rye with sourdough, onions and caraway.  I sauteed two medium sized onions in about 2 TBSP of olive oil and added them to the final dough along with all the other ingredients.  The dough smelled sooo good even before it was baked.  The bread is light and fluffy.  I baked the second loaf about 10 minutes more for a total of 50 minutes since it was a 2 lb. boule.  The batard loaf could have stood a little more time in the oven but it still is baked enough in the middle. 

I made this bread to take to a potluck on Thursday.  There will be a hearty soup as part of the potluck so I thought this rye bread would work well.  I'm definitely making this again for us to have with some pastrami and homemade sauerkraut.


Crumb close up

Franko's picture
Franko

It's around this time of year that I tend to make rye bread of some kind more often than not. For me the flavour and texture of a hearty rye bread helps to dispel at least some of the cold and damp days we have and will continue to have for the next few months here on Vancouver Island.


This latest rye bread started out to be Dan Leader's Light Silesian Rye from his book “Local Breads” which he discovered on a visit to the Czech Republic. After entering his formula into my spreadsheet format to have a better look at it I began tinkering around with it a bit... and then a little bit more...

Well I tinkered so much that in the end I wound up with something quite different from Leader's original formula. My initial intention was to make just a few minor adjustments to it by slightly increasing the rye content, adjusting the salt, and hydration levels, but the more I played with the formula the higher the percentage of rye became. It seems that what I really had in mind was the type of rye bread that has a smooth, and very even cell structure to the crumb, reminiscent of one I had in Prague two summers ago.

That bread was almost certainly a mass produced commercial product which I probably wouldn't find as tasty today as I remember it being then, but in fact the texture of it was what I enjoyed more than anything. The bread was what a street vendor used to stack thick slices of smoky ham on top of, glorious huge hams that had been cooked over the wood fire right next to the stand, then sliced from the bone to order. The bread did such a good job of holding the ham, mustard, pickles and fried onions together in a coherent package as we wandered around Old Town Square, it was really the perfect medium for a big juicy sandwich like that.

 Leader's formula comes in at roughly 18% rye content, and confident this wouldn't give me the texture I wanted it was eventually increased to 68%. With the higher percentage of rye some extra water would be needed to achieve the smooth even crumb I was hoping for so the hydration was bumped to 76% over the original formula's 67%. The commercial yeast included in Leader's formula was turfed in favour of an all rye sour leaven and an addition of non-diastatic malt powder was added for flavour and colour. Since I like seeds in my rye bread, toasted pumpkin seeds were added to the mix along with wee bit of ground caraway to round things out. For a high ratio rye bread like this the procedure would need to change as well, primarily with the bulk ferment and final proof times and temps being warmer and shorter respectively than those for a lighter ratio rye bread. Mixing time went from 10-12 minutes down to 5-6, ample time to develop the gluten in the 32% ratio of bread flour used. Not even close to Mr Leader's formula any more, but I do have him to thank for the inspiration, and for reminding me of the bread and the wonderful sandwich I enjoyed with it that afternoon in Prague.

Although I didn't manage to get exactly the type of smooth and even crumb I'd hoped for, it came fairly close. The flavour is mildly sour, with a pleasant after taste accented by the toasted seeds and hint of caraway. I can't say for sure how much influence the malt had on the flavour but tend to think it contributed to the overall balance of it.

I'm kicking myself now for not putting a ham in the smoker to have with this loaf but I'll make do with some smoked ham from the deli and make a note to self for next time.

Link to spreadsheet *here*

Link to procedure *here*

Cheers,

Franko


Song Of The Baker's picture

What Kind Of Rye Bread Am I Thinking About?

October 30, 2012 - 5:34pm -- Song Of The Baker
Forums: 

Last month I had a sandwich handed to me from someone I can no longer ask what kind of rye bread it was (employee I fired - he is Polish if that helps), and I am hoping you all can direct me to the right recipe and name.

The rye was light to medium brown, it was thinly sliced - very thin.  It was the type that had a dense, and hearty quality.  Not pumpernickel (at least I don't think it was - are there lightly coloured pumpernickels?? - no, no it was rye.  It HAD to be rye).

Isand66's picture
Isand66

The storm is upon us as I try to write this post before losing power.  Hurricane Sandy is set to touch down in a few hours but already the wind is howling and the water is starting to rise over the docks on Long Island.

I baked this rye bread yesterday in preparation for possibly not having any bread or water for a while. Fortunately it came out as good as I could hope with the addition of a corn slurry added which added some nice moisture to the overall bread.

I built up a yeast water starter using white rye and pumpernickel flour in two builds and also used some of my existing AP sourdough starter as well.

Directions for Yeast Water Levain

Yeast Water Starter Build 1

40 grams White Rye Flour (KAF)

40 grams Pumpernickel Flour (KAF)

80 grams Yeast Water Starter

Mix the flour and Yeast Water in a bowl until thoroughly combined.  Cover the bowl and let it sit at room temperature for around 4 hours.  The starter should almost double when ready to proceed to build 2.

Build 2

Add ingredients below to starter from above and mix until incorporated.  Cover with plastic wrap and let sit at room temperature for 4 hours.

100 grams Pumpernickel Flour

100 grams Yeast Water Starter

Main Dough Ingredients

345 grams Rye Starter from above

80 grams AP Sourdough Levain Refreshed (65% Hydration)

305 grams First Clear Flour (KAF)

75 grams Potato Flour (Bob's Red Mill)

100 grams Pumpernickel Flour (KAF)

85 grams Corn Flour (Bob's Red Mill)

50 grams Rye Chops

141 grams Corn Slurry (1 small can of corn put in food processor for about 30 seconds, water drained before processing)

22 grams Pistachio Oil (You can sub Olive Oil or Vegetable Oil or any nut oil)

18 grams Seas Salt or Table Salt

350 grams Water at Room Temperature

Procedure

Mix the starters (levains) with the water to break them up in your mixer or by hand.  Next mix the flours, and rye chops with the starters in your mixer or by hand for 1 minute. Let it rest covered in your bowl for 20-30  minutes.   Next  add the oil, salt, and the corn slurry mix for 4 minute to incorporate all the ingredients. I mixed on speed #1 for 3 minutes and speed #2 for 1 minutes.   The dough should have come together in a ball and will be pretty sticky from the high percentage of rye flour.

Next take the dough out of the bowl and place it an oiled bowl or container.  Do a stretch and fold and rest the dough for 30 minutes.  After the rest do another stretch and fold and cover the dough and let it rest for 30 minutes.  Do one more stretch and fold and let it sit at room temperature covered for 2 hours.  After 2 hours you can put the dough into the refrigerator for 24 hours or up to 2 days before baking.  Feel free to do some additional S & F's if you feel it is necessary.  I baked the bread about 24 hours later.

The next day (or when ready to bake) let the dough sit out at room temperature for 2  hours.

Next, form the dough into your desired shape and put them in floured bannetons, bowls or on a baking sheet and let them rise covered for 2 hours or until they pass the poke test.  I used my baker's couche to let the batards rise.  Just make sure to not let them over-rise.  Note this dough is going to be very sticky so resist the urge to use too much flour just use enough to prevent sticking.

Score the loaves as desired and prepare your oven for baking with steam.

Set your oven for 500 degrees F. at least 30 minutes before ready to bake.  When ready to bake place the loaves into your on  your oven stone with steam and lower the temperature immediately to 450 degrees.    When both loaves are golden brown and reached an internal temperature of 200 degrees F. you can remove them from the oven.

Let the loaves cool down for at least an 3 hours or so before eating as desired.

Isand66's picture
Isand66

Last Friday I finally returned from my latest trip to China and was eager to try my hand at a rye bread after reading about some interesting ones on The Fresh Loaf.  I wanted to make one utilizing a Yeast Water starter per my baking friend DA Brownman who recently baked a master piece using a combination of a Yeast Water starter and traditional SD starter.

Since I have been having some fairly successful bakes using coffee in place of the water in my multi-grain bakes I decided to try again and used a simple dark roast coffee for the soaker and for the final dough.  I made a soaker using rye berries and cracked wheat.  I mixed the hot coffee with the dry ingredients and let sit for 24 hours covered at room temperature.

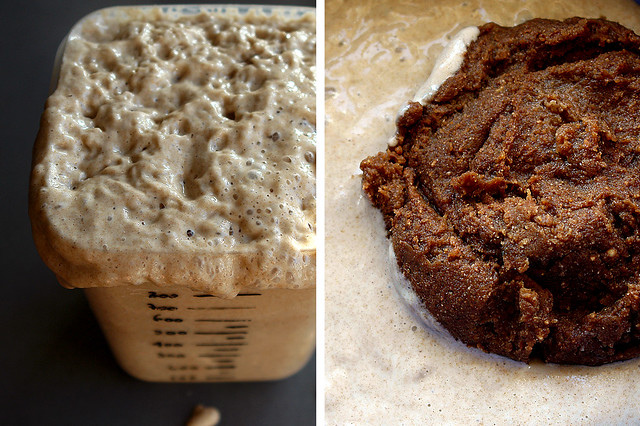
For the Yeast Water starter I wanted to develop a Pumpernickel starter so I built up the starter in 3 stages.  The first stage was left for 4 hours at room temperature and the second stage was left overnight for about 8 hours at room temperature.  The final build was left for around 5 hours at room temperature.  I tried to make exactly 425 grams of starter, but be sure to weigh your final starter and adjust as needed.

Make sure you drain the grains from the soaker, but be aware that they will absorb a great deal of the liquid.  Even though the hydration of this dough is only 70%, it is really much higher when you take the soaker into consideration.

Soaker

485 grams Hot Coffee

100 grams Cracked Wheat

150 grams Malted Rye Berries

Mix coffee in a bowl with other ingredients and let sit covered at room temperature for 24 hours.

Yeast Water Starter Build 1

60 grams Yeast Water

60 grams Pumpernickel Flour

Mix ingredients in a bowl and cover.  Let sit at room temperature for 4 hours or until you see some activity and your starter is almost doubled.

Yeast Water Starter Build 2

100 grams Yeast Water

100 grams Pumpernickel Flour

Mix above into starter from Step 1 and let sit covered for 8-10 hours or until the starter has almost doubled.

Yeast Water Starter Build 3

15 grams Yeast Water

100 grams Pumpernickel Flour

Mix above into starter from Step 2 and let sit covered for 4-5 hours or until starter has almost doubled.  You can also put in the refrigerator and leave for up to 1 day if necessary until you are ready to bake.

Main Dough

Ingredients

425 grams Starter from above

150 grams Graham Flour (I used Bob's Red Mill)

200 grams White Rye Flour

100 grams Pumpernickel Flour or Dark Rye Flour (I used KAF)

70 grams Roasted Wheat Germ (adds a nice nutty flavor)

370 grams Dark Roast Coffee (90 degrees F.)

14 grams Sea Salt (or table salt)

10 grams Walnut Oil (substitute any oil desired)

Procedure

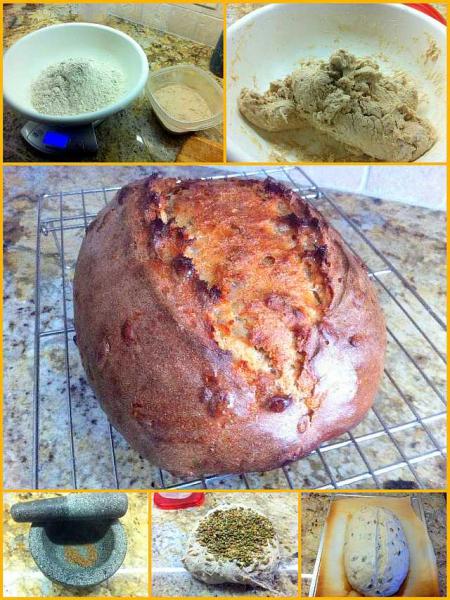
I mixed  the flours together with all the coffee except for 50 grams and let them autolyes for 30 minutes.   I then added the Yeast Water Pumpernickel levain, oil and the soaker and the rest of the coffee with the salt and mixed on speed #1 for 1 minute and #2 for 4 minutes.  I then did a stretch and fold, rested the dough uncovered for 10 minutes.  Note that since this dough was extremely sticky it was not very easy to do a stretch and fold.   I then did another stretch and fold, covered the dough and let it rest for 10 minutes.  I did one more stretch and fold and put it in a lightly oiled bowl for 2 hours.  I then put it in the fridge overnight.

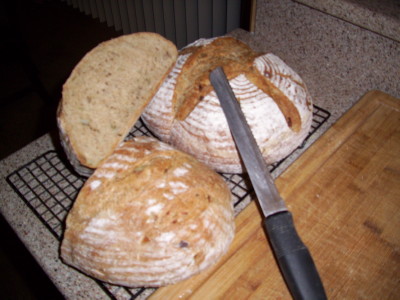
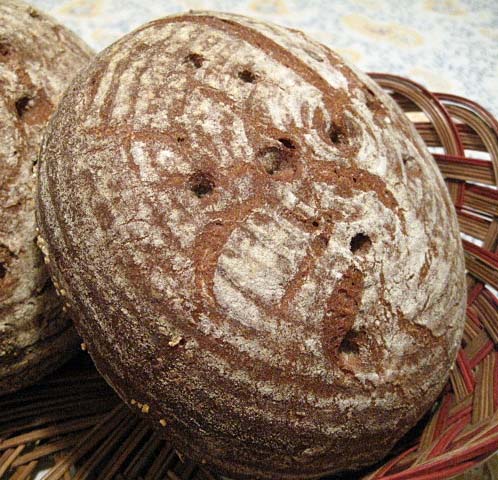
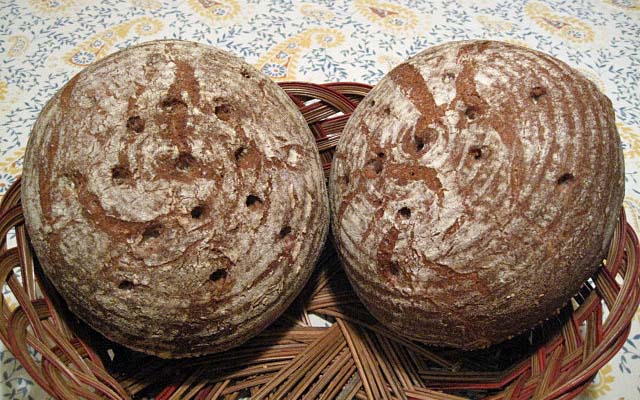
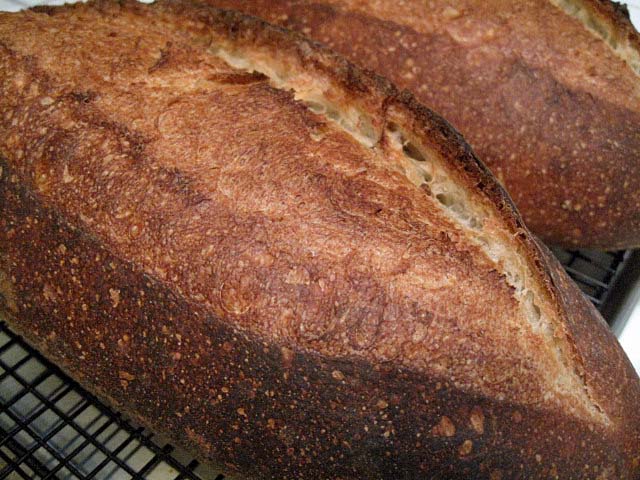
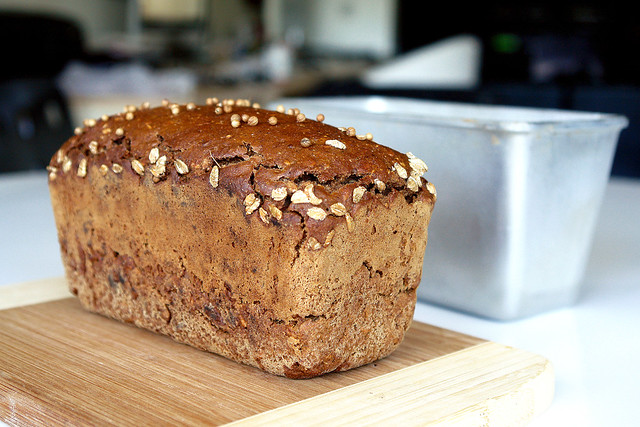
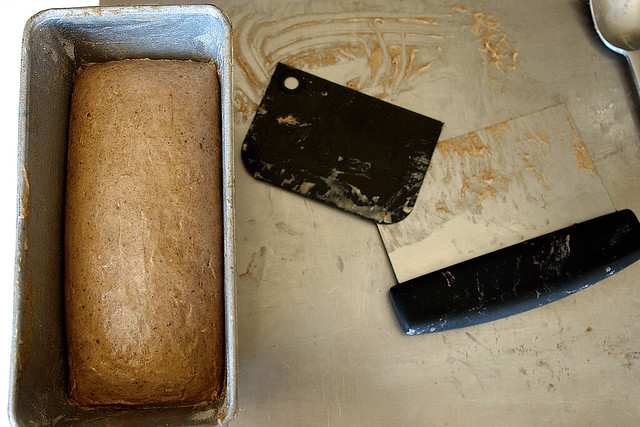
The next day I let the dough sit out at room temperature for 2 hours.  I had planned to make 2 boules but since this dough was so moist and did not come together like a bread made with white flour I decided to form it into a large Miche.  Alternatively I could have formed it into loaves and baked in a bread or Pullman pan.

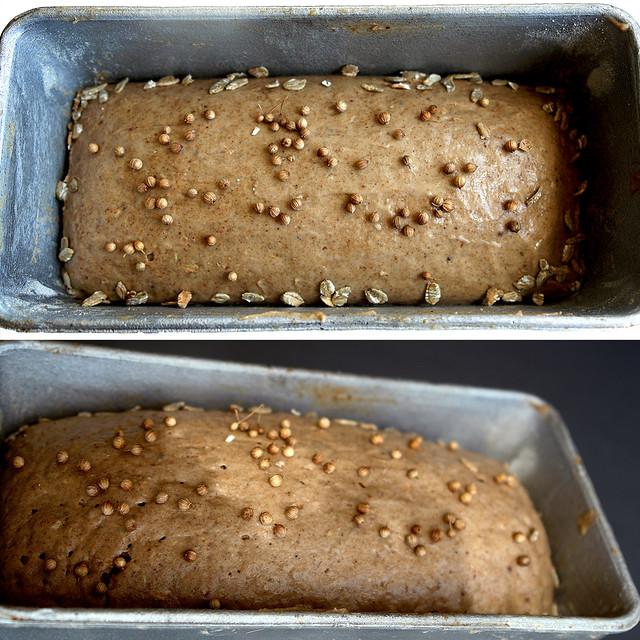
Cover the dough in your pans or basket and let it sit at room temperature for 2 hours or until you notice some lift to the dough and it can pass the poke test.

Score the loaves as desired and prepare your oven for baking with steam.

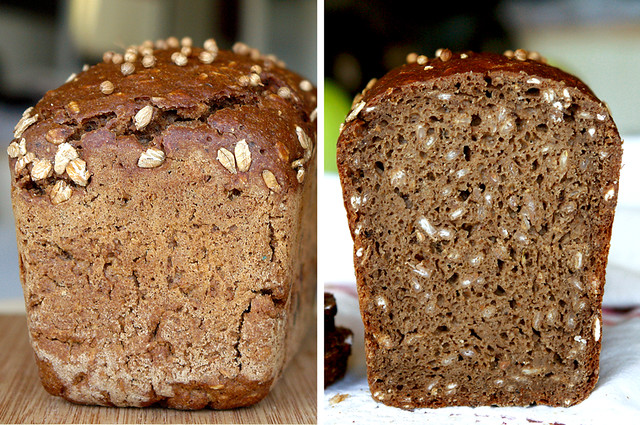
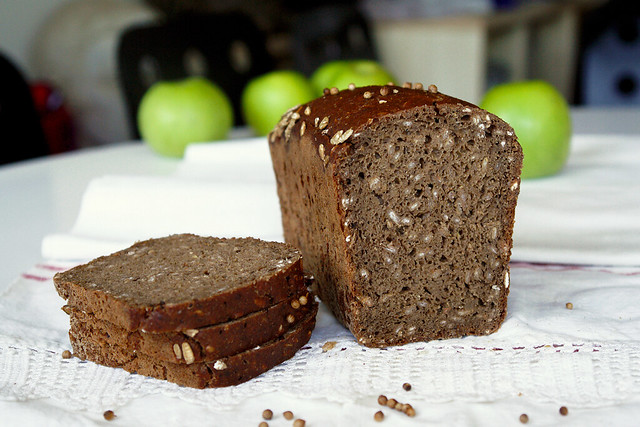
I then baked on my oven stone with steam at 450 degrees until the loaf was golden brown and reached an internal temperature of 200 - 210 degrees F.

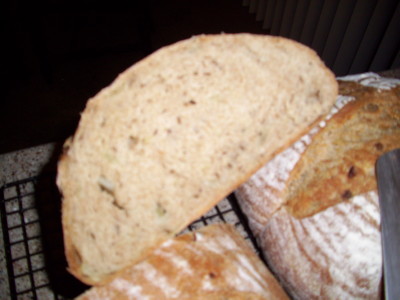
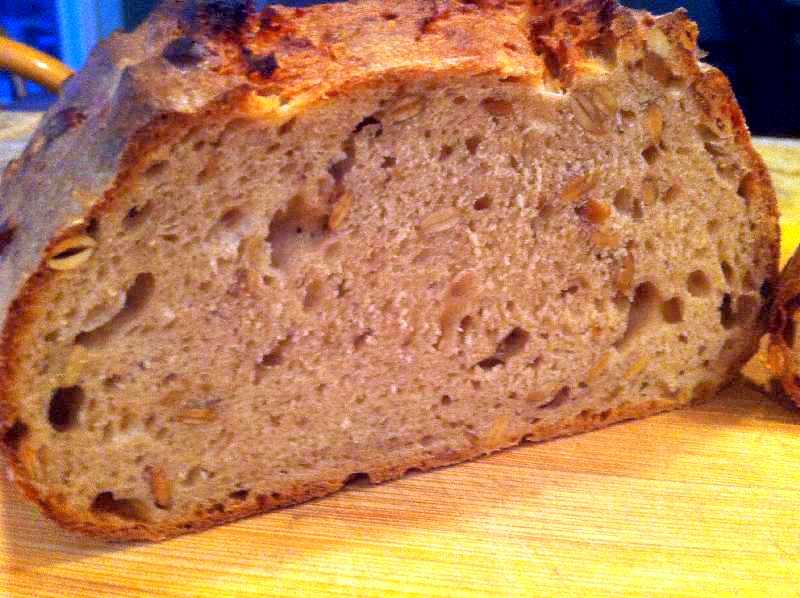
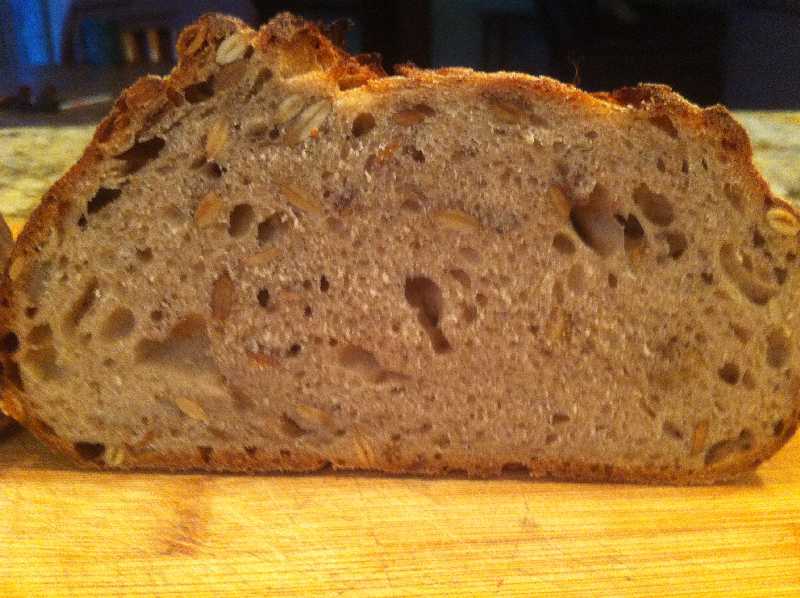
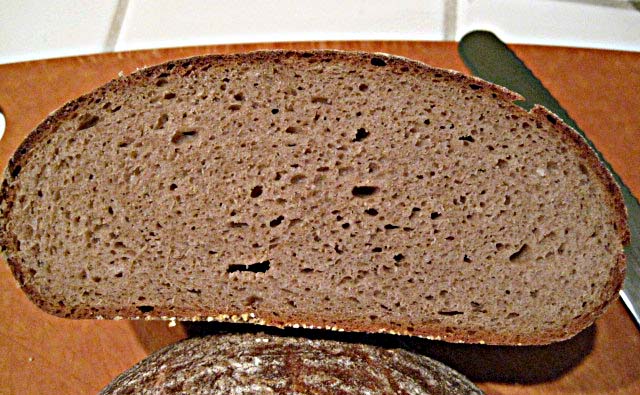
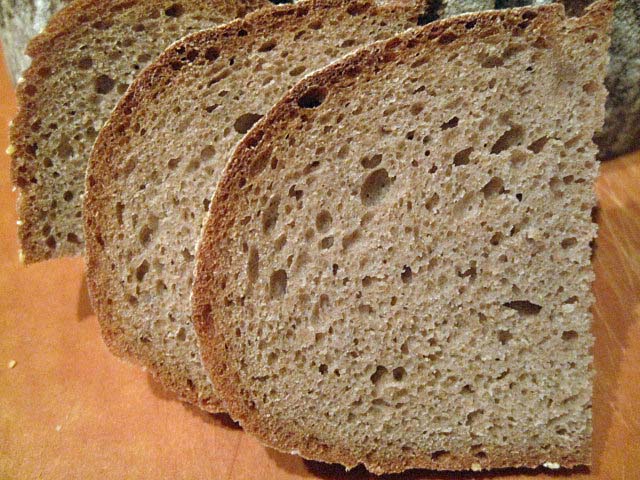
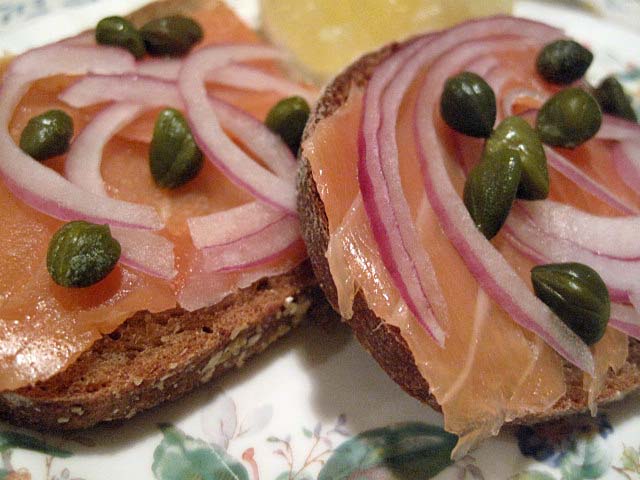
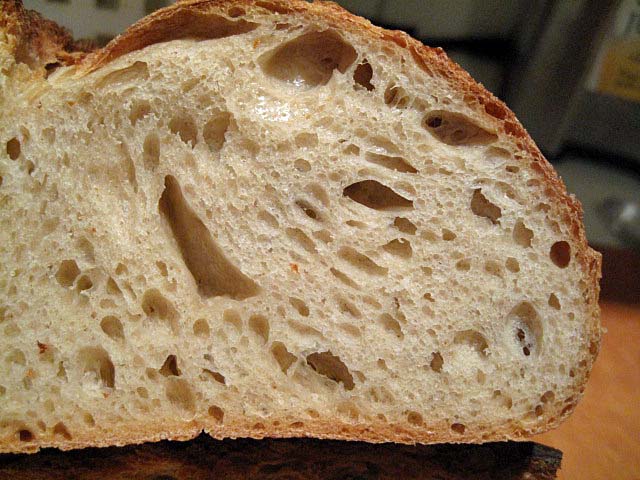
I had to bake this bread for almost 50 minutes since it was so moist and the final dough came out with an excellent crust and moist crumb but a little denser than I would have preferred.  It is an excellent bread for some sharp cheese and/or a nice grilled cheese sandwich.

This bread has been submitted to Yeast Spotting here at http://www.wildyeastblog.com/

breaducation's picture
breaducation

As you can probably tell from my name(it's Jorgen in case you're wondering) I have Scandinavian roots in my family. My great grandparents were immigrants from Norway and while I don't speak Norwegian nor have I ever been there, I've always felt a connection to Norway and the Scandinavian countries in general(I almost always root for the Norwegians when the Olympics come around, which for some reason is much more successful in the winter.). So when I was pointed, by breadsong, to this article and formula, written by Chad Robertson, I got excited and knew I had to give it a try.

I was further interested in trying this bread when I stopped off at Bar Tartine's new sandwich shop on the way home from work one day. This is where Chad Robertson is doing most of his bread experimentation these days so I was hoping to taste something new and interesting. I went in to try and get one of the Smørrebrød(an open faced danish sandwich) but upon entering I was informed that they had just closed. However, they also informed me that they would be happy to make one for me anyways, on the house, so I could get a taste of what they do there! What great customer service! I knew I would be coming back even before I got to taste the Smørrebrød. The Smørrebrød I ended up getting consisted of eggplant, white bean puree and a whole roasted tomato all served on an extremely delicious and seed-dense slice of rye. It was sooo good. Upon comparing the bread in the Smørrebrød to the formula posted on Food Arts I was fairly certain they were one in the same or at least very similar.

Smørrebrød from Bar Tartine's Sandwich Shop

I've already been doing a bit of rye baking recently(See: Sprouted Vollkornbrot with Seeds) and loving the flavor, heartiness and keeping qualities, however, Chad Robertson's formula brings some interesting new ideas to the table that I've never tried before. For one thing, the loaf is partially hydrated with buttermilk and beer. Such a combination sounded too delicious to resist. His loaf is also extremely seed and rye berry dense. The total seeds and rye berries in the formula add up to over 170% of the flour! I'd certainly never pushed seed content that high in any loaf so it was all the more enticing(I love trying new things). Finally I had never retarded a loaf with a high percentage of rye because of concerns about high levels of sourness but Robertson goes for it. And when in doubt, listen to Robertson.

This dough was a little bit scary in the beginning stages of the mix. It started out extremely wet. At first I was seriously concerned that there was a misprint in the formula but as I added seeds and rye berries into the dough, and they started to absorb some of the water, the dough came together some and became more manageable. Let me warn you though that it is still an extremely wet dough so don't panic if you give it a shot. Also, there are no guidelines as to what the dough should feel like at each stage. I would have to rely on the times and temperatures he states in the formula and my own baker's intuition to get through.

I ended up modifying the process some by switching the retarding to the bulk instead of shaped to accommodate my schedule. I also doubled the sunflower seeds because I didn't have pumpkin seeds on hand and used my remaining sprouted rye from my Vollkornbrot bake in place of some of the soaked rye berries. In the article Robertson mentions using sprouted grain in several of his breads so I felt like this would be a proper fit.

This loaf is my new favorite rye bread! I love how many seeds there are. It's almost like you're eating seeds held together with rye and spelt flour which is quite pleasing actually. Also there is only a slight hint of sourness despite retarding the dough. The only disappointment is that the beer and buttermilk flavors don't really come through. I think if I was to make this loaf again I would increase these two ingredients. Perhaps even replace all the water with beer.

I ended up taking a few slices of this loaf with me on a rock climbing session in place of energy bars. It worked great! One or two slices gave me plenty of energy and kept me feeling nourished for hours  without the sugar rush feeling. I'm guessing that was the effect of all the seeds, whole grains and good carbs slowly digesting. I may have to try adding some dried fruit to the bread next to truely make it the ultimate climbing snack.

You can check out my modified formula and process at aBreaducation.

dmsnyder's picture
dmsnyder


One of my thoughts in purchasing a Brød & Taylor Folding Proofer was that I would be able to make Three-Stage Detmolder rye breads with more precise temperature control than I could otherwise achieve. After using this device for fermenting other starters, fermenting doughs and proofing loaves over the past couple of months, I my first rye by the three-stage Detmolder method employing the Folding Proofer this weekend.

My one previous bake of a Detmolder 3-stage rye was almost 3 years ago. (See: http://www.thefreshloaf.com/node/12742/hamelman039s-70-3stage-rye-sourdough) I do recall that bread as having a delicious, sweet, earthy, complex flavor. The bread I baked this weekend was the very similar 80% Three-Stage Rye from Bread. This bread has an hydration of 78%. 37.8% of the flour is pre-fermented.

As described by Jeffrey Hamelman in Bread (pg. 200), this method, developed in Germany, “develops the latent potential of a mature rye culture through a series of builds,” each of which optimizes the development of yeast growth, lactic acid and acetic acid production, respectively. The builds differ in hydration, fermentation temperature and length of fermentation.

Hamelman calls the three stages or builds “Freshening,” “Basic Sour” and “Full Sour.” The first build encourages yeast multiplication in a moist paste fermented at a moderate temperature. The second build is much firmer and is fermented for a long time at a relatively cool temperature to generate acetic acid. The third build is, again, moister, and it is fermented at a warm temperature for a short time. This build is to increase the lactic acid content of the sour. After that, the final dough is mixed.


Freshening

Wt (g)

Baker's %

Medium Rye flour

8

100

Water

12

150

Mature rye culture

4

50

Total

24


Ferment 5-6 hours at 77-79º F.


Basic Sour

Wt (g)

Baker's %

Medium Rye flour

100

100

Water

76

76

Freshening sour

24

24

Total

200


Ferment 15-24 hours at 73-80º F. (Shorter time at higher temperature.)


Full Sour

Wt (g)

Baker's %

Medium Rye flour

270

100

Water

270

100

Basic sour

200

74.1

Total

740


Ferment 3-4 hours at 85º F.


Final Dough

Wt (g)

Medium Rye flour

422

High-gluten flour

200

Water

422

Salt

18

Instant yeast (optional)

8

Full sour

740

Total

1810

Procedures

  1. Mix all ingredients 4 minutes at Speed 1 then 1-1 1/2 minutes at Speed 2. DDT=82-84º F. (Note: Hamelman's times are for a spiral mixer. If using a KitchenAid, I double these mixing times.)

  2. Bulk ferment for 10-20 minutes.

  3. Divide into 1.5-2.5 lb pieces and shape round.

  4. Proof about 1 hour at 85º F.

  5. Dock the loaves. Bake for 10 minutes at 480-490º F with steam for the first 5 minutes, then lower temperature to 410º F and bake 40-45 minutes for a 1.5 lb loaf and about 1 hour for a 2.5 lb loaf.

  6. Cool on a rack. When fully cooled, wrap in linen and let rest for at least 24 hours before slicing.

These loaves scaled to 807 g. After baking and cooling, each weighed 700 g.

Crumb and loaf profile

Slices

I sliced the bread after it had sat, wrapped in linen, for 24 hours. The crust was chewy, and the crumb was moist and tender. The flavor was very mellow and balanced. It was not as sweet as I remember the 3-stage 70% rye being, but that was 3 years ago(!). The sourdough tang was present but subdued. A lovely flavor.

I had been planning on leaving the loaves unsliced for another 12 hours, but my wife decided she wanted rye with smoked salmon as an appetizer for dinner. How could I refuse such a tempting proposition?

Delicious!

I also made a couple loaves of Hamelman's Pain au Levain today. As simple and straight-forward as it is, this is one of my favorite breads.

Pain au Levain bâtards

Pain au Levain crust

Pain au Levain crumb

 David

Submitted to YeastSpotting

codruta's picture
codruta

hi everyone!

A few weeks ago I tried my first 100% rye bread. I wrote about it in a previous post (click here for link). In the meantime, I received a fantastic bread pan special for rye breads from a friend from Russia, Masha (mama lunetta) and I imediately used it. I was very happy and confident, but the bread was a semidisaster. Please check my post here to see what I mean (beware, not a pretty image, my bread). I wouldn't give up so I went to Mini Oven for help. How to season the pan, how much dough do I need for this new pan, how to set the oven, etc. A lot of new factors for me, but thanx to Mini, I'm happy and proud of my first successful 100% rye bread!

And the result... voila:

I began with Andy's formula, I used some altus I had from the previous bake, I put some rye flakes and I all the four I used was rye flour type 1150. Unfortunatelly I forgot to add the honey in the scald, and I thought I'll add it next day in the final paste, but I didn't write it down and I forgot completely :(.

Good news for me, I'll receive a jar of blackstrap molasses at the end of May! I can't wait to try the real thing!


The taste is delicious. The crust is chewy, the crumb is moist, but not sticky, the rolled rye give a nice texture and contrast, the coriander is there but not dominant (I put less than in Andy's recipe, maybe next time I'll add a bit more). I miss the sweetness of honey and I sense that I'm very close to a extraordinary bread but not quite there yet. After few days the taste was better, richer and the crumb colour was darker.

Another thing that bothers me... I remember Phil saying once (click for link) he could fold a slice in half without breaking. I can't do that :( I wonder why?


I wrote the modified formula on my romanian blog Apa.Faina.Sare. (translated: Water.Flour.Salt.) (link for post here), translation is automatic and pretty bad, but if anyone is interested in more details, please ask.


Thank you Mini Oven, thank you Masha, thank you Andy, Varda, and thank you all who helped me along the way and encouraged me in my previous attempts.

codruta


ps. please stay close, I'm dreaming, negociating and planning to open a bakery here in town and I'm scared and don't really know where to begin with. All I have are my hands and my passion... will it be enough?! ♥

Pages

Subscribe to RSS - rye bread