The Fresh Loaf

A Community of Amateur Bakers and Artisan Bread Enthusiasts.

Recent Blog Entries

pmccool's picture
pmccool

Although my baking has waned recently because I need to reduce the bread backlog in my freezer, it hasn't gone entirely dormant.  For instance, I baked some hamburger buns today (thanks, dolfs!) as a demonstration/interview for an instructor's position with the Culinary Center of Kansas City.  It was a lot of fun and felt more than a little bizarre.  After all, I am, to steal proth5's pet expression, just a raggedy home baker, not a professional chef/baker.  Still, any time that you get to talk to people about baking bread is a pretty good time.  And I apparently managed to do so in a coherent fashion because they asked me to teach for them.

The demo was slated as a 30-40 minute session in front of six of the CCKC staff and instructors, followed by their feedback.  That's a very small slice of time to work with, so I broke it into two separate phases and applied some "TV cooking" tricks.  The first phase was to demonstrate the mixing and kneading of a single batch of dough (using pre-measured ingredients), fielding questions as I went.  Some of the reviewers are bread bakers, some are not.  From a previous test run with the dough, I knew that I did not want to add more flour to the dough.  I also knew that the butter content was high enough that the dough would not stick to the work surface.  Consequently, I only did a rough mix and dumped the not-entirely-cohesive mass out onto the work surface, which was a polished marble or travertine material.  That elicited a few questions about why I wasn't worried about the whole thing sticking, so I showed them how the butter in the dough was keeping my hands and the counter comparatively clean.  I only kneaded it enough with the push-turn-fold-push method to get everything to hang together, then started French folding, a la Richard Bertinet.  That triggered a number of questions and comments, since none of them had seen that technique previously.  They were impressed with how easily the dough developed and smoothed out, and with how it picked up the initial goop from the countertop.  Putting that aside, I pulled out six batches worth of dough that I had made prior to leaving home for the demo and put each of them to work shaping the dough into the bun type of their choice, with pointers on how to achieve the various shapes.  I gave them tips for the final fermentation and baking (they have plenty of ovens to work with at the center) and that was the end of the demo.  Next up was listening to the critiques, which were uniformly positive and provided some very useful tips for me as a presenter.

So, the next step is to work out what courses to offer and to get them scheduled.  The catalog for the November 2012 - April 2013 semester is being developed now, so my timing was good.  I'll probably teach once, perhaps twice, a month.  This promises to be a lot of fun and I'm really looking forward to sharing the joy of good, home-made bread with others.

Paul


Isand66's picture
Isand66

Chocolate flavored coffee.....what could be wrong with using some in a bread you ask?  Nothing of course, so why not use it in a soaker as well ?  That is exactly what I ended up doing.  I normally leave the grains soaking for about 30 minutes to an hour, but in this case I left it over night for around 24 hours and the soaker grains sucked up all the coffee.  When I mixed the final dough I decided to make this a very moist, high hydration dough so I didn't cut back on the additional coffee used and the end result as you will see was the most moist bread I've made to date that almost melts in your mouth.

I used some rolled oats, cracked wheat and malted rye berries for the soaker and for the final dough I used durum, dark rye, white rye, European style flours and some roasted wheat germ.  I added some barbecued potatoes and pistachio oil as well.

In order to make the soaker I used 285 grams of hot water and mixed it with the ingredients and let sit at room temperature for 24 hours.

For the starter, I refreshed my standard AP 65% hydration white starter the night before and used most of it in this bake.

Soaker

100 grams Rolled Oats

100 grams Cracked Wheat

50 grams Malted Rye Berries

285 grams Hot Mocha Coffee

Mix coffee in a bowl with other ingredients and let sit covered at room temperature for 24 hours.

Starter

71 grams Seed (Mine is 65% AP Flour Starter)

227 grams AP Flour

151 grams Water (85 - 90 degrees F.)

Mix seed with water to break up for a few seconds and then mix in flour until the starter form a smooth dough consistency.  Put it in a lightly oiled bowl and loosely cover and leave at room temperature for at least 10 hours.  The starter should double in volume.  Put the starter in the refrigerator for up to 1-2 days or use it immediately.

Main Dough

Ingredients

425 grams Starter from above (all of the starter)

100 grams Durum Semolina Flour (KAF)

100 grams White Rye Flour

100 grams Pumpernickel Flour or Dark Rye Flour

150 grams European Style Flour (KAF)  (Sub Bread Flour if you don't have this)

50 grams Roasted Wheat Germ

370 grams Mocha Coffee (90 degrees F.)

14 grams Sea Salt (or table salt)

209 grams Mashed Roasted Potatoes

10 grams Pistachio Oil (substitute any oil desired)

Procedure

I mixed  the flours together with all the coffee except for 50 grams and let them autolyes for 30 minutes.    I then added the levain, potatoes, oil and the soaker and the rest of the coffee with the salt and mixed on speed #1 for 1 minute and #2 for 4 minutes.  I then did a stretch and fold, rested the dough uncovered for 10 minutes.  I then did another stretch and fold, covered the dough and let it rest for 10 minutes.  I did one more stretch and fold and put it in a lightly oiled bowl for 2 hours.  I then put it in the fridge overnight.

The next day I let the dough sit out at room temperature for 1.5 hours.  After 1.5 hours I formed it into loaves and put them in floured bannetons and let them rise covered for 2 hours.

Score the loaves as desired and prepare your oven for baking with steam.

I then baked on my oven stone with steam at 450 degrees until both loaves were golden brown and reached an internal temperature of 200 - 210 degrees F.

I had to bake this bread for almost 50 minutes since it was so moist and the final dough came out with an excellent crust and moist crumb.

Please visit my other blog for my older posts at www.mookielovesbread.wordpress.com.

Crumb Close-up
codruta's picture
codruta

Summer News.   My path in becoming a baker... (part II)

... goes through Kalispell Montana USA

 (A true story about chance, adventure and passion without boundaries)


Hello, TFL friends.


          As some of you know, there are some changes going on in my life and it all started a few months ago, when I decided I want to be a baker and open my own bakery in my town.
In the last years, I've been an amateur home baker and a TFL member and I spent hours and hours reading bread related subjects, experimenting and learning from my mistakes. I learnt a lot from books, blogs and from the greatest bakers on TFL. My love for bread grew so much, till one day I realized I'm only happy when I bake (no exaggeration here) and from that moment my final decision was taken.


I have been searching for a while some bakeries in Europe who would take interns during summer and some of you probably already read my previous post about this (link here) and so you know I'll go to Powburn at the beginning of August to meet Andy (Ananda) and to work with him for a week.

          One day I was talking with MC Farine, asking her if she can guide me to a nice bakery she visited in her travels in Europe. Her answer pointed me in a direction I would have never thought of: she suggested to talk to Mark Sinclair (mcs on TFL), the famous baker from the Back Home Bakery, Kalispell, Montana, USA. I needed three days to have the courage to write him, but I finally did and his answer to my request was affirmative.

          To make a long story short, I will spare you of the part that I had to go to the trouble of getting a tourist Visa for USA (there was some stress involved, because I was not the classic rich tourist type and there was a high risk of being rejected, but it all ended well) and I rather speak about the great joy I feel for getting the chance of traveling to USA to meet Mark, the baker who inspired me so much in the past and in the last months. My emotions are precipitating as the time for internship is approaching and I can't tell how glad I am because things arranged themselves as they did.

          I read all the posts here on TFL written by the former interns or by Mark himself, I read and re-read his internship application, I made my homeworks, I've talked to Mark a few times about the program and I know exactly where I'm heading (sleep deprivation, long hours of work, rigorous program) but I am very excited and motivated and determined to do my best and get the maximum from this amazing opportunity and challenging experience.

          TFL members who have been there before me, please feel free to advise me or to warn me, if it's the case, what are the dos and don'ts I have to be careful about.

          I think I will be the first Back Home Bakery intern who travelled from so faraway to get there. Also the first to spend more than 2 weeks in a row there. The first who's English is not the native language.

          For those of you unfamiliar with Mark's website, please visit it (link here) and watch his tutorial videos (link here) (or order the DVD's) because they are amazing and helpful whatever is your stage in baking (the ones demonstrating the shaping techniques are my favorites).

          I'll be at The Back Home Bakery in the interval between 16 August - 3 September. I will keep you updated when I'll get there, but till then I want to share wih you a drawing that Mark did specially for this blog post, which makes me smile everytime I look at it and it also makes my future to look so pretty :)

                                             "Under the spell of Kalispell" (my title)
with the note that "brutarie - deschis" means "Bakery - open"


If you have time and patience you can also read my post in my romanian blog (link here) (translation available on the upper right side), which given the fact that it was written in my native language it is a longer and more emotional version of this one presented here. Hope you'll enjoy it :)

Till we'll hear again, I'm wishing you all the best and keep on baking!


Codruta

www.codrudepaine.ro

breaducation's picture
breaducation

In my last post, I experimented with spelt flour in a country bread. The flavor was very appealing with slight nutty undertones and the bread came out great! However, I'm never satisfied with my last bread and always want to push into new areas. So I decided to increase the spelt in the formula from 10% to 20%.

I didn't stop there however, as at the last second I decided to add in polenta. I've tried using polenta in bread before and liked the result. There are a few steps to take when adding polenta or any grain for that matter into a bread.

Soft grains and seeds need to be soaked in water first so that they don't steal water from the dough and change the dough composition. With a hard grain like polenta you may need to go a step further and either use a boiling water soaker or just cook the grain beforehand. I elected to cook the polenta as I didn't have time to let it soak in hot water for 2+ hours. Once the polenta was cooled off I simply hand mixed it into my dough.

The loaf was dusted with cornmeal to hint at the polenta on the inside.

But that is not all! Like I said, I had put polenta in bread before and liked it but this time I really wanted to try something new. I decided to consult The Flavor Bible which is one of my absolute favorite books for cooking and baking. It is essentially a list of just about every ingredient you can think of and then under each ingredient is another list of all the other things that pair well with that ingredient. I simply looked up polenta and found a number of options that would go great with it. I decided on roasted garlic.


The still-warm crumb.

If you've never added roasted garlic to your bread I highly recommend it! Think garlic bread except the garlic is built into the bread instead of spread on top. It created a wonderful aroma throughout the apartment while baking. How to add roasted garlic to bread you ask? Simply roast the garlic with your preferred method and allow to cool. Then chop up and mix into your dough by hand. I went with four medium to large sized cloves in my 500g. loaf. I think I could have doubled that though and been fine(the garlic flavor I got was mild and subtle).

All in all this loaf was quite delicious and I would definitely bake it again especially if I was making bread for an Italian dinner.

Isand66's picture
Isand66

There are not too many things I like more than a pastrami sandwich, so when my wife suggested I try using some left over pastrami on a pizza I figured it was worth a shot.  I also had some left over smoked pulled pork in the refrigerator so I figured I would make a barbecued pulled pork pizza as well

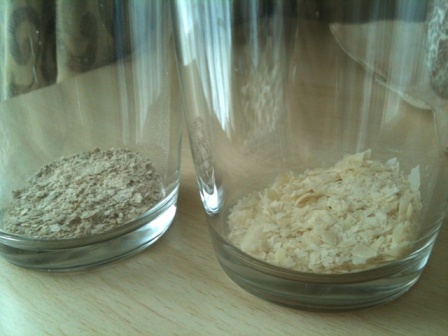
I recently was gifted a cool item called the "Kettle Pizza" attachment.  This item fits on top of an existing Weber kettle style grill and allows you to get your grill over 700 degrees which is ideal for pizza.  I have used this a  few times with some great success and was looking forward to trying it again.    I have been reading many posts about using 00 style flour and how it really only works best when you can get your heat source over 700 degrees so while I could have used a 100% "00" flour pizza I still decided to do a 50-50 blend with bread flour.  If you don't have any "00" flour you can use 100% bread flour or another low protein flour.  The "00" flour does require less water so if you use it make sure to watch your hydration.  I suggest you add 50% of the water in the recipe before adding more and adjust as needed.

For the Pastrami pizza I used a simple fresh tomato sauce consisting of 1 can of diced tomatoes with red peppers, salt, freshly ground pepper, oregano, basil, 1/2 of a lemon and a dash of red wine vinegar. I also used fresh mozzarella along with some Munster cheese and Pastrami for the topping.

For the Pulled Pork pizza I used my home-made barbecue sauce along with fresh mozzarella.

I adapted a recipe from Peter Reinhart's Artisan Baking Everyday for the basic dough.  I have made this recipe several times and it is very simple and comes out great.

If you want to make this in your oven you certainly get great results as well.

I have tried the method suggested by  Steve B. at http://www.breadcetera.com where he suggested to put your pizza stone on the highest shelf of your oven and set your oven to broil.  The purpose of this is to get as much heat as possible to be retained by the stone.  I have to say it worked perfectly in the past for me so give it a try!

If you don't have the Kettle Pizza attachment for your grill you can still put a pizza stone on your grill and end up with a successful pizza.  The biggest issue is trying to get the desired char effect on the crust.

I have to say both pizzas came out great and I would definitely try both of these combinations again.  Maybe next time I would put some carmelized onions on the Pulled Pork version.

Ingredients

340 grams, 12 ounces Italian Style (00) Flour

340 grams, 12 ounces Bread Flour

14 grams, .5 ounces, or 2 teaspoons salt (sea salt or table salt)

3 grams, .11 ounces or 1 teaspoon instant yeast

28.5 grams, 1 ounce or 2 tablespoons sugar

428 grams, 17 ounces water (90 degrees)  (I suggest you decrease this amount if using "00" flour)

28.5 grams, 1 ounce or 2 tablespoons olive oil

Directions

Combine all the ingredients in your mixing bowl and mix on the lowest speed possible for 1 minute.  The dough should be rough and a little sticky.  Let it rest for 5 minutes so the flour gets fully hydrated.

Knead the dough on medium low-speed (or by hand) for 2 to 3 minutes until the dough is smoother.  Next put some olive oil on your work surface and your hands and transfer the dough to your work area.  Do a stretch and fold and form the dough into a ball.  Divide the dough into 5 pieces weighing about 8 ounces each and form into balls.  Spray the inside of a mini plastic storage bag with oil and seal each dough ball in the bags.  Put them in your refrigerator overnight or up to 4 days.  You can freeze them also for several months if desired.

About 90 minutes before you are ready to bake your pizzas take how many dough balls you plan on using out of the fridge and put them on your lightly oiled work surface.  Stretch the dough balls and reshape them into a tight ball.  Cover the dough balls with either plastic wrap sprayed with cooking spray or a clean lint free kitchen towel sprayed with some water and let them rest until you are ready to bake.

One hour before you are ready to bake pre-heat your oven or grill  to the highest temperature and put your pizza stone on the highest shelf possible in your oven.

Prepare your favorite sauce and get your cheese and toppings ready.  Remember, that more is less.  Don't use too much cheese or sauce or you will end up with a soggy mess.

Put some bench flour in a bowl and dip each dough ball in the flour as well as your hands.  Flatten the ball of dough on the work surface with your hands first and if desired either use a rolling-pin or pick the dough ball up and using both hands start stretching it out using your thumbs and the back of your knuckles.   Your thumbs should actually be doing all the stretching and not your knuckles.  you want dough to be fairly thin, but not too thin or it will end up ripping.

If cooking on the Kettle Grill set-up be sure to have your pizzas ready to go as you want to get your additional pizzas in as soon as possible after the first one is done.  In order to get the heat so high you must use a bed of coals with wood chunks or small logs and you want to cook your pizza before the temperature gets too low.

If using your oven, turn your oven on broil 10 minutes before you are ready to bake your pizza and get the stone as hot as possible.  Assemble your pie and brush some olive oil on the crust if desired.  You can either sprinkle corn meal or flour on your bakers peel and place the pizza on your peel before putting the topping on it. Alternatively you can put your pizza dough on a piece of parchment paper and slide the peel underneath when ready to put in the oven.  The worse thing that can happen is for your dough to get stuck on your peel and make a mess in your oven, not to mention ruin all your good efforts.

Make sure you turn the oven off broil before you put the pie inside and turn it back to your highest setting.  Let the pizza cook until the crust is blistering and the bottom is nice and brown.

If using the Kettle Grill attachment, you want to bake the pizza turning it a couple of times with your peel until the bottom and top crust is nice and charred.

I hope you give this recipe a try yourselves.  It is actually fun to make and relatively easy.

Feel free to visit my website at www.mookielovesbread.wordpress.com for some of my older posts or search the TFL site.

Pastrami Pizza

Anonymous baker's picture
Anonymous baker (not verified)

I found this when going through some old files on my computer: (pdf file) Marcel Desaulnier's Old-Fashioned Speckled Chocolate Cake.pdf

My sister was convinced she couldn't bake a cake from scratch, so I created a 'process document' from a recipe in Marcel Desaulniers' Death by Chocolate, The Last Word on a Consuming Passion.

It's probably the nuttiest document in my arsenal!

Enjoy, if just for laughs.


Szanter5339's picture
Szanter5339

510 ml víz          (ez lehet kicsivel kevesebb vagy több, függ a liszt milyenségétől!)

5 kávéskanál só (csapósan)

1 evőkanál porcukor

1000 gr BL55 liszt

40 gr élesztő

+ a kovász


Kovász készítése, sütés előtt 1-2 nappal.


Kovász:

250 ml víz

250 gr  BL 80 liszt

½  kávéskanál só

15 gélesztő

Mebake's picture
Mebake

Oh, boy i feel at home, again!

Not only baking is addictive, it has become a part of me now. Almost 3 months of bed rest, and ayurvedic therapy, 1 of which was spent in Kerala, the beautiful southern city of India; has never detached me from thefreshloaf site, nor did my enthusiasm for bread baking waver.

Despite the restricted indoor stay, I was fortunate to witness the onset of monsoon on June 5th from the view of small balcony. Kerala, is a southern district of India blessed with lush green pastures, abundant rain, and intense vegetation. The climate was humid, rather hot when I arrived there, but the weather soon changed, and the westerly ocean winds brought breeze and rain.

Monsoon clouds from afar:

Drawing nearer:

Overcast:

Rain Pours, not falls!

Although I was not fully satisfied with my therapy program, I was strangely ecstatic about the fact that I was returning home, and will soon resume baking! after all, baking is therapy all by itself.   

Upon arrival, I wanted to bake some bread, as no stock was in my freezer. Due to my almost  de-conditioned body, I chose to bake some yeasted whole wheat bread from Laurel’s book, and I elected the basic recipe.

Days ago, I diluted and fed my dried starters (Wheat, and Rye), and baked yesterday a 40% Rye – no caraway. (note to self: Next time I’ll add caraway, regardless of what my wife likes :) )

Left is Rye, Wheat is right:

The flavor of this bread never disappoints. Pity, i excluded the caraway seeds.

Khalid


breadforfun's picture
breadforfun

If you haven't tried David Snyder's SF Sourdough bread technique yet, you really should.  It is a crusty, tasty bread that is very forgiving to make.  I have made it a number of times, and have been making some small adjustments to fit my schedule and my tastes.  In the last two weeks, I baked it twice and thought I would share some photos.

I like adding a small amount of whole spelt flour (about 10%) because of the flavor it imparts.  This loaf used David's 50% hydration starter that I made with 5% spelt in place of the rye that he lists.  I also wanted to try to shape it into a fendu, which I have never tried before.  The loaf was shaped and retarded overnight (about 18 hours) directly in a floured banneton.  In the morning it was proofed an hour at 85˚F and two additional hours at room temperature, about 68˚.  The results were quite good.

Sorry, I don't have a crumb picture because I took the bread for a dinner party and didn't have a chance to take one.  There is a very strong sour flavor to this bread, and it has a crispy-chewy crust and creamy crumb.

I baked a second set of batards the following week.  Again I used 10% whole spelt, but instead of the 50% hydration starter, I used a 75% hydration starter to try to reduce the acidity.  There have been some discussions on whether the starter hydration affects acidity recently, and I wanted to see what happens to my loaves.

The technique was mostly the same.  The main difference was that I proofed the loaf in linen lined baskets for 90 minutes after shaping and then retarded them overnight.  In the morning I finished proofing at 85˚ for an hour, then another 45 minutes at room temperature.  To my taste, the second bake (75%H starter) seemed less tart than the first (50%H starter), but of course it is highly subjective.  Both bakes gain acidity after sitting for a day or two.

Thanks again David for a great bread formula.

-Brad

dabrownman's picture
dabrownman

I was commenting on txfarmer's very nice 30% rye sandwich bread that we use left over cream to make ice cream in AZ when it is scorching hot in the summer - instead of pechy scones like she does.  The batch finished yesterday, after a 2 day process, came out better than usual because we managed to have most everything on hand to put it over the top.

The first day is used to make the ice cream base:

The second day you make everything else

Ingredients

16 oz of cream

16 oz of  half and half

4 egg yolks

1/4 C cocoa powder

1/2 C sugar

1-100 g gram dark chocolate bar - chopped up

1/2 T of instant coffee or 1 tsp of espresso powder

1/4 oz of granulated gelatin

1 tsp vanilla

Brownie mix

Your favorite box of brownie mix

1/4 bag of chocolate chips

Method

Put everything, except the vanilla, brownie mix and chocoalate chips, in a 2 qt sauce pan and bring to a near boil 200 F stirring constantly with a whisk.  Remove from heat and place in a large bowl of ice.  Keep stirring until mix is cooled to 40 F.  Add the vanilla and stir it in.  Cover saucepan with the lid and put the base in the fridge overnight.  In the morning you will have a wonderful Mocha Pudding.

Mix up your favorite boxed brownie mix, (we use the Mocha one but not required at all) or make your favorite from scratch that you would normally use for 9x13 pan.  Divide the batter between (2) oil sprayed 9x13 pans.  Add some chocolate chips sprinkling them evenly over the top.  Bake at 350 F for 8 minutes, then rotate the pans and bake for another 8 minutes - we use Pyrex pans.  This will make the top and bottom of the ice cream sandwich that are are little less than 1/2" high when baked.  Cool completely.

Remove the two brownies trying not to break them, good luck with that but don't worry at all since you can easily press them back together.  If you cut them in half lengthwise (6 1/2"  if you measure like I don't) they are easier to get out intact with a long fish spatula.  They are also easier to get out if you don't add the chocolate chips but that would be a crime :-)  Wrap one side in plastic wrap and put the other one back in the pan, cover it and freeze them both.  The pan will be the form holding everything in place after the sandwiches are made and they too are frozen.

Make your ice cream - we have a Krups that seems to work well.   Place about 1" of ice cream over the bottom layer and cover with the top gently pressing the sandwich flat.  Freeze until hard.  You will have about a third of the ice cream left over for you and your apprentice to taste to make sure it isn't poisonous and saving your family much potential grief.  Someone has to do it :-)  We actually made a batch and a half of brownies and using all the ice creame for the sandwiches.

I'm thinking txfarmer's Peach Scones would go very well with Mocha Chocolate Chip Ice Cream Brownie Sandwiches and both are excellent for using up left over cream.


Pages

Subscribe to Recent Blog Entries