The Fresh Loaf

A Community of Amateur Bakers and Artisan Bread Enthusiasts.

Recent Blog Entries

dabrownman's picture
dabrownman

We had some yeast water and SD Desem starter left over from our 'Bun Experiment' yesterday where we compared YW with SD in buns.  We were going to use them up with a combo starter to make the same buns but we have too many buns after yesterday.

From left: poppy and not your usual; nigella and basil seeds.

What we did not have was bagels so we used them up on some 15% WW bagels.  Our last bagel bake was a much higher percent whole grain SD bagel with sprouts.  They were delicious.  This bagel recipe was still based on Stan Ginsberg’s recipe he published on TFL and is more traditional in grains with the whole wheat being in the combo yeast water and SD Desem starters only.

These bagels are by far and away the best ones we have ever produced.  If you want NY Jewish Bakery Bagels - these are the ones you want to bake - thanks Stan.  The crust was nicely browned and blistered.  They came out of the oven crisp and went to chewy as it cooled.  The crumb was open and moist yet had just the right bite a bagel should have.  The taste was very good with a slight SD tang.  They were delicious, just cooled, un-toasted with cream cheese.  No toasting necessary at all.

Method

We built the YW and SD Desem starters separately over (2) 3 hour and (1) 2 hour  build and then refrigerated them both for 48 hours.  Home ground whole wheat berries were used for both starters and accounted for all the WW in the final dough.

The water was mixed with the 2 starters to liquefy them.  The rest of the ingredients were added and mixed by hand to incorporate.  The dough was kneaded for 10 minutes by hand and then allowed to rest, ferment and develop for 2 hours covered with plastic wrap on the counter.  The dough doubled over that time.

The dough was them divided into (10) 128 g, folded into balls and then into 12” tapered, from middle to end, ropes.  The ropes were rested for 10 minutes and then formed into bagels by the ‘over the knuckles’ method where the ends were rolled on the counter to seal them together. 

The bagels were placed onto a parchment covered and semolina sprinkled cookie sheet, covered in plastic wrap and refrigerated for 20 hours.

After removing the bagels from the fridge, they were immediately simmered for 30 seconds a side in 1 gallon of water with 1 T of barley malt syrup and 1 tsp of baking soda.  The wet bagel bottoms were placed on a kitchen towel for 5 seconds after coming out of the water and then placed on parchment paper sprinkled with semolina which was on the top cover of the mini ovens broiler.

The mini oven was preheated to 500 F with the rack on the bottom.  A 1 cup Pyrex measuring cup with a rolled up dish rag, half full of water, was micro waved until the water boiled.  Sylvia’s steaming method was then placed in the middle of the parchment paper between (4) bagels at the corners.

The bagels were steamed for 8 minutes with the heat being turned down to 450  after 2 minutes at 500 F.  At the 8 minute mark the steam was removed, the bagels turned upside down, the rack rotated 180 degrees and placed in the upper position.  The Mini Oven was turned down to 425 F convection at this time.   After 4 minutes the bagels were turned right side up again, the rack was rotated 180 degrees and placed back in the lower position for an additional 4 minutes

At 16 minutes total baking time the bagels were deemed done.  They were nicely browned top and bottom and sounded like a drum when tapped on the bottom.  They were moved to wire cooling racks until cooled.

Dabrownman's 15% Whole Wheat  Bagels     
      
Desem StarterBuild 1Build 2 Build 3Total%
SD Desem Starter1400142.06%
WW152020558.09%
Water15208436.32%
Total Starter44402811216.47%
      
YW StarterBuild 1Build 2 Build 3Total%
Yeast Water25160412.06%
WW25206518.09%
Total Starter503669213.53%
      
Starter     
Hydration80.65%    
Levain % of Total15.94%    
      
Dough Flour %   
Bread Flour34050.00%   
AP34050.00%   
Dough Flour680100.00%   
      
Salt121.76%   
Water36253.24%   
Dough Hydration53.24%    
      
Total Flour788    
Total Water453    
T. Dough Hydration57.49%    
Whole Grain %14.34%    
      
Hydration w/ Adds58.86%    
Total Weight1,280128 g each for (10) bagels
      
Add - Ins %   
Barley Malt202.94%   
Diastatic White Malt20.29%   
Total223.24%   


jarkkolaine's picture
jarkkolaine

This week, I have been reading Sandor Katz's wonderful book, The Art of Fermentation. For most part, the book is not about bread, but as bread is mostly about fermentation, the book is helping me a lot in understanding what happens in the dough   and when growing yeasts.

Last night as I was reading the book again, I had a revelation: you can drink yeast water. And in fact, a lot of people are doing it already--they just have a different name for the drink!

Or what do you say? This recipe for fruit mead from The Art of Fermentation looks just like the one I used to start my yeast water (except that I used some black tea in it at first):

 Mead is honey wine. It can be flavored in infinite variations, and many of the fruits and other botanical flavorings you can add to it also serve as sources of yeasts and yeast nutritients.

[...]

My typical proportion, measuring by volume, is 1 part honey to 4 parts water. For a lighter mead (or if I'm adding a large amount of sweet fruit), I'll dilute each part honey with 5 to 6 parts water.

[...]

Thoroughly dissolve honey in water by vigorous stirring or shaking. Be persistent if necessary. Leave the vessel capped, or cover it to keep flies away; any covering, from a cloth to a tight-fitting lid, is okay. 

[...]

Stir or shake, vigorously and frequently, several times a day for a sustained couple of moments.

[...]

After a few days of frequent stirring, you will start finding the honey water with bubbles on the surface and an effervescent release when you stir. [...] Keep shaking and stirring a few more days and the bubbles will build into a formidable force.


...and so on. The instructions continue to explain how you can then further process the mead to get more alcohol and a more refined taste by aging the drink. 

From all of this,  I'm ready to equate yeast water = fresh mead.

Another revelation from this section of the book (to me) was that the purpose of the shaking is to get oxygen into the mix so that yeast cells can multiply.  

S. cerevisiae and many other yeasts, much like the cells of our bodies, are capable of both anaerobic fermentation and oxidative respiration. In the oxidative mode, yeasts grow and reprodue much more efficiently but do not produce alcohol. Vigorous stirring stimulates yeast proliferation by providing aeration.


I still don’t have all the answers, especially for the difference in bacteria between sourdough and yeast water, but this is getting interesting--and soon, I’m going to start a new batch of yeast water, this time with the idea of drinking most of it and baking only with the remains…

--- 

And then to my most recent bake, with sourdough and yeast water.

For a long time already, I have been baking most of the bread we eat at home, so when this summer we bought a toaster and my wife and kids started buying toast bread from the store, I knew I had to do something about this. Buying toast bread (of all things) was diluting all my credibility as a real bread home baker! ;)

I have been experimenting with different bread recipes for a while now, but wasn't satisfied until I finally found txfarmer’s recipes again. Although I had seen and admired them before, I had never gotten around to trying them before now. And I had never worked the dough for 40 minutes before either. Doing this, as suggested by the recipe, made all the difference!

The bread is soft, delicious and has a fine, sweet and a little sour taste that I enjoy. 

My older son says he likes it but still prefers the storebought with no taste at all… So, maybe next I’ll try to do this without any sourdough. Let’s see! 

I’m not going to rewrite the whole recipe here as you can get it from txfarmer's blog. But I made a few changes, which may or may not be interesting. So, here we go.

 The yeast water had been sitting in the fridge for about a week and gotten a lot of color from the fruit (peaches and grapes):


I used 100 grams of sourdough starter in one build (at 100 % hydration) and 200 grams of yeast water in two builds (100 % hydration) and reduced the amount of milk accordingly. Also, the original recipe used milk in the starter as well. I used water as yeast water comes with its own water… 

Final dough:

  • 100 g sourdough starter, refreshed about 8-10 hours before mixing the dough
  • 200 g yeast water starter (built in two steps during the same 8-10 hours)
  • 450 g bread flour
  • 60 g sugar
  • 50 g butter
  • 120 g egg whites
  • 6 g salt
  • 160 g milk 

I’m very happy with the results and will definitely be making some variation of this bread again. Next, with some darker grains, maybe a bit of rye or at least wholegrain wheat.

GSnyde's picture
GSnyde

Recipe ideas come from a variety of inspirations.  I love Carnitas.  I love Duck Confit.  I love Cubano sandwiches.  I recently had an excellent—if non-traditional—Cubano sandwich that had spicy pulled pork (with Chiles and Coriander) in place of the traditional sliced roast pork.  I happened to have some crushed Coriander seed left over from Pastrami rub.  I looked at a bunch of recipes for Carnitas and Cuban-style pork, and went from there.

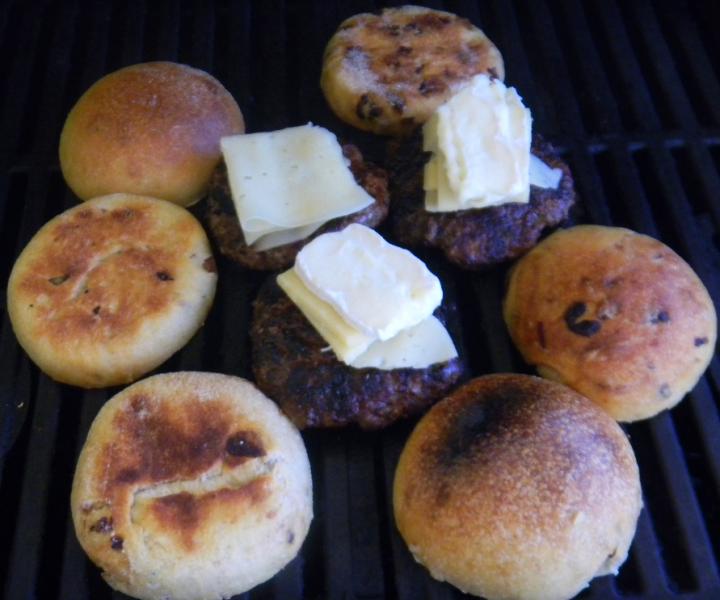
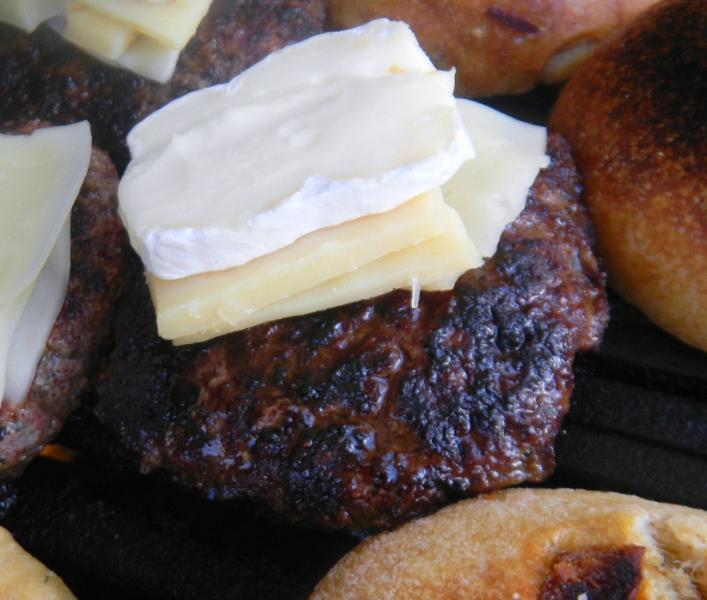
The result is a semi-hot, complexly spicy and delicious, moist but crispy, pulled duck (yes, David, I know…they quack loudly if you pull too hard).  The balance of spices is inspired (modesty aside)—you can taste each spice but they meld nicely.  It made a wondrous Cubano Sandwich, with Gruyere, sliced Kosher dills and homemade Chipotle–Lime Sauce, all on a home-made Po-Boy Roll (recipe below).

Ingredients:

6 Duck Legs

Kosher Salt

Fresh ground Black Pepper

½ tsp Chile Powder

1 dried Ancho Chile, seeded and minced

2 dried Chipotle Chiles, seeded and minced (or 1 or 3, for less or more heat)

¼ tsp ground Cumin

1 tsp dried Oregano

2 Bay Leaves, broken in half

2 tsp crushed Coriander Seeds

½ tsp crushed Anise Seeds

4 Cloves Garlic, sliced

4-6 oz. Chicken Stock, hot

Juice of 2 Mexican Limes


Procedure:

Three to twelve hours before cooking, wash and dry the duck legs and sprinkle them well with salt and pepper.  Cover and refrigerate.

Pre-heat oven to 450 F. 

Mix up the spices listed above from Chile Powder to Anise seeds.  Lightly oil a heavy pot or Dutch Oven that will fit the duck legs in a single layer fairly tightly.  Add the duck legs and roast for 1 ¼ hours, turning them mid-way.

Remove the legs to a plate and spoon out all but a thin layer of the rendered fat.  Pour an ounce or so of the hot stock into the pot and scrape loose the stuff at the bottom of the pot.  Return the legs to the pot and sprinkle with the spice mix, lime juice and garlic slices.  Pour the stock into the pot until the legs are about 2/3 covered.

Return the pot to the oven, uncovered.  Lower temperature to 400 F.  Braise for two hours or until most, but not all, of the liquid is gone, turning the legs once or twice and basting every 20-30 minutes.  The legs should be nicely browned and very tender. [Note: during this stage, if you need the oven—say, to bake some bread—the pot can be moved to the stove on simmer and covered].

Remove the pot from the oven and remove the legs to a plate.  With a slotted spoon, remove most of the solids (garlic, bay, chile and seeds).   When the legs have cooled, remove the bones (and skin and fat if you like) and shred the meat into rough shreds. 

Return the shredded meat to the pot, stir to moisten, and return to the oven.  Reduce heat to 350 F.  Roast for 45-60 minutes uncovered, stirring occasionally, until there is no liquid remaining but the meat is still moist.

The Rolls

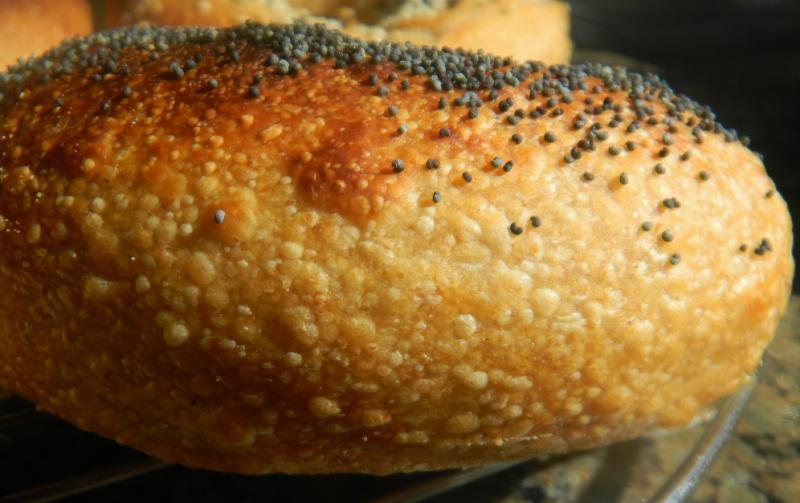
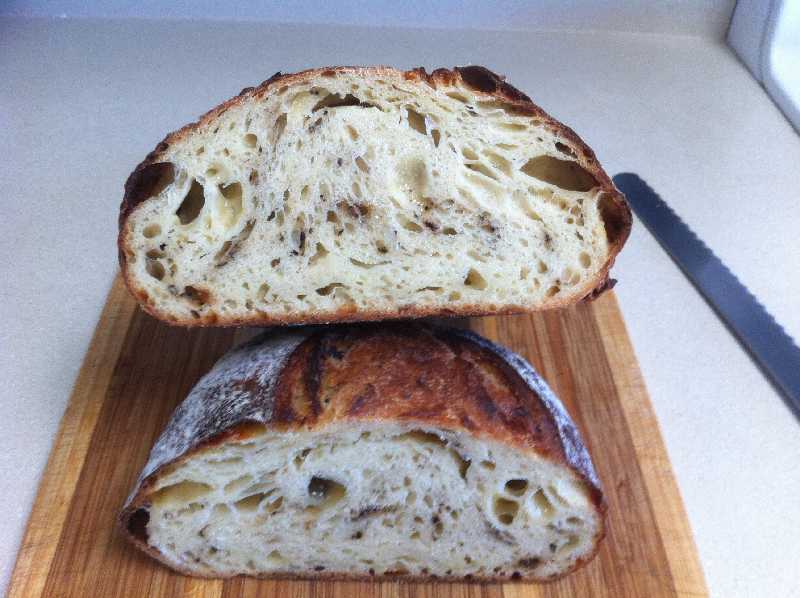
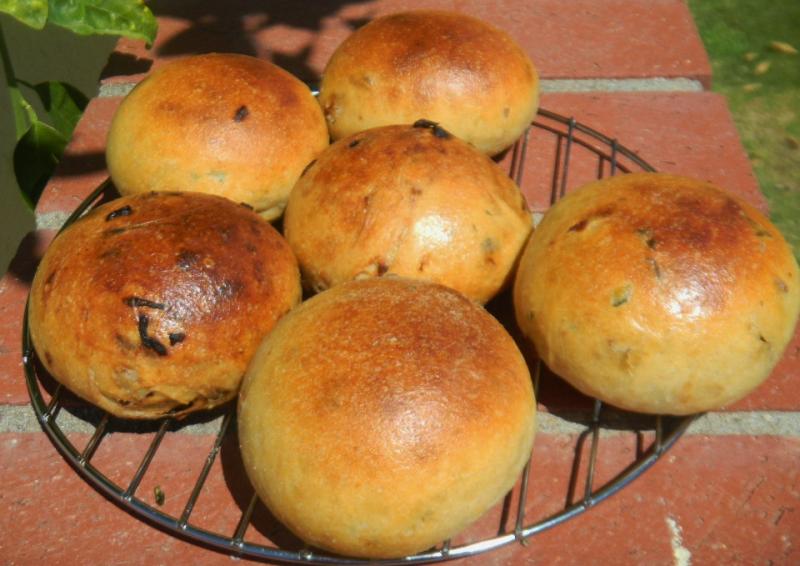
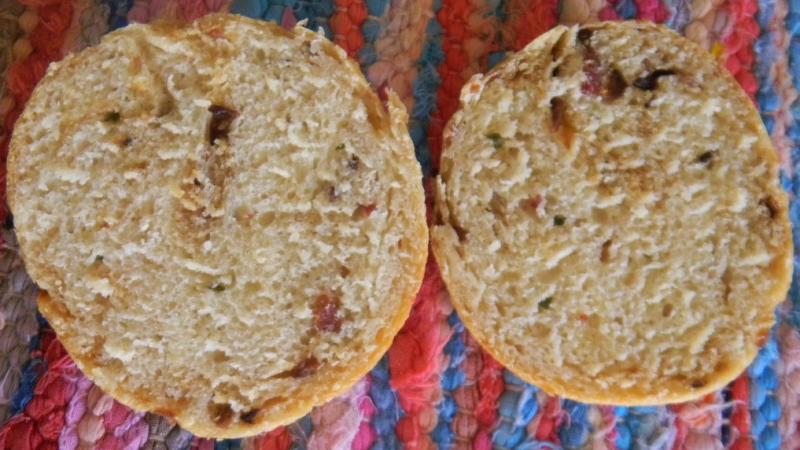
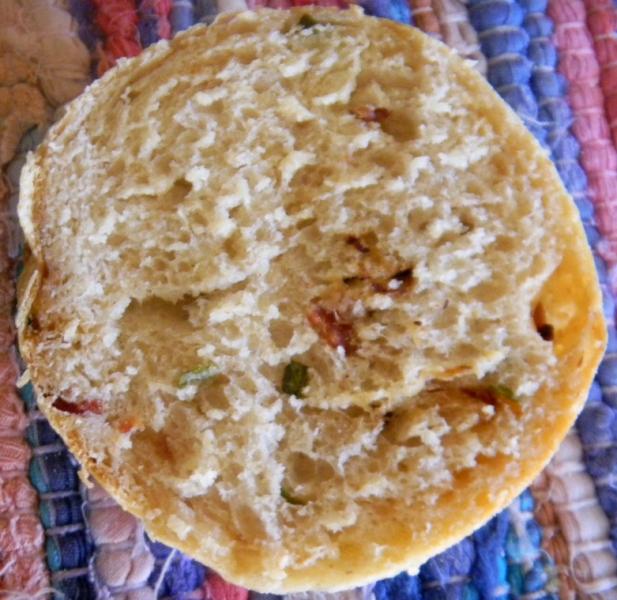
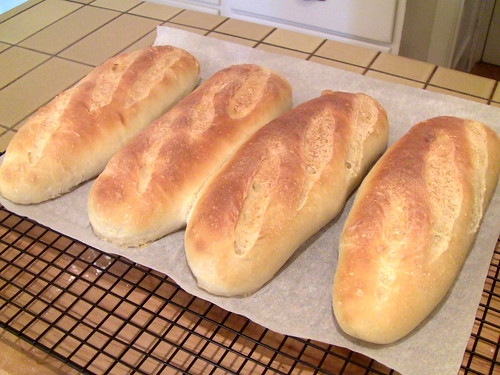
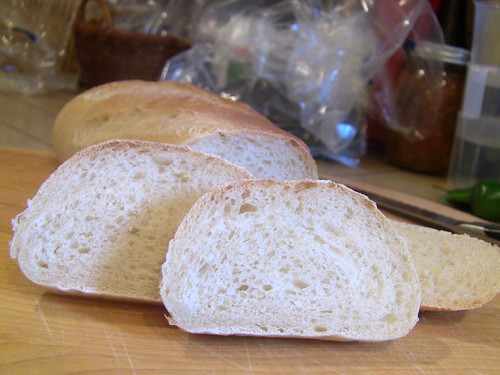
And here’s the recipe for the Two-Starter Po-boy Rolls, adapted from a recipe by  Bernard Clayton, brought to my attention by  ehanner (http://www.thefreshloaf.com/node/4329/po-boy-victory).  I thought adding two pre-ferments (a poolish and a levain, as in proth5’s Bear-guettes) might enhance the flavor.  I honestly can’t say it made a big difference, but the rolls were excellent—crispy crust and soft innards.

Mixed Starter Po-Boy Rolls

Poolish:

¼ tsp Instant Yeast

2 oz. Water room temp

2 oz. AP Flour

Levain:

½ oz. Active Starter

2 oz. Water

2 oz. AP Flour

Main Dough:

1 ½ tsp Instant Yeast


2 Tbsp Nonfat Dry Milk


1 Tbsp Sugar


1 Tbsp Salt


20 ½  oz. AP Flour (divided)


12 oz. Warm Water (100 F)


Poolish

Levain

1 Tbsp Butter (room temp)


1 Tbsp. Cold Water

Method:


Mix the levain and the poolish 12 hours ahead.

Mix together 10 oz. with the flour, and the yeast, dry milk, sugar and salt.


Mix the levain, polish, and butter into the warm water and add to dry ingredients.  Mix well (2 min with beater blade). Switch to dough hook and add remaining flour 1/2 cup at a time.  Add additional flour if needed to get to a shaggy elastic but not sticky mass. Cover and rest for 10 minutes.


Knead on speed 2 for 10 minutes. Dough should clean sides of the bowl, adjust flour accordingly.


Turn out into a lightly oiled bowl with at least 2-1/2 times the capacity and cover. Let rise until doubled (1-1-1/4 hrs).


Punch down and turn out onto a lightly floured surface. Knead briefly to degas. Divide into 4 pieces. Pre-shape into a loose rectangle and cover loosely, rest 10 minutes.


Shape using baguette technique.  Seal the seam and ends.  Roll and stretch to desired length and place on parchment lined sheet.  Cover loosely with saran and proof for 45-60 minutes.  The dough should double easily in 45 min.


Pre-heat oven to 400F.
 When proofed, brush dough with cold water, slash, steam oven and bake for 35 Minutes.  Rotate half way through for even color.  Bake to a golden brown (25-30 Minutes).  Cool on a rack.


Glenn

Franko's picture
Franko

Semolina Levain with Roasted Garlic, Black pepper and Provolone

Incorporating black pepper into a bread is something I've wanted to try for a while now, finally deciding last week to have a go at it. What I wanted was a bread for grilling to use for bruschetta, with black pepper, roasted garlic and cheese meant to provide a bit more zing than your standard white Italian of French loaf offers. Using Jeffrey Hamelman's recipe for Semolina Levain from "Bread" as my starting point I took my best guess as to what percentages of pepper, garlic and cheese to add to his formula to achieve the flavour I was looking for. In the end I think I came pretty close, although next time I'll cut back on the black pepper just a touch and use either a sharp, dry aged Provolone or Pecorino Romano for a more assertive cheese flavour.

NOTE: Formula below and in the link have been adjusted accordingly.

After the loaf had cooled down and the first slice tasted, I was slightly disappointed with the flavour since neither the cheese or roasted garlic came through as much as I'd hoped for, although there was no mistaking the presence of the black pepper, every so often hitting a pocket of it that definitely got my taste buds attention. Fortunately my disappointment didn't last long once I'd fired up the BBQ and grilled a few slices (brushed with olive oil) over a bed of hot coals.

The subdued garlic and cheese flavour from my previous cold tasting were now right up there with the black pepper, creating a very good balance of flavour with the durum and wheat flours of Hamelman's base formula. Without the high ratio of durum flour used in the mix I think the flavour and crumb texture would not have been as good as one made with standard wheat flour. Durum flour has such a unique and subtle flavour to it and the crumb seems to retain moisture better than standard wheat flour, possibly why the flavours released as well as they did once the bread had been heated. Just a theory, but something I've noticed with high ratio durum doughs I've made in the past. At any rate, the grilled slices were perfectly suited to pairing with the fresh taste of chopped tomatoes and basil from our garden that I made for the bruschetta topping. My best recommendation for using this bread is to either toast, grill, or fry it in some fashion to really let the flavours come to their best. Served warm to dip in EVOO, mixed with egg and cheese for a savoury [Strata] or simply to make croûtons with, just a few of the possibilities that come to mind for enjoying this bread at it's best.

NOTE:

Extra fancy durum flour can sometimes be difficult to find and costly, depending upon where you live. Durum Atta Flour could be substituted for X Fancy Durum, or even a 100% hydration, coarse semolina soaker used at a 20-40% ratio would likely make a good substitute to use in this formula.


The very best of the Summer to all,

Franko

 Link to working spreadsheet [here]

Procedure for Semolina Levain with Roasted Garlic, Black Pepper and Provolone


Roasted Garlic Paste:

Make the roasted garlic paste the day before the final mix and keep covered in the refrigerator. Two heads of garlic should be adequate for a single loaf of 1.150K. Roast the garlic at 325F in an oven proof dish with a 1/4 C of water, covered in foil for 30-45 minutes or until the garlic is very soft. Cut in half and squeeze the paste through a strainer or run through a food mill to ensure that the paste is smooth.

NOTE: This a method for garlic paste that I've been using since first reading of it in Michael Ruhlman and Brian Polcyn's book "Charcuterie" [ http://ruhlman.com/my-books/ ] The addition of water produces a braised paste that has fewer of the bitter flavours encountered in a typical roasted garlic preperation. 

Levain:

Mix all the ingredients for the levain to a temperature of 70-71F/21C and let sit for 12-15 hours. 

Final Dough:

Scale out the black peppercorns and roast at 350F/176C for 15-20 minutes. The peppercorns should have mild to medium aroma to them. Allow to cool, then crush with a mortar and pestle or a heavy pan. Cut half the cheese into 1/4" dice, shred the remaining cheese and toss all of it with the crushed black pepper. 

Add the water to the Semolina flour and All purpose and autolyse for 40 minutes.

Add the levain and combine with the flours thoroughly, then add the salt and garlic paste and knead to a medium development. 

Allow the dough to relax for 5 minutes then gently stretch it out to a disk. 

Spread the cheese and pepper mix evenly over the dough. Fold the sides of the dough disk to the center then fold the dough in half and slowly knead the cheese/ peppercorn mix into to the dough using wet hands, until thoroughly combined. DDT of 76-78F/24-25C 

Bulk ferment at 76-78F/24-25C for 90-120 minutes, giving the dough 2 stretch and folds at 45 and 90 minutes. 

When bulk fermentation is complete round the dough lightly, dust with flour and cover with a cloth or plastic, resting for 15 minutes before shaping. 

Shape as desired and begin the final proof at 76-78F/24-25C for 75-90 minutes. The dough should spring back slowly when pressed with a finger.


Bake with steam in a 475F/246C oven with the vents blocked for 10 minutes. After 10 minutes vent the oven and remove the steaming apparatus. After 20 minutes rotate the loaf for even colouring and continue baking for a further 15-25 minutes. Check the colouring during this time and if necessary adjust the oven temperature to prevent the loaf from over browning. Baking times will vary depending on the weight of the loaf but a 1 to 1.5K should take between 35-45 minutes to reach an internal temperature of 210F/98.8C. At this point remove the loaf from the oven, wrap in cloth and cool on a rack for 8-10 hours before slicing.


NOTE: Use the bread toasted, grilled, or fried for best flavour.


Andreea C's picture
Andreea C

Hello everybody!

I have just baked this delicious bread for the third time and I am finally content with the results. I really love the feel of big breads, so I chose to make a 2 kg loaf. Making such a big bread is a joy for me also because it always means that I'm gonna make some other people happy with little tasty presents.

I had some problems in the past with underproofing this bread, mainly because my old fridge is playing tricks on me. I am never quite sure that the temperature inside it will remain constant. This time, the day I prepared the bread, it was pretty hot outside and the temperature inside the fridge was around 11-12 degrees (often it stays around 5-6 degrees). So I chose to take the loaf out of the fridge after seven hours of proofing and left it at room temperature another 30 minutes before baking it.

I don't know if I could have achieved larger wholes in the crumb, I am still not very good at diagnosing an underproofed bread, unless it's really underproofed as in very very dense. All in all, the bread tastes and feels very good, it has a pretty light texture and the aroma given by the combined seeds is a delight. 

I wish you all happy baking and beautiful summer days!

Andreea

P.S.: I am submitting this bread to YeastSpotting.

dabrownman's picture
dabrownman

We have been baking with YW, Combo YW / SD and straight SD lately but have not had the chance to compare identical YW and SD recipes to see how they might compare.  We recently made a Joe Ortiz Desem Starter that we really liked so decided to use WW to build each of the starters to the same 90 grams of levain with the same 80% hydration.


We usually want somewhere around 40 % whole grains minimum in our breads with sprouts and seeds, but since these rolls were going to be used for our monthly hamburger dinner we skipped the sprouts and seeds but added fresh chopped basil, caramelized onions, bacon and parmesan cheese instead. 

Yeast Water version is first for pictures.


These additions reflected isand66’s (Ian’s) bacon, caramelized onion and cheese bread we rank in our top 5 and his roll bake this week along with breadsong’s roll bake this week that had basil and parmesan cheese in it.  We thought combining the 2 would make for a very nice bun for our grilled poblano chili, caramelized onion and mushroom, cheese burger we were planning for dinner.


Since it is summer, we planned on bailing the rolls in the mini oven using (2) of Sylvia’s steaming cups designed for it.   We are amazed the varieties of well baked bread that come out of that little oven.


This was no exception.  Both rolls were soft and moist inside with the YW being more so but the SD was more open.  The crusts came out nice and crusty but were immediately toned down to nice and soft by brushing milk on them immediately – no one wants a hard hamburger bun. The crust on the SD was darker and more blistered and the spring was greater.  The SD rolls were baked last when the oven temperature and steam were working better.

Now for the Desem SD pictures


The YW rolls were slightly under baked and the SD ones were slightly over baked even though both were baked the same way and for the same time and temperature exactly.  Since only the levain was retarded, the SD tang was muted for the SD rolls and there was no SD tang in the YW as expected.

We liked both of these rolls equally well and have now found our new go to hamburger bun and possible bruschetta  bread.  We will add 10g each of potato flakes and ground oats with a little garlic and 12g of water to the recipe next time to make it even better.  We just forgot them this time by mistake.


Method

The levains were built over (2) 3 hr and (1) 2 hr build before being refrigerated overnight.  Home ground whole wheat was used for the levains in keeping with the normal Desem starter feed.  We also ground the soft white whole wheat berries.


Each  dough was made by hand mixing the levain and non fat milk together first to break up and liquefy the levain, then the flours, butter and oil were added.  We added the fat to give the rolls an even more tender and moist crumb.  The dough was then hand kneaded for 4 minutes and allowed to rest for 15 minutes in an oiled, plastic covered bowl.

YW is on the right in side shot and on the left in the crumb shot.  The spirng better for the SD - quite unexpected.


(4) sets of S & F’s were done on 15 minute intervals with the herb, onion, bacon and parmesan added in on the third set.  The dough was then allowed to ferment and develop for 90 minutes.

Each batch made (6) 111 g rolls.  After dividing, the rolls were S&F’ed to shape and then rolled under the palms of the hand until the skin was tight and the fold seamed shut.  The rolls were then proofed for 2 hours on parchment in a plastic bag.

YW on the left, SD on the right.


The oven was preheated to 500 F and Sylvia’s (2) Pyrex cups, half full of water with a wash cloth in them were heated until boiling in the microwave.   The rolls with parchment were placed on the top part only of the mini’s broiler pan with the steaming cups and loaded in the lower rack for 10 minutes of steaming.  After 2 minutes the temperature was turned down to 425 F.

Who wants a plain cheeseburger?


When the steam came out at the 10 minute mark, the baking rack was moved to the upper level and the temperature turned down to 375 F convection this time.  In 5 minutes the rack was rotated 180 degrees and moved to the lower level for 5 more minutes of baking. 

When you can have one of these.  Both have grilled poblano peppers, Alpine Lace, Emmenthaler Swiss and brie cheese, caramelized onion and mushrooms.  One has lettuce and tomato and one does not.  Either makes any architect a proud builder :-) Even Lindy's on 4th in Tucson would have a hard time beating these burgers and no way they can beat the buns!


At 20 minutes the rolls were deemed done and removed to wire cooling racks where they were immediately brushed with milk to soften the crust for hamburger buns.

Brownman's Banana Bread made as a sheet cake For desert.

Formula follows the pictures.

YW StarterBuild 1Build 2 Build 3Total%
Yeast Water25200452.86%
WW152194515.00%
Total Starter404199030.00%

Or the Desem starter below

Desem SD, Caramelized Onion, Basil, Bacon,  Parmesan Rolls     
      
Desem StarterBuild 1Build 2 Build 3Total%
SD Desem Starter1000102.86%
Rye00000.00%
AP00000.00%
WW152194515.00%
Water152003511.67%
Total Starter404199030.00%
      
Starter     
Hydration80.00%    
Levain % of Total14.49%    
      
Dough Flour %   
Semolina5016.67%   
Bread Flour7525.00%   
Soft White Whole Wheat5016.67%   
AP7525.00%   
Durum Atta5016.67%   
Dough Flour300100.00%   
      
Salt62.00%   
Non Fat Milk19565.00%   
Dough Hydration65.00%    
      
Total Flour350    
Milk and Water235    
T. Dough Hydration67.14%    
Whole Grain %42.86%    
      
Hydration w/ Adds68.29%    
Total Weight621    
      
Add - Ins %   
Butter206.67%   
Olive Oil 103.33%   
Total30

10.00

   
 Add ins are split between  12 rolls     
3 Bacon strips     
4 T Chopped basil     
6 T Caramelized onion.     
1/4 C Grated Parmesan    


baybakin's picture
baybakin


For part II of my panaderia series, I bring the recipe for just about the most prevelant of pan dulces (sweet breads) in my old neighborhood; Conchas.  I've been looking for a good conchas recipe for ages, ever since I could no longer walk down the street to get a batch for 30 cents apiece.

This recipe is adapted from a great book (possibly the best one I've found in english) by Diana Kennedy, Regional Cuisines of Mexico.

Starter:
114g Flour
22g Water
50g (1) egg
1/8 tsp yeast

Final Dough:
453g Flour
150g Sugar (I use "evaporated cane juice" or "Azucar Morena")
28g Unsalted Butter
250g (5) eggs
58g water
8g Salt
2g yeast

Topping:
114g Flour
56g Superfine Sugar
56g Powdered Sugar
56g Unsalted Butter
56g Shortening
(Optional Flavorings: Cocoa powder/Vanilla extract/Cinnamon)

Method:
Mix starter, let rest overnight or until doubled.
Tear starter into pieces, mix with liquids and sugar until incorporated
Mix flour, butter and yeast into liquids and let autolysis for 20 mins.
Fold in salt and kneed until dough is satiny.
Let dough double in a warm area, folding at least twice during fermentation.

Mix topping, incorporate until a dough using the back of a wooden spoon.
Add flavoring to taste.
Divide dough into 16 pieces (about 60g apiece), shape into rounds and place on a silpat or parchment paper.
Pull off 1" balls from topping mix, flatten into discs between your palms.
Press flattened discs into dough balls, flattening them a bit.
Score tops in a shell or grid pattern, cutting half way into the topping, and let double in size.

Bake at 350 for 15-17 mins, until conchas turn golden and sound hollow when bottom is tapped.

Enjoy with a glass of milk or a nice cup of hot cafe con leche.  The shaping takes some practice, but there's a few videos on youtube that can help out.  These simple eggy breads are favorites of mine, and I hope they will be of yours too.


breaducation's picture
breaducation

My latest bake continues my recent obsession with sprouted grains in bread. I've been experimenting with them a lot lately and have found the flavor truly excellent. There is a nice sweetness to the sprouted grain and none of the bitterness that you find in whole wheat flour. Combine this with the great healthy benefits that come from sprouting grain and you have a great addition to many breads.

At first I tried playing around with sprouted wheat in country breads and had great results but it was time to step it up. My latest bake is an extremely tasty sprouted wheat sandwich bread. This loaf's flavor is unlike anything I've tasted when using pure whole wheat flour. The sprouted spelt berries really add a nice texture to complement the flavor. I think it is a near perfect sandwich bread. So far it's made several delicious peanut butter banana sandwiches(my favorite snack).  It's likely going to be my go to sandwich bread as long as I've got some sprouted wheat available.

For the formula, process and more photos visit abreaducation.

Isand66's picture
Isand66

I wanted to make some good soft tasty rolls using my Cherry Yeast Water starter.   I figured since I can't drink the starter I should use some organic cherry lemonade in place of the water.  In order to get the rolls to be nice and soft and rich I decided to add some cream cheese and butter and used some Durum flour in the levain as well as the final dough.

As I have mentioned in previous posts I have found that the best way to use the Yeast Water starter is to build up the levain in 2-3 stages.  For this bake I did a 3 stage build detailed below.  If you want to know more about starting your own WYW starter let me know and I will be glad to help you.  It is really easy to start and maintain and WYW does not have nearly as much of a sour tang as sourdough starters.

Procedure

Wild Yeast Water Starter Build 1

50 grams AP Flour

50 grams WYW

Mix the flour and the WYW in a bowl and leave covered at room temperature for 4-5 hours. You can refrigerate it after 4-5 hours if you don't have time to go to step 3.

Wild Yeast Water Starter Build 2

100 grams Durum Flour

100 grams WYW

Mix the flour and the WYW in a bowl and leave covered at room temperature for 4-5 hours.  You can refrigerate it after 4-5 hours if you don't have time to go to step 3.

Wild Yeast Water Starter Build 3

100 grams Durum Flour

150 grams Water

Mix the flour and the WYW in a bowl and leave covered at room temperature for 4-5 hours.  You can now proceed to the main dough or refrigerate overnight and use the next day.

Mix additional ingredients into Build 1 and use your hands to make sure all the ingredients are incorporated.  You should have a fairly firm 65% starter.  Leave covered for 4-5 hours at room temperature and then either proceed to main dough or refrigerate over night.

Main Dough

375 grams WYW Levain from Above

512 grams Bread Flour (KAF)

88  grams Durum Flour (KAF)

393 grams Organic Cherry Lemonade (I bought it at Whole Foods and it has about 23 grams of sugar per serving)

16 grams Salt (Seas Salt or Table Salt)

102 grams Cream Cheese Softened

49 grams Unsalted Butter Softened

Add all the Cherry Lemonade except 50 grams to the starter to break it up in your mixing bowl.  Next add all of the flours and mix on low for 2 minutes.  Let the dough autolyse for around 15 - 20 minutes up to an hour. This will help the dough absorb the flour.  Next add the salt, remaining Cherry Lemonade, cream cheese and the butter and mix for 4 minutes on speed number 1.   You should have a nice smooth dough which is still tacky.  Move the dough onto your work surface and dust lightly with flour if necessary or spray some cooking spray instead.  Most of the time if the dough is not a high hydration I will not use anything on my wood board.

Do 4  stretch and folds and form the dough into a ball and leave uncovered for 10 minutes.  After the first rest do another stretch and fold and cover the dough.  Let it rest for another 10 minutes and then do another stretch and fold.  You can now put the dough into a lightly oiled container or bowl and cover it.  Let it sit at room temperature for 2 additional hours or less if it is warm in your kitchen.  After 2 hours place the covered bowl in the refrigerator for 1 - 3 days until ready to bake.

When you are ready to make your rolls take the dough out of the refrigerator and keep it in its bowl at room temperature for 1.5 -  2 hours.  After its rest it is time to shape the rolls.  Depending on how big you want the rolls, first cut the dough in half and then roll half the dough into a log.  Next cut off the desired size piece you want and roll it into a tight ball.  Place rolls on cookie sheet and cover the rolls with a clean lint free towel sprayed with water or a piece of plastic wrap lightly sprayed with cooking spray.  Let the rolls rest at room temperature for 2 hours or until they are at least 1.5 the size.

Around 30 minutes before baking the rolls, prepare your oven and pre-heat at 450 degrees.  I used my usual set-up for steam and added 1 cup of boiling water to a pan on the bottom shelf but for rolls you could omit this step and you will get softer rolls if that is what you desire.  After adding the steam lower the oven to 425 degrees and continue baking.

It should take around 20-25 minutes to bake the rolls and they should be nice and brown on the bottom and top.  When done, let them cool on a wire rack and enjoy.

The rolls ended up nice and soft with a chewy and nice open crumb.

This post has been submitted to the Yeast Spotting Site here: http://www.wildyeastblog.com/category/yeastspotting/.

odinraider's picture
odinraider

Forgive the bad photos; they were taken at 5 a.m. with my cell phone. I wanted some pictures before I devoured the stuff. This is a rustic course wheat loaf. It is easy to make, and packed full of great wheaty flavor.

Here is my recipe for anyone who wants to try it:

Bread / all purpose flour: 400 grams

Whole wheat flour: 50 grams

Cracked wheat berries: 30 grams

Wheat bran: 20 grams

Water: 350 grams

Salt: 10 grams

Yeast: 2 grams

1. Combine whole wheat flour, bran, and wheat berries in a bowl. Add 330 grams of water. Cover and let sit for 30 minutes.

2. Add white flour. Mix completely, then cover and let sit 30 minutes.

3. Mix salt with 10 grams of water to dissolve. Mix yeast with 10 grams of water to dissolve. Do this during the autolyse period, so the yeast will be fully active and hungry. At the end of 30 minutes, it will have a nice smell and be ready to go into the dough.

4. Squeeze yeast water and salt water into dough until combined.

5. Knead until elastic, about 10 minutes.

6. Place in lightly oiled bowl, cover, and bulk ferment for two hours, giving a stretch and fold every half hour.

7. After two hours, shape the loaf. Proof 1 1/2 to two more hours. Preheat oven to 500 degrees, with your stone in the second from bottom position.

8. Place dough on peel, or on parchment and a peel, slash as you wish, and spritz the top with water. Put your loaf in the oven, and turn the temperature down to 450 degrees. Bake with steam for 15 minutes.

9. Open the oven to remove the steam, and turn the oven down to 400 degrees. Rotate the bread so it browns evenly, and cook another 18-22 minutes, until the bottom is hard and sounds hollow when you knock on it.

10. Let your loaf cool at least 2 hours before cutting into it.

Enjoy, and please post your results so I can know if the recipe is universally good.

Matt

Pages

Subscribe to Recent Blog Entries