The Fresh Loaf

A Community of Amateur Bakers and Artisan Bread Enthusiasts.

Recent Blog Entries

Justkneadit's picture
Justkneadit


After having a successful first try at my first of two recipes I will bake for a year, my sourdough boule, I gave DonD's recipe for Baguettes a l'Ancienne my best. I will say a good baguette is not as simple as it may seem, and I feel this recipe will take more time to become proficient.

The method to my madness...

Recipe:

Flour Mixture

  • 470g KAF AP
  • 30g Arrowhead Mills Whole Grain Rye
  • 300g Cold Water (38F)

Dough

  • 50g Cold Water (40F)
  • 10g Pink Himaylan Salt
  • 2g Instant Yeast

Procedure:

  1. Mix flour and cold water into a doughy blob. Temp of dough after mixing 63.7F. Place in fridge for 12hr at 42.2F.
  2. Pull flour mix out of fridge and mix in 50g of cold water and yeast. This was um...difficult at first. Between freezing my fingers and fighting the slimy mixture I finally brought it together, about 10 min. 
  3. Then add the salt and knead until distributed evenly, using Bertinet's method.
  4. Let the dough rest for 15 min, then began 1st of 4 S&F's at 30 min apart and then 2 S&F at 45 min apart.
  5. Place dough in oiled bowl, in to a plastic bag it went and then in to the fridge (44.2F) for 24hr.
  6. Pull out of the fridge, gently divide into three 270g pieces and gently preshape into a fat log. I used Ciril Hitz's method for prehaping and shaping. Cover with plastic and let rest for 1hr.
  7. Preheat oven to 490F. I gently degased and shaped then proofed en couche for 45 min seam side up.
  8. Misted sides of the oven, transferred baguettes to baguette pan, scored and placed in oven with 2/3 cup of boiling water. Immediately turned oven down to 460F. Bake for 10 min then remove pan with lava rocks and reduce to 430F for 10 min. Then turned off oven and opened the door and let the baguettes sit for 5 min. Allowed to cool for 30 min.

My results are as follows, but not exactly what I wanted.

Notes:

Crumb was no where near what I wanted or comparable to DonD's wonderful baguettes, but then again I have only just begun. Maybe no degas the next time and some work on shaping and scoring wouldn't hurt.

Crust color was a little light. Any tips?

What is the purpose of the rye in the recipe? The inside was nice and soft with a thin crunchy crust but I thought the taste was a bit off. In all honesty a may have forgotten the salt but I can't remember, mise en place right? So, the no salt could have been the culprit, not totally sure I forgot it though. Anyways I'm open to suggestion, critques or comments. Thanks!

Isand66's picture
Isand66

Last weekend I baked a multi-grain bread using white wine with sweet potatoes which came out as good as I could have expected.  This time I wanted to try using a red wine and what goes better with red wine but chocolate and cheese.  I used a cocoa rouge which is a special type of cocoa that has an intense bittersweet character with a rich deep red color and fudge-like flavor.

In my last bake with the white wine you did not really taste the wine due to the fact that i used so many different multi-grains so I wanted to make sure to keep this one a little simpler.  I two of my favorite flours, durum and white spelt added with some European style flour from KAF and some potato flour.

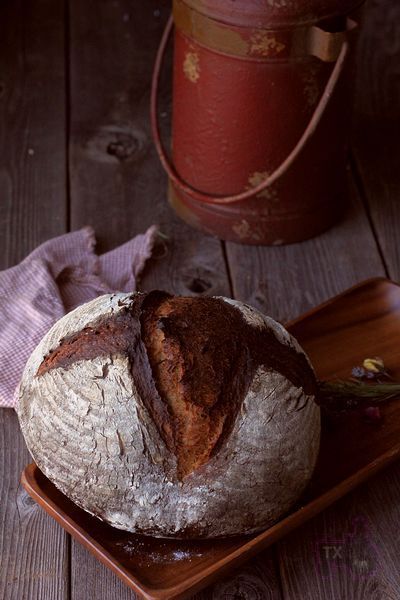
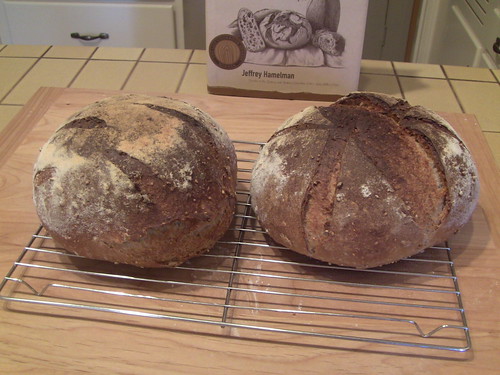
I also tried to make one loaf using a new cat cookie cutter I just bought, but that was probably a mistake.  The cookie cutter ended up leaving too much of an escape hatch for the cheese which ended up splattering all over the front of the bread.  I guess that's not the worse thing that could have happened.

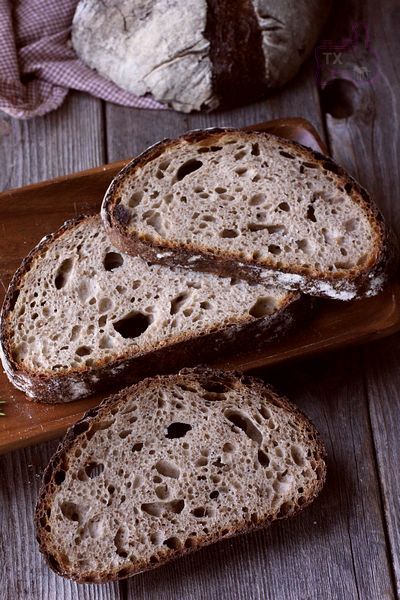
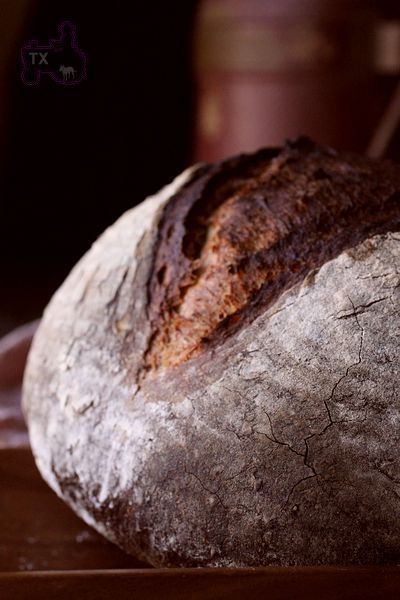
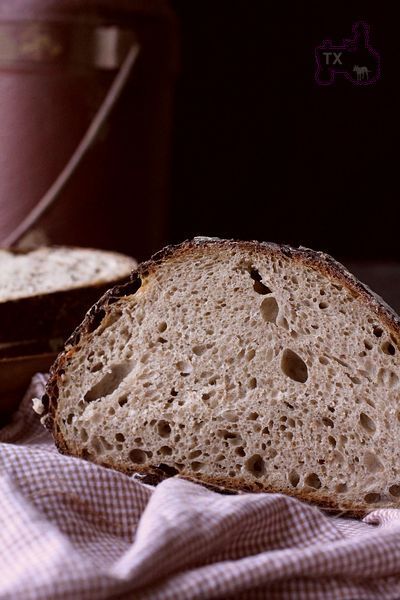
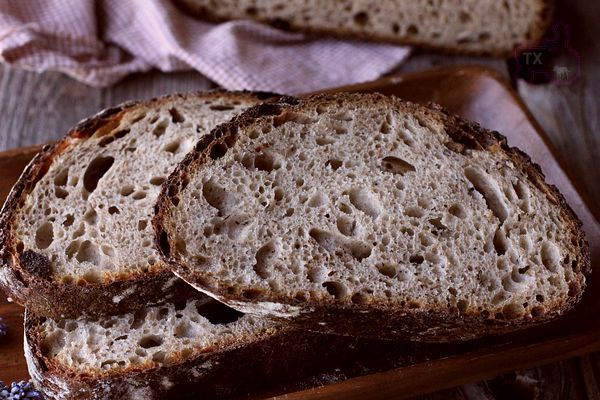
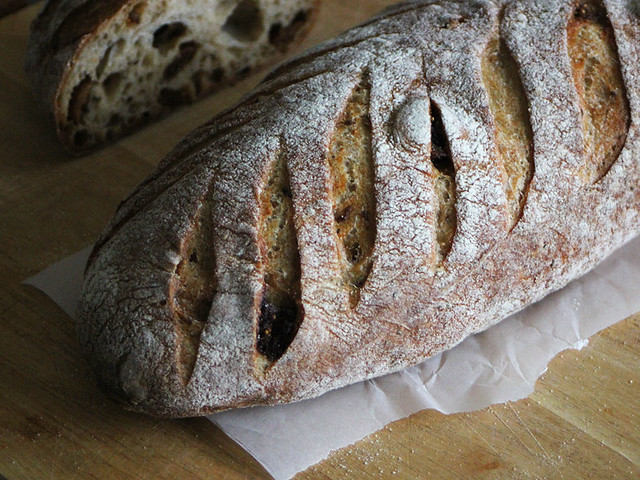
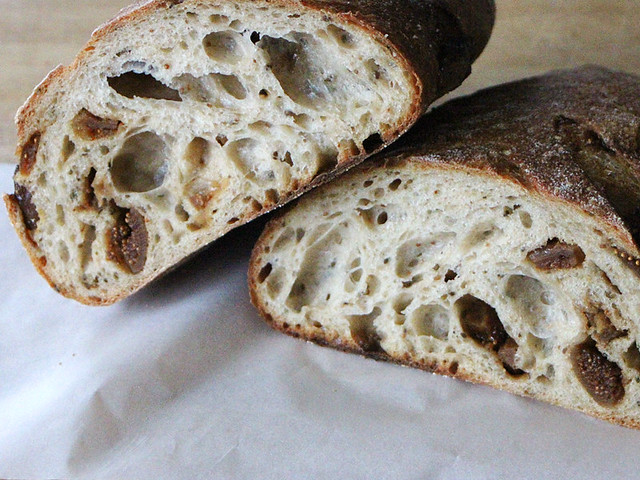
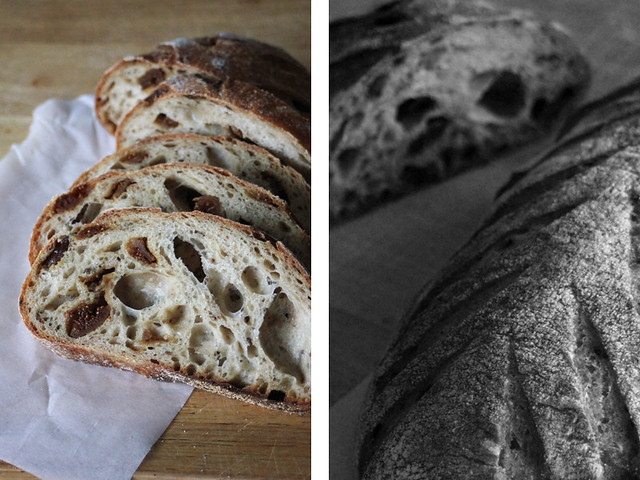
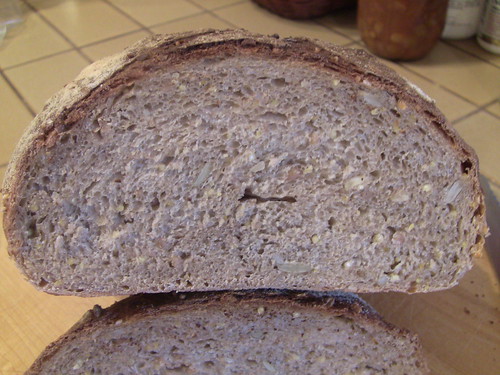
The end result was a nice flavorful dark and rich bread with the added flavor of the Havarti cheese to put it over the top.  The crumb was nice and open and flavorful with a nice chew.

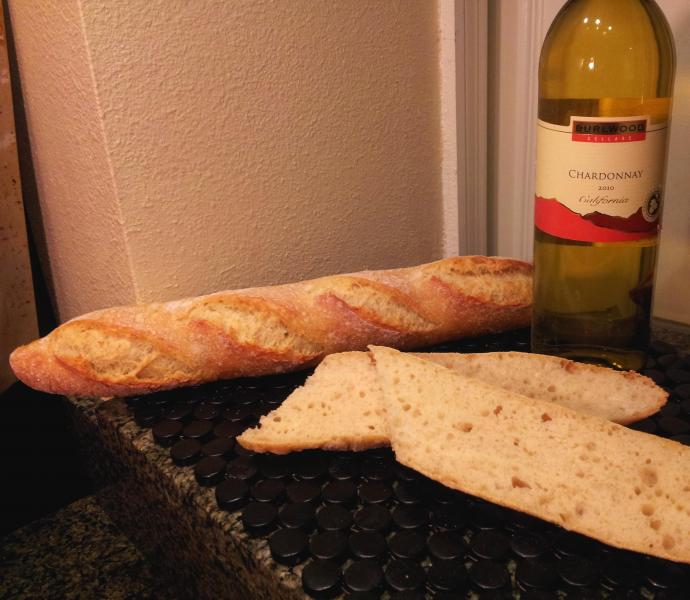
I used a Merlot from another local winery called Duckwalk on the east end of Long Island.

Directions follow below.

AP Starter

227 grams AP Flour

71 grams AP Seed Starter

151 grams Water at Room Temperature (80-90 degrees F.)

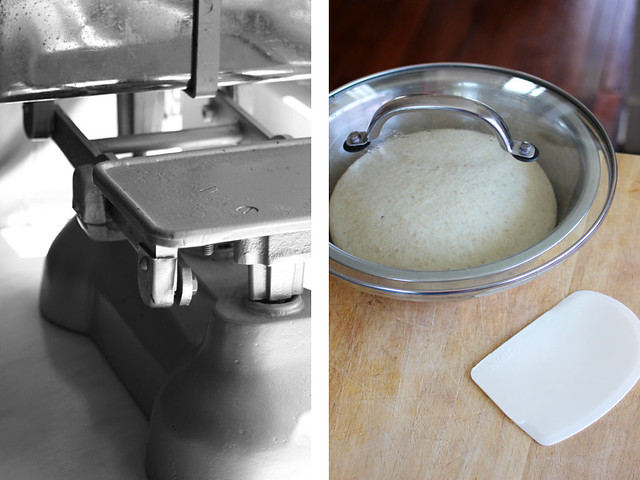
Mix ingredients in a bowl until thoroughly combined.  Cover the bowl and let it sit at room temperature for around 8 hours.  The starter should almost double when ready to proceed.  You can either mix in final dough or put in refrigerator for at most 1 day before using.  If your kitchen is warmer than mine which is usually about 70-72 degrees with my air-conditioning you can proceed sooner.

Main Dough Ingredients

425 grams Refreshed AP Starter (65% hydration) from above

103 grams White Spelt (KAF brand)

200 grams Durum Flour (KAF brand)

220 European Style Flour from KAF (can substitute Bread Flour)

50 grams Potato Flour

15 grams Cocoa Rouge (KAF, you can substitute any dark cocoa but use a good quality)

16 grams Sea Salt or Table Salt

410 grams Merlot Wine

26 grams Walnut Oil

Havarti Cheese (sorry but I forgot to measure how much cheese I used.  I believe it was probably about 10 ounces)

Procedure

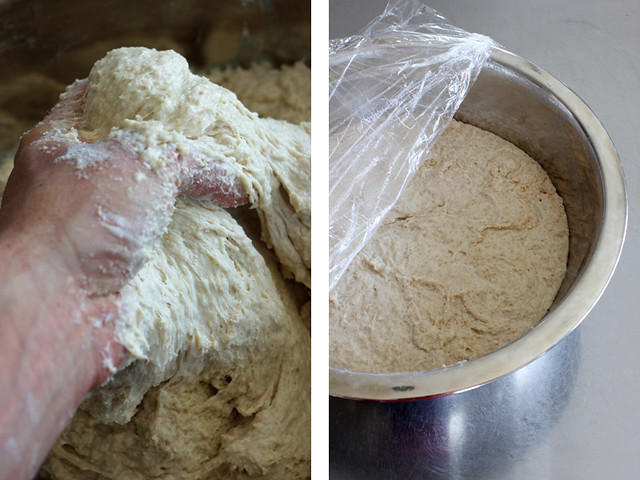
Mix the flours with the wine leaving 50 grams of wine for later in your mixer or by hand for 1 minute.    Let the dough autolyse for one hour in your bowl and make sure to cover it.  Next add in the salt and the starter with the balance of the wine and mix by hand for 2 minutes until everything is well incorporated.  Mix on speed #1 for 2 minutes and speed #2 for 2 minutes or by hand for 5 minutes.

Next take the dough out of the bowl and place it on your work surface.  Do a stretch and fold and rest the dough uncovered for 10 minutes.  After the rest do another stretch and fold and cover the dough and let it rest for 10 minutes.  Do one more stretch and fold and put the dough into a lightly oiled bowl and let it sit at room temperature covered for 2 hours.  After 2 hours you can put the dough into the refrigerator for 24 hours or up to 2 days before baking.  Feel free to do some additional S & F's if you feel it is necessary.  I baked the bread about 24 hours later.

The next day (or when ready to bake) let the dough sit out at room temperature for  2  hours.

Next, form the dough into your desired shape and put them in floured bannetons, bowls or on a baking sheet and let them rise covered for 2 hours or until they pass the poke test.  If you want to make the pattern on top, press your cookie cutter into the dough and place it good side up in a floured basket to rise.  When ready to bake, score the loaves as desired and prepare your oven for baking with steam.

Set your oven for 500 degrees F. at least 30 minutes before ready to bake.  When ready to bake place the loaves into your on  your oven stone with steam and lower the temperature immediately to 450 degrees.   The total baking time was around 45 minutes.  When both loaves are golden brown and reached an internal temperature of 200 degrees F. you can remove them from the oven.

Let the loaves cool down for at least an 6 hours or so before eating as desired.

Please visit my other blog at www.mookielovesbread.wordpress.com for all of my recipes.

Cosmo resting after a full meal :)

dabrownman's picture
dabrownman

My wife asked for a sandwich loaf that was made with whole grain, mainly whole wheat and a tiny bit of sweetness supplied by honey.  She wants a replacement for her old favorite Oroweat Whole Wheat.


She doesn’t like sprouts or seeds or soakers in her bread which makes it easier if more boring.  So we came up with a loaf she can take for lunch every day and not be forced to read the ingredient label that scares folks to death.


The whole grains include home ground whole; wheat, spelt and kamut with more emphasis on wheat.  Since wheat would be the dominate flour, we decided to use our Desem starter that is fed only whole wheat and tends to produce bread that is less sour and more sweet than our rye sour starter.


Method

We levain was a 5 hour single all in one shot kind of build, which had the same variety of home milled whole grains in it.  We like using whole grains in levains and at220 gthis one was 23% of the total dough weight - right in the 20-30% range we like. 


While levain was building itself up to full strength we autolysed all the other ingredients including the salt for nearly 5 hours.  When the levain was finished we mixed it by hand with the autolysed portion of the mix.  Once mixed we did a full 12 minutes of French slap and folds before allowing the dough to rest in a plastic covered  and oiled bowl for 15 minutes.


After the brief rest, 4 sets of S&F’s were done one 15 minute intervals with the resting done back in the covered bowl.  Once the S&F’s were completed the dough was allowed to develop and ferment for 1 hour before being pre-shaped into a loaf and allowed to rest for 10 minutes before being final shaped and place into a loaf tin.


As soon as the tin was filled with dough,  it was placed into a plastic bag and refrigerated for a 15 hour retard at 38 F.  The dough was taken out of the fridge and allowed to come to room temperature for 1 hour.


With 15 minutes left for the warm up, (2) of Sylvia’s steaming cups were prepared with dish cloth, Pyrex cup 1/2 full of water and micro-waved to boiling and the Mini Oven heated to 500 F.

One of Sylvia’s steaming cups were placed in the back of the oven, the bread tin slid in and the other steaming cup placed in front.  It is a perfect fit that ensures maximum steam if you throw in ¼ C of water on the bottom of the mini oven when you close the door like we did.


We steamed the bread for 2 minutes and then turned down the mini oven to 450 Fand steamed for another 8 minutes – 10 minutes of steam total.  When the steam was removed the MO was turned down to 400 F - convection this time.  Every 5 minutes the tin was turned 180 degrees.  After 5minutes the bread was removed from the tin and baked directly on the oven rack.  In 10 more minutes the bread tested 205 F and in Fahrenheit degrees too.  Total bake time was 25 minutes.


Since we wanted a softer crust the bread was removed to a cooling rack instead of being allowed to crisp in the off oven with the door ajar.  It was surprising how nice this bread really is - no kidding.  The taste is nice and wheaty and the sour is mild.  The crust baked up blistered and softly chewy like we had hoped for.  The crumb is glossy, soft, and very moist.  A real challenger to Oroweat Whole Wheat that tastes and looks better too.   


Nothing like laying down in the cool grass when it is 104 F outside - if you are a tired baking apprentice.

Formula

Starter

Build 1

%

Desem Starter

20

5.00%

Kamut

20

5.00%

WW

40

10.00%

Spelt

40

10.00%

Water

100

25.00%

Total Starter

220

55.00%


Total Starter


Hydration

100.00%


Levain % of Total

23.40%


Dough Flour


%

AP

150

37.50%

Bread Flour

150

37.50%

Whole Spelt

12

3.00%

Whole Kamut

6

1.50%

Whole Wheat

80

20.00%

Dough Flour

400

100.00%


Salt

8

2.00%

Water

270

67.50%

Dough Hydration

67.50%


Total Flour

510


Water

380


T. Dough Hydration

74.51%


Whole Grain %

45.10%


Hydration w/ Adds

72.83%


Total Weight

940


Add - Ins


%

Honey

12

3.00%

VW Gluten

10

2.50%

Wheat Germ

10

2.50%

Ground Flax Seed

10

2.50%

Total

42

10.50%

txfarmer's picture
txfarmer

Sending this toYeastspotting.
Click here for my blog index.

This formula was inspired from a bread in "Bread", however, it's been modified a lot. It's a whole grain heavy loaf with 25% rye flour (all in levain), 25% spelt flour, and 14% rye flakes. The rye flakes were recently "re-discovered" from bottom of the bin, after being soaked in hot water overnight, they added significant moisture to the crumb. Since the levain ratio was much higher than I usually do (25% of flour in levain, comparing to my usual ~15%) and my rye starter is ultra active to start with, bulk rise and proofing were much faster than I expected. I made it a couple times to arrive at the optimal hydration level and fermentation schedule. 

- Levain
rye starter (100% hydration), 6g
water, 94g
rye flour, 113g

mix and rise at room temp for 12 hours.

- Soaker
rye flakes, 65g
boiling water, 130g

mix and soak with cover for 12 hours

- Dough
bread flour, 227g
spelt flour, 113g
water, 170g
salt, 8g
levain, all
soaker, all

2. Mix everything together, autolyse for 20 to 30min,mix @ medium speed for 3-4 min until gluten starts to develope.
3. Bulk rise at room temp (~75F) for about 2.5hrs. S&F at 30, 60, 90, 120min.
4. Shape, put in basketes smooth side down, proof for about 1 hour at room temp (the kitchen got pretty warm, about 80F). Score.
5. Bake @ 450F for 15 min with steam, then @430F for 35min. Turn off oven and leave loaf inside for 10-20min with the oven door cracked open.

I tend to like a very bold bake, with cracking crust and nice ears

It's fairly tricky to adjust hydration for whole grain heavy loaves. Too much, the relatively weak dough won't hold shape, and crumb would be too wet and sticky; too little it would be dry and crumbly. Took a few tries, but worked out great for this one. Crumb is fairly open for such formulas.

Rye and spelt make a great flavor combo.

PiPs's picture
PiPs

Each day I try and find some time to write. It’s a habit I started years ago. And although I am sometimes shuffled along in life, and occasionally forget my place, it's a practice I always return to. It is not so much a diary, more like a snapshot in time and atop of every page I start with a grateful list for that particular moment in time.

So here goes for today:
I am grateful for the phone call from Dennis
I am grateful for a hot coffee next to me
I am grateful for my day off spent with Nat
I am grateful for an amazing find at an antique shop and the idea it spawned for another blog post
I am grateful for the new Grizzly Bear CD

Some of our plans are beginning to burble into life and as we watch where they might flow, many life lessons are being learned—patience, it seems, is lesson number one! These ‘in-between days’ need something special to lift our spirits and help us stop and appreciate our lot in life. These ‘in-between days’ require comfort food.

Our love of fig & anise bread is well known. I have mentioned it in postings here quite a few times, but it is still kept as a rare treat for us. A giddy excitement comes over us as it emerges from the oven—quick fingers pick at caramelized figs oozing from the crust—suddenly breakfast the next morning seems too far away.

The initial inspiration came years ago from the Pearl Bakery’s fig and anise panini formula in Maggie Glezer’s Artisan Baking. Over the years I have tinkered and experimented with ingredients and methods. I have crushed the aniseed, toasted the aniseed, used different varieties of figs, pureed the figs and added walnuts—and do you know what?

I think the ingredients are best left alone. Simplicity wins again it seems.

Fig & Anise levain (2 x 1105g Batards)

Formula

Overview

Weight

%

Total dough weight

2210g


Total flour

1028g

100%

Total water

772g

75%

Total salt

20g

2%

Pre-fermented flour

103g

10%

 Add-ins

390g

37%


Levain – 5-6hrs 25°C


Previous levain build

50g

50%

Flour (I use a flour mix of 70% Organic plain flour, 18% fresh milled sifted wheat, 9% fresh milled sifted spelt and 3% fresh milled sifted rye)

100g

100%

Water

58g

58%

Salt

1g

1%


Final dough. DDT=25°C


Levain

163g

17%

Laucke Wallaby bakers flour

787g

85%

Freshly milled spelt flour

138g

15%

Dried figs chopped (use good quality moist figs!)

375g

40%

Aniseed

15g

1.6%

Water

712g

77%

Salt

19g

2%


Method

  1. Mix levain and leave to ferment for 5-6 hours at 25°C
  2. Mill spelt flour and combine with bakers flour.  Mix with water holding back 50 grams of water.
  3. Autolyse for 5-6 hours.
  4. Add levain to autolyse then knead (french fold) for three mins. Return the dough to a bowl and add salt and remaining 50 grams of water. Squeeze the salt and water through the dough to incorporate (the dough will separate then come back together smoothly). Remove from the bowl and knead a further three mins.
  5. Begin Bulk ferment. After 30mins add in dried figs and aniseed. Squeeze through the dough until evenly distributed.
  6. Bulk ferment for a further three and half hours untouched.
  7. Divide. Preshape. Bench rest 30 mins. Shape into batards and proof in couche seam side up.
  8. Final proof was approx 2 hours at 24°C - watch the dough – we had friends over so I watched the dough not the clock as I was easily distracted.
  9. Bake in a preheated oven at 250°C for 10 mins with steam then reduce temperature to 200°C for a further 30 mins.


I distinctly remember pre-shaping the dough and commenting on how silky and extensible it felt. The figs draw some of the moisture and the dough feels very easy to handle for a 75% hydration dough. It smells heavenly as it bakes and becomes almost intoxicating when pulled from the oven. This bread never disappoints.

Kids need comfort food from time-to-time and the fig & anise flavours are too much of an acquired taste for them to be excited over—in fact I would say it is almost the opposite reaction. A quick scan of the fridge revealed some egg-whites leftover from a custard tart baked earlier in the week—Meringues!

The Bourke Street Bakery cookbook has an interesting recipe for meringues that involves heating and dissolving the sugar in egg-whites over a bain-marie. This mixture is then beaten to stiff peaks before being rustically dumped onto a tray for baking. I love the visual appeal of this and was further intrigued by an option that called for rolling balls of meringue in cocoa powder. They tasted as good as they looked!

The kids are meringue lovers now—the trick is now to convince them that these crunchy, gooey and delicious puffs are treats only!

Cheers,
Phil

Juergen Krauss's picture
Juergen Krauss

I have got a very simple fan-only oven (BEKO), and it took me a while figure out how to put it to its best use - with lots of inspiration from TFL.

This is how I bake my bread:

Usually use an oven stone and a metal baking sheet.

You can see the backplate of the oven cavity in the picture below - the shelf positions and the hot air outlets are highlighted:

I noticed that airflow changes a lot when loading the oven in different ways - it is not always the bit nearest to an outlet that gets burnt first!

I am now using 2 basic setups that work well. In both scenarios I have a small pan on the oven floor into which I pour boiling water (about 1/4 cup) once the oven has been loaded. The oven keeps moisture very well, and using more water cools it down too much.

Scenario 1: For a batch of 4 X 500g boules or 2X 800g boules or up to 6X 500g tins:

The baking stone receives a lot of heat from below and stays hot during the bake. The side of the boules facing the backplate gets more heat.

Therefore after 10 minutes I shuffle the breads around: turning them 180 deg. and sqapping the loaves on the stone with the loaves on the baking sheet. Usually I turn down the temperature at this point and bake for another 20 minutes. The bottoms of the loaves that started on the baking sheet might still be3 weak after that, so I usually turn those loaves over and bake them for 5 more minutes.

Scenario 2: For a batch of 1 X 100g or 2 X 500g

I place the loaf (loaves) on the baking stone, and rotate them after 10 minutes.

The baking sheet helps distributing the hot air and helps getting a more consistent bake.


I hope this might be helpful,

Juergen


mwilson's picture
mwilson

I’m still experimenting and making observations my with my natural “lievito 2.0”. All that experimenting and nothing to show for it… So while I had the time I decided to actually make something. Something different to Panettone…


I adapted the original recipe (from Dolcesalato), scaling down the formula, making just one modification to include white, along with the milk and dark chocolate chips.

Veneziana al Cioccolato by Giovanni Pina
VIEW SLIDE SHOWDOWNLOAD ALL
 

First dough – left to rise at 30C for 10-12hrs

  • 225g ‘00’ flour
  • 75g lievito naturale
  • 56g egg yolks
  • 64g caster sugar
  • 90g water
  • 75g butter

Second dough – left to rise at 30C for 6-7hrs

  • 83g ‘00’ flour
  • 56g caster sugar
  • 56g egg yolks
  • 4g salt
  • 15g honey
  • 38g water
  • 98g butter
  • 165g chocolate chips (55g each of white, milk and dark)

I glazed the dough with an egg and sugar solution and scored a Y shape on top as per original instructions.

GSnyde's picture
GSnyde

Seeking a hardy healthy bread, I decided to try Hamelman's Whole Wheat with Mixed Grain Soaker.  It's 50% whole wheat, made with a pate' fermente', and has a soaker of millet, cracked wheat, corn meal and oats.  I also added toasted sesame, sunflower and pumpkin seeds.  It has a nice crispy crust, tender crumb and a wonderful nutty flavor.  This will not be the last time I make it.

Sorry for the lack of detail, but it's been a busy weekend.

Glenn

BurntMyFingers's picture
BurntMyFingers

Last week I did a three-way miche taste test, with the same formula using three different flours: King Arthur High Extraction, King Arthur First Clear, and a blend of 60% KA Bread Flour/40% KA Whole Wheat Flour. Here are what the loaves looked like:

Clockwise from the top they are First Clear, Hi-X and the hybrid.

My judges were Michael London, a very well-known baker in upstate New York, and Cindy Corbett, an accomplished home baker with a wood fired oven in her back yard whom I'd met at a KAF workshop. The results of the taste test are detailed on my blog at http://wp.me/p1S3Ig-kY . But to give you a preview, the High-X and First Clear finished neck and neck with the hybrid well behind but still a good choice for the baker who doesn't have access to these other flours.

One of the reasons I'd wanted to do this test was some discussion on TFL in which First Clear and High-X are discussed as equivalents. They're not, per Martin Philip, the staff baker at KAF who provided me with research and advice: "In terms of comparing Type 110 with an ~85% extraction rate to First Clear which lacks the patent portion would be to compare apples and oranges at least from a functional standpoint (the patent portion contains the highest quality protein in the endosperm). " Yet the finished loaves were very close in nose, texture and taste and after a few days I couldn't tell them apart.

I am now doing a follow-up test with the KAF Hi-X pitted against Type 85 Malted from Central Milling. Stay tuned.


evonlim's picture
evonlim

This is how I enjoy my sourdough every tea break...
https://www.facebook.com/photo.php?fbid=531886010161293&set=a.306764779340085.90912.100000196962848&type=1&relevant_count=1

Hello everyone, I am a 6 months old at baking sourdough bread. Loving it! Found my own wild yeast and started baking since with inspiration from this wonderful web of bread lovers. Thank you without you all it is impossible to learnt so fast.

Evon

Pages

Subscribe to Recent Blog Entries