The Fresh Loaf

A Community of Amateur Bakers and Artisan Bread Enthusiasts.

Recent Blog Entries

louie brown's picture
louie brown

Much as "Slow Food" is a contemporary rubric for "what was once normal," so too was all bread once made without commercial yeast, where nowadays, making something "sourdough" is presented as a kind of achievement. Ciabatta is a bread originally made by poor people, likely first in Liguria. I learned about it just south of there in northern Tuscany, where they pronounce it "shabbatta." It means slipper.

The Tuscans have a well earned reputation for being cheap. Their nickname is "mangia fagioli," bean eaters. Before the "discovery" of Tuscany by the British and then everyone else, the undisturbed culture was austere and magnificent at the same time. To save money and resources, Tuscans baked bread without salt (you get used to it) and used more water in order to use less flour. They needed something cheap they could fill up on, like beans. The concept of artisanal sourdough ciabatta with competition quality voids separated by filaments of gluten would be unrecognizable to an old school Tuscan, and preposterous if explained. Among many things, they would want to know how it would hold the oil. 

I don't bake to live, the way the Tuscans did. Baking for me is a leisure activity allowed to me by a wealthy society, a fun "project." When I do this, I try to remember people I've known who were connected to the old way. Somehow, this gives the outcome more meaning than just saying, "Hey, look at these holes." If there is a purpose to my baking beyond fun and food, it is this learning experience.

Being a right brain guy, all I can tell you is that this was about 85% hydration, with long cold hydration for the flour and fermentation for the bulk dough. No question, in all the time I've been reading this site, Pat's comment, "Get the fermentation right." is the most useful and important thing I've learned. Oh, and if you're using that new baking steel idea, try lowering the rack and putting the steam above, otherwise you'll have a pretty tough bottom crust.

[/url]


dabrownman's picture
dabrownman

We had two experiments going on at the same time and thought we would kill two birds with one stone by combining them sort of like a YW SD combo starter.


Our 1 gram SD 36 hour before retard levain build went well and we split it in two to make a white flour one and a whole grain one here:

http://www.thefreshloaf.com/node/30755/sd-starter-experiment-how-long-can-it-ferment-counter-goo-overtakes-it


We also had our 15% whole grain SD project that we wanted to increase up to 40% whole grains too.  So we used the whole grain levain(after a 24 hour retard in the fridge making it a 60 hour build) to make a 40% whole grain SD bread using spelt, rye and WW.  To make things interesting and even more tasty we included a bulgar and flax seed scald to round out the flavor


With the white flour 60 hour levain we made another 15% whole grain SD but also perked it up some with pumpkin, sunflower, chia and hemp seeds inside and out.


We decided to bake both in Chacon shapes and also in Dutch Ovens.  The white seeded Chacon was made with one central knotted roll surrounded by a non twist rope and covered with a huge bialy shaped main dough.  Hydration was 75,5%.


The flours and water were autolysed with the salt for 3 hours for both breads.  Each started out with 10 minutes of French Slap an Folds followed by a 30 minute rest in a plastic covered, oiled bowl.  Then 3 sets of stretch and folds we done every 30 minutes with the add ins being incorporated on the 2nd set.


Once the S& F’s were completed each dough was allowed to ferment for 1 hour before being shaped into Chacons in the rice floured baskets.  They were immediately placed into sealed trash can liners and placed in the fridge for a 12 hour retard.


The 40% whole grain Chacon was nearly fully proofed during the retard but the white one was only half way there.  So well pulled the white one out of the fridge, leaving it in the bag to warm up and proof an hour and half at room temp before we took out the 40% whole grain Chacon.


Both were baked at 450 F for 15 minutes to steam with the lid on starting the 40% whole grain Chacon 15 minutes before the white one went in.  After the lids were removed they were allowed to continue to bake in the DO for 5 minutes before being removed from the DO and allowed to finish baking on the stone.


Both were deemed done at the 25 minute mark when they read 209 F in the middle.  They were removed to the cooling rack immediately and allowed to cool for 1 ½ hours before slicing into quarters and slicing 1 quarter into ½”slices.

The seeded white Chacon browned a little more on the outside and also had a slightly more open crumb – but not much.  Both crusts went soft as they cooled and were chewy. The crumbs were soft, airy and moist with a little gloss.

For once my wife agreed.  The 40% whole grain variant tasted noticeably better to each of us and was our favorite even thought the seeded white Chacon was a fine and dandy SD bread.  Both were noticeably more sour tangy than our standard SD breads made with a normal 6 hour build and a 24 hour retard of the levain.

When ever we have 60 hours to kill and only 1 g of SD starter we now know what to do with it to make some nice SD bread.

40% Whole Grain SD with Scald Formula   

SD Starter

Build 1

Build 2

 Build 3

Total

%

SD Desem & Rye Sour

1

0

0

1

0.19%

Spelt

0

15

0

15

3.95%

Whole Wheat

0

29

0

29

7.63%

Dark Rye

0

44

0

44

11.58%

AP

50

0

0

50

13.16%

Water

37.5

45

10

92.5

24.34%

Total Starter

88.5

133

10

230.5

60.66%


Starter


Hydration

67.15%


Levain % of Total

23.09%


Dough Flour


%


Bread Flour

130

34.21%


Whole Spelt

40

10.53%


Dark Rye

40

10.53%


Whole Wheat

40

10.53%


AP

130

34.21%


Dough Flour

380

100.00%


Salt

8

2.11%


Water

325

85.53%


Dough Hydration

85.53%


Total Flour

518.5


Total Water

418


T. Dough Hydration

80.62%


Whole Grain %

40.21%


Hydration w/ Adds

80.62%


Total Weight

1,003


Scald


%


Flax Seed

20

5.26%


Bulgar

38

10.00%


Total Scald

58

15.26%


15% Whole Grain Seeded SD Formula

Starter

Build 1

Build 2

 Build 3

Total

%

SD Desem & Rye Sour

1

0

0

1

0.26%

AP

50

88

0

138

36.22%

Water

37.5

45

10

92.5

24.28%

Total

88.5

133

10

231.5

60.76%


Total Starter


Hydration

67.15%


Levain % of Total

23.14%


Dough Flour


%


Bread Flour

150

39.37%


Whole spelt

27

7.09%


Dark Rye

27

7.09%


Whole Wheat

27

7.09%


AP

150

39.37%


Dough Flour

381

100.00%


Salt

8

2.10%


Water

300

78.74%


Dough Hydration

78.74%


Total Flour

519.5


Total Water

393


T. Dough Hydration

75.65%


Whole Grain %

15.69%


Hydration w/ Adds

75.65%


Total Weight

1,001


Add - Ins


%


Chia  15, Hemp 15

30

7.87%


Pumpkin 25, Sunflower 25

50

13.12%


Total

80

21.00%


Additional 30 g of Sunflower and Pumpkin


Seeds Used as Topping Not Included


HokeyPokey's picture
HokeyPokey

I went a bit Pumpkin crazy this year - Pumpkin Pie with a twist - bourbon, maple syrup, pecans and fancy flour.

But I must say, the result is outstanding, I have managed to convert 2 pumpkin pie critics into pumpkin pie lovers

Recipe on my blog here

mwilson's picture
mwilson

To me, the pinnacle Panettone. Formula comes from Iginio Massari.

This is the most challenging formula for Panettone, hence why I have been so drawn to it. I rise to technical challenges. I followed the formula, timings and temperatures without compromise.

Iginio Massari’s formulas typically use only 25% natural yeast and cooler temps for the first dough. The result, more flavour… I can still recall that familiar aroma after the first rise. So aromatic!

Oven spring was huge. I didn’t know when it was going to stop… Lasting nearly 20mins.

The taste and texture was perfect. I made the choice to use super strong Canadian flour to get that fluffy character I was looking for. A clean taste, not a hint of acidity or sourness. Just sweet, light, fluffy goodness, natural and nutritious.

The volume increase from dough to finished product was about 6 fold. All that lift created by my natural yeast...
 
Here it floats in water fermenting away. Beloved lievito 2.0! 

-Michael

Isand66's picture
Isand66

The storm is upon us as I try to write this post before losing power.  Hurricane Sandy is set to touch down in a few hours but already the wind is howling and the water is starting to rise over the docks on Long Island.

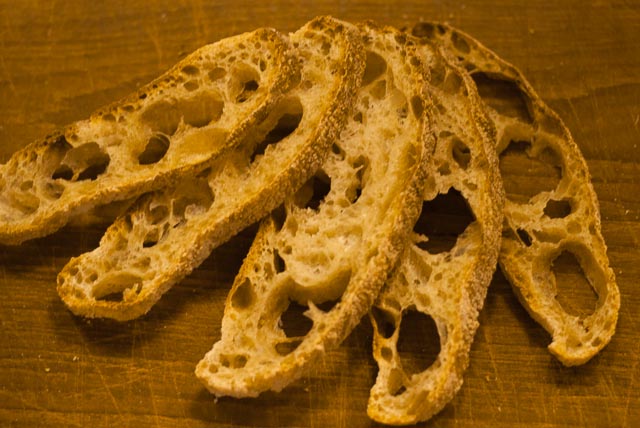
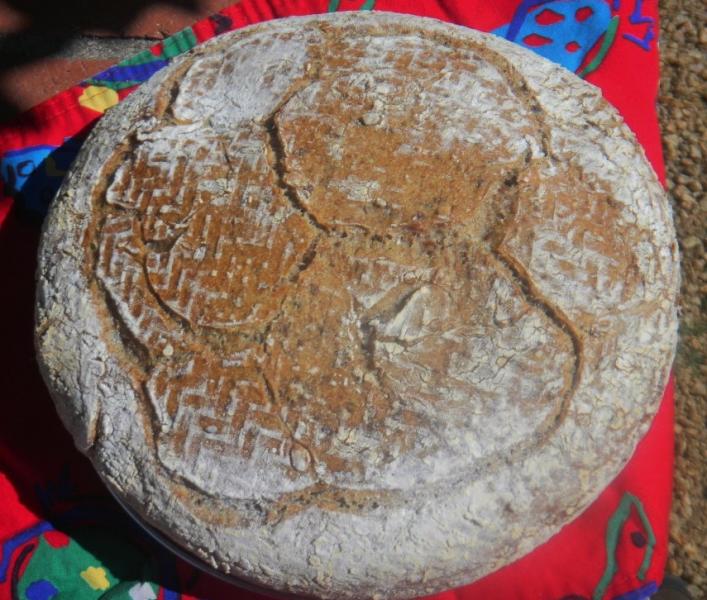
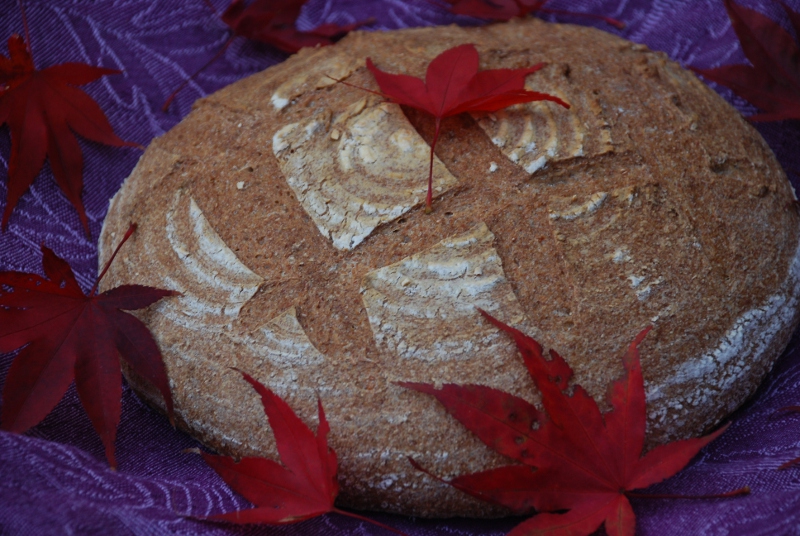
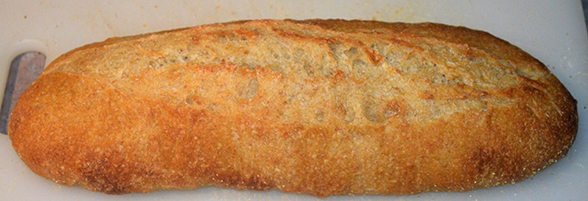
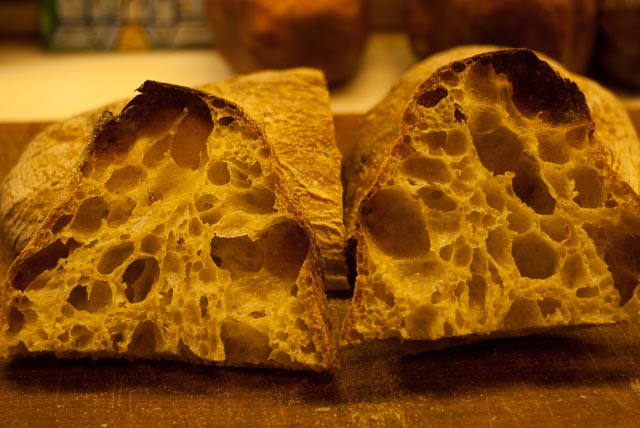
I baked this rye bread yesterday in preparation for possibly not having any bread or water for a while. Fortunately it came out as good as I could hope with the addition of a corn slurry added which added some nice moisture to the overall bread.

I built up a yeast water starter using white rye and pumpernickel flour in two builds and also used some of my existing AP sourdough starter as well.

Directions for Yeast Water Levain

Yeast Water Starter Build 1

40 grams White Rye Flour (KAF)

40 grams Pumpernickel Flour (KAF)

80 grams Yeast Water Starter

Mix the flour and Yeast Water in a bowl until thoroughly combined.  Cover the bowl and let it sit at room temperature for around 4 hours.  The starter should almost double when ready to proceed to build 2.

Build 2

Add ingredients below to starter from above and mix until incorporated.  Cover with plastic wrap and let sit at room temperature for 4 hours.

100 grams Pumpernickel Flour

100 grams Yeast Water Starter

Main Dough Ingredients

345 grams Rye Starter from above

80 grams AP Sourdough Levain Refreshed (65% Hydration)

305 grams First Clear Flour (KAF)

75 grams Potato Flour (Bob's Red Mill)

100 grams Pumpernickel Flour (KAF)

85 grams Corn Flour (Bob's Red Mill)

50 grams Rye Chops

141 grams Corn Slurry (1 small can of corn put in food processor for about 30 seconds, water drained before processing)

22 grams Pistachio Oil (You can sub Olive Oil or Vegetable Oil or any nut oil)

18 grams Seas Salt or Table Salt

350 grams Water at Room Temperature

Procedure

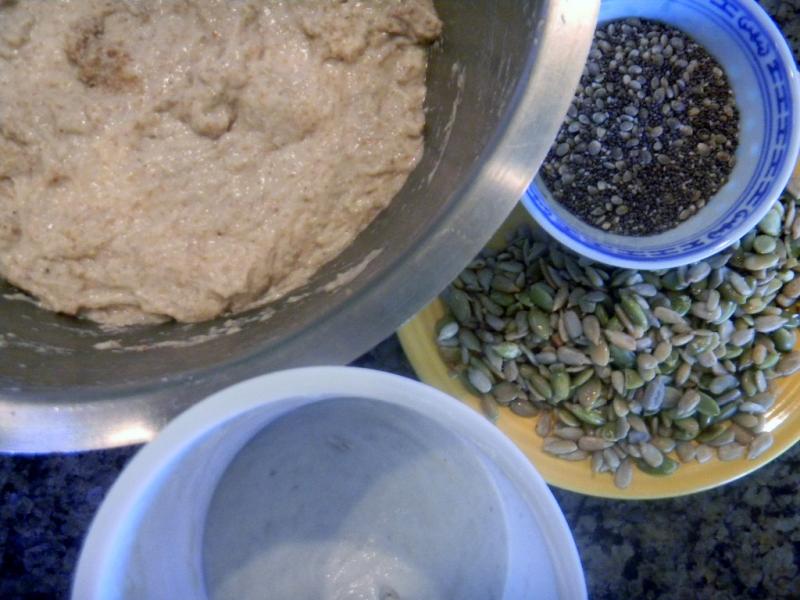
Mix the starters (levains) with the water to break them up in your mixer or by hand.  Next mix the flours, and rye chops with the starters in your mixer or by hand for 1 minute. Let it rest covered in your bowl for 20-30  minutes.   Next  add the oil, salt, and the corn slurry mix for 4 minute to incorporate all the ingredients. I mixed on speed #1 for 3 minutes and speed #2 for 1 minutes.   The dough should have come together in a ball and will be pretty sticky from the high percentage of rye flour.

Next take the dough out of the bowl and place it an oiled bowl or container.  Do a stretch and fold and rest the dough for 30 minutes.  After the rest do another stretch and fold and cover the dough and let it rest for 30 minutes.  Do one more stretch and fold and let it sit at room temperature covered for 2 hours.  After 2 hours you can put the dough into the refrigerator for 24 hours or up to 2 days before baking.  Feel free to do some additional S & F's if you feel it is necessary.  I baked the bread about 24 hours later.

The next day (or when ready to bake) let the dough sit out at room temperature for 2  hours.

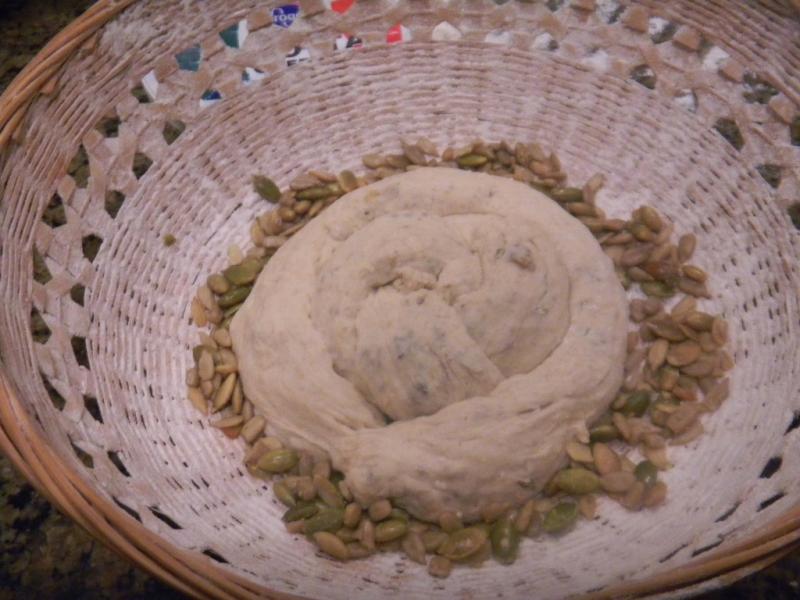
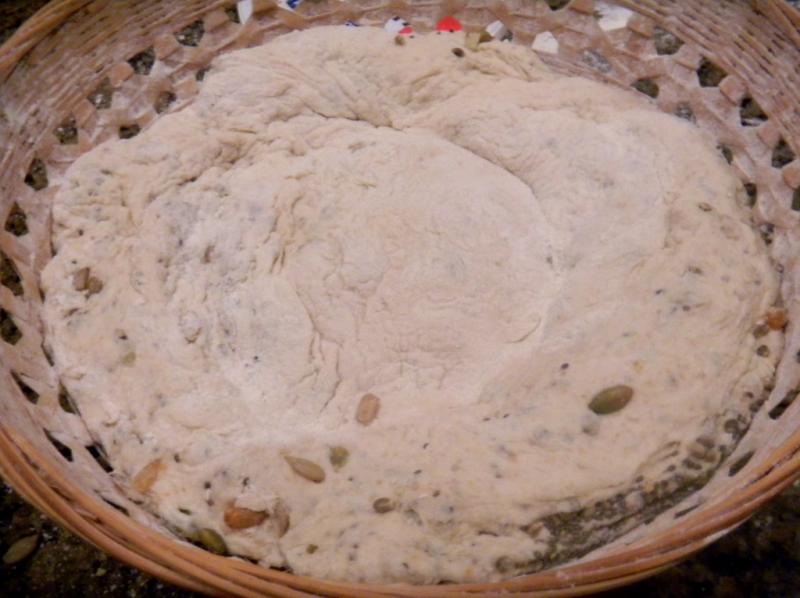
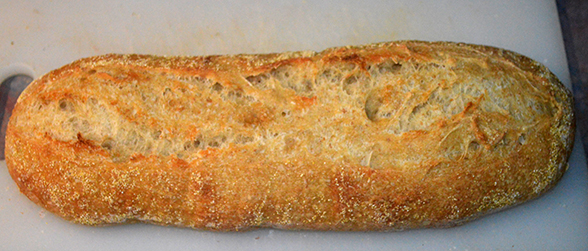
Next, form the dough into your desired shape and put them in floured bannetons, bowls or on a baking sheet and let them rise covered for 2 hours or until they pass the poke test.  I used my baker's couche to let the batards rise.  Just make sure to not let them over-rise.  Note this dough is going to be very sticky so resist the urge to use too much flour just use enough to prevent sticking.

Score the loaves as desired and prepare your oven for baking with steam.

Set your oven for 500 degrees F. at least 30 minutes before ready to bake.  When ready to bake place the loaves into your on  your oven stone with steam and lower the temperature immediately to 450 degrees.    When both loaves are golden brown and reached an internal temperature of 200 degrees F. you can remove them from the oven.

Let the loaves cool down for at least an 3 hours or so before eating as desired.

Skibum's picture
Skibum

Double chocolate and sweet biscotti:

It ws time to bake another batch of DaveG's fabulous double chocolate, hazelnut, chipotle biscotti  and also try the seeet biscotti recipe he provided.  To the half batch of 2x choco, I added 1 tsp of expresso coffee powder, was out of hazelnuts, (aka filberts) and used alsonds instead.  The hazelnuts provide a better flavour balance to the cocolate and chipotle, but hey, almonds work too!

I have been working through Carol Field's, "The Italian Baker," and checked her biscotti recipe also, which looked much like Dave's.  In the end I used the TIB recipe because, horror of horrors, I had no lemon zest -- my only lemon had been previously zested!  Now the TIB recipe is forgiving in that you can use either lemon extract or zest and/or orange exract or zest. I used lemon extract and orange zest for half the batch and baked according to Daves's loaf style 2x bake instructions, rather than shape the TIB cookie rounds.   I have not been able to stay away from these biscotti, oh my do I love the subtle flavoring!

Today I added lemon zest and some chopped almonds to the last half of the sweet biscotti dough and baked it up.  The lemon zest kicks the flavour up a good notch or two.  I think next batch, I will do half with lemon zest and half with orange zest.  At the pace I am eating these things, I may have to do another batch in the morning, (oink, oink).  The TIB biscotti recipe is listed at the end of this post.

A little ciabatta and salami by the campfire:

The last camping days of the season are now but a distant memory that ski season.  The photo was taken at a campsite along The Icefields Parkway, in Banff, Alberta Canada.

Bake ON TFLoafers!  Brian

Biscotti, from The Italian Baker, by Carol Field

160 g unsalted butter

200 g sugar

1 Tbs honey

2 eggs room temperature

Cream sugar and butter and add eggs one at a time and cream.

1/3 C + 3 Tbs milk

1 tsp vanilla extract

1/2 tsp orange extract or zest of 1/2 orange

1/2 tsp lemon extract or zest of 1 lemon

500 g flour

2 tsp baking powder

1/4 tsp salt

11/2 Tbs or so coarsly ground almonds to top

1 egg for glazing

I bake @ 300F 20 munites turning halfway, chill 15 munites or so then slice on the diagonal 3/4" thick, turn on sides and bake for 20 munites @ 300F turning halfway, then turn the slices over and bake for another 20.  Yumm

Mebake's picture
Mebake

Recently, I have been limiting myself to a weekly baking routine, as I nurse my back after the spinal Steroid injection. I have been on and off TFL, viewing other members’ posts, and drawing inspiration from their contributions.

Having baked a Volkornbrot from Hamelman last week, I wanted something lighter, and the oblack olives sitting in a corner of my fridge was I all the nudge I needed to choose Olive levain. I have baked this recipe last year, and did not care much for its flavor, but this time, I decided to give it another go.

The recipe is from Hamleman’s “Bread”, which calls for a liquid white levain, and 10% whole wheat. I used Waitrose strong white bread flour for 1/2 the flour quantity, and the rest was an ordinary all purpose flour. The whole wheat flour was freshly milled. I wanted to mix the dough very minimally, and significantly increased the hydration in hopes of achieving the random open cell structure depicted in the book. I mixed the dough with a wooden spoon, slowly, adding water gradually, until a shaggy dough was formed. The dough contained only the levain, flour and water, and was rested while pitting the olives. 15 minutes later, the salt was sprinkled on top , olives were mixed in, and the dough was folded gently in the bowl to incorporate all the ingredients, which was a clear deviation from Hamelman’s instructions which state that everything should be mixed, including salt, but the olives, and after slightly developing the dough, the olives would be added. Remaining steps were exactly as Hamleman’s. I don’t know how significant my deviations were to the outcome. Any ideas? 


The dough was shaped, rested for 1/2 hour, and then refrigerated for 8 hours. It sat warming up for an hour while the oven was heated.

The Bread came out crackling from the oven. The crust was very crispy, and the crumb was cool and and soft: the perfect sourdough.

Now i realized that i underestimated the subtle flavors that this bread carry. This bread's flavor shines exceptionally well when dipped in olive oil. Lovely bread! and an excellent way to make use of surplus olives.

Khalid

Skibum's picture
Skibum

Pulla, or Nisu as it is known by some Americans of Finnish extraction is my all time favourite sweet bread and has been all of my life.  The recipe I still have in my file was hand written by my mother, from my granny's original recipe.  I have loved this bread as long as I can remember --  back to my grandmother's lap!

I won't post the recipe here as a search of this site turned up identical, authentic recipes.   These loaves are great with coffee or tea for breakfast.  I particularly like a cafe con leche, or a spanish expresso shot with hot milk!  Both the finished loaves and proofed dough freeze well.  I'm afraid I can't comment on the keeping properties of this bread as it simply disappears before your eyes!

Traditional is an egg glaze and sprinkled, crushed sugar cubes.  The chopped almonds are not traditional, but once I tried it, almonds are now an in-dispensible part of the recipe! 

This recipe makes 3 loaves.  I proofed all 3, baked 2 and froze the third loaf, glaze, almonds and all, wrapped in heavy foil, then in plastic.  The night before baking, the frozen pulla goes onto the counter, resting on parchment and supported by a linen couche, covered with plastic and a towel.  In the morning, bake as usual.  Un-frozen dough, above, ready for the oven  Voila:

I could not tell the difference between the fresh baked and baked from frozen pulla!  This is an easy recipe and doable by novice bakers on the first try.  Braiding the loaves is not really difficult.  If you can braid hair or rope, you can braid dough . . .

Bake ON TFLoafers!  Brian


varda's picture
varda

I'm back with new tools.    Ever since Andy (ananda) started posting about baking with local wheat, I've had it in the back of my mind.    However, local in my case means New England, which isn't exactly known as the American bread basket.    In fact I more or less assumed that Massachusetts wheat was an oxymoron.    I did however, keep my eyes open, and found several farms in the area that grew wheat.    The closest however, were not that close, and I had no mill, and, and, and...  But time goes on and new opportunities arise.    With my birthday coming up, my DH asked me what I wanted and I said a mixer.   I picked out a fancy one and was ready to pull the trigger, when I realized that I simply didn't need such high capacity, and would do quite well with a much more modestly priced model.   That meant that I had "saved" a lot of money, so my husband decided to throw in a mill.    With a new mill coming, I needed wheat.   In fact I needed Massachusetts grown wheat.  

I called a friend and convinced her that she absolutely needed to drive west with me to see the leaves (and incidentally buy wheat.)   She agreed that was absolutely necessary, so the other day we went west.    That is 3/4 of the way across Massachusetts to the little town of Gill, where lies a farm called Upinngil, which sells its own wheat.    I tried calling beforehand to see what they had available, but no dice - they didn't answer.    When we got there, true they had 50 lb sacks of wheat in their store, but they were soft red winter wheat, and hard white winter wheat, neither of  which were what I had in mind.   One of the nice women there said that I should come back in two weeks.    That was hardly possible, as my first trip out there had already strained the limits of practicality.   Fortunately at that moment in walked Mr. Hatch, the farmer.    Told of my plight, he said, no problem.   I have some hard red winter wheat out at the cleaner (not the cleaners).   I'll just drive over to the field and pick some up for you.   Phew!   So with a 50 pound sack of wheat in my trunk, mission accomplished.   And yes, the leaves were lovely as well.

Yesterday the mill and the mixer (Bosch compact) arrived and needed to be put to use.   So I got my starter going, and today started milling and baking.   Not knowing my mill very well yet, I milled pretty coarse, and wanting to get to know the wheat, I decided to make all the flour in the final dough my fresh ground whole wheat.      This meant over 75% coarsely ground whole wheat, which is not something that I'm all that familiar baking with, as I usually keep whole grains to 30% or below.   

I have just cut and tasted, and who knew that Massachusetts wheat would be so good.   Mr. Hatch said that he had been growing it as feed for 20 years, but only in the last 10 has he started selling it to bakers who are interested in local foods.    He also told me that a CSA near me makes regular trips out to his farm for milk, cheese, etc.   So it may be that in the future, I won't have to make the trek if I can meet up with them.  

In any case, I think my whole wheat baking needs work, and I am excited to learn more.

The third new tool I used for this bake was a single edge razor for scoring, taking a tip from breadsong.   I love the control it gives.  

Of course that's not quite as exciting as the KoMo Fidibus 21  shown here resting after it's first milling.


Here's to local farms:

and local wheat:

I used my WFO today probably for the last time of the season.    Now I need to wrap it up tight so it can get through Sandy unharmed.

And finally, I'll close with the a bit of Autumn splendor:  first Tartarian Asters (over 7 feet tall)

and mums which can't really compete with the leaves this time of year:

Update:  Just changed the title of this post from ...freshly ground... to ...freshly milled...   It ain't coffee after all.

Skibum's picture
Skibum

One of the things I have noted about TFL, is that most of the seriojus bakers have a blog.  I decided it would be a good place to document my various success and failure in the kitchen.  Since I baked my way through 20 kilos of strong bakers flour in 5 months, I now consider myself a 'serious' baker and so goes my blog.

I have had the original version of The Italian Baker from the library for a while now.  I have had some spectacular failures, along with some gratifying success.  The 'como Antica' is the best tasting bread I have ever produced.  Ariving there took a fairly significant departure from the printed sintructions!

The recipe calls for a 11/2 - 2 hour bulk rise, followed by shaping and proof for another 11/4 - 11/2 hours.  The above mis-shapen loaf is my first try.  I got very little bulk rise in 21/2 hours and little rise during the proof, but some pretty good spring, heartth baked.  The loaf split part way along the seam, which was baked up as per instructions.  Behind is pane di Como, a simple recipe from this book which ueilds great sandwich bread with little effort.

This was not a good result, so I thought I would make a new biga and start again in the morning.  Re-reading the recipe carefully, I noted she recommends using half the yeast in the biga for this bread.  The next morning after 14 hours or so the biga was bubbly and smelled great!  I proceeded to mix and knead.  After 21/2 hours of bulk ferment I didn't have an iota of rise, nor after 3 hours.  Rather than toss the effort, I did a stretch and fold, to re-distribute any available yeast and then forgot about it for the afternoon and evening.  By bed time it had risen 11/2 times and by the next morning had doubled or more.  I rested shaped and hearth baked and scored along the top of the loaf, trying to match the seam:

Nice crust, chewy crumb and great flavour!  I didn't need butter to savour this bread!  In the end, it needed a 24 hour bulk ferment and the patience was worth it.

I made a second attempt at the pane di Como Antico the next day with the 2 day old biga.  The result was the same:  a 24 hour bulk ferment, followed by a normal proof time and hearth baked.  Wonderful rich wheat flavour in this recipe!  This is my favoroute bread so far:  great fresh, toasted or for sandwiches.

Bake ON TFLoafers!  Brian

Pages

Subscribe to Recent Blog Entries