The Fresh Loaf

A Community of Amateur Bakers and Artisan Bread Enthusiasts.

Recent Blog Entries

Fagus's picture
Fagus

Bread without kneading, with organic stone milled flours,solid rye sourdough and wheat liquid leaven.


 Cheers!

Fagus

limmitedbaking's picture
limmitedbaking

Hi and welcome to my first blog post. Had always been a long time lurker in TFL, admiring and learning from the many delicious looking creations from all the posters. Finally, decided to start a bread blog to record the process and outcome of each bake. Started bread baking a few years bake but has only been baking about once a week due to other activities - hence limited baking. Being a bread baker in Singapore brings with it quite a different set of challenges such as the higher temperature and humidity which means that normally recipes have to be adapted slightly to suit local conditions. Maybe I will slowly address these various issues in subsequent blog post. Also fascinated by the chemistry being bread baking and am an avid reader of chemistry and cereal publications. Would be interested to find out also how bakers in tropical areas deal with all these issues too. 

But first up, Hamelman's 5 Grain Sourdough Rye. A house favourite and my personal favourite among the other multigrain formulas in the book. The use of a rye sourdough really adds a depth and added complexity that trumps the non-rye variants. For this bake I followed the seed mix as recommended - flaxseeds, cracked rye, sunflower seeds and oats. Though for the oats I substituted half with rye flakes. Made 1360g of dough and bake as 2 loaves. Used 1/2 tsp yeast and 11.5g salt (2% instead of 2.2%). Prepared starter and let it ferment for 10 hours at 30C. Mix 10 minutes. Bulk ferment 1.5 hours. Proof 45minutes. And here are the results (Hope the picture works!):

And the crumb shot, moderately open and full of seeds.

Notes: Rye makes up 25% of the total flour. Reasonably easy to handle, not too sticky. Mild sourness with a nice balance between the lactic and acetic acid. Wheaty taste with the added complexity of rye. Would normally like to bake at a higher temperature to get a browner crust but decided to go for golden brown this time round for a different look. Could still decrease yeast slightly as the final proof was going very fast already. Can't decide which variant is better, the soak sunflower seed (which is easier) or the toasted one. Both bring a different taste to the final product.

-Tim

txfarmer's picture
txfarmer

Sending this to Yeastspotting.

Click here for my blog index.


For a lot of bakers, it's an important milestone to learn to make a good baguette. I have been asked many times both at my Chinese blog and TFL what the "trick" is for those big holes in the crumb. The truth is that, there's no trick. It's everything: appropriate flour, S&F rather than intensive kneading, appropriate fermentation, precise shaping, clean scoring, good steam and high temperature baking. I have yet to make a baguette that I am totally happy with, probably it's the chase that keeps me making it again and again. For that reason, I hesitate to call this post a tutorial - how can a student in bread baking offer a tutorial at all. However, I did write it up for some of my blog friends who are new to bread/baguette baking, and in need of a simple recipe to get started. This recipe contains lessons and notes learned from many many many baguettes I have made over the years, hopefully it will be helpful to others.

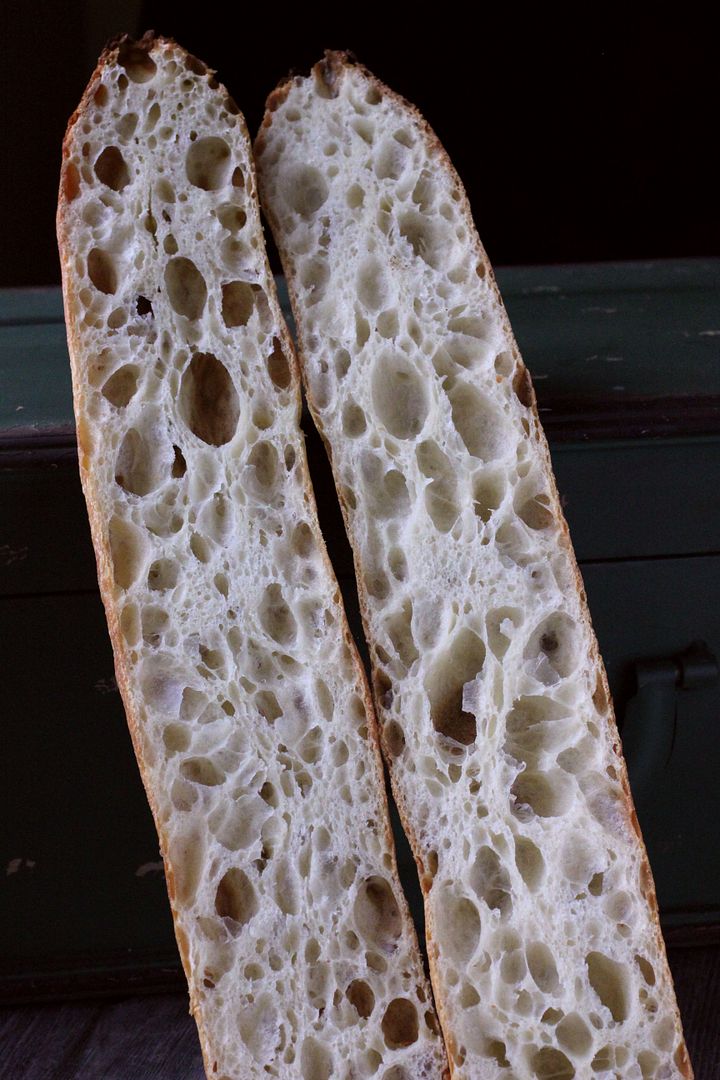
Since this recipe is meant for newbies, I intentionally kept it as simple as possible. No sourdogh, just dry yeast. No long cold fermentation, just straight method. No whole grain flour or addins, just white AP flour. By taking out all those variables, hopefully it's easier to follow and repeat. Even with such simplification, as the pictures show, the crumb still can be very hole-y, and the crust still can be very crisp, however, the flavor does suffer. Its taste is not nearly as complex as my favorite 36 hour baguette formula and its many variations (see here). Therefore, once you are comfortable with this straight method, I would definitely encourage you to move on to more complex recipes.

Straight Baguette
Note: makes 4 baguettes, each 220g, 40CM in length

AP flour (I used King Arthur AP flour because most people can get that easily and reproduce the recipe with the same flour), 500g
water, 375g (this means the dough is 75% hydration, yes, it's wet, but trust me, it's managable, especially after a few tries)
salt, 10g
instant yeast, 2g

1. Mix everything together. No need for kneading. Just mix everything into a rough dough.

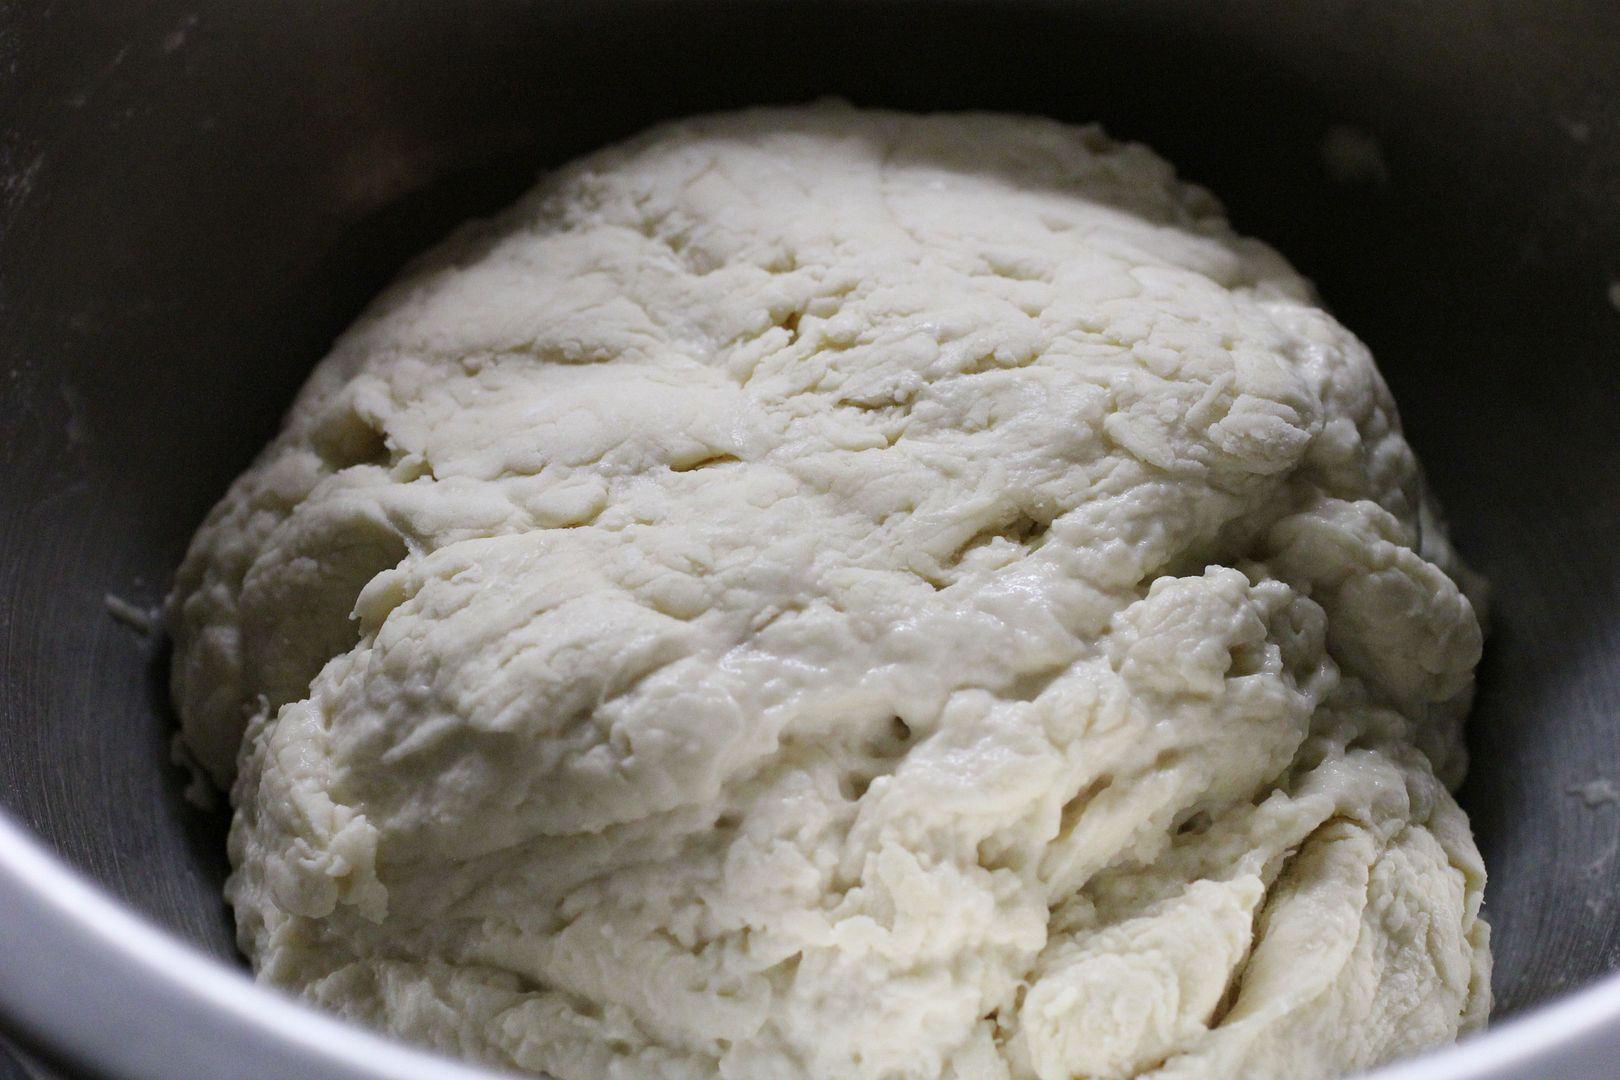
2. Cover the container, rise at room temp (22C-25C) for 3 hours. At 45, 90, 135min, do Stretch and Fold (S&F). TFL handbook has good explanation on S&F. For a dough this size, I find it's the best to water/oil/flour my hands, lift the dough out and do S&F directly in my hands. That's two quick movements, one in horizontal direction and one in vertical direction . The hand/dough touch time is so brief that sticking is not an issue. By the end of 3rd S&F, the dough magically becomes very smooth. And by the 3rd S&F, you can feel the dough offers resistence when being stretched out, that's a sign of gluten developement. Rember how the dough feels, because you want to remember how "elastic" (i.e. gluten strength)  yet extensible of a "good baguette dough" should be. Oh yeah, keep the container oiled and covered the entire time.

3. Dump the dough out and divide into 4 portions. Try to have less small scrap pieces. I have practiced enough to eyeball and cut 4 equal portions without too much weighing and adjustment. I find each detail in preshaping and shaping affects final crumb, in general the less I touch the dough (yet still get all the tasks done) the better crumb is. Roll each piece into a colum, with tight skin surface . This is my version of preshaping, there are other methods. Again, the key for less sticking is lightly flour/oil/water hands and surface, AND MINIMAL TOUCHING. Cover and rest for 25-30 minutes.

4. Shaping the baguette. Now there are so many good ways to do this, my method below is just what I am used to. As long as you can shape the dough into desired size/shape with minimal handling, your method is good. The key here is 1)keep skin surface tight, AND 2)don't destroy too much of internal bubbles. Be gentle yet effective.If you find it hard to roll the dough long enough, the dough is too strong, S&F less next time or use a weaker flour. If you find the dough to be limpy, extensible but offers zero resistence when being rolled long, can't keep a tight surface, the dough is too weak, use a stronger flour or S&F more next time.
a. Lightly pat the preshaped column into a rectangle, roll the top edge down twice

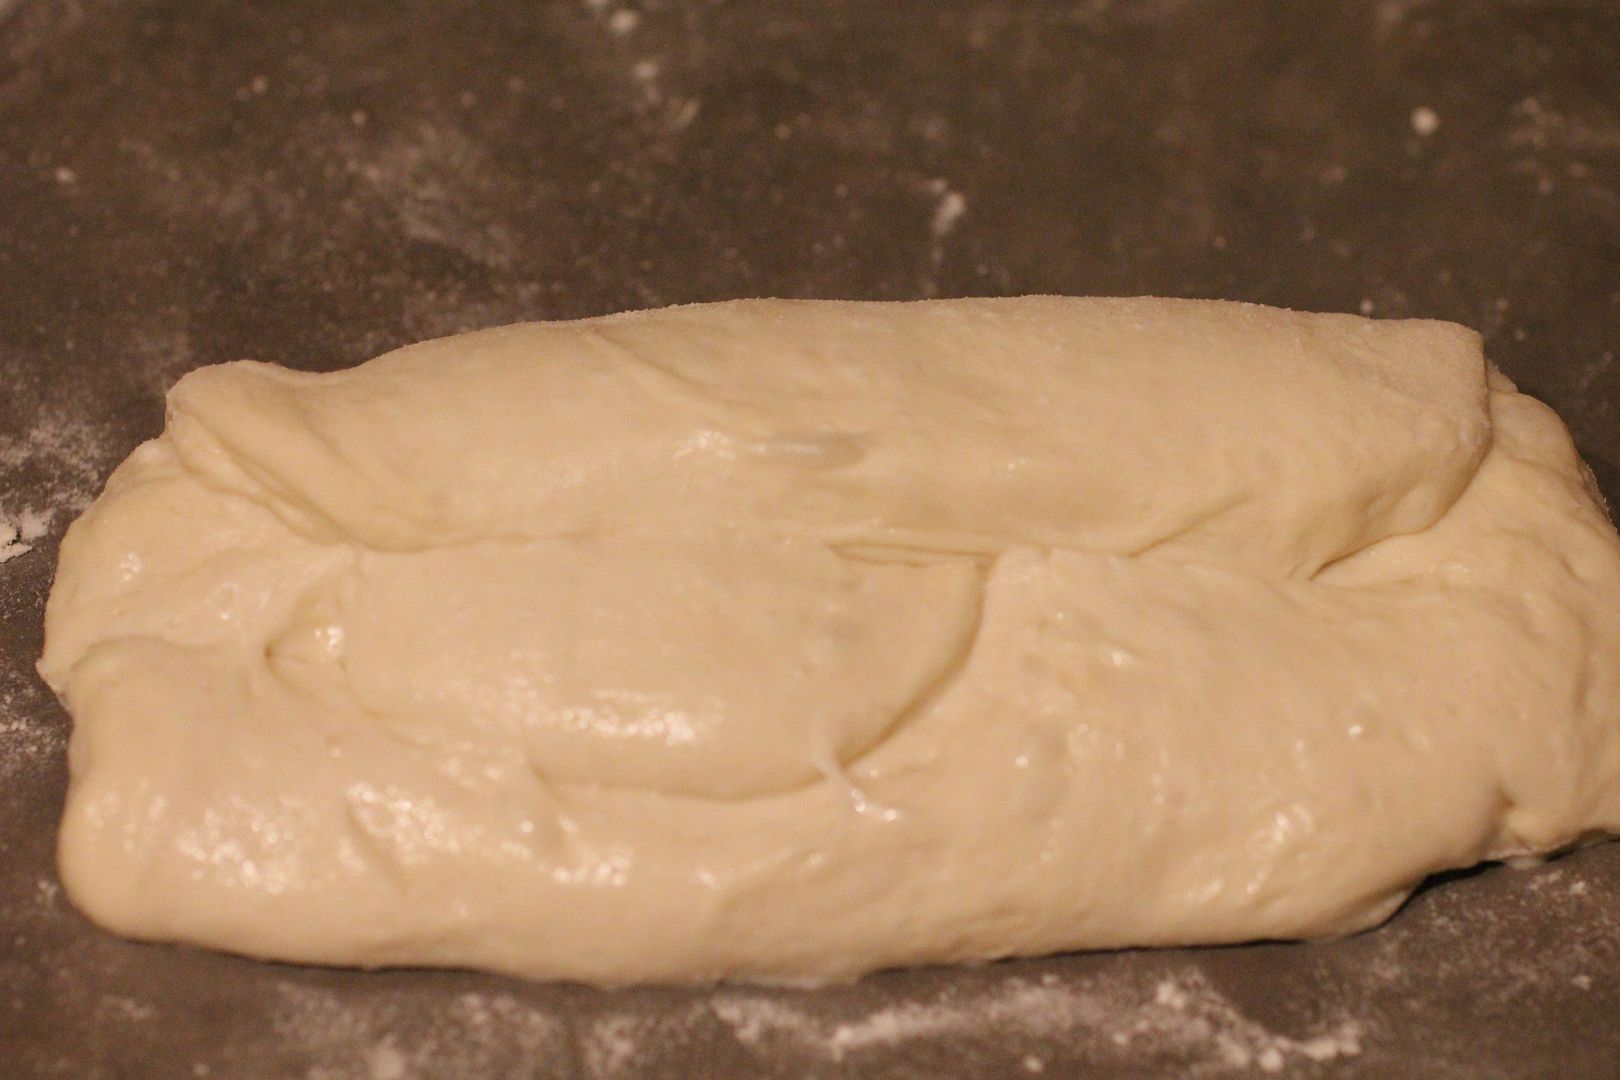
b. Turn the dough 180 degrees, and fold the now top edge to middle

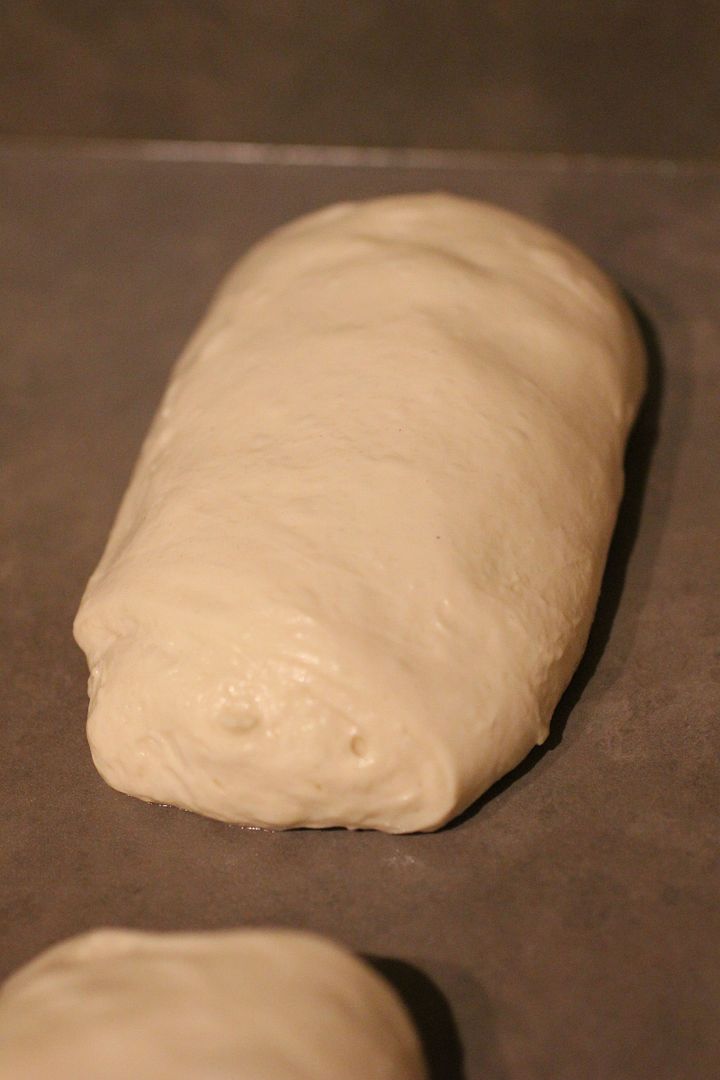
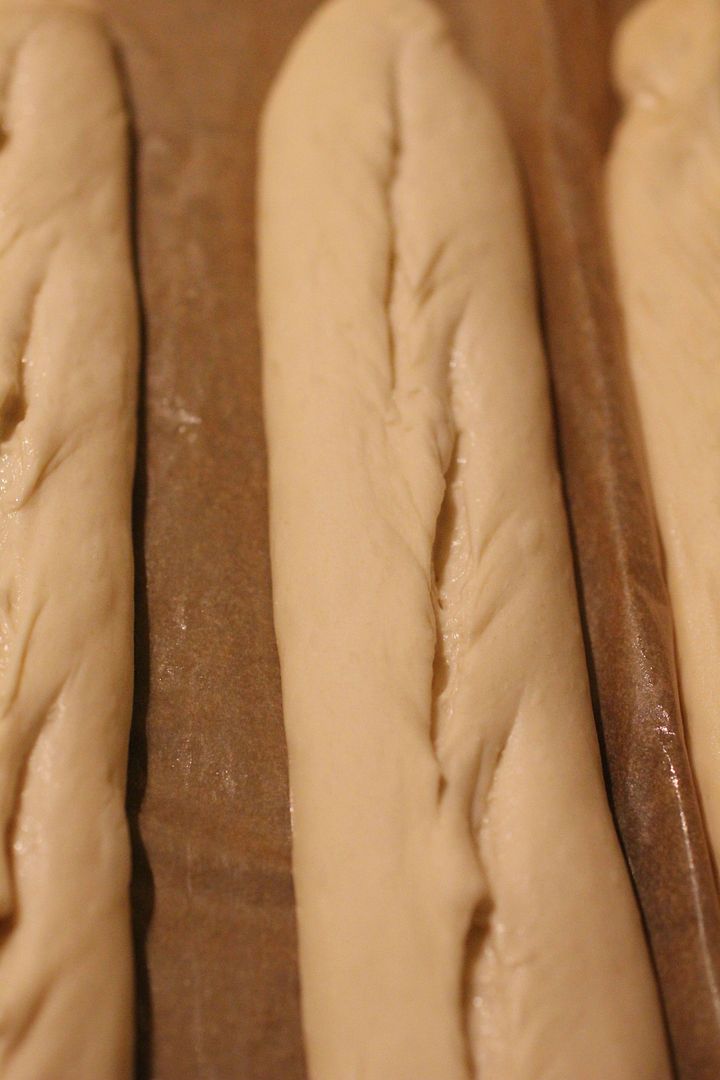
c.Fold in half again, top edge meeting bottom edge, seal. Roll it to 40cm long. "Light", "firm", and "even" are the key words while rolling out. Start rolling from the middle, move both hands outward until the ends, while applying light force downward and outward. If the skin of the dough is tight enough, it should be enough to just lightly flour the surface for the dough not to stick. Most of the flour should end up on skin, rather than inside of the dough anyway. If you find the dough slipping while rolling, you might be flouring the dough and surface too much. Put them on lightly oiled parchment paper (and the whole thing sits on the back of a baking sheet), with middle part of the parchment paper srunched up to act as dividers. Note that there are people who prefer bakers couche such as this, and I have seen/used it in a class using profession oven with great success, HOWEVER, in a home environment, I much prefer to use parchment paper so that I can slip the dough along with paper together into the small home oven onto the steaming hot stone. I don't want risks associated with moving the dough onto a peel, then moving the dough again from peel onto stone. It's just safer, neater, and quicker.

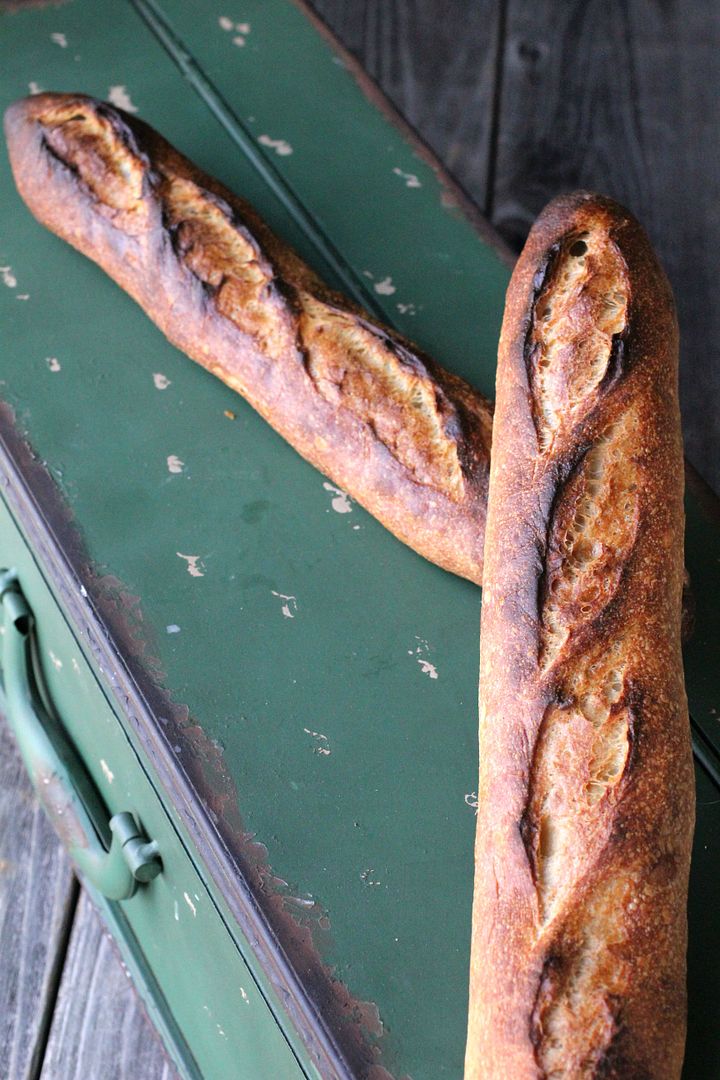
5. Cover and proof at room temp (22C-25C) for 30-60minutes. The dough should have grown noticably but still have enough bounce left. If you dough does not grow much in oven, you have over-proofed, proof for less time next time. If the dough grew too much in oven, resulting in bursting seams and uneven distribution of holes, proof longer next time. Score. For tips on scoring, please see this great tutorial from David. For baguettes in general, the dough is pretty wet, which means you need to be quicker and firmer with your movement for the blade not to drag and stick. Dipping thd blade in water before each cut sometimes help. Furthurmore, David's tutorial mentions "classic cut", which is done by cutting at a shallow angle to get "ear/grigne/bloom". With a 75% hydrated dough, you might at first have trouble cutting at the shallow angle without sticking, don't worry, just cut perpenticular to the surface for now, once you get all the other components correct, you can then start cutting at an angle and try to get "ear" for your cuts. The dough may seem deflated somewhat when you score it, don't worry, a well executed baguette dough would recover and expand beautifully in the oven.

6. Bake at 460F for 10 min with steam, then 15min without steam. Turn off oven, crack the door open, and keep baguettes inside for about 5 minutes. Take out and cool. Note that I preheated my stone at 500F for an hour to make sure the oven is hot enough, only reduce the temp to 460F when the dough is loaded. There are many ways to steam and load, each oven seems to prefer a different way. I use the most common method for my very ordinary electric home oven: a cast iron pan on a rack below the stone with some rocks inside; it's preheaded along with the stone; once the dough is ready to be loaded, I pour a bit of boiling water onto the cast iron pan (steam comes out, watch out!), close the door and get the baking sheet (with the dough/parchment on top) in hand; open the door again and slide parchment paper along with dough onto the hot stone; pour another cup of boiling water into the cast iron pan (watch out again, more steam comes out); close the door. The whole operation is pretty intense, my husband is still amazed that I haven't lost a finger loading bread doughs ... yet. However, it does get easier with practice.

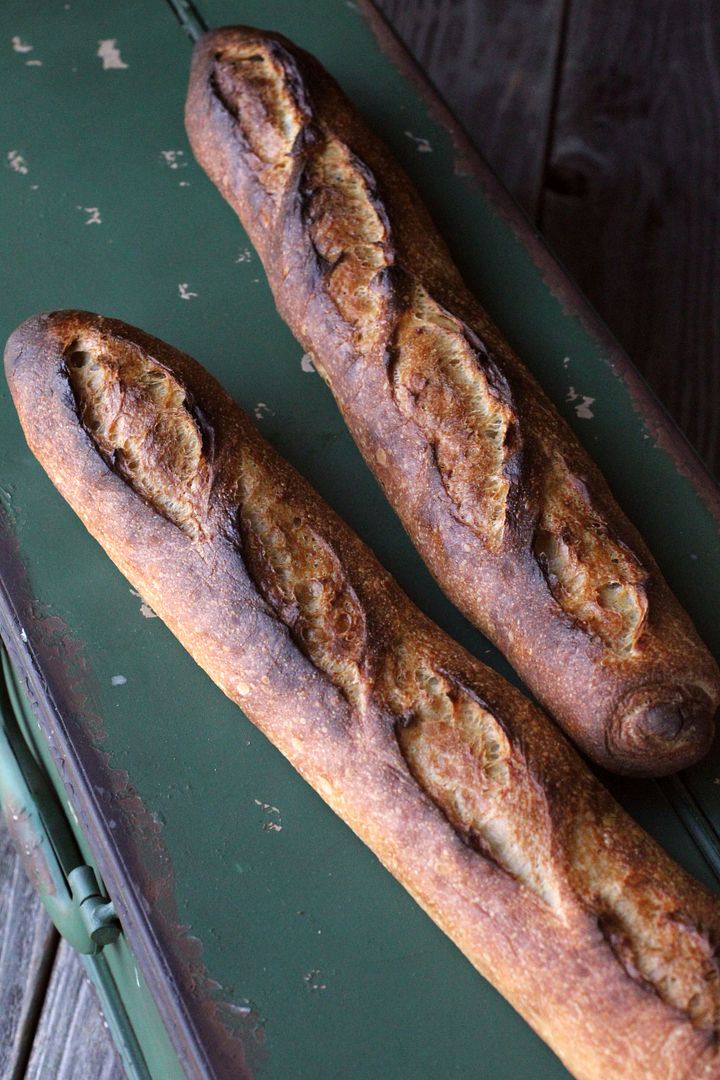
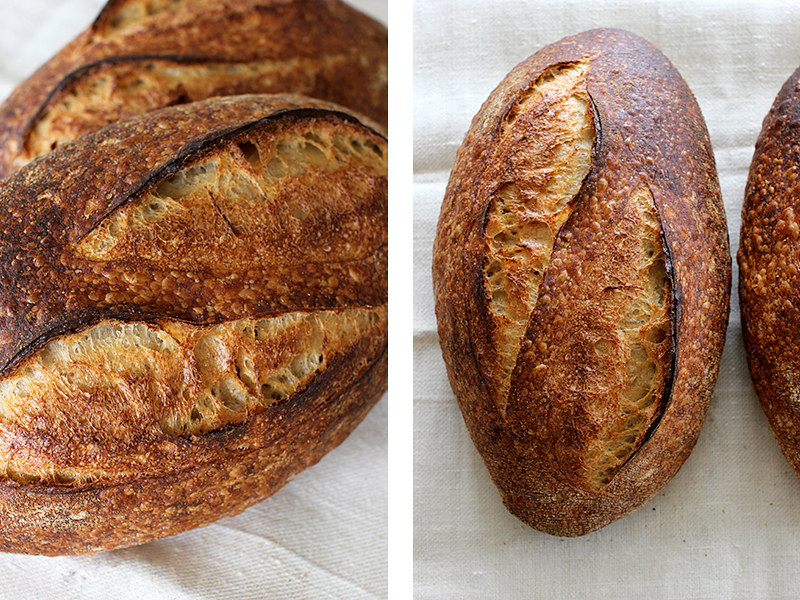
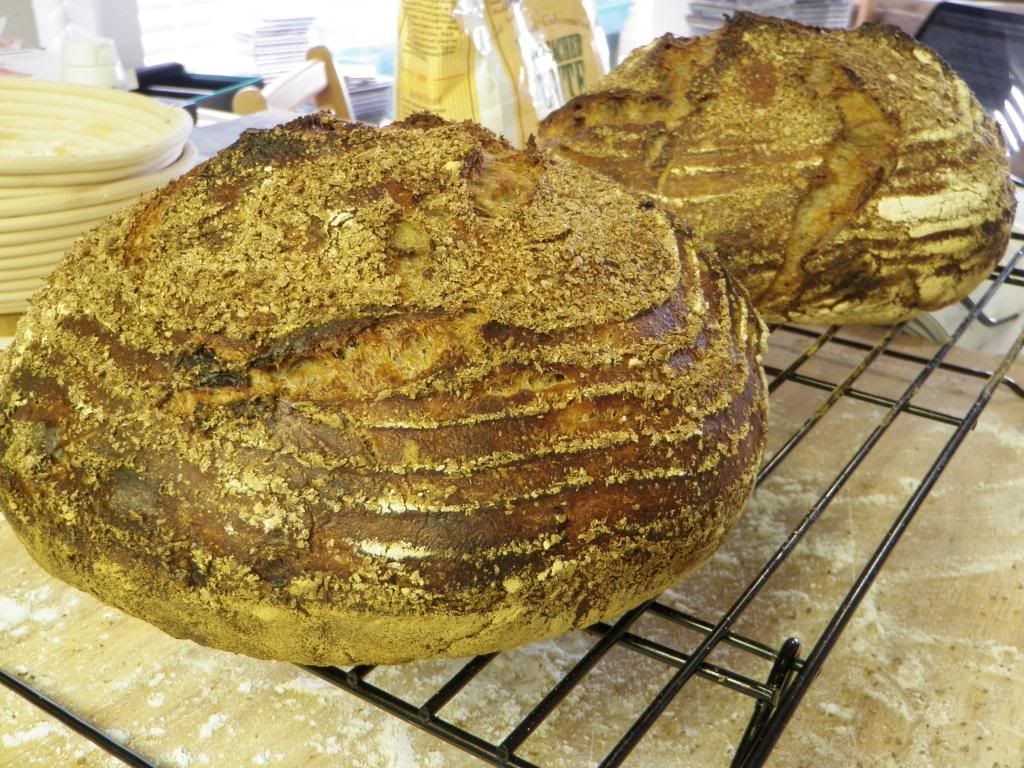
Comparing to my 36 hour baguette doughs, this dough is much easier to score!

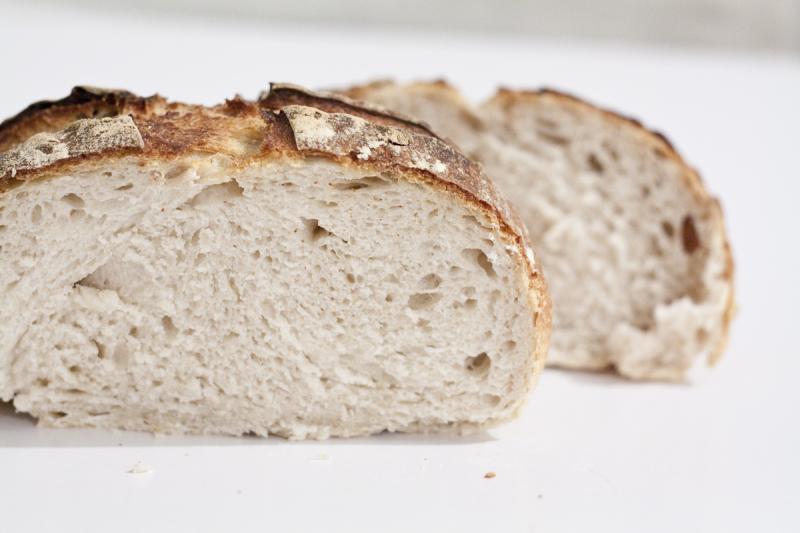
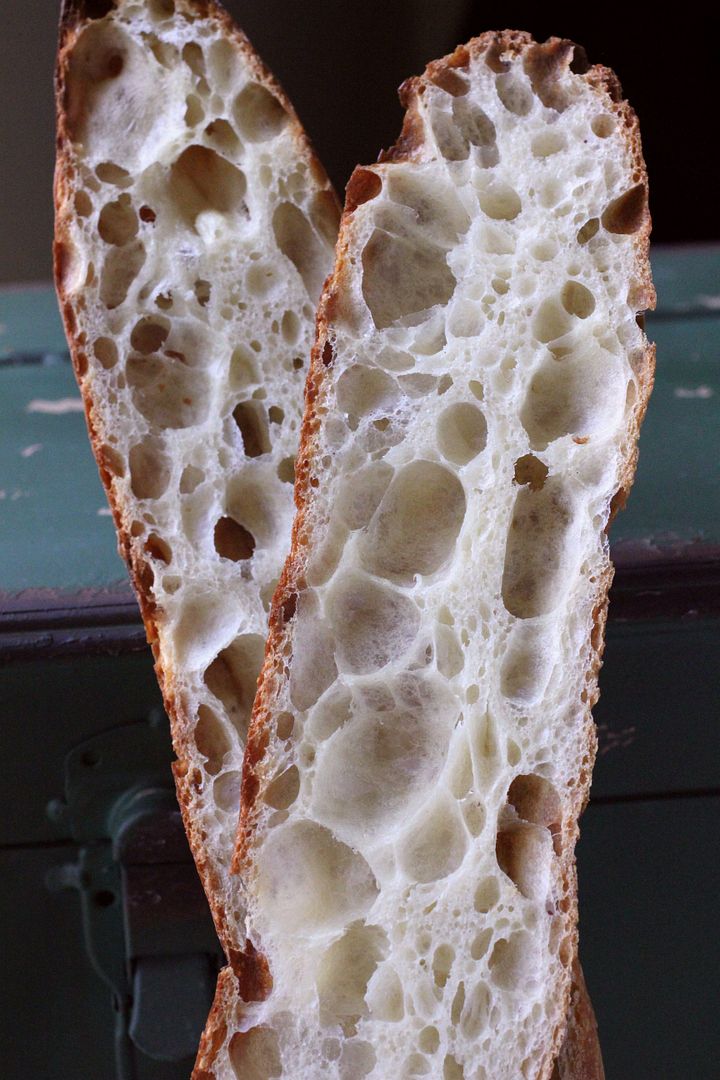
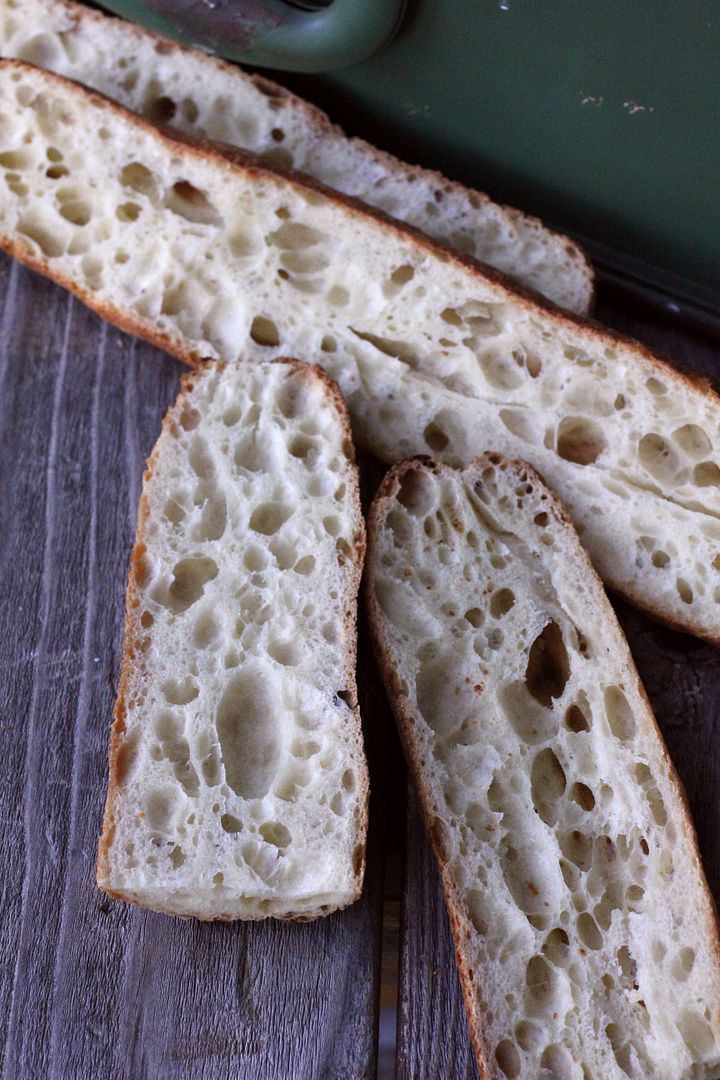
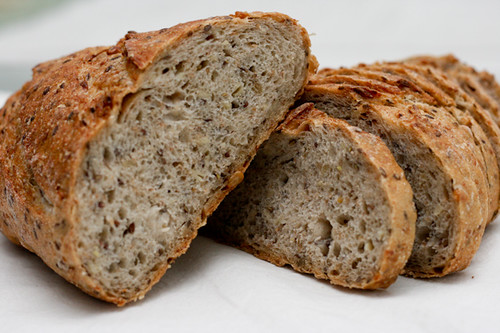
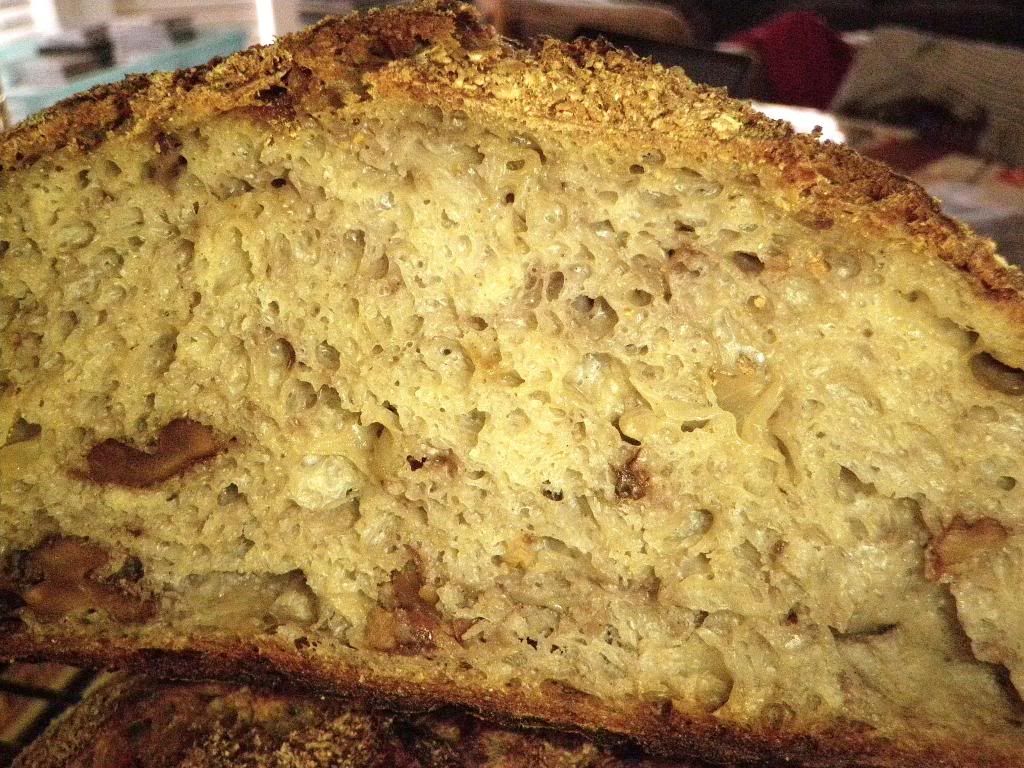
Crumb is decently hole-y, and even. :)

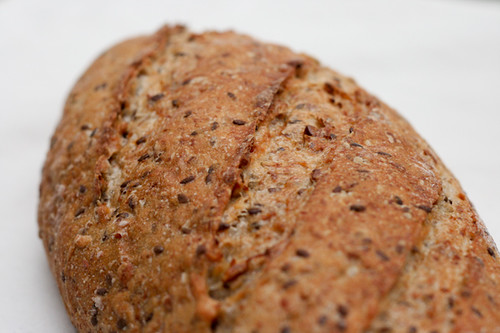
Crust is thin and crispy. If they are baked enough, they should be singing for a long time while cooling, which means a lot of tiny cracks on the crust.

However, I am never completely happy with my baguette. Holes can be bigger, more even, and I can live without the line in the middle of the crumb coming from the seam at the bottom. But hey, like I said at the begining, the fun is in the chase. :)


dabrownman's picture
dabrownman

I had some KA WWW flour that was almost 8 months old hanging around doing nothing.  We like whole grains around here mostly but needed to get rid of the WWW in some kind of bread.  We hate throwing flour away for any reason if possible even if it flour we don’t use much.


We also wanted to try out the water roux method by using 25 g of flour mixed with 125 g of water and cooked on the stove top until it sets up like a thick gravy.  It weighed 135 g when done.  The roux was not used in the hydration calculations in the formula.  We also made a scald with wheat berries and saved the soaker water for the liquid in the dough.


After reading lumos’s post on adding a pinch of yeast to his last baguette post  we decided to go all in on a 3 way leavening by making a quick 4 hour poolish with50 gof autolyse and a pinch of yeast along with separately prepared YW and SD starters.  This is a first, at least for us if you include my faithful apprentice Lucy, at making a triple threat leavening for one loaf of bread


We were into 4’s so after we did the 4 hour scald and 4 hour poolish we did the 4 hour autolyse with the soaker water and the rest of the non leavening and  soaker ingredients.   After all of these 4’s we decided to continue with them a little longer.


We thought we would limit ourselves to a 4 hour maximum, after the autolyse met the leavens, before the finished dough hit the fridge, panned up, for a 40 hour retard as has been our norm of late.


After mixing them together with a spoon we let the dough sit for 15 minutes before starting 12 minutes of French slap and folds.  By the time you take out the time for scraping up the counter a sew times we figure we had about 10 good minutes of slapping and folding the dough around and it made a beautifully smooth ball when formed.


We then let the dough sit for 15 minutes before doing the first of 3 S&F’s that were performed 15 minutes apart.  We incorporated the scalded and soaked wheat berries on the first set and they were fairly distributed after the 3rd.

Red sky in the mnorning , baker take warning. 

We let the dough rest for 1 hour to ferment and develop before panning it up using S&F’s to try to corral this wet dough into something resembling a loaf.   Even though the dough hydration is low at 68% it really is much wetter with the roux and scald contributing extra water. It felt like a high 70’s hydration and the reason we panned it. 

We let it proof for 1 hour on the counter, in a used trash can liner (for bread only), before placing the tin of dough in the fridge for its anticipated slow proofing for 40 hours.

My apprentice gets all excited when we try something new and is always skeptical that her master can pull off these odd bakes we seem to make on the fly.   With a water roux included and an added commercial pinch poolish, her master wasn’t too sure that a 40 hour retard could be met either in all truthfulness.

You don’t know for sure how things will work out till you do and my apprentice thought we, meaning I,  could always keep and eye out for the dough to double and bake it off ahead of time if required, if we weren’t asleep - and my apprentice is asleep nearly 16 hours a day it seems.  But, it looked OK after its long proofing rest and had risen just above the lip of the tin and near ready for the oven.

We decided to bake off the loaf in the big oval Magnalite Turkey Roaster like we do some tinned other breads on occasion.  It can really do steam with the trivet insert and water on the bottom.  It puts the best crust on bread that we have discovered to date.

We took the dough out of the fridge to warm up a little and finish proofing for and hour before Betsy was fired up to heat the roster to 450 F.  The loaf was slashed right before the tin went in the roaster with a half a cup of water.  The lid went on and the roaster went back in the oven.

We steamed the bread for 15 minutes before taking the lid off, removing the bread and let it continue baking at 425 F, convection this time,  another 10 minutes.  We rotated the tin 180 degrees every 5 minutes to ensure even browning.  We also removed the bread  from the tin at the 30 minute mark and finished the baking on the oven rack.

The bread did not spring at all in the roaster or out of it but it or bloom at the cut either.  It did blister and browned up as expected though.  Well. At least it didn’t over-proof so much that it fell when slashed or in the oven.  40 hours with 2 levains  adn poolish working must have been too much for it even though it only rose to the rim of the pan. 

Can’t wait for the bread to cool and slice to see how it compares to our normal boule crumb for this kind of bread after adding in a water roux and a 3rd leaving with the 4 hour poolish. 

It is now sliced and eaten.  Just delicious.  Very wheaty in taste.  The crumb was pretty open for a bread with whole grains and so much soaker.  It had to be the 3 leavens working together.  they couldn't get it to spring and bloom but the crumb was moist as can be, tasty and chewy with the soaker.  This is a really =nice sandwich bread that can be sliced very thin which is great for those of us who need to watch out bread intake.  We like it a lot.  Toasted with butter is a dream come true.

Formula

Combo YW & SD   Starter

Build 1

Total

%

WWW & AP SD Starter

10

10

1.94%

White Whole Wheat

62.5

62.5

12.14%

AP

62.5

62.5

12.14%

Yeast Water

75

75

14.56%

Water

50

50

9.71%

Total

185

260

35.92%


SD Starter Totals


%


Flour

130

25.24%


Water

130

25.24%


Starter Hydration

100.00%


Levain % of Total


23.34%


Dough Flour


%


Red Malt

2

0.39%


Toadies

6

1.17%


Vital Wheat Gluten

5

0.97%


White Malt

2

0.39%


White Whole Wheat

185

35.92%


AP

185

35.92%


Total Dough Flour

385

74.76%


Salt

9

1.75%


Soaker Water

225

43.69%


Dough Hydration

58.44%


Add - Ins


%


Water Roux

135

26.21%


Total

135

26.21%


Total Flour w/ Starter

515


Total Water w/ Starter

355


Hydration w/ Starter   & Adds

68.93%


Total Weight

1,114


% Whole Grain

54.17%


Water Roux is not   included in hydration calculations

Wingnut's picture
Wingnut

My latest attemps...........

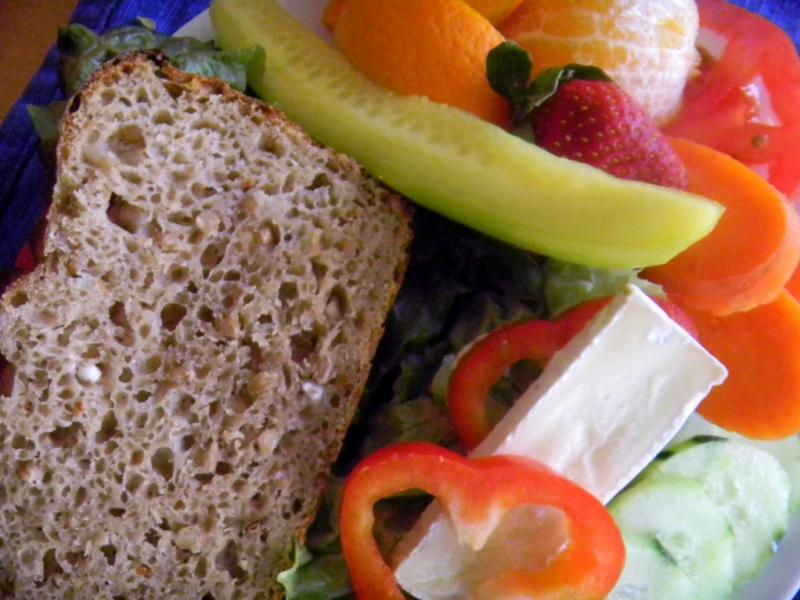
Good taste and crumb, for me.......

Cheers,

Wingnut

Raluca's picture
Raluca

I haven’t started with my first breads as there isn’t much to tell you, so I am starting with the breads I baked this year.

First I started by cultivating my own sourdough starter. It is now a 100% hydration starter with a mix of 90% whole wheat flour and 10% dark rye flour.

I will try to write a different post on how I made the starter soon and to explain all the terms, utensils and about the baker’s percentage.

Today let’s just talk about the bread above, which let me tell you from the start, it’s not a success (I’ll tell you why, of course).

For this recipe I used a recipe for a white sourdough bread from the Weekend Bakery.

Time schedule:

Day 1: Make the preferment leave for 12 hours at room temperature to mature

Day 2: Make the bread

  • Mix the preferment with the water and flour.
  • Leave to rest for 20mins (autolyse)
  • Add the salt and mix for 4 minutes
  • Leave to rest for 50mins
  • Perform 1st stretch and fold
  • Leave to rest for 50mins
  • Perform 2nd stretch and fold
  • Leave to rest for 50mins
  • Shape the bread
  • Proof it for 150mins
  • Bake at 230C for 45mins


Recipe for 1 loaf (aprox 65% hydration)

Ingredients for the preferment

For this bread a preferment is needed.

IngredientQuantityBaker’s %
Strong white wheat flour115gr100%
Water115gr100%
Sourdough culture15gr10%

Method

Dissolve the sourdough culture with warm water (you shouldn’t feel the water when dipping your hand in) and add the flour. Mix until all the flour is wet. Cover with kitchen foil and leave at room temperature for 12 hours.

Ingredients for the bread

IngredientQuantityBaker’s %
Preferment245gr72%
Strong white flour340gr100%
Water180gr53%
Salt8gr2.30%

Final baker’s percentage (including preferment)

IngredientQuantityBaker’s %
Strong white flour455gr100%
Water295gr64.83%
Sourdough culture15gr3.29%
Salt8gr1.75%

For this bread I used an organic strong white wheat flour from a traditional British mill Shipton Mill.

Method for the bread

I dissolved the preferment in about 2/3 of the water and then added it to the flour. Mix and add the rest of the water until you have quite a weird and not smooth mass of wet flour coming together. Do NOT add the salt at this point.

I covered the bowl and left to rest for 30 minutes for the autolyse. The recipe calls for 20 minutes autolyse, but I couldn’t get around to the next stage after 20 minutes, as I was busy around the house. Anyway I don’t think it’s anything bad with a longer autolyse.

When the 20 minutes are up add the salt and mix for around 4 minutes. I use a Kitchen Aid with a hook attachment usually, but this bread in particular I kneaded by hand as the lil’ one was asleep and I didn’t want to risk waking her with the Kitchen Aid noise. I think I probably should have kneaded longer by hand, but I only did it for about 4 minutes.

Baker’s tip: use fine salt as it will be easier to incorporate it in your dough.

Transfer the dough to a clean greased bowl (I used an oil spray to grease the bowl), cover it with cling film and leave it to rest for 50 minutes.

When the 50 minutes are up you are ready for your first stretch and fold. If you are not familiar with this technique watch this video from the Weekend Bakery, that I find really useful.

I did my stretch and folds directly in the bowl, but you can either tip the dough onto a lightly floured surface or you can initially place your dough in a large rectangular container so you can do them directly in there.

Now cover the bowl again and leave to rest for another 50 minutes. Do another stretch and fold (the last one) and again leave to rest for 50 minutes.

It may seem like a lot of work, but it’s not really a massive amount of active work, you just need to have the time to take care of your bread. And let me tell you with this cold weather in London I had some time to bake  .

After this final rest you need to shape your bread. Now shaping and scoring are still a mystery to me.. You can find loads of clips on shaping and scoring online. I shaped my white sourdough as a boule, here is a clip from the Weekend bakery on boule shaping. You can find another clip on both shaping and scoring of a boule here.

For this particular bread I did a very bad job at shaping and therefore the bottom came out with a massive number of cracks….The scoring though was not so bad. To score the bread I use this bread scoring tool.

I use bannetons to proof my bread, so I moved my shaped boule in a floured banneton, covered it with a tea towel and left it to proof for 2 hrs and 30 minutes.

You will need your oven to reach 230C so start pre-heating sometime after the proofing period has started, depending on your oven.

To bake the bread I use a 3cm thick granite baking stone, that needs at least 1h20 minutes in a 250C oven to heat up properly. However for this first time I only pre-heated my oven and stone at 230C for about 20 minutes, which was clearly not enough, as my bread was white on the bottom when it came out of the oven, cracked and undercooked.

So, after the 2hrs and 30 minutes of proofing, I tipped my bread on a baking sheet (that I use to transfer the bread to the oven..as I don’t have a peel yet) scored it with a cross and put it in the oven.

I also keep in the oven one of the trays, while it is pre-heating, so it gets hot hot. Then, immediately after transferring the bread on the stone, I add a cup of hot water to the tray below to create some steam and shut the door quickly.

I baked this bread at 230C for 45 minutes. To get a nice crust open the oven door 5 minutes before the baking time is up, to release some of the steam.

I didn’t need to reduce the temperature of the oven this time, because the pre-heating period was short, but usually I need to do it as my oven is really small and burns the top of my loaves.

Resulting bread:

Because of the bad shaping and the short pre-heating time the bread came out with a very cracked bottom. Also, as the baking stone was not hot, it came out white on the bottom and undercooked. It was also a bit too dense (not sure exactly why..as it could be a lot of reasons..still learning), but smelled nice, had a lovely crust on top and was very tasty.

What do you guys think? Any comments welcome!

pmccool's picture
pmccool

More than a little irony in that title...

Let's talk about the new, first.  That would include the second edition of Hamelman's Bread and the pain de mie formula found in it.  It would also include some new Pullman pans that I picked up recently.  The book is remarkable, as many before me have said.  I don't see this one getting shoved aside by future books, as has happened with some that I own.  Yes, there are a few nits (why weren't the home formulae in metric units instead of English units?) but they are rather trivial compared to the quantity and quality of information residing between the covers.  The Pullman pans figure as a long-delayed gratification.  When faced with that much "new", why not put all of them together?  And then, to really put it over the top, why not employ a previously unused shaping technique?

That takes us to the "could be improved" part of the tale.  Not the formula, mind you, nor the pans, either.  The dough was a real treat to work with, especially since I usually work with breads having a significant percentage of whole grains.  It was smooth, silky, satiny; embodying all of those lush descriptors that cookbook authors love to employ.  The new (to me) shaping technique even worked nicely, thanks to txfarmer and others who like assemble their loaves from smaller components.  And the finished bread tastes wonderful, too.  

Everything appeared to be going well in the early stages:

There's just one niggling little problem.  Someone (I need to get an assistant, if only to serve as whipping boy) miscued on the dough quantity calculations.  It wasn't a fat-finger mistake, either.  More like a fat head mistake.  I shouldn't be so negative.  This bread actually achieved something that many home bakers want to emulate in their breads: ears.   No, no, no, not that kind of ears, this kind:

Maybe I should call them eaves, instead of ears.

Anyway, the loaves have a beautiful fluffy core, perhaps 2.5 inches across, with an approximately .75 inch wide perimeter band that is dense and firm.  Quite firm.  Oh, okay, it requires some serious chewing!  Not your Momma's Wonder Bread by any stretch of the imagination.  The crust is lovely, though.

Just guessing, but I probably had about 15% too much dough for the pans.  Thank goodness for a non-stick lining and some generous greasing before putting the dough in the pans.  The lids were somewhat reluctant to release but came off without requiring excessive force or causing harm to anything.  

I think I want to try this bread again, albeit with the right amount of dough in the pans.  If that works as I expect it can, the next step will be to experiment with some of Hamelman's ryes, baked in the Pullman pans.  If I get really brave, I may even try the Horst Bandel pumpernickel.

Despite my frustration with myself, it was a fun experience to play with a new bread, new pans, and a new technique.  And I've only scratched the surface with this book!

Paul

PiPs's picture
PiPs

"Life must change from time-to-time, if we are to go forward in our thinking."

Stay tuned ...

Cheers,
Phil

ananda's picture
ananda

Bread and Roses in January 2013


A Happy New Year to all here at the Fresh Loaf.   I last posted on my blog just after the December Alnwick Farmers’ Market, with some photographs taken on a very wet and gloomy morning.   The January Market is just a few days away, meaning that the first month of 2013 is really flying by.   I thought I would put up a post telling of what has been going on in the “Bread and Roses” world post Christmas.


I had been planning for a return to Leeds for the new term for some teaching work.   Unfortunately, that seems to have fallen through.   Around Christmas time Alison and I were really feeling the effects of life in Recession-hit Britain, so this was a big worry.    The worries soon eased as I was approached by Dunbar Bakery for more consultancy work.   This was very easy to arrange and I am currently sitting at Berwick Rail Station writing this post, waiting for a connecting train to take me to Dunbar ready for a nightshift of bread production, starting at 22:00.


Maybe I should say something about Dunbar Bakery?   I first visited back in February last year.   The business is a Community-owned Co-operative, established to fight the problem of a dying High Street in the town.   The Committee which oversees the business has many noble ideas, one of which is to provide real bread.   The first Bakery Manager employed was incapable of making this as he had an unhealthy regard for the Improver bag.   The replacement Bakery Manager came along in March, soon after I began work to introduce a range of breads using Sponge and Dough and Natural Leavens only.   He is the winner of the Patissier of the Year in Scotland; a rising star indeed.   By the end of the Summer, the business had been utterly transformed, and the baking team were all producing lovely bread, beautiful patisserie and the business was back on track.


There has, understandably been significant interest in the business model used by the Bakery, especially in the context of the many struggling High Street shops up and down the UK right now.   But the ambitions have just kept the business moving forward, with Ross [Bakery Manager] taking a lead by entering the business to compete in the ITV television series “Britain’s Best Bakery”, screened just before Christmas.   The Bakery ended up as finalists, and I’m still not sure how they managed to avoid being named winners, as their appearance in the final showcased some awesome breads and top market sales, plus the most amazing wedding cake you can imagine….TOP stuff from Ross.   You can find out more about the Bakery at Dunbar here: http://thebakerydunbar.co.uk/


And here is a slideshow of photographs from my production shift last Wednesday night: http://www.youtube.com/watch?v=AOx2gPp9orA   

I am working 4 nightshifts on bread production, plus other work to cover staff training and looking to run some bread courses for the public too.   I am here until at least the end of March.   After that Alison and I have a fortnight’s holiday over the Easter vacation, and we are staying at the lovely Anatolika in Crete….the lovely Beach House with the wood-fired oven for me to bake bread on once more.   I posted on our summer holiday here in this blog post: http://www.thefreshloaf.com/node/19167/anotolika-beach-house     When we return I will either do more work at Dunbar, or the time will finally be right to expand the Bread and Roses baking operation.


I managed some rest on Thursday, but also put in some planning work and fired my oven ready for a baking course which ran on Friday.   I entertained 2 women from near Morpeth who came to make pizzas, ciabatta, focaccias and baguettes.   In spite of some dicey weather, the day was a roaring success, thanks largely to the enthusiasm of the students, and my oven behaving almost impeccably.   A full set of photographs can be seen here: http://www.flickr.com/photos/24731237@N03/sets/72157632558366165/    Here is a selection of photographs from the day.


The weekend has quickly passed by.   Alison and I have set a gruelling schedule to keep ourselves afloat this year.   But we have also lined up 4 holidays, which will be our time to rest, relax and recuperate together.   Next weekend I have 2 markets.   I have little time in February, but have to produce for both markets.   We have a holiday lined up in the third week of February for 4 nights.   I don’t know any more than that.   It’s my 48th Birthday surprise!!!”


To finish here are a few photographs of some of the breads I expect to be offering for sale in Alnwick on Friday.   You can see the full set here: http://www.flickr.com/photos/24731237@N03/sets/72157632562817778/


Very best wishes to you all

Andy  

JennyLeah's picture
JennyLeah

I've taken a bit of a break from baking, recently. Sourdough starter has been sitting in the fridge untouched for almost a month now, and it hasn't been fed in quite a while. I'm not worried about it. It's a resilient starter - in the past, I've abused it far worse than this, and it's come back for me after a week or so of careful attention.

I have 3 hobbies. I bake, I knit, and I'm a theater person. The last one is more identity than hobby, but suffice to say that I sing, I act, and I dance. In that order. (My life goal, for as long as I can remember, has been to work on Broadway. Not there yet, but I'm not giving up on it either.) Baking and knitting I am equally passionate about. This break from baking has been one of necessity more than anything else. I have a couple of impacted wisdom teeth that are coming out tomorrow afternoon that have been causing a great deal of pain and sickness recently, and although a nice, crusty loaf of sourdough is the perfect compliment to any soup, the crust does me in every time.

In spite of that, when the proverbial poop hit the fan the last two weekends, tired of my knitting and unable to find any privacy to rehearse in, I ran to the kitchen. Wishing I had pictures to post along with this, but first weekend I decided to jazz up a favorite sandwich loaf, substituting beer for the milk, with a swirl of horseradish mustard, dill, and sharp cheddar cheese. I wish I had a recipe or even percentages, but this is a dough I always go by feel on. If I'm relying on my memory here, I used about 1/2 cup of dark beer (we had guinness, so that's what I used), melted 3 or 4 tablespoons of butter into it, and a couple of large eggs. I used plain, old bread flour and rye flour - about 75% bread flour to 25% rye. Maybe a teaspoon and a half of salt. Less than a tablespoon of yeast, but more than I would typically use, because I was more interested in handling the dough that day than allowing the flavors to develop. I probably used a tablespoon of sugar too, to get the yeasty-beasties excited. (Probably overdid it in that regard.) It's not an incredibly moist dough, but it's not too dry either. If I had to guess, I'd say the hydration was around 70% when all was said and done. Let it rise with a few stretch and folds, and then carefully flattened it out to fill and roll.

For the filling, I used dijon mustard, mixed together with a little bit of tobasco sauce and horseradish, and some chopped fresh dill. I grated a block of extra sharp cheddar cheese mixed with a little bit of dry mustard and paprika. After letting the loaves benchproof, I slashed them and threw the leftover cheese on top. Baked at 350F for about 35 minutes. Got a ton of oven spring. It was a bit insane. It was great, but next time, I may use more cheese. The flavor was all mustard, which wasn't quite what I was hoping for.

This weekend, I stuck with a sweeter profile. I used a basic challah dough (this recipe has been my go-to for the last year: http://www.thechallahblog.com/2011/01/basic-challah-recipe-1-with-honey.html), substituting maple syrup for the honey. And filled it with lemon curd and blueberries, doing a strudel braid to keep it all together. So not good for the waistline, but tasty enough that I don't care.

Pages

Subscribe to Recent Blog Entries