The Fresh Loaf

A Community of Amateur Bakers and Artisan Bread Enthusiasts.

Recent Blog Entries

Mebake's picture
Mebake

There are times when I stare at my pantry and decide to be creative and use leftover flours in bread, this is one of those times.

I had some Whole spelt flour, and Whole wheat flour, and therefore decided to use both in a 50% wholegrain sourdough hearth bread. I made up a formula that benefits from my ripe White liquid starter, here it is:

Preferment:

Bread Flour: 188 g

Water: 188 g

White Starter: 1.5 Tbl


Dough:

Whole Wheat Flour: 280 g

Whole Spelt Flour: 120 g

All Purpose Flour: 251 g

Bread Flour: 103 g

Water: 470 g

Salt: 1.25 Tbl

Total dough weight: 1600 g

Total Dough hydration: 75%

Wholegrain %: 42%

% of Prefermented flours: 20%

The dough was not kneaded, instead, folded in the bowl 4 times every 30 minutes. The bread fermented as expected, with 3 hours initial fermentation, and 2.5 hours final. I baked the bread on stone, with a another stone on a rack above. The dough was quite soft, but behaved nicely after the third fold.


The flavor of this bread is clean, yet isn’t sweet-sour as i prefer, and is somewhat bland. The crust was chewy, and crumb moist and tender. In retrospect, I believe that with 42% wholegrain flours, I should have used a levain that contains some wholegrains. The bread was also baked on the same day, and not retarded.  DA, and Ian.. and many others here have come up with lovely tasting formulas because they utilize the wholegrain flours in their levain, thereby enhancing the finished product’s flavor. They also retard their doughs, while I’m unable to do so due to timing constrains. The flavor would have been better enhanced if I had used my white levain with a high proportion white flour, but I can’t resist adding more wholesome flours. This explains a lot, as Hamelman’s wholewheat levain (50% wholewheat) recipe calls for a wholewheat levain NOT white.

Therefore, from now onwards, I’ll add wholegrain flours to my levain for high Wholegrain doughs.  

PiPs's picture
PiPs


Well, I have strung everybody along for long enough ...


It seems my plans are coming to fruition so it's time to share what I have been up too ...

Last year my graphic design position of eight years was made redundant and I found myself unemployed with the uneasy prospect of contemplating my future career. It was one of the hardest, most drawn out and stressful years I have known, but through this change I grew stronger and found an energy lost long ago working in an unchallenging desk job.

I have known in my heart for some time that bread was going to play a part in my future and to cut a long story fairly short after a few months of putting myself and my blog out into the market I have landed on my feet baking for one of Brisbane trendiest restaurants/pubs ...

http://www.alfredandconstance.com.au/

… and I will soon be baking woodfired sourdoughs in one of their sister ventures …

http://www.chesterstreetkitchen.com.au/

So how did this come to be? 

Contacts … it seems so much in this this life is interconnected … more than we actually realise sometimes. 

I have blogged previously about my woodfired baking experiences with Laurie Stiller at Chalala Micro-Bakery in a oven that Alan Scott had built. Helping with that build was a bloke named Dennis Benson. Dennis is a bricklayer and was an old friend of Alans who has built many ovens all across Australia. Early last year I contacted Dennis who lives close to Brisbane about the price of building an oven (at the time not knowing he had helped build Lauries oven). Although that oven was never built, Dennis mentioned that he was building another oven for restaurant in town in which they would be roasting whole pigs. I went along to see the build and met the owner briefly. It was about six months after this time that I lost my graphic design job.

When I was finally unemployed I looked into setting up a micro-bakery and subletting space, but the costs and regulations seemed prohibitive in an already uncertain time for me. I emailed the owner of the restaurant to see if I could sublet the woodfired oven when it was not in use … and after some months a reply came through that it probably wasn't possible but they had leased another location and were building another Alan Scott oven if I was interested in baking for them …. um … guess how long it took for me to answer that question!

So here I am … the new oven is halfway through being built. Everyday is an exciting challenge for me in the kitchen and I am working harder and longer than I ever remember ... and loving every single second of it.

Today, on my day off, I spent the morning hemming edges of the new couche that has arrived from France, then popped in and spent some time with Dennis and helped pour some vermiculite around the edges of the concrete hearth, then spent time learning the ins-and-outs of the coffee machine and I am about to sit down and review a couple of bread formulas that need some tweaking for tomorrows bake.

The ovens I am currently using are not bread ovens and are less than ideal … but I am making do … and each day the woodfired oven is closer to completion.

Stay Tuned :)

Cheers,
Phil

ndechenne's picture
ndechenne

So I'm about three months into my sourdough "experiment", have my starter (I call him Niles) nicely sour and thriving. Having tried a number of recipes, my biggest problem has been consistency. The nice thing about making bread... one dollar experiments.

In any case, recently I've been managing a high-hydration poolish and have had some nice results. While the recipe calls for using the slap and fold method (did try it, arms fell off), I find that using my kitchenaid for half the process heps a lot and gets me what I'm looking for (pretty much). Slightly less open crumb, but that's ok. Different variations, added up to 100g of wheat flour that makes a nice loaf. I tend to like my bread a little tangy so I augment with some citric acid, which I like.

In any case, consistency. Dough issues, I've had rise issues, over-rising and really determining when the poolish is ready to work with makes a big difference. In this recipe, I started the poolish (1-1-1 ratio by weight) and after about 4hrs began to work with it. No additional yeast added, did the kitchenaid for ten minutes then a couple of tuck and folds. Repeat every ten minutes up to three times and I've got a pretty good gluten structure. Rise 2hrs, tuck and fold again and then rise another hour. 

I want a dutch oven but I'm broke right now, so I got this idea. I use a cast iron skillet,  then steam the oven. What you see here is that product, works amazingly well. The skillet really seems to help with oven spring, it just jumps up. The steam first ten minutes works well, at 425 for 40 minutes this is what I got:


Wingnut's picture
Wingnut

Has anyone else noticed that the bags of 5lb bag are an ounce light? My last three bags have been short, and that's not counting the bag itself!

Cheers,

Wingnut

Franko's picture
Franko

Like many members of this forum I have a lengthy to do list of breads and pastries that I intend to make at some point in time. Making a focused effort at baguettes has been on this list for far too long and I decided late last year it was time to finally do something about it. Baguettes aren't my first choice for a daily bread because they stale so quickly, but they are great to serve just a few hours out of the oven when we have friends or family over for dinner. I've never been truly satisfied with the results of the baguettes I've made in the past, primarily because of the poor crumb, but shaping and slashing were factors that needed attention as well .

Off more than on over the last few months, this project has taken longer than expected for a number of reasons, work, vacation, etc, but over the last few weeks I've managed to get back on track with it and make what I feel is some progress. The formula I was using was based on Jeffrey Hamelman's Poolish Baguette from his book “Bread”, (pg 101) the one minor change to it initially being my addition of a small percentage, (6%) of either light rye or whole grain spelt to add a bit more overall flavour. After two mixes following JH's procedure the crumb was slightly better than any previous result I'd had but nothing close to what I'd hoped for.

 JH's procedure doesn't include an autolyse in it and I wondered if that might help loosen things up a bit. The next mix was given a 60 minute autolyse which did help open the crumb, showing a few more holes of various sizes, still not as many as I wanted, but better. The white flour I use is from a company here in B.C. , Anita's Organics which is milled from spring wheat and has a protein content of 13.3% with a fairly strong gluten level. I felt this was the most likely suspect for the crumb/hole problem I was having and my suspicion was confirmed after reading Hamelman's section on wheat, specifically paragraph 2-page 36 of “Bread” where he says (paraphrase) that high gluten flours (from spring wheats) in general do not support the long fermentation associated with hearth breads. For better or worse this is the type of flour I had and somehow I needed to find a way to make it work as best as I could. Thinking back to some breads I've made using this flour that had a wide open crumb I remembered that they'd either had a long retarded ferment or high levels of preferment included in the mix. The bread that came to mind first was Hamelman's Pain Rustique, a bread that uses 50% of it's flour in prefermented form and has a crumb with lots of random sized holes and excellent flavour. Since I wanted to avoid an overnight fermentation if I could, I decided for the next mix that I'd increase the poolish from the 33% I'd been using till now, up to 50% and see if that helped in generating more holes. It was one of those classic Aha! moments when I took a slice off the top of a loaf from this new mix and found holes...lots of nice holes! This is better I thought, but just to be sure I did another bake later that week using the same formula and procedure as the last one.

The crumb result was basically the same but neither of these loaves or the ones from the previous bake (top 2 photos) had the right look to them, which I chalked up to not having developed the dough enough during mixing and through bulk fermentation. I'd been doing just light stretch and folds in the bowl during bulk fermentation thinking it would be enough but clearly a better workup was what the dough needed. 

For this latest bake (pictured in the photos below) the dough was kneaded on the counter till smooth and slightly springy before going into a 75 minute bulk fermentation with 2 full stretch & folds on the counter at 30 & 60 minutes. This made things a little easier for molding, and allowing me to get a slightly tighter skin on the shaped dough making for cleaner slashes than on the previous loaves.

 The crumb turned out nicely, creamy, soft, and porous, and it tastes great. Lots of the toasty, nutty wheat flavour that people crave in a baguette, and highlighted by the small percentage of whole spelt included in the mix. The crust has good colour, splinters when sliced and crackles loudly when eaten. I can't ask for more than that.

Ham Hock Terrine with fresh baguette, grainy mustard and cornichons.

Recipe for the terrine from Raymond Blanc's recipe site 

This project is now at the point I can say I'd be happy to serve this loaf to my family and friends, but know that when it comes to bread making these projects are seldom ever finished for me. I'd like to try gradually increasing the level of preferment over a series of bakes to see if I can find the sweet spot, assuming it exists, that will yield a slightly more porous crumb than the one above and with enough dough strength left for proper molding. For the immediate future though I'm planning on making something completely different. As enjoyable and interesting as this project has been, I desperately need to get back to eating bread that has something more substantial to it than flour, water, salt and air. 

Below is copy of the formula that was used, as well as a link to a scalable version of it, and one more link to a detailed description of the procedure for making the baguettes.

Cheers to all,

Franko

Link to scalable version of the formula HERE

Link to procedure for Baguettes with Poolish and 6% Spelt HERE

Baguettes with Poolish & 6% Spelt   
Ingredients%Kilos/grams
   
Poolish  
Bread Flour100.00%201
Water100.00%201
Yeast-instant.2%.4
Total200.20%402
ripen 12-16hrs @ 70F  
   
  720
Final Dough  
Bread Flour90.00%181
Spelt Flour-One Degree Organics12.50%25
Water50.00%101
Yeast-instant1.20%2
Sea Salt4.10%8
Poolish200.00%402
Total357.80%720
DDT- 76F Scale at 340 gr.
   
Total Formula  
Total Flour100.00%407
Bread Flour93.82%382
Spelt Flour-One Degree Organics6.18%25
Water74.06%302
Yeast-instant0.69%3
Sea Salt2.03%8
Total % and Weight176.78%720
Prefermented Flour 49.36%


kmcquade's picture
kmcquade

Organic Sprouted Wheat Berry with Whole wheat and Rye & 50% Sourdough Starter.

 400 gm.  Organic AP flour

  60 gm.  Organic KA WW

  30 gm.  Organic Medium Rye

  11 gm.  Kosher salt

1 TPSP Brown Sugar (Just cause I thought a little sweetness would go well with the wheat berry taste)

300 gm. H20

250 gm. 100% hydration starter fed twice

~ 1/8 tsp instant yeast (just to help in my cold damp Seattle kitchen J)

~ 1 cup sprouted wheat berries


I soaked Wheat berries over night, then spread them out between wet paper towels for another 24hrs or so until they began to sprout


I started to mix up the flours at about 8pm after dinner and between episodes of “The Protectors”  (a Netflix Danish series I got hooked on ).  I Autolysed the flour combo and H20 for ~1 hr.  - At this point the dough was fairly dry (60% hydration)


Flour and water after autolyse


About 9:30PM I mixed in the starter by hand, added the salt , and a pinch of  instant yeast – This was a lot of starter ( 50% of the total flour) which made a very wet dough requiring a fair amount of stretch and folds to get in mixed well and under control – In another hour, I did  a couple more stretch and folds.  According to my calculations the final dough adjusting for the Starter Hydration and high amount of starter was ~ 82% hydration.


Stretching and folding


Bulk ferment overnight on the counter  ~ 10 hrs ( room temp was ~ 65F)

Sunday morning at 7:30am, I folded in the sprouted wheat berries as much as I figured the dough could handle – Then into a cloth lined banneton for proofing for about 2.5 hrs. ( its cold in my house). At 2hrs, I turned on the oven with the cloche in it .  I like to use my bannetone but when the dough is too wet it will stick to it so I need to line it with a floured cloth.


Score & Bake in a covered Cloche 475F for 15 min then uncover reduce to 450 for 15min  - I checked the temp and feel, at this point and decided it could use another 10 min, but I reduced the temp to  425 F. Lately I have found that serial reduction in the temp results in a longer lasting crispy crust.


Results – Take a look Great crust and crumb Crunchy with the wheat berries With just a touch of sweetness J


bastet469's picture
bastet469

12:00 AM March 9, 2013 (72 hrs)

Red

Lots of small bubbles on the surface only. Sorry; too hard to photograph. :(

Blue

Flattened to sides of container but no difference in volume. Based on the time passed, the directions say I should refresh now. But it hasn't puffed up the way Sweetbird's did . Line of dough on container is the true measurement. I've decided to give this another 24 hours and see what happens. Ugh...


bastet469's picture
bastet469

12:30 AM March 10, 2013 (96.5 hrs)

Red

Same surface bubbles as yesterday....

Blue

I have NO IDEA if this one is going to work. I've given this one 72 hours rather than 48 in hopes that it would puff up the way Sweetbird's did but so far it looks like a pancake that was left out to rot!!

It's moist on top instead of having the dried crust Sweetbird mentions. The smell is mildly cumin-y like it was on Day 3 & 4. One thing is similar to Sweetbird's findings is the discoloration of the top layer. Below you can hopefully see that the underside of the starter is the same color as it was originally while the top turned greyish. The only reason I'm continuing is because of the bubbles I saw on the underside. I hope that means bacteria growth. :S

First refreshment (48-72 hrs.):

6.25 oz/117 g organic whole wheat flour (3/4 C.)

2.75oz/72 gms warm water (1/3 C.)

1 oz/28.5 gms chef (2 Tbs.)

Combine ingredients. Turn out onto work sureface and knead briefly. Cover and set aside for 10-12 hours.

 I removed the discolored portion of the chef and measured from what was left. Also, as I mentioned, I gave mine an extra day before doing the refreshment so we'll see what happens.

Isand66's picture
Isand66

Earlier in the week I attempted to make a bread using a raspberry dessert wine and I didn't take my own advice and used too much wine in the bake.  It did not develop properly and the final bread ended up gummy and is now food for my compost pile.

For my next bake I wanted a more simple bread and after watching an episode of Lidia Bastianich's TV show on Italian cooking I had a craving for a nice hearty Italian Durum Semolina type bread that you can dip in sauce or olive oil.

I recently made bread with Kamut which has a similar color and nutty flavor like Durum wheat and I wanted to combine the two together along with some organic Bread Flour I just received from KAF to add enough gluten to pull it all together.  Kamut wheat does not have a strong gluten structure so it's important to combine it with a flour that has a higher protein level.

I have to say that this dough came together as a nice silky moist and tacky dough and was easy to work with.  The final bread had a wonderful yellow crumb which was nice and open.  The crust was just chewy enough as to be ideal and made this a joy to eat dipped in some olive oil with a little roasted red pepper.

If you make this bread I guarantee you will have a hard time stopping yourself from finishing the entire loaf in one sitting!


Levain Directions

Mix all the levain ingredients together for about 1 minute and cover with plastic wrap.  Let it sit at room temperature for around 7-8 hours or until the starter has doubled.  I usually do this the night before.

Either use in the main dough immediately or refrigerate for up to 1 day before using.

Main Dough Procedure

Mix the flours, and 375 grams of the water together in your mixer or by hand until it just starts to come together, maybe about 1 minute.  Let it rest in your work bowl covered for 20-30 minutes.  Next add the salt, starter (cut into about 7-8 pieces), and olive oil and mix on low for a minute.  Add the rest of the water unless the dough is way too wet.   Mix on low-speed for another 4 minutes.  Remove the dough from your bowl and place it in a lightly oiled bowl or work surface and do several stretch and folds.  Let it rest covered for 10-15 minutes and then do another stretch and fold.  Let it rest another 10-15 minutes and do one additional stretch and fold.  After a total of 2 hours place your covered bowl in the refrigerator and let it rest for 12 to 24 hours.

When you are ready to bake remove the bowl from the refrigerator and let it set out at room temperature still covered for 1.5 to 2 hours.  Remove the dough and shape as desired.  I made 2 loaves using my bannetons.  Place your dough into your proofing basket(s) and cover with a moist tea towel or plastic wrap sprayed with cooking spray.

The dough will take 1.5 to 2 hours depending on your room temperature.  Let the dough dictate when it is read to bake not the clock.

Around 45 minutes before ready to bake, pre-heat your oven to 500 degrees F. and prepare it for steam.  I have a heavy-duty baking pan on the bottom rack of my oven with 1 baking stone on above the pan and one on the top shelf.  I pour 1 cup of boiling water in the pan right after I place the dough in the oven.

Right before you are ready to put them in the oven, score as desired and then add 1 cup of boiling water to your steam pan or follow your own steam procedure.

After 1 minute lower the temperature to 450 degrees.  Bake for 35-50 minutes until the crust is nice and brown and the internal temperature of the bread is 205 degrees.

Take the bread out of the oven when done and let it cool on a bakers rack before for at least 2 hours before eating.

davidg618's picture
davidg618

A couple of days ago I made an attempt at Eric's Rye using this formula

http://www.thefreshloaf.com/node/5076/eric039s-fav-rye#comment-25620

substituting Bread Flour in the Final Dough since I had no access to First Clear Flour

Specifically: 

I built a Rye starter with three progressive builds over 24 hours, 2:1:1 with the following results

Build 1: 20g seed starter, 10g Whole Rye, 10g Water; the seed starter all white Bread flour, 100% Hydration

Build 2: 40g (build 1), 20g Whole Rye, 20g Water

Build 3: 80g (build 2), 40g White Rye, 40g Water

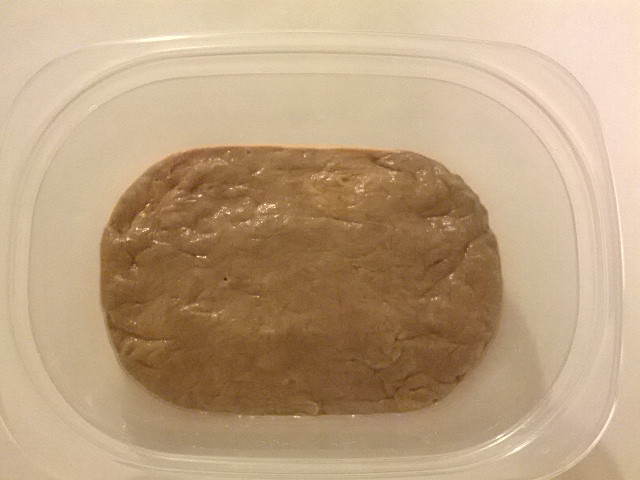
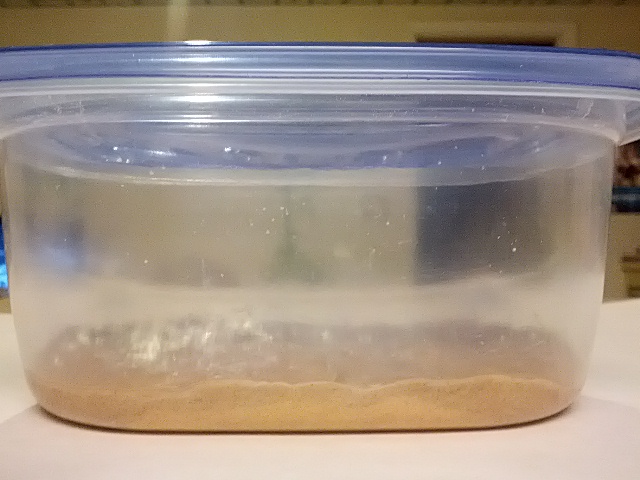
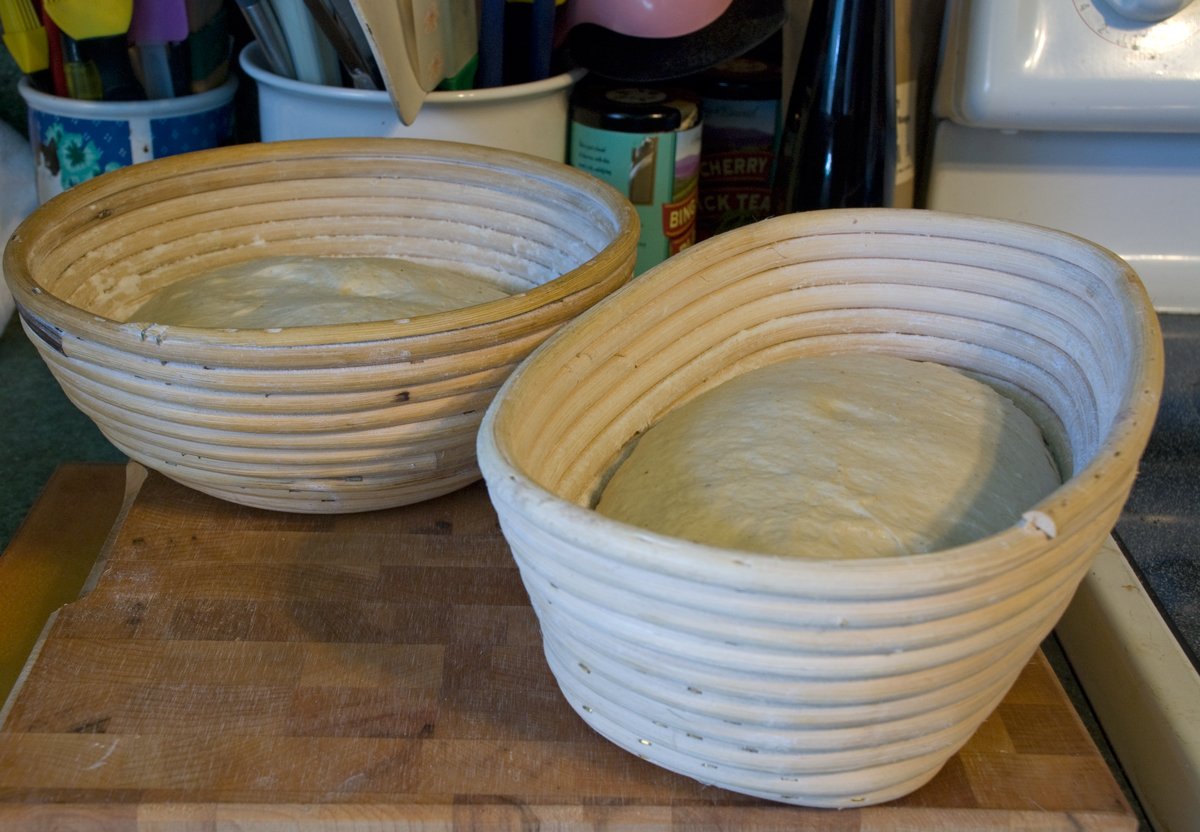
From this I used 100g of the Rye Starter + 275g White Rye + 275g Water for the sponge. I put the sponge in the proofing box (82°F) for three hours, then placed it in the wine coller (54°F) over night for 12 hours.

The next day I mixed the final dough in accordance with Eric's instructions, using Bread flour instead of First Clear flour as mentioned earlier.

I bulk fermented the dough for three hours at 82°F. It double in volume.

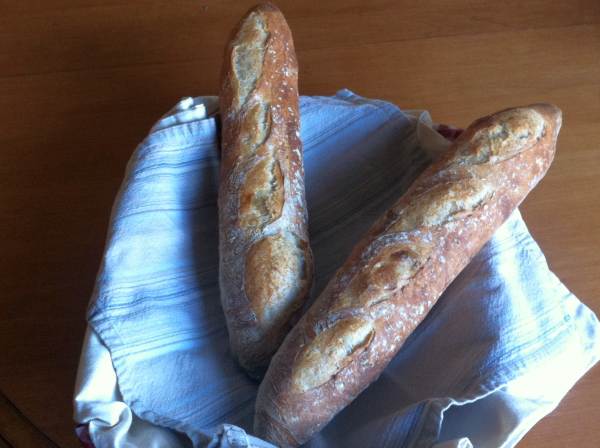
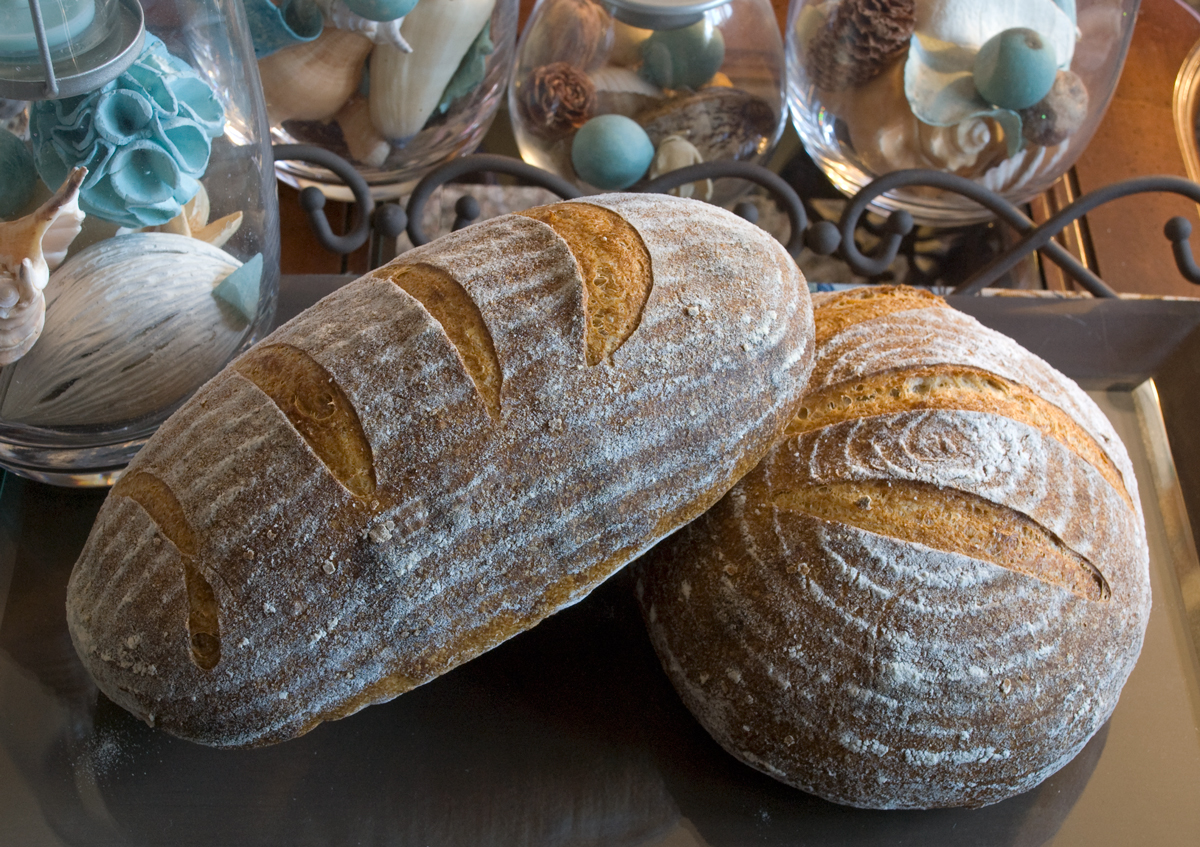
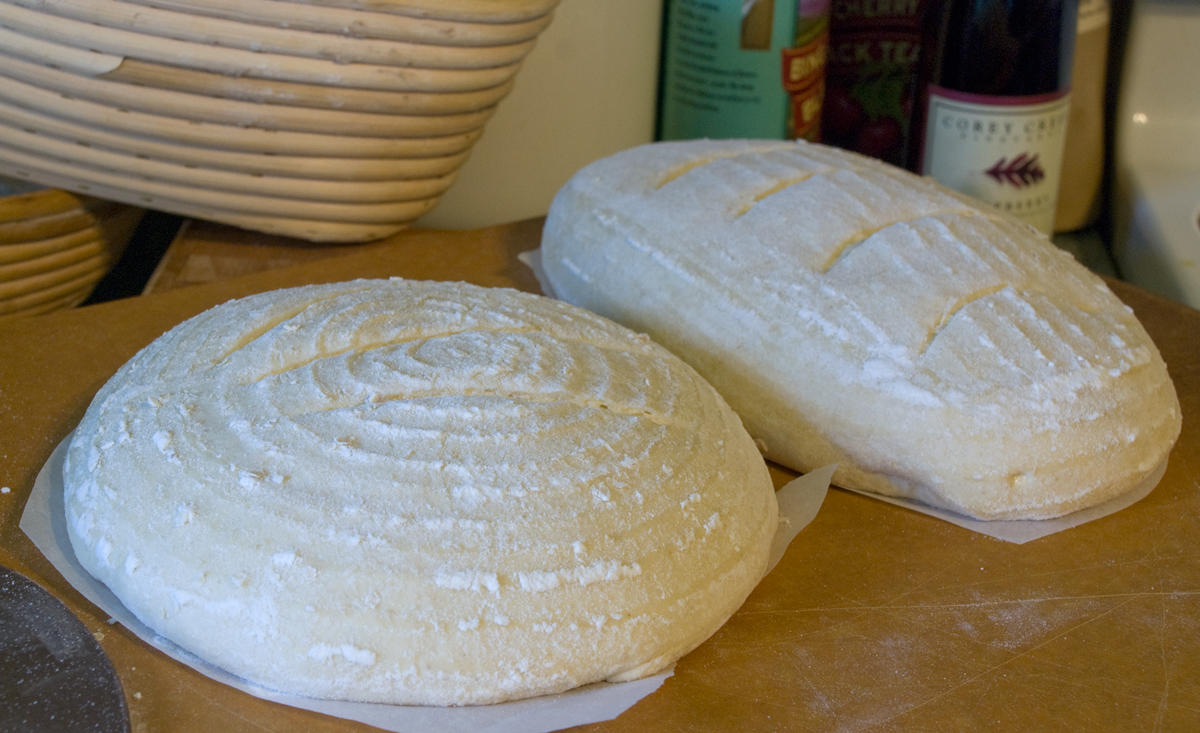
I shaped 1 Boule, and one Batard. The boule was 100g lighter than the batard.

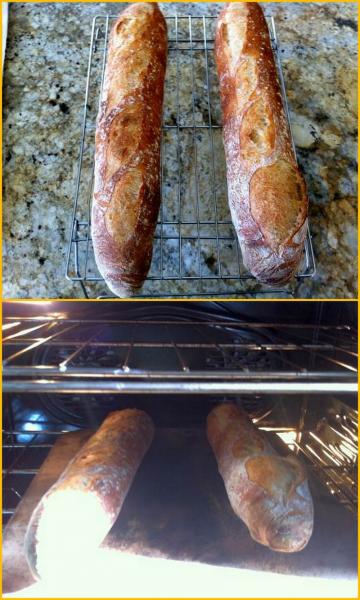
I baked them at 400°F for 35 mins. Internal temperature was 198°F when I removed them. I didn't use steam, but I sprayed the loaves with water every minute, for the first 10 mins. I glazed them with the cornstarch glaze prescribed. I gave them two coats of the glaze.

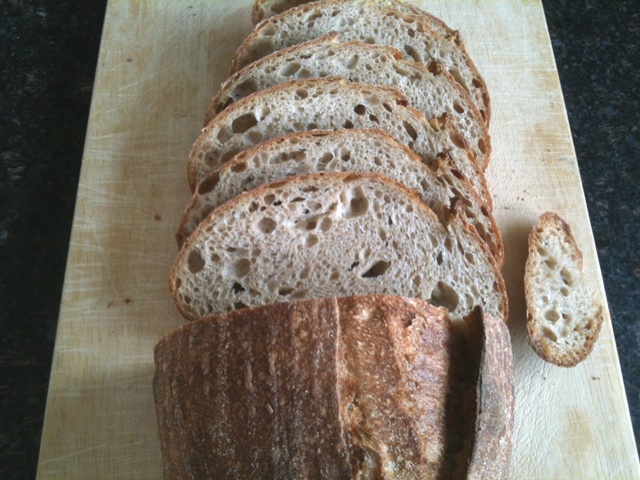
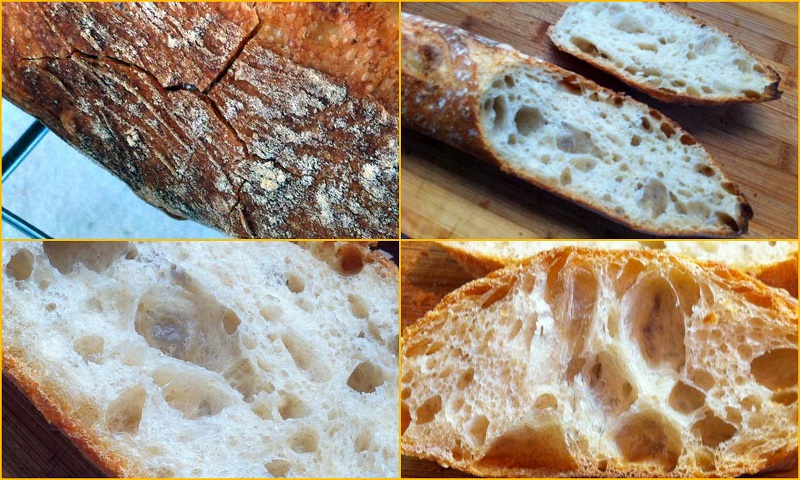
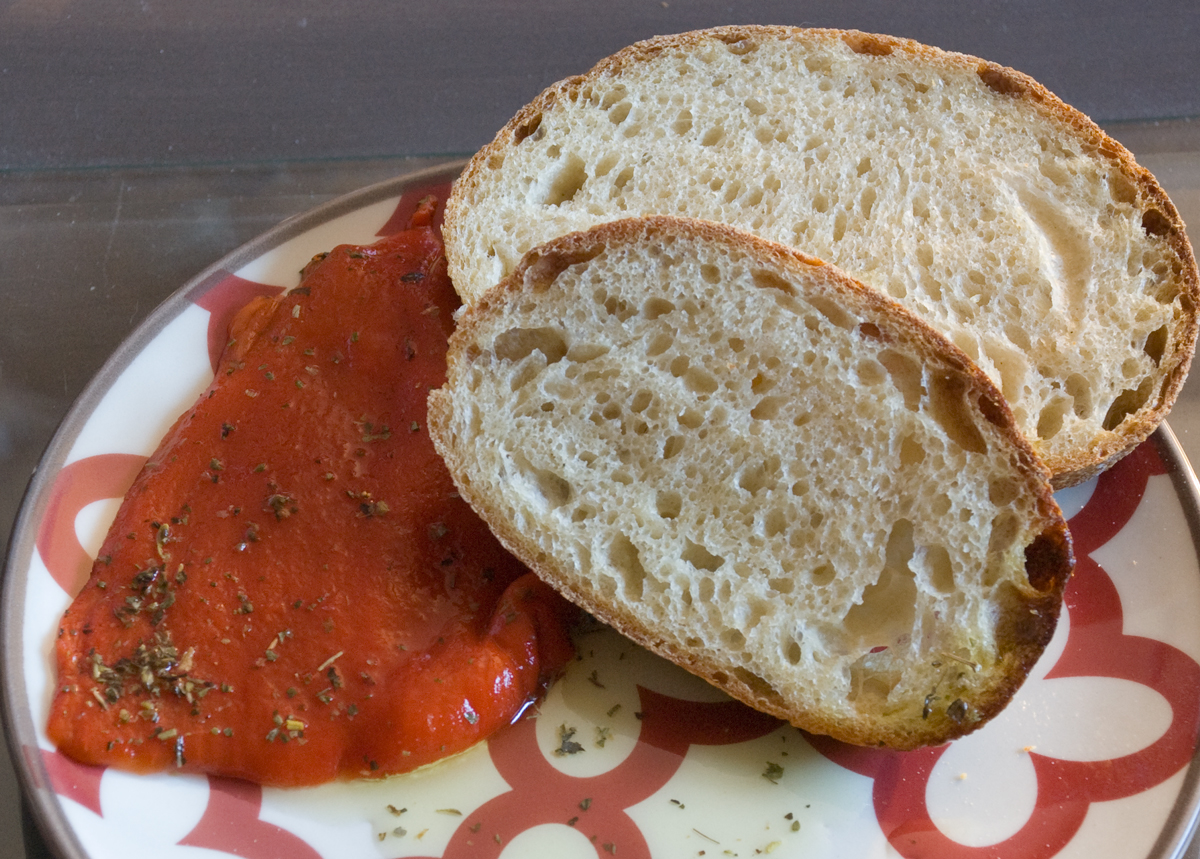
Here is a photo of the crust and crumb

This dough behaved unlike any rye dough I've ever baked before, although I'm not an accomplished rye bread baker. In fact, I started with Eric's Deli rye because I'm on a quest to improve my rye dough handling/baking skills.

Specifically:

This bread doesn't have a rye flavor! I put ten percent Whole Rye in my "go-to" sourdough bread. This bread has 2% Whole Rye and 27% White Rye, yet it has no more Rye flavor.

The crumb appears fully developed. The crumb appears more open than other examples of Eric's rye pictured on TFL, but didn't surprise me: the dough is 73% Hydrated, and contains 71% bread flour. The crust is lighter than I expected even though it baked at a temperture higher than Eric's specified 370°F but at the mid-point (35 mins of his 30 to 40 min. estimate.)

The glaze was absorbed by the crust--both coats. This really surprised me because I've used cornstarch glaze before (Secret's of a Jewish Baker deli Rye) with high gloss results.

I attribute the lack of flavor to the high percentage of white rye, and the low percentage of Whole Rye, but maybe its also dulled by the high hydration.  Another alternative is I need a more agressive, mature starter--like Varda' description of J. Hamelman's rye starter she experience in her recent rye class.

The light crust color I attribute to not being steamed continuously in the early time baking.

I've no idea why the glaze didn't behave as I expected.

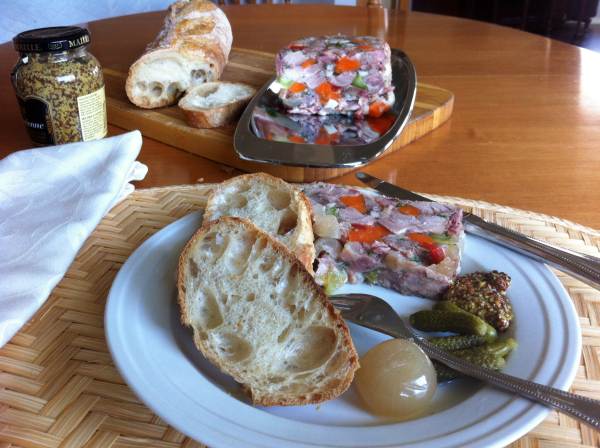
And, I'm very uncertain my analyses are correct. Please, offer opinions what went wrong, and suggestions what to do next: changes to make, or alternative deli Rye formulae to try. My goal is to bake a deli Rye loaf, consistently, to match the rye breads I ate in NYC when I was a kid eating in the Silver Dollar on Broadway with my Dad (I think it was there) before grabbing the subway to Yankee stadium.

David G

Pages

Subscribe to Recent Blog Entries