The Fresh Loaf

A Community of Amateur Bakers and Artisan Bread Enthusiasts.

Recent Blog Entries

linder's picture
linder

I finally got around to making Eric's Rye Bread.  I've been wanting to try out this formula ever since I saw it posted here on TFL.  It is a wonderfully fragrant loaf of rye with sourdough, onions and caraway.  I sauteed two medium sized onions in about 2 TBSP of olive oil and added them to the final dough along with all the other ingredients.  The dough smelled sooo good even before it was baked.  The bread is light and fluffy.  I baked the second loaf about 10 minutes more for a total of 50 minutes since it was a 2 lb. boule.  The batard loaf could have stood a little more time in the oven but it still is baked enough in the middle. 

I made this bread to take to a potluck on Thursday.  There will be a hearty soup as part of the potluck so I thought this rye bread would work well.  I'm definitely making this again for us to have with some pastrami and homemade sauerkraut.


Crumb close up

PiPs's picture
PiPs

Today was a big day ... um ... no, it was so much bigger than that ... um ... i'm not even sure if I can put into words the anticipation I have felt for today.

... and all for a tiny little fire that we allowed to burn for only an hour or so.

The black granite stone has been installed at the mouth of the oven and Dennis has constructed a wonderful door from recycled timber (and a bit of high tech ceramic wool and steel)

For the rest of the week we will light small fires everyday and push them around the interior of the oven to further dry the masonry ... then the real fires will begin ...

... then will come bread ...


myself with Dennis the oven builder 


myself with Daryl (the great chef I work with)

Cheers,
Phil 

dabrownman's picture
dabrownman

My apprentice says that sane German bakers don’t usually try to do a pumpernickel style bake of; slowly reducing low temperatures over a long baking time, when baking white bread of any kind.  But, I figured that if professional bakers can call a bread with only 25% to 30% of rye flour in it a rye bread, then we should be able to DaPumperize a white bread too.  

I have to admit this is about the whitest bread we would usually make, but thankfully, only my apprentice is a German baker and she doesn't count when it comes to new and exciting things, bread wise, around here most always.  Now, if the bake goes horribly wrong, then it is all her fault - I mean she is only an apprentice.  She also looks ridiculous in that full body hair net when she bakes anyway.  So who could take what she says seriously looking like that?


We had to break the recent trend of 100% whole grain bakes or risk falling into the dark abyss.  Even though the dark side breads are fantastic and tempting, being stuck there forever is a little much if you aren’t a German bread baker,


We do like breads in the 25% - 30% whole grain range and they make fine sandwich breads.  Sandwiches, as some might know, are right up there with home made amber lager beer, as far as, my apprentice’s way of thinking goes - which admittedly isn't very far or even deep for that matter.


So, mainly out of boredom with a touch of insanity and a touch of spite, I decided to try to DaPuperize a white bread and see if the tremendous boost in flavor this technique usually provides would work with white bread too.  It was worth a shot even though a long one – otherwise you would think people would be doing it all the time as a matter of course – but they don’t.  Maybe it’s the 6 hour bake time that puts them off?


To give the bread a chance at being decent, we included bread spice seeds and the other usual other seeds we have recently been using, to give this bread a chance the bread at some depth and chew like our whole grain breads we DaPumperize.

Since this bake was planned to be 80% wheat we decided to use our new Not Mini’s Ancient WW starter ( a very powerful one)  to go along with a WW Yeast Water one and make separate levains.   All 25% of the whole grains are in the levains and are made up of a mix of WW, rye and spelt.

We upped the whole grains some using 100 g of wheat berries for the scald along with the Toadies and home made red and white malts.  We dropped the molasses and barley malt syrup for this bake. For much of the dough water we used the excess scald water. Aromatic seeds were the usual coriander, fennel, anise and bi-color caraway that we buzzed up a little after roasting this time.   The meaty seeds were also roasted and they included; black and white sesame seeds, cracked flax and 50 g each f pumpkin and sunflower seeds.

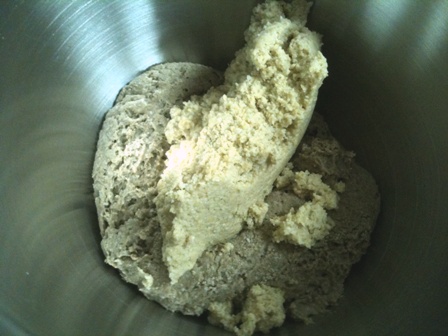
We followed usual routine of late by building the levains over 3 stages with the Not Mini’s Ancient WW one doubling every 3 hours from the first build on while the YW one took 4 hours. For the last build – its best showing.  We autolysed the dough flours, salt, malts and Toadies  for 3 hours before adding in the levains. 

10 minutes of Slap and folds followed when the slack dough really came around on the gluten development side.  After a 20 minute rest we stretched out the dough to do an envelope fold and dropped all the seeds and scald onto it and folded it up with a few S&F’s.   We did 2 more S&F’s on 20 minute intervals to further develop the gluten and to distribute the add in seeds thoroughly.

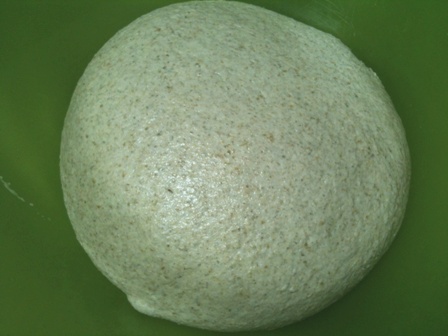
After a 30 minute rest we took half the dough and shaped it into a loaf and placed it into a large loaf tin, filling it less than half full and covering it with plastic.  The other half of the dough was left in the oiled and plastic covered bowl. Both were then refrigerated for 8 hours overnight.  They didn't expand much in the fridge.

In the morning, both were placed on a heating pad, covered with a cloth and allowed to warm up for 1 1/2 hours.  The bulk retarded dough was them shaped and placed into a basket for final proof on the heating pad with the tinned loaf.

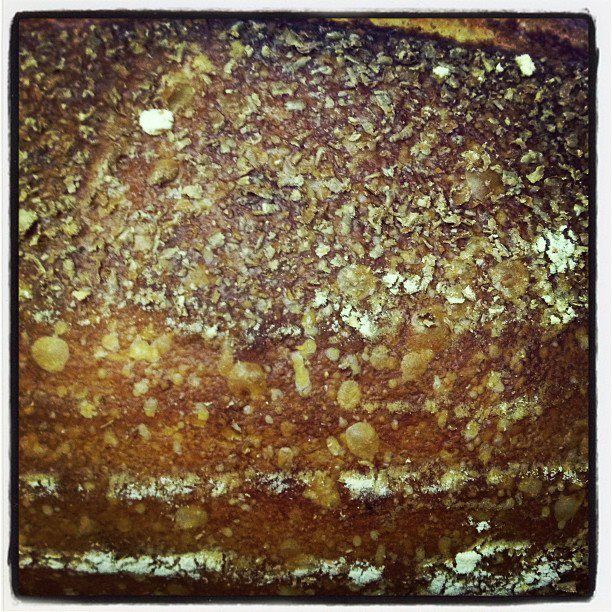
After another 2 hours the tinned loaf was 1/2” under the rim.  We covered it with aluminum foil and placed it into the preheated 375 F mini oven for its 6 hour baking schedule where the bottom of the broiler pan was full of water to provide extra steam.    We didn't put any oat bran or poppy seeds on the top of the loaf because we wanted to see how dark a white DaPumpernickel could get in 6 hours.  The baking schedule follows:

375 F - 30 minutes

350 F - 30 minutes

325 F - 1 hour

300 F - 1 hour

275 F - 1 hour

250 F - 1 hour

225 F - 1 hour

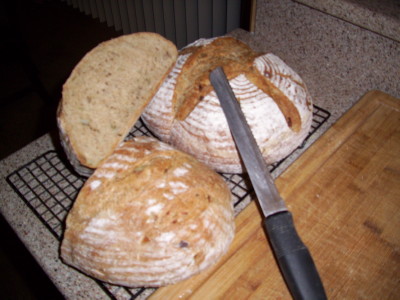
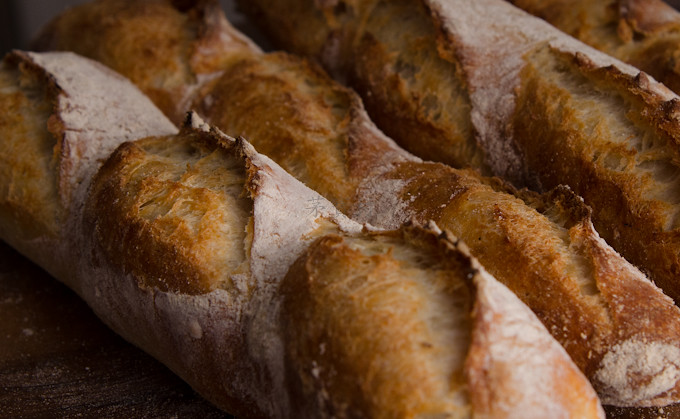
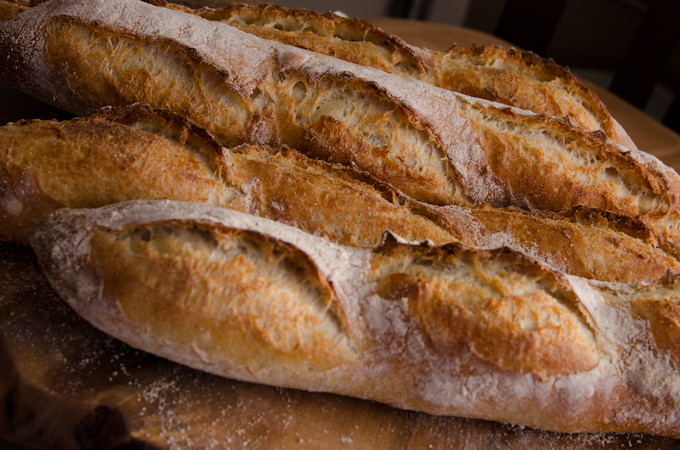
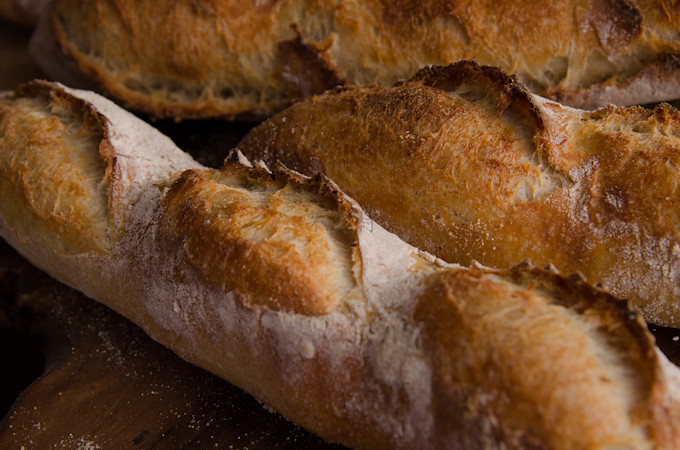
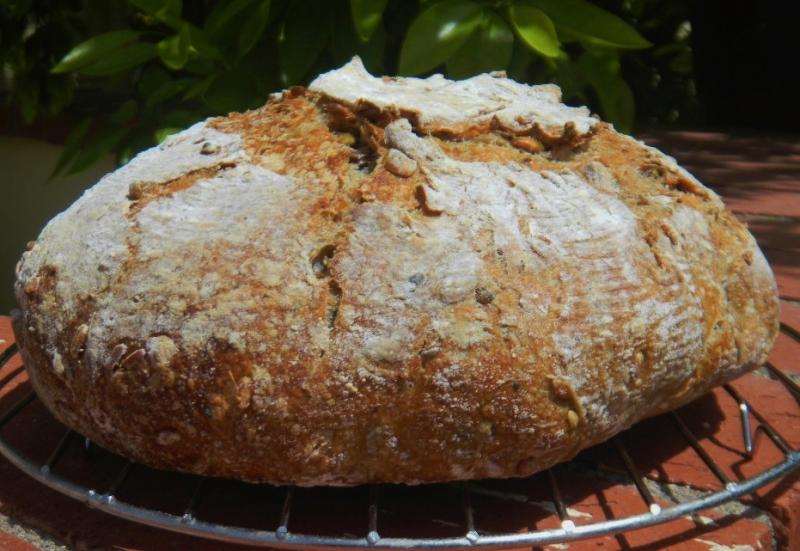
For some extra thrill for my apprentice and a comparison baseline for me, we decided to bake the other half; the boule, as one would expect a loaf like this to be baked - just in case the DaPumpernickeled half was a total failure.

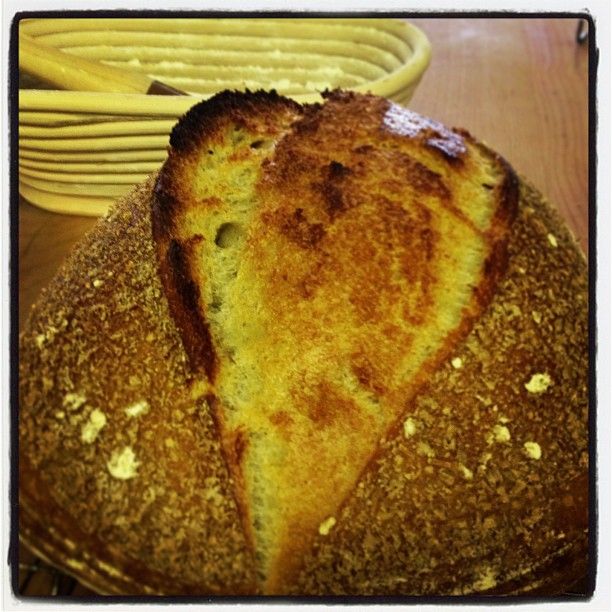
We decided to bake it in a hot DO but it took another hour and a half before we thought that it was ready for the oven.  After a poor slash job and lowering into the DO with a parchment sling, this boule was baked at 450 F for 20 minutes with the lid on and another 5 minutes with the lid off at 425 F convection before removing it from the DO and placing it on the lower stone to finish baking - another 10 minutes – 35 minutes total baking time.

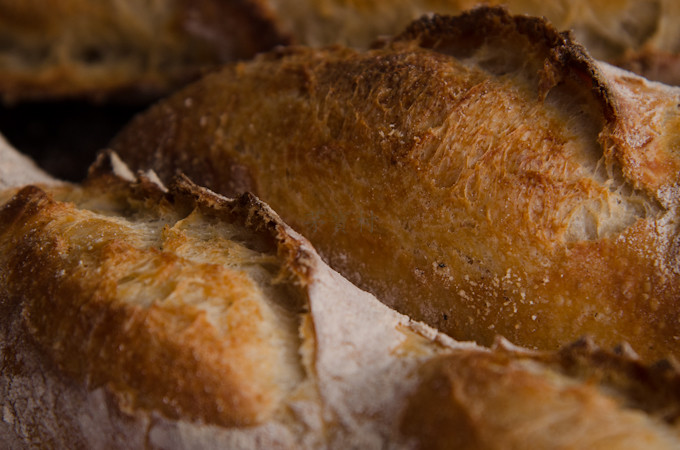
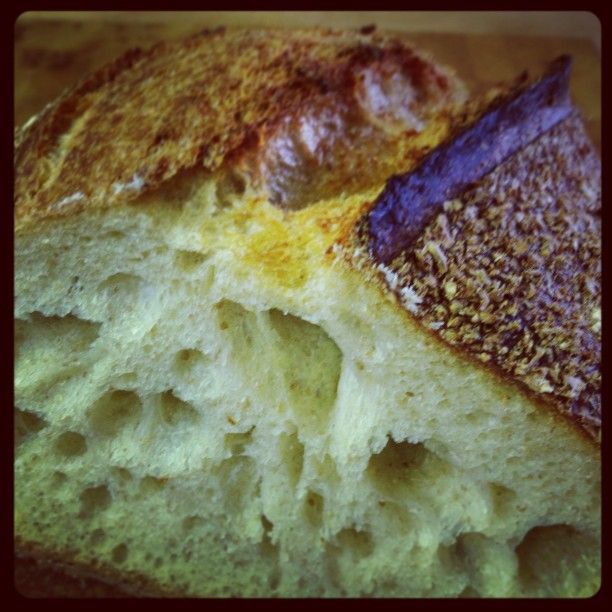
We then turned the oven off and left the bread on the stone with the oven door ajar for 5 minutes to help crisp the crust.  The boule baked up nice and brown, blistered and the crust was crispy before went chewy as it cooled.  It smells terrific.

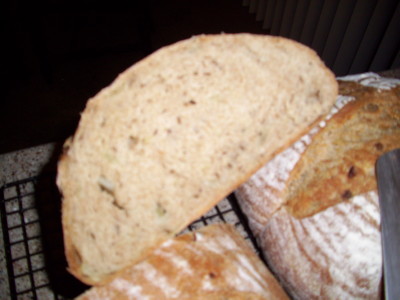
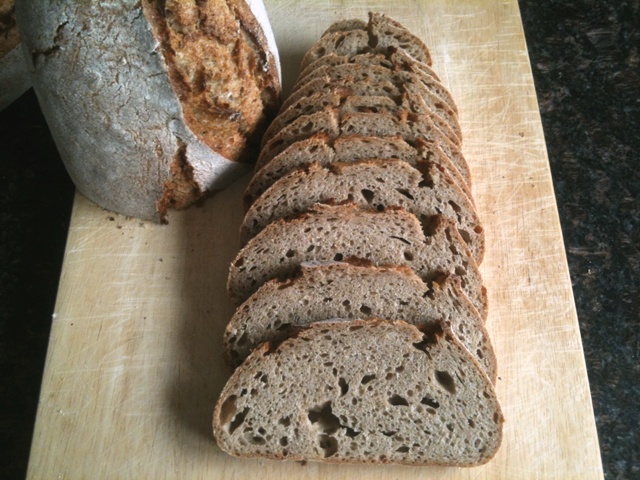
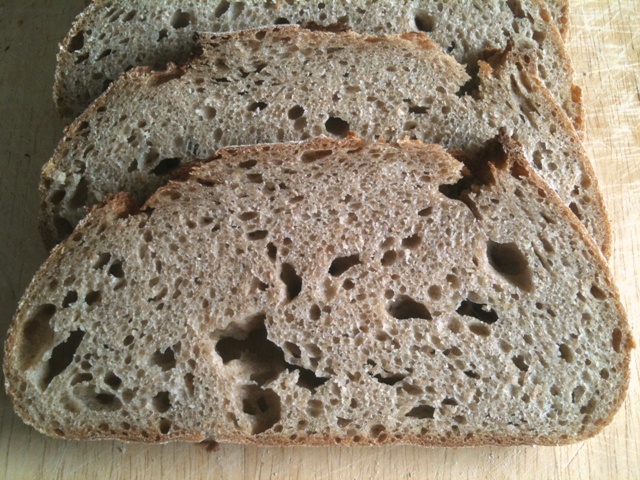
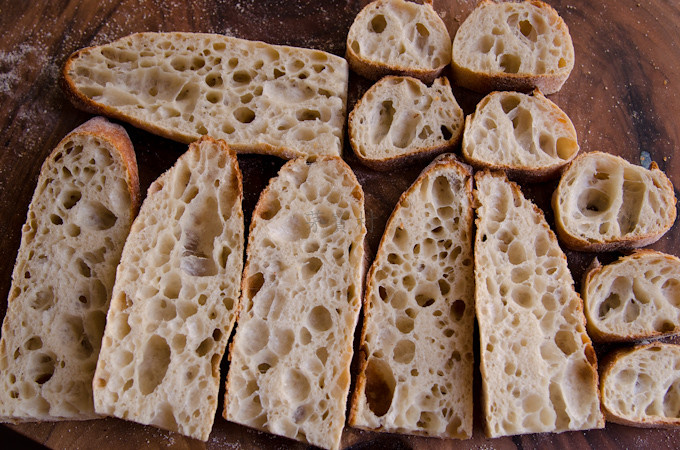
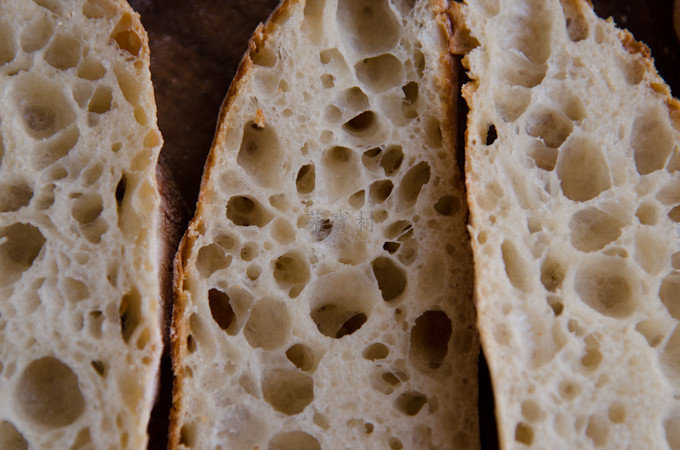
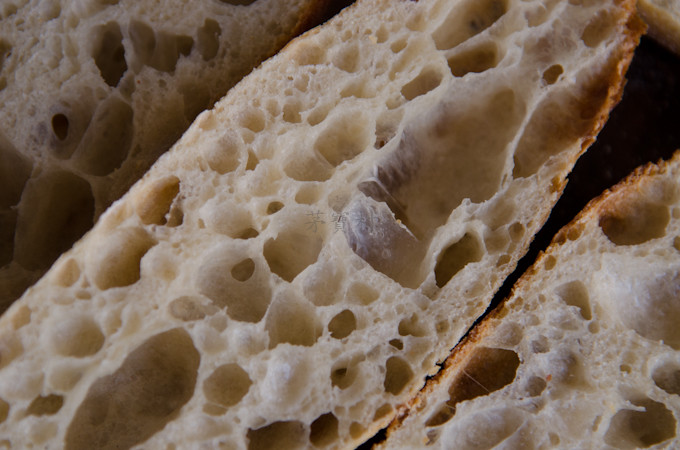
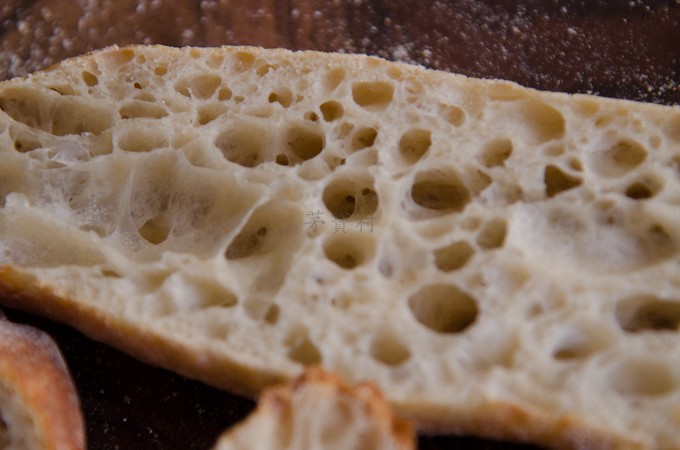
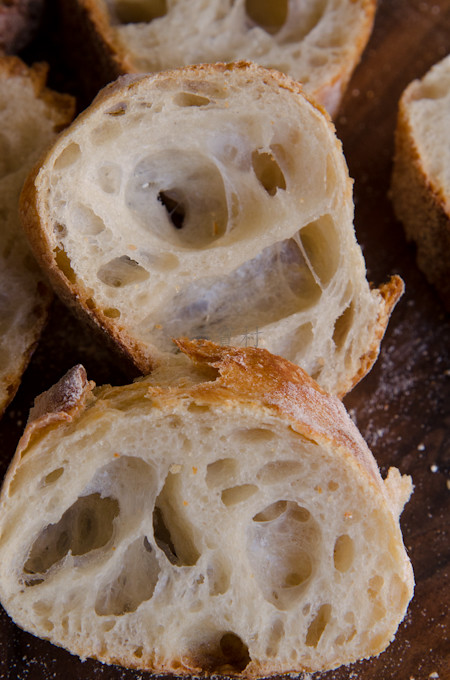
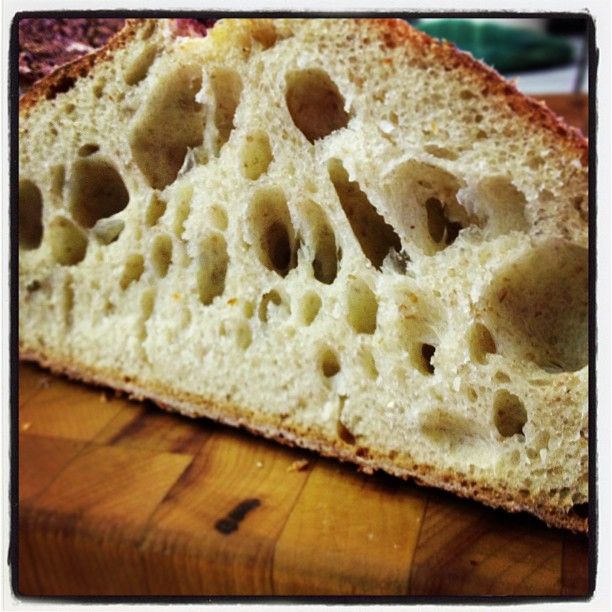
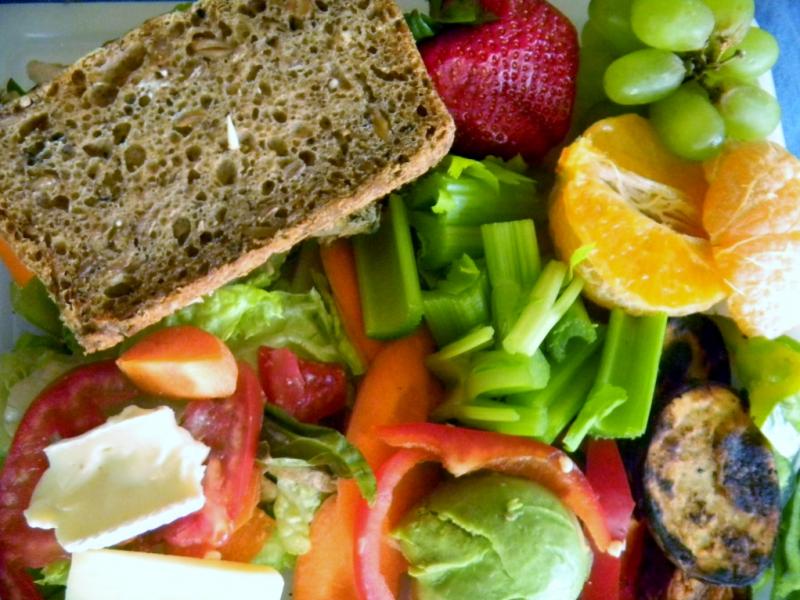
The loaf is now through with its slow and low bake and hit exactly 210 F at the end of 6 hours in the mini oven.  We will slice into this loaf after it has rested for 40 hours. Luckily we have tasted the boule and it is a fantastic loaf of bread.  The crumb is so soft and shreddable, glossy and open like it had butter, eggs and and cream in it - just delicious!   This bread cannot be sliced thin and 1/2" thick, or maybe a little more is its sweet spot. This is another bread could eat every day.  Already ate a quarter of the boule!.Can't wait for the loaf to be ready to slice thin.  It will have to go a long way to be better than the boule.

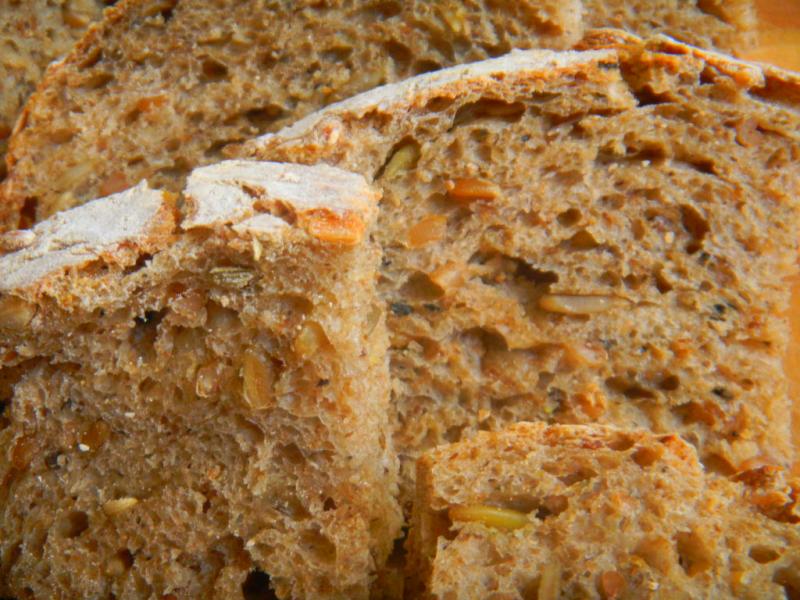
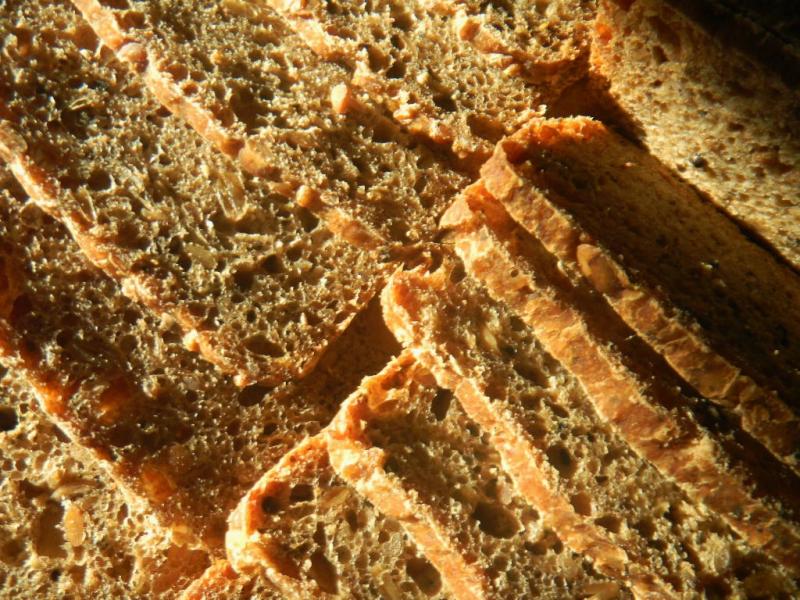
We got 33 slices oiut of the 83/4" DaPumpernickel loaf.  It wasn't as dark as a black pumpernickel about a couple of shades darker than the other part of this two way bake.  The flavor wasn't as deep or rich as a 100% whole grain pumpernickel but it tastes totally different than the regular baked boule.  This tastes like half a pumpernickel and is much more powerful a taste than the boule.  We like this bread a lot too!  For those that don't like pumpernickel but want something stronger than a rye then this loaf  might be the one for you!

Formula

YW and Rye Sour Levain

Build 1

Build 2

 Build 3

Total

%

WW SD Starter

20

0

0

20

2.47%

Dark Rye

0

25

0

25

5.00%

WW

0

0

50

50

10.00%

AP

50

0

0

50

10.00%

Water

50

50

10

110

22.00%

Spelt

0

25

0

25

5.00%

Total

120

100

60

280

56.00%


Levain Totals


%


Flour

310

62.00%


Water

230

46.00%


Hydration

74.19%


Levain % of Total

31.69%


Dough Flour


%


AP

500

100.00%


Dough Flour

500

100.00%


Salt

13

1.60%


Water

400

80.00%


Dough Hydration

80.00%


Total Flour

810


Soaker Water 300 & Water

630


T. Dough Hydration

77.78%


Whole Grain %

26.67%


Hydration w/ Adds

75.99%


Total Weight

1,704


0.40669


Add - Ins


%


White Rye Malt

3

0.60%


Red Rye Malt

3

0.60%


Toadies

20

4.00%


Bicolor; Sesame, Cracked Flax

13

2.60%


Pumpkin and Sunflower Seeds

100

20.00%


W&B Caraway, Anise, Coriander, Fennel

12

2.40%


Total

151

30.20%


Scald


%


WW Berries

100

20.00%


Total Scald

100

20.00%


Weight of scald is pre scald weight


miranme's picture
miranme

Thank you all for the excellent articles and posts on Larraburu french bread. As a former Bay Area native I grew up with Larraburu bread and loved it. I make my own bread and starter. Does anyone know of a source for the original Larraburu starter. One of the bloggers described a cold storage area where they had it stored.  I would be very interested to get a sample if it is available.

Thanks,

Michael

Mebake's picture
Mebake

Last week, I had some left over whole spelt flour, some corn meal, and some semolina in addition to a ripe Rye starter. Therefore, I decided to put them all to use in a new recipe as follows:

UPDATE** INSTRUCTIONS:

Prepare the Rye sour by adding a tablespoon and a half of your active rye starter to the 250g water, and mix well to disperse. Add the Whole rye flour, mix well, and let stand for 8-12 hours at room temperature until the surface just starts to crack and collapse. To prepare the soaker, weigh all soaker ingredients into a bowl, and then weigh 160 grm of water, boil it, and add it to the soaker. Mix well, cover, and let stand until overnight, or when your rye sour is ready.

Next day, mix all ingredients at once, by hand or using a mixer for 5-10 minutes. The dough will remain relatively sticky, so try to resist adding any flour at this stage.Shape as a round and let ferment in an oiled bowl for 2 hours at preferably 78 F or 24-25C, folding it half way through at the 1 hour mark. By the end of bulk fermentation, the dough will have risen by 50-60%. scrape your dough onto a heavily floured surface, pat the dough even (Don't knead), divide into the desired dough pieces, and round each piece leaving them to rest for 15- 20 min, covered. Dust your basket with a mixture of all purpose flour and rice flour, and shape your dough and invert it smooth side down into the basket. The final fermentation will be only 45 minutes, but watch the dough NOT the clock. Preheat your oven at this stage with a stone in place to a 500F or 260C. 5 minutes before loading the bread, place your steaming dish filled with wet towels on the bottom of your oven.  When ready, invert the dough on baking paper lined peel/ board and close the oven immediately. Bake for 15 minutes with steam, and then remove the steaming dish and reduce the temperature to 400F for another 20-25 minutes. 

When the time is over, remove your bread from the oven. Wear oven mitts, and tap on the bottom of one loaf, It should  sound hollow. Furthermore, you may insert a thermal probe into the center of the loaf from the bottom, and the temperature should register 195-200F or 90-95C. If it doesn't, put it back in the oven for another 10 minutes. Cool the bread completely on a wire rack, prior to cutting. 


Due to the soaker, the aroma of this bread is really attractive. When cool, The crust was somewhat chewy, and the crumb slightly moist but not chewy. The flavor of this bread is earthy sweet and very pleasant. The crumb is close textured and compact due to all the whole grains, the bread might have benefited from extra lightness by increasing bread/all purpose flour.

I have eaten this bread thinly sliced with a spread of cheese, and it was fabulous. This bread keeps really well.


- Khalid


hungryscholar's picture
hungryscholar

I've been experimenting with beer bread and granary style bread. For this round I used a doppelbock along with some stuff labeled malt powder that I got at my local Korean grocery store. I tried it with WW flour as is included in a lot of recipes, but I felt like it was competing with the malt powder, so this one is just AP flour, plus what's in my starter.

I think this was 9 hours from mix to start of bake. I kneaded it for about 5 minutes after I mixed it and then let it bulk ferment for around 3 hrs at ~86F, shaped as a boule and let it proof in a towel lined bowl for another 6 hrs at 86F again before slashing and baking at 450 F for 40-45 min. The big revelation for me on this bread was using a lame to make the slashes. Up until now I've been using various knives and the difference blew me away, hence the crazy pattern- I was just enjoying the ease with which I could make the cuts.

Submitted to YeastSpotting

>

   
Granary Bread
Ingredients grams
AP Flour 270
Total Liquid 180
Water 22
Beer 158
Salt 6
Malt Powder 30
   
Stiff Levain 51
Total Dough Weight  537
Isand66's picture
Isand66

After returning from the first ever TFL gathering in Lexington MA last weekend I wanted to use some the rye starter that Varda gave me to make a rye bread.  Dave Snyder posted his latest bake of the above bread on The Fresh Loaf this past week and pushed me over the edge to try it myself.  You can find the recipe at his original post here.

This recipe uses a three-step build process called the Detmolder  process which by using precise temperatures for each build is supposed to optimize the development of yeast growth, lactic acid and acetic acid production.

David had described his latest bake as having an almost sweet taste without that much sour flavor.  My bake to me seemed to have a much more sour flavor than intended.  I think I might have rushed the second build a bit which could have effected the final outcome.

In any case, the crumb came out about where I think it should for such a high percentage rye bread.  The crust ended up much more thick than I think it should.

This type of dough is docked instead of scored and you only use steam for the first 5 minutes of the bake.

Before Docking Dough
Docked Dough
I used my knife tool to dock the dough. Worked fine.

I will have to try this one again and see if I get the same result.

Submitted to Yeast Spotting.

maojn's picture
maojn

This is the result of my weeks of practice making baguettes. I posted a question in the forum and thanks to everyone who provided help. I have finally nailed down the problem and have made 3 consistant good batches. Turned out my problem is not only at scoring, but also the fermentation time, my oven temp,  and steaming duing baking.

The story started at my first post and here is the quesiton I posted. 

To summarize:

- The bulk fermentation should be much longer so the volume at least 3x

- The final fermentation takes 1 hour, instead of 30 min

- My scoring was indeed too deep, should be shallower like trying to make a flip. With the combination of enough fermentation, right scoring and right temp/steam, the ears will stand up themselves!!!

- put my stone at the bottom near the heat source which is 290C, preheat at least 1 hour, lava stones in cast iron tray under it preheat together. Once the dough in, add two cups of boiling water over the lava stone and keep the temp at 290 for 5 min, then drop to 240C. Take the lava stone out after 10 min and continue 240C for 10min

I am very happy with my current baguettes. I did modified my previous recipe a little bit and use only SD without instant yeast, also did autolyse during bulk fermentation.


MANNA's picture
MANNA

I pulled my copy of Beard on Bread today and decided to take on one of his basic white loafs. It seemed straight-forward with the ingredient list. I started converting from cup measure to grams. Given the stated amount the dough hydration came out to 25% ????? So i read his instructions he said to keep adding flour until it wasn't sticky. I don't bake that way! So, I started playing around with the numbers and settled on amounts I know would produce a good loaf in a reasonable amount of time. I had to reduce the flour, salt, and yeast to percents that are tried and true. The loafs came out great and the kids loved them too. So, this will be the daily bread around here till they get sick of it and want something different.

Home-Style White Loaf

makes 2 - Loafs

7 g - yeast

474 g - Milk, Warmed

30 g - Sugar

60 g - Butter, Unalted, warmed to liquid state

15 g - Salt, Kosher

730 g - Flour

Mix milk, butter, sugar, salt. In another bowl of stand mixer, mix flour and yeast. Pour liquids into mixer and knead intill dough is developed (about 4 or 5 with a dough hook for about 5 min with a kitchen-aid). Place in oiled bowl and turn to coat. Cover bowl and place in a draft-free spot. Let double. Turn-out, divide, and shape. Place in loaf pan, cover and let double. Bake at 400 degrees F intill tops are lightly browned. Remove from pans and let bottoms lightly brown. Remove from oven and let cool on racks. ENJOY with butter!


Wingnut's picture
Wingnut

Decided to proof a little longer to see if there was a difference in crumb and taste.

As soon as it cools I will slice and taste. It is slightly darker on the outside which I like but I don't know if my sainted wife will.

Cheers,

Wingnut

P.S.

Good Flavor with a much nuttier finish with the longer proof, it has 30% White Whole Wheat flour in the mix.

Pages

Subscribe to Recent Blog Entries