The Fresh Loaf

A Community of Amateur Bakers and Artisan Bread Enthusiasts.

Recent Blog Entries

MaximusTG's picture
MaximusTG

For this bread I took 300 grams of whole wheat flour and mixed it with 300 grams of water and 1/8 tsp of instant yeast. 

That was at midnight. Next morning I added 280 grams of flour, 1 tsp salt, some pumpkinseeds and some flax seeds. Also enough water to make the hydration 75%. Gave it a stir and then kneaded with mixer. Let rise for 1,5 hours. Then shaped into boule. Proofed for 2 hours in banneton. Baked for 50 minutes at 190 celsius with steam.


300

300

300

Floydm's picture
Floydm

As I've mentioned previously, I've been working for the past few months to upgrade TFL to a new version of the content management system it runs on, Drupal.  I'm also redesigning the interface a bit, mainly so it works better on tablets and phones.  

The new version of the site is close, really close, to being ready. The gap in projects I carved out for my recent vacation is quickly closing too, so I'd like to make the switch to the new version of the site soon and work out the remaining kinks once we're on the new system. It'd be a shame for this opportunity to make the switch pass and the upgrade not happen for another 6-8 months.

The new version of the site can now be found at: http://upgrade.thefreshloaf.com

This is a new server with more horsepower and better caching than the existing system.  I'll crank it up even higher before the new site goes live, so we should have fewer performance problems and less lag than we do now.

As before, if you want to log in and tinker around with test version of the new site, be my guest.  I'll be refreshing the database there again before the new site goes live for real, so anything you post there today will be disappear soon.  

Some of the site features like the email features are disabled because I don't want to accidentally spam folks while I'm working on the new site.  But it should be pretty much functional.

For the switch over, I'm thinking... next week?  Maybe Tuesday?  I'm going to continue tuning things the next few days, but the sooner we make the move the better, IMO.   

Of course I'll be backing everything up before the move so should anything go awry we can roll back to where we are before the switch, but I hope and expect it'll be a big step forward, that it'll work better for all of us and be easier for new folks to learn how to use, than the current site.   

Please give a shout, folks, share your feedback on the new site and let me know if you see any reason I shouldn't try to move this forward next week.  Otherwise, I'll try to do the flip and then make myself as available as I can to help folks learn the ins and outs of the new system or fix any issues that we didn't discover until after the switch.  

If I can do the switch on Tuesday, my hope would be that by the end of the week most (if not all) of the functionality would be restored and everyone could blog and chat as normal.  Fingers crossed, knock on wood, and all that. :)  

Cheers,

-Floyd

dabrownman's picture
dabrownman

After our recent experiments with 100% whole grain bread, and DaPumperizing some of them, we found out that our limited supply of what we call white breads was exhausted.  These ‘white breads’ still have 20%-30% whole grains in them so they have some decent flavor and healthfulness.


We thought we would go Italian for this bake because of the sneaky ricotta, goat cheese and citrus cheese cake my apprentice baked while no one was looking.   It had also been awhile since we had done a chacon shape too.  We could have done an Italian shape like an Altamura but these shapes usually need some durum flour in hem and we are saving the last of Desert Durum for something else.


Instead of out usual pesto, parmesan and sun dried tomato Italian bread that we like so much we decided to go in a different Italian direction by using figs, hazelnuts and ricotta cheese to go along with the 22% whole grain Rye, spelt and WW that was mainly used in the levains.


Yes, we had 2 levains for this bake but they were both of the SD variety instead of YW we usually use for 1 of them.  We used out Rye Sour and our Not Mini’s Ancient WW starters for this bake.  We love what both of them do for bread so why not combine them and see what happens.


So not to have enough to do for this bake we also decided to use whey water for some of the liquid and do a Tang Zhong with 25 g of the dough flour with an additional 125 g of water not included in the liquid amounts in the formula.


We thought about throw in some of our aromatic seed mix but the apprentice nixed that at the last minute wanting to know what was German about this bake anyway?  For being mainly nutzoid when it comes to breaking the bread mold, she can be traditional when you least expect it – usually right before doing a nose rip on you – which is also not expected.


These levains built themselves up to doubling in 4 hours so only one build was needed to get them full strength.  We did not retard the levains when built as is our usual practice of late but we did do a 4 hour autolyse of the dough flours with the malts, VWG and Toadies.  We kept the nuts, figs, cheese and salt out.  Usually we put the salt in the autolyse so we don’t forget it but thought we try to have Lucy remember to put it in later.

After the 2 levains, the Tang Zhong, ricotta cheese and autolyse came together, we mixed it withy a spoon for 1 minute and then did 4 minutes of slap and folds before adding the salt.  This dough feels much wetter that the just short of the 69% total hydration with the add ins.  This is due to the Thang Zhong and the cheese. 

After the salt went in, we did another 8 minutes of slap and folds before the dough finally came together fore a 20 minute rest.  We then did (3) sets of S&F’s on 15 minute intervals and incorporated the nuts and re-hydrated figs in the 2nd one and by the 3rd one they were well distributed.   The wet figs also added some more unaccounted liquid to the mix. 


After a hours worth of ferment on the counter the dough was bulk retarded for 12 hours, ala Ian’s typical retard mastering.  In the cold it had risen to the rime of the bowl and after 1 ¾ hours on the counter the next morning it has risen above the rim of the bowl .

We then divided it and shaped the knotted rolls; one each for the bottom of each basket, and shaped the twisted rope in addition of the oval basket so these Chacons wouldn’t end up looking too similar after baking.   So no braids, balls or other intricate shapes and designs in the bottom of the basket were used in keeping with this simple Italian bake.

After 2 hours of final proof on the counter in a plastic bag, they were ready for Big old Betsy that had bee preheated to 500 F with one of David Snyder’s lava rocks in a large cast Iron skillet along with a large size one of Sylvia’s steaming pans with 2 rolled up towels in it.  Both were put into the oven half full of water when the 40 minute preheat started and they supplied their usual mega steam.  We also used top and bottom stones as we always do since they never come out of the oven.

My apprentice thought that the loaves were over proofed again when the came out of the bag since the dough jiggled like jello or a croissant and the dough had risen above the rim of the baskets.   But, since Chacons do not need to be slashed, they went straight into the oven on the bottom stone after un-molding onto parchment paper and peel.  They still managed to spring nicely anyway and my apprentice’s over proofing fear was as unfounded as her legal immigration status.

After 2 minutes the temperature was turned down to 460 F and then after a total of 12 minutes the steaming apparatus came out of the oven and the temperature was turned down to 425 F , convection this time.  The loaves were rotated on the stone every 5 minutes for 15 minutes when they tested 205 F and were removed from the oven to a cooling rack.

The loaves cracked well on top as they should and they ended up being nicely browned,  crisp but un-blistered despite the long retard and mega steam.  They are awfully nice looking loaves none the less and we can’t wait to cut into one to see what the crumb looks like.

The crumb turned out fairly open, glossy and super soft.  The Tang Zhong really came through as it always does.   I like to use it on whole grain, multi-grain breads since we discovered that it does the same thing for these breads as it does for white breads.  Now we know it isn't just the YW that makes the crumb soft.  We like this bread very much and it is worth the extra effort required to pull it off. 

Formula

WW and Rye Sour Levain

Build 1

Total

%

WW SD Starter

25

25

3.79%

Rye Sour Starter

25

25

4.67%

Spelt

25

25

4.67%

Whole Wheat

50

50

9.35%

Dark Rye

25

25

4.67%

Water

100

50

9.35%

Total

250

200

37.38%


Levain Totals


%


Flour

125

23.36%


Water

125

23.36%


Hydration

100.00%


Levain % of Total

17.82%


Dough Flour


%


Whole spelt

5

0.93%


Dark Rye

5

0.93%


AP

525

98.13%


Dough Flour

535

100.00%


Salt

10

1.52%


Whey 200 Water100

300

56.07%


Dough Hydration

56.07%


Total Flour

660


Soaker Water 300 & Water

425


T. Dough Hydration

64.39%


Whole Grain %

22.27%


Hydration w/ Adds

68.92%


Total Weight

1,403


Add - Ins


%


White Rye Malt

3

0.56%


Red Rye Malt

3

0.56%


Toadies

6

1.12%


VW Gluten

10

1.87%


Ricotta Cheese

100

18.69%


Adriatic & Mission Figs

115

21.50%


Hazelnuts

71

13.27%


Total

308

57.57%


Weight of figs is pre re-hydrated weight


d_a_kelly's picture
d_a_kelly

Hi bakers everywhere!

I made this a few weeks ago but have only had the chance to post it now. I took the recipe from Cresci, by Massari and Zoia. In the book it's for a panettone but I thought I'd try to make it in the form of a colomba because it was around Easter and I still had a few colomba cases left to use :)

This is a very unusual panettone recipe in the all the flour goes into the first dough. The traditional method is to split the flour between the two stages. I'm not quite sure what the benefits of this are (allowing for more autolysis) but there are a few recipes in the book where this happens. I'm pretty certain that these "non-traditional" formulae are associated with Achille Zoia. I've been working on his panettone paradiso (another flour-all-in-one recipe) on-and-off now for over a month and I kid you not, I've only made it work once, despite about 15 attempts!! Fool that I am, the one time it worked I didn't take any photos, but the crumb was the softest and moistest of any panettone I've ever had, so I'm determined to persever. But back to the colomba...

The recipe calls for hazelnut paste and gianduia amara. I bought the hazelnut paste online (very expensive) because I don't have the equipment to make a truly smooth paste at home. The gianduia I made myself, using the following recipe (in grams). I took amara here to mean the use of dark chocolate rather than milk. I used Amedei toscano black - a really delicious, and Italian, chocolate.

hazelnut paste 50

dark chocolate 70% 20

cacao butter 6

icing sugar 50

melt the chocolate and cacao butter together and then blend in the icing sugar and paste. It's important to stir constantly and drop the temp as quickly as possible to 26C to prevent it from separating. I took this recipe from Valrhona's cooking with chocolate book.

I made the first impasto at about 10pm so that I could go to bed and rise the next day with it ready.

sugar 79

water 177

hazelnut paste 32

very strong flour 316

Italian sweet starter 63

butter 63

I left the flour, sugar and water to autolyse for half an hour and then added the other ingredients, working it until the dough was stringy.

The next morning it had tripled in volume (12 hours precisely) so I reworked it with the following:

sugar 47

honey 32

butter 47

gianduia (melted) 47

hazelnut paste 32

yolk 73

salt 2.5

vanilla quarter of a pod

water 9

milk chocolate 62

dark chocolate 47


take 991 of the  impasto and add chocolate pieces. For the milk choc I used Valrhona's Jivara, and a mix of Amedei toscano black and Valrhona's Manjari for the dark. 

My last attempt at forming a colomba hadn't been a success, so taking inspiration from thefreshloaf, I decided to fold and stretch it repeatedly until I had a nice tight ball. I let this rest for an hour and then repeated the process, before putting it into the shape. I was much happier with the shaping this time, the dough had a better, tighter skin on it.

I had just enough dough left over to make a "panettoncino" of about 85g. 

About 6 hours later (held at c. 30C) it was ready to go in the oven. I glazed it, covered it was sugar granules and almonds, and then dusted it was icing sugar.

My glaze this time was a little thicker than I've made it before - too thick I think, even though I followed my usual recipe. I should have added a tiny bit more egg white. It was just a tad too thick to be easily spreadable. In the oven then for 50 minutes at 170C. I didn't bother with steam because I was worried about the icing sugar. I'm not sure it made any difference.

Oven spring was enormous. The top photo doesn't really do it justice. I doesn't show just how much over the edge of the form it is. I slightly crushed it with my hand when I was turning it upside down (idiot!!!) but apart from a crack on the surface, it popped right back out when it was hanging during cooling. 

The colomba itself was a present, so the only crumb shot I have is from the panettoncino. I think there was just a little too much impasto in the pirottino... BakeryBits.co.uk markets them as 100g cases, but I think even 80g is too much if you are using them for a panettone. I think perhaps 70g might have been better. 

Well, my conclusions...

I tasted both the baby panettone and the colomba and I was very... disappointed!!! There was zero(!!) taste of hazelnut from it. Zero!!! The hazelnut paste I used was professional quality (it certainly had a professional price) but it didn't even leave a trace of flavour in the finished product. The photo in Cresci implies a deep brown crumb, but my crumb looks more beige. I didn't know what industrial strength paste Zoia must be using to achieve any flavour or colour on this one. The crumb itself, although very shreddy, as it should be, was also quite dry. The driest of all the panettone I've made so far. All I can say is thank God I used good quality chocoalte, because otherwise the entire thing would have been very uninteresting. 

It's a great shame, because I'd been looking at the recipe for ages, thinking it would be great. Where is the hazelnut flavour?!?!? Another thing I've noticed is the how much growth in the colomba is lost to sideways motion. The circular shape of the panettone form is very strong, so all the growth is directed upwards. The colomba seems structurally weaker, you can see how the sides have bulged out and become distored. 

I need a break from panettone making for the moment... the repeated disasters with the panettone paradiso have knocked my confidence terribly. Hopefully a break will allow me to... what? I'm not giving up on it though. I refuse to be beaten by a bit of flour, butter and egg!


David

Jerrywatts's picture
Jerrywatts

   Hey everyone, I've been on this website for a while and just love the loaves here! I'm from China and I love baking, bread especially. I feel it's time to share some really good bread with you here. I cant just keep taking without giving, right? Anyway, I got this recipe from a Chinese blogger and our family just loved it. Hope you will like it too.

   I made 9 small loaves out of the dough.

High gluten flour:………… 350g

Medium Rye:………… 150g

Salt:………… 8g

Caster sugar:………… 10g

Mature sourdough culture :………… 225g(100% hydration)

Water:………… 300g

Pumpkin seeds:………… 60g

Fig:………… 60g

The recipe originally used walnuts instead of pumpkin seeds but I had run out of walnuts so I just used pumpkin seeds instead. They worked for me. You can use your own combo. Also, the blogger only used 220g water but he didnt state the hydration of his sourdough culture. Using my own sourdough culture, I increased the amount of water to 300g. It was too dry for my dough with only just 220g water.

1.Mix sourdough culture with water, then flour,salt and sugar . Mix well.

2. Mix in the seeds and fig pieces. No need to autolyse or stretch and fold. When I mixed everything together, the dough just came together and I felt the guten was strong enough already.

3. Ferment for about 3 hours at 20°c.

4. Divide the dough into 9 pieces,shape into oblong loaves.

5. Proof until they are 80% proofed.

6.Preheat the oven and bake the bread with steam at 230°c for about 35mins until golden brown.

7. Cool and enjoy!

When it's baked thoroughly, the crust of this bread is wheaty and crusty.

The crumb is full of flavor, bouncy as well.


This bread is definitely worth trying!


dmsnyder's picture
dmsnyder

Powerless Baguettes: Not pretty but quite tasty.

April 10, 2013

A couple days ago, my wife pointedly remarked that there were only two baguettes left in the freezer. This was a fair warning, so I built up a liquid levain and made a batch of SJ SD dough. This afternoon, I divided, pre-shaped, proofed, slashed and loaded 4 baguettes in the oven. The timing was perfect to have them out of the oven in time to get to the farmer's market when it opened and then to enjoy fresh-baked baguette with dinner.

Eight minutes into a planned 20-minute bake, our power went out. The oven is electric. What to do? Well, I removed the steaming skillet as usual at 10 minutes. At 20 minutes, the loaves were browned somewhat, but still pretty pale. I gave them another 7 minutes in the cooling oven, at which point they were still rather pale but had a nice hollow thump and were over 205ºF internally. So, I took them out and let them cool.


The oven spring seemed pretty normal. The bloom was a bit crazy, but I don't know whether that was my scoring or an effect of the cooling oven after the first 8 minutes. The crust was pale and kind of soft, but I can't say the crumb structure suffered.


The crust did have some crispness but was more chewy. The crumb was fully baked. It was chewier than usual. The flavor was excellent – about the same as the last SJ SD Baguette bake, currently featured on the home page. I ate half a loaf with dinner.

David

Noah Erhun's picture
Noah Erhun

Favorite ciabatta recipe so far, apart from the added yeast, which I cut in half increasing the fermentation time. Next time around I'll try to elimiated it complety. 
http://www.farine-mc.com/2009/07/tweaked-ciabatta.html


Levain: equal parts flour, water starter (Ischia). 

Flour 100% (39.6% Caputo 00, 39.6% KAAP, 21% KAWhite WW) 
Water 64.5%
Levain 55% (100% hydration)
Milk 4%
Oil  2.7%
Salt 2.4%
IDY  .3% 

(Final hydration 77.6%)
4 hours @65F bulk, 8 hours in the fridge around 1.5 hours RT in loaves. 
The rounds were baked on a stone covered by a stainless bowl. The free-form Ciabattas were baked without steam...just replaced the oven glass  

Since I don't own a mixer I mixed the dough by hand with some additional stretch and folds. Following Ken Forkish's technique  http://www.youtube.com/watch?v=HoY7CPw0E1s
Excellent flavor with only a slight tang. 

I'm suprsed how well the free-forms turned out considering the lack of steam and being a bit over done. 

-Noah

greedybread's picture
greedybread

Pizza Civitavecchia …Last of the Easter Breads…

Pizza di Pasqua….Pizza Civitavecchia…Pizza di Pasqua…

Lovely….

Tasty!!

Mmmmmm

Too hard!! I can’t choose…

Both are too lovely…

I need to be very greedy and have both…with Pandoro and all my other bready lovelies…

Now this gorgeousness is deceptive.

By the 2nd day, it looked a little dry but it wasn’t, when I ate it, it was lovely, spongey and moist and the aniseed aroma….Divine:)

I am now on day 5 and it is still ok to eat with out toasting but I have been toasting it and having it with greek yoghurt!!

Simply sublime….

Hints of rum, aniseed and the moist ricotta:)

So let us get yeasty beasty as this is the last of the summer breads…err Easter breads!!

Start with the sponge…

Ground the aniseed…

Almost batter like..

rising….

Rising….

What will you need?

A bloody lot of eggs!!:)

For the sponge:

4 tsp of dried yeast

1/2 cup of warm water

3/4 cup of flour.

For the Dough:

3.5 cups of Flour

1/2 cup of castor sugar

Pinch of salt

4 eggs

9 egg yolks!!! (yep- meringues coming up later or almond cookies)

200g ricotta

1/2 cup of rum

3 tbsp of aniseed powder

Grated Zest of 1 lemon

1/2 tsp of cinnamon

250g of butter

rising…

Place dried yeast in the warm water and stir until combined.

Allow to stand and become frothy, usually about 10 minutes.

Add flour and mix in well.

Cover tightly with Gladwrap and allow to stand for an hour and become soupy.

almost ready….

Combine all dry ingredients in a bowl and combine well.

Add the egg yolks and eggs into the yeasty mix, combine well.

Add the ricotta and rum  into the eggy yeast mix, combine until smooth.

Grate zest directly into the dry ingredients to get the oils of the lemon into the mix as well.

Mix well and pour the eggy mix into the dry, forming a dough.

Knead for 6 minutes until golden and springy.

Add in the butter, 30-40g at a time until well combined into the dough.

The dough will be very soft, almost batter like.

Place in a well oiled bowl and rest, well covered for 2 hours.

Place / pour dough when risen into 1 or 2 well greased moulds.

Cover and allow to rise for a further 60-90  minutes until doubled in size.

30 minutes before finishing, pre heat the oven to 200 celsius.

You can brush the top with egg white and sprinkle with sugar pellets if you wish.

Place bread into the oven and bake for 15 minutes, reduce the temperature and bake a further 40 minutes at 175 celsius.

Cover tops of the bread if need be, if they get too brown.

Remove from oven and allow to cool.

Place on a wire rack after 15 minutes to cool fully.

Slice and ENJOY, ENJOY, ENJOY!!

This bread is gorgeously moist but not so delicate as the Pizza di Pasqua.

As Carol Field says ” it has an unusual taste”…

Which it does but its gorgeous, not overly sweet, you could almost have it with cheese but that hint of sweetness is there.

A Fig jam would be divine on it, after toasting…I can verify it is heavenly with greek yoghurt:)

Sit down, have a coffee and Enjoy!!

Adapted from the ever Fabulous Carol Fields “The Italian Baker” 2nd Edition, 2011.


http://greedybread.wordpress.com/2013/04/03/pizza-civitavecchia-last-of-the-easter-breads/


Floydm's picture
Floydm

Every now and then you learn a new technique in the kitchen that really knocks your socks off.  Tangzhong is one of them.

Tangzhong

Tangzhong is the technique of heating a portion of the flour and liquid in your recipe to approximately 65C to make a paste (roux).  At this temperature the flour undergoes a change (gelatinizes?).  Adding this roux to your final dough makes a huge difference in the softness and fluffiness of your final dough.

It is really easy to do a tangzhong.  Take 1 cup of liquid (milk or water) to 1/3 cup flour, or a 5 to 1 liquid to solid ratio (so 250g liquid to 50g flour) and mix it together in a pan.  Heat the pan while stirring constantly.  Initially it will remain a liquid, but as you approach 65C it will undergo a change and thicken to an almost pudding like consistency.  

Once it is evenly thickened, remove from heat and allow to cool down some before making your final dough.  

Reportedly you can cover it and keep it in the fridge for a few days before using it, but I baked with it immediately.

Hokkaido Milk Bread

We have some great Asian bakeries in Vancouver and they all make some version of a Milk Bread.  Soft, slightly sweet, often baked in pullman pans so that the slices are perfectly square, sometimes containing raisins or a swirl of red beans or cream cheese, milk bread is the ultimate comfort food. It has a tenderness I've never reproduced at home until now.  I always figured it was a ton of oil or some other artificial conditioner that gave it that consistency, but now I think Tangzhong and heavy kneading were the secret. 

My recipe is a hybrid of a bunch of different recipes I found online and credit below.  What I offer here is a good place to start but certainly not an authoritative version or one I'd suggest is the best.  Still, it was awfully good.


Tangzhong


1/3 C all purpose flour

1 C liquids (I used 2/3 C water and 1/3 C milk)

Final Dough

800g (around 5 C) all purpose flour

1/2 C sugar

50g (1/2 C) milk powder

1/2 C half and half

3/4 C milk

2 eggs

4 T butter

4 t instant yeast

1 t salt

all of the tangzhong

Combine all the ingredients in a bowl or standmixer and mix the heck out of it, 10 or 15 minutes, until the dough is silky and smooth.  I didn't initially add enough liquid so my dough was quite dry, but by adding more to the bowl and using wet hands I was able to work more milk and water into the dough.  

Once you've kneaded the dough well, cover the bowl and let the dough rise until doubled in size, roughly an hour.

Divide the dough into smaller portions.  I divided it into 8 ~210g pieces, which I baked 4 to a pan in 2 pans.  As you can see, that was a bit much for the pans I have!  Next time I think I'll divide the dough into 12 pieces and bake it in the 3 pans. 

Cover the pans loosely and allow to rise for half an hour, then glaze with milk or an egg wash.

Heat the oven to 350F while letting the loaves rise another 15-30 minutes.  

Baking the loaves at 350F for approximately 40 minutes.  If they are browning too much, you can cover them loosely with foil.

Look at that crumb!  Absolutely the softest, silkiest loaves I've ever made.

Further reading/discussion about Hokkaido Milk Bread and Tang Zhong:

bakingbadly's picture
bakingbadly

Three weeks ago I volunteered to bake bagels for a party. Though, not just ordinary bagels. Sourdough based bagels, with a spicy twist, featuring characteristics of a pretzel---or what I call "pregels".

Visualize this: A doughnut---but not a doughnut---that's as chewy as a bagel, but has a crispy, lustrous, dark brown crust, sparsely topped with coarse sea salt. (I can almost hear bagel purists hollering abomination.)


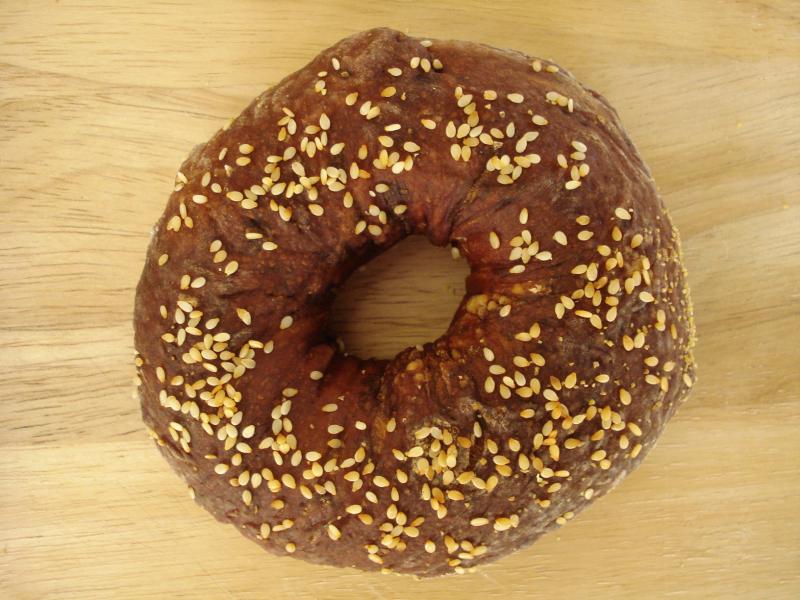
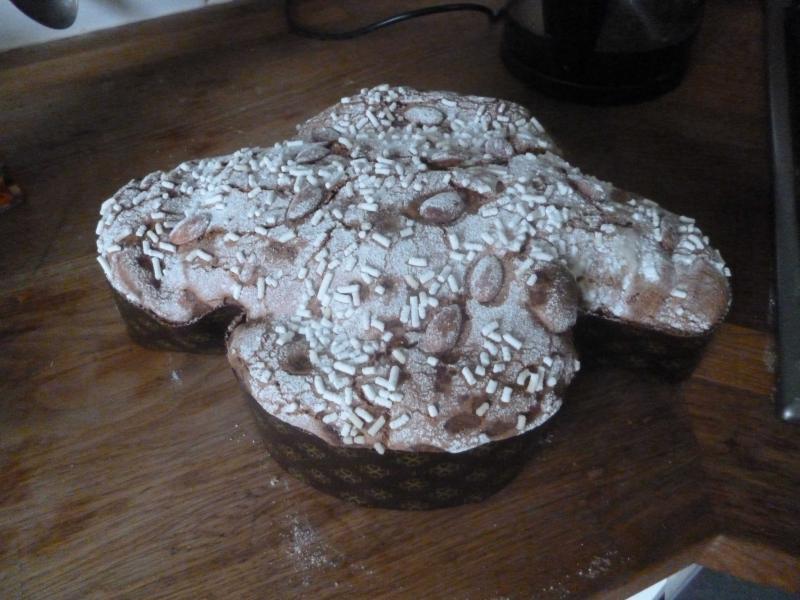
The first trial (above) was unpleasant. Prior to its consumption, none of my breads had induced retching. (Yes, it was that bad.)

My major mistakes: Too much water was incorporated into the the dough, the parchment paper wasn't coated with enough cornmeal, the dough was overproofed, the (baked) baking soda solution was at the incorrect ratio, and I somehow neglected the fact that I did not own a slotted spoon or strainer. Consequently, I pulled a MacGyver and used a dismantled food steamer filter as a strainer. Clever, isn't it?


The recipe for the first trial pregels was heavily adapted from the Wild Yeast Blog.

Why the heavy adaptation, you ask?

Well, most bagel recipes I've happened upon requires a sturdy mixer---and I don't have a mixer. Second, one of my objectives was to eliminate the tang in my sourdough bagels. Third, it's approaching rainy season where I'm located and the humidity, as well as the temperature, has soared. (For the past several weeks, the average room temperature of my apartment has hovered around 33C  / 91F.)

For these stated reasons, I had to adjust the original recipe. 


Two weeks ago I conducted the second trial. Much, much better, but worst in other respects. In summary, the pregels, amongst other bagels, were underproofed, slightly underspiced, and too chewy.

If you're curious, I taste-tested the following variations: salted and unsalted pregels, (emmental) cheese pregel, plain honey bagel, and seeded honey bagels (topped with poppy and/or sesame seeds).


In terms of baker's percentages, the hydration of the second trial dough was approx. 55 to 56%, whereas the hydration of the first trial dough was 57 to 58%. Such a seemingly minor change in hydration transformed the bagels from moist and tender to very stiff and chewy.


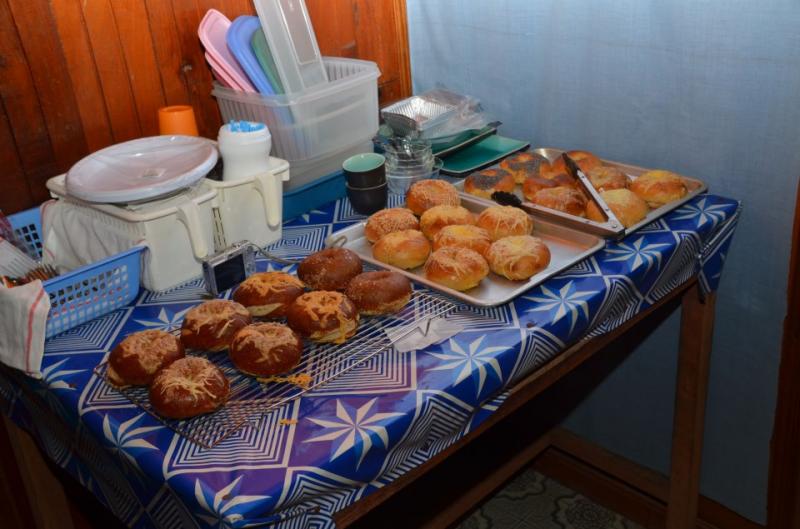
Last Sunday I executed the third trial of the pregels, to be served to the party. Expectedly, I encountered a handful of problems.

Never had I handled and baked over 4kg / 8.8lbs of dough in a single day, and never had I operated a gas oven (based in the hostess' house). Moreover, because the gas oven could only accomodate 4 bagels at a time, due to its small size, I brought along my countertop oven to hasten the process. 

One compact kitchen, two operating ovens, a pot of boiling water, high humidity, and room temperature at above 30C / 86F. Metaphorically speaking, I was a frantic salamander encased in my own sweat.


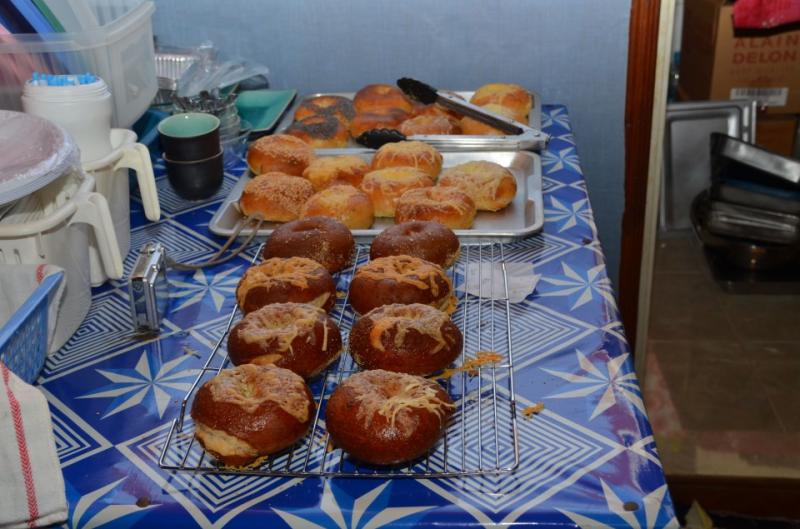
Sharing the cost of several cheeses as bagel toppings, we purchased and taste-tested the following cheeses: mild cheddar, emmental, gruyere, young gouda, edam, port salut, and cantal jeune. In addition to that, we had Philadelphia cream cheese on hand, homemade honey-peanut butter, Austrian libtauer (spicy cheese spread), French butter, and salami.

Funny thing, as I was tending to the last batch of bagels in the ovens, I instructed members of the party to help themselves and commence eating. What was initially a room filled with chattering became dead silence... for a solid thirty seconds. Enticed by this peculiarity, I peeked out of the kitchen door.

"Zita... This is the best bagel I've ever had."


RECIPE

Makes approx. 32 bagels

Starter:

  • White sourdough starter, 55% hydration [33 g]
  • Water [241 g]
  • All-purpose flour [438 g]

Spice Mix:

  • Caraway seeds
  • Fennel seeds
  • Coriander
  • Black peppercorns

Soaker:

  • All-purpose flour [1,849 g]
  • Medium rye flour [205 g]
  • Vital wheat gluten [82 g]
  • Sea salt [41 g]
  • Spice mix, Lightly ground [12 g]
  • Water, Iced, Strained [1,150 g]
  • 100% pure honey [103 g]

Final Dough:

  • Starter [657 g]
  • Soaker [3,442 g]

Baking Soda Solution:

  • Water [1,500 g]
  • Baking soda, Baked [75 g]

Honey Water Solution:

  • Water [1,500 g]
  • 100% pure honey [20 g]

Topping:

  • Coarse sea salt
  • Poppy seeds
  • White sesame seeds
  • Various cheeses

Instructions:

Caution: Variations in branded products, ingredient amount, room temperature, humidity, altitude, tools and equipment, techniques and methods will affect the outcome of your bagels. Extending the de-chilling or bulk fermentation period is highly advised.

  1. Bake baking soda at 150C / 302F for one hour; store in airtight container
  2. Prepare starter; mix ingredients until combined; rest at above room temperature for 12 hours
  3. Prepare soaker; mix ingredients until combined; chill 10 hours
  4. De-chill soaker; rest at above room temperature for 2 hours
  5. Mix starter and soaker until combined; bulk ferment (rest) 2 hours at above room temperature
  6. Knead dough by hand for 5 minutes; bulk ferment (rest) 2 hours at above room temperature 
  7. Knead dough by hand for 5 minutes; bulk ferment (rest) 2 hours at above room temperature 
  8. Divide dough into 32 equal portions (approx. 125 g each)
  9. Rest 5 minutes to relax gluten, if necessary
  10. Shape dough into bagels; transfer onto cornmeal-dusted parchment paper
  11. Preheat oven at 200C / 392F for 1 hour or more
  12. Proof (rest) 1 hour at above room temperature
  13. Prepare baking soda or honey solution; pour baked soda or honey into boiling water
  14. Boil dough 10 seconds each side; drain 30 seconds on wire rack
  15. Transfer dough to parchment paper
  16. Add topping (excluding cheese)
  17. Bake at 200C / 392F for 30 minutes, rotating at 15 minutes (steaming not necessary)
  18. Add cheese 10 minutes prior to baking completion
  19. Cool for at least 30 minutes on wire rack

If you have any suggestions or feedback on how to improve my recipe, please feel free to post. Thank you in advance and have a jolly baking. :)

Zita 

Pages

Subscribe to Recent Blog Entries