The Fresh Loaf

A Community of Amateur Bakers and Artisan Bread Enthusiasts.

Recent Blog Entries

cranbo's picture
cranbo

There's quite a few good tutorials on this on TFL, but tons of lousy ones online, but I thought I would add my own. Mine is a bit different than others in that it focuses on maintaining warm temps throughout the starter creation process. I believe this is key to establishing good yeast and bacterial multiplication and a healthy starter ecosystem. It also focuses on just using flour, water, time and temperature to build a starter. No sugar, potatoes, honey, (heaven forbid) commercial yeast, other fancy stuff. Be patient, pay attention (look, smell, taste, and take good notes) and you will be rewarded with a strong, tasty starter. 

You'll need:

  • A quart-sized Ziploc bag (or other clear plastic or glass container)
  • A bowl (optional, to contain the Ziploc bag in case it leaks) 
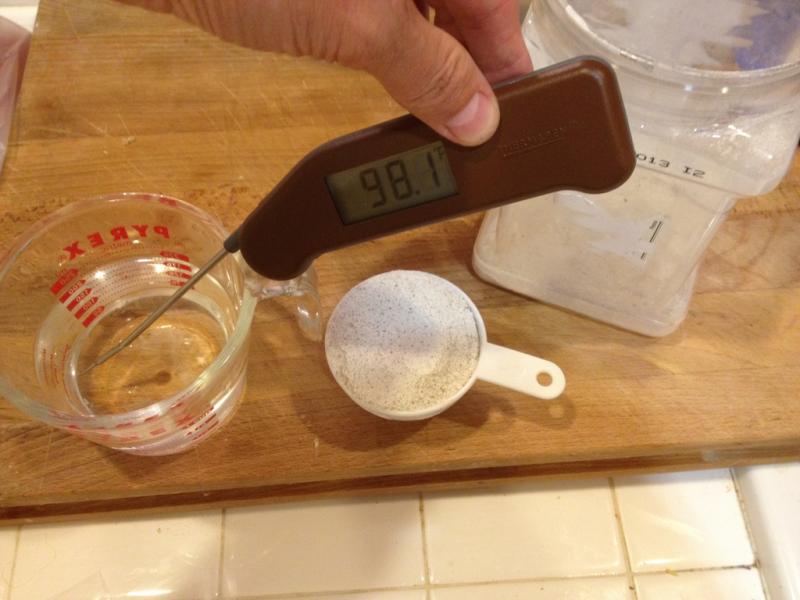
  • An instant read thermometer (that provides accurate temperature between 60 - 110F) 
  • Whole wheat (or rye) flour (organic is nice but not required)

Day 1

To the Ziploc bag, add: 

  • 1/2c whole wheat (or rye) flour 
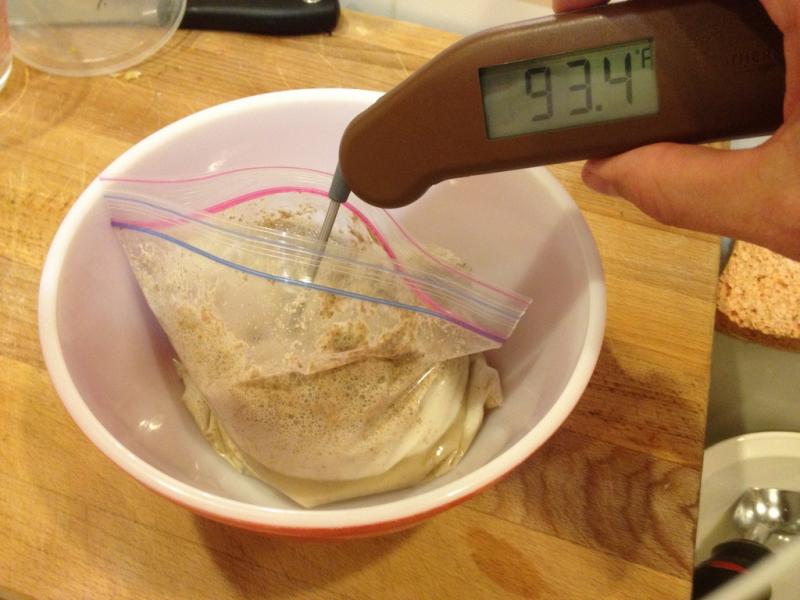
  • 1c very warm water (98F) 

Thermometer in starter

Get as much air as you can out, zip it up, and squish the mixture around. 

sourdough starter in ziploc bag with flour

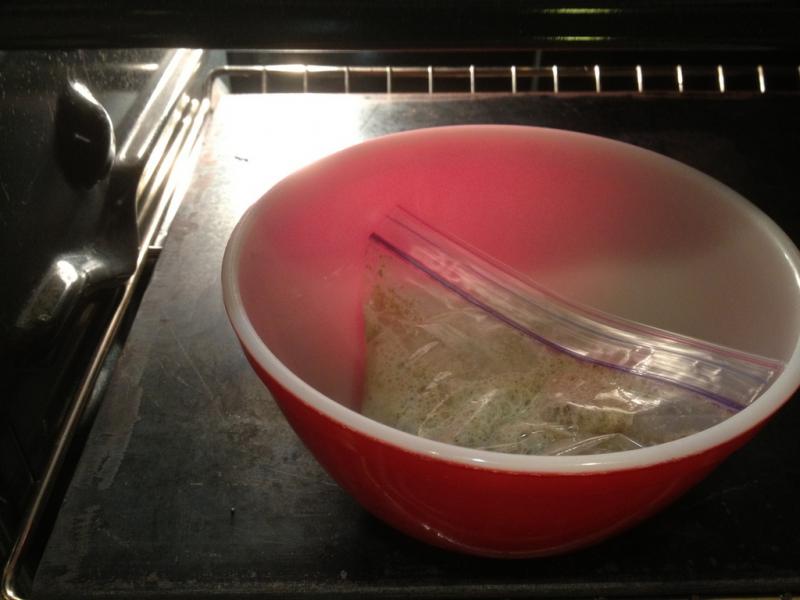
Now put it in a very warm place (but not in direct sunlight!) between 85-99F...this is important. If your house isn't warm enough, you can place your starter in your oven with the oven light on. Or you can use a heating pad. Use your thermometer to check the ambient temperature where you are keeping it. You don't want it to get hotter than 100F, otherwise this has a negative impact on yeast and lactic acid bacteria development: any hotter and you risk killing them.

starter ziploc bag in ceramic bowl in oven with light on

Let the Ziploc rest in this warm place for 24 hours. Relax and congratulate yourself...you've taken your first steps towards a healthy starter. 

Day 2

Your starter might look fizzy or foamy today. That's good; if it doesn't, don't worry about it. It's time for its first feed. Beware, it may smell vomit-like and be gag-worthy. Don't sweat it, this is normal; pinch your nose or breathe thru your mouth if it bothers you. 

sourdough starter day 2, foamy and smelly

To the Ziploc, add: 

  • 1/2c whole wheat (or rye) flour

day 2 sourdough temp reads 93.4F

Again, squeeze the air out, seal the bag, then squish the mixture around again. Let it again sit between 80-99F for 24 hours. 

Day 3

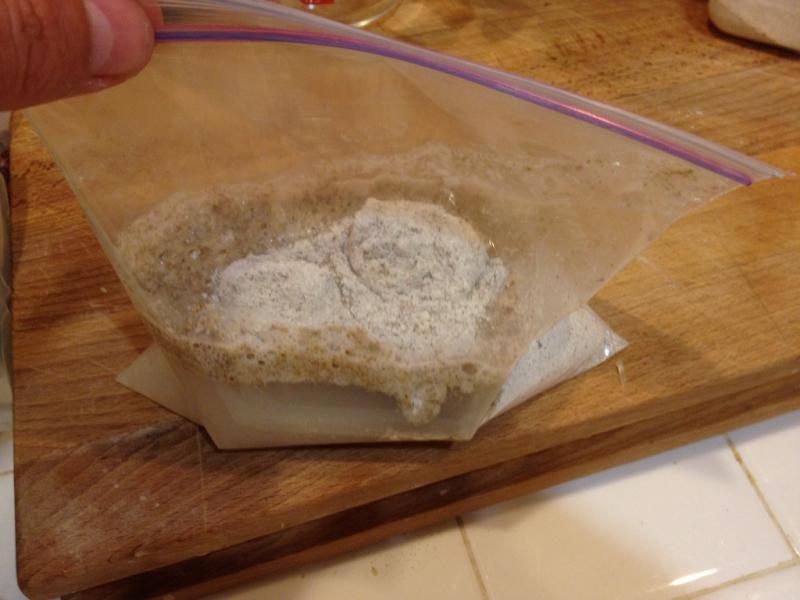
Give the bag 1-2 shakes to distribute mixture.  Check how it smells. Should be somewhat less vomit-like at this point. If you're lucky, it may start to smell a little vinegar-like, or like sharp cheese (like Parmigiano), or beer like. If it still smells vomit-y, don't worry about it. Over the next 2-3 days, with subsequent feedings, this smell will pass. 

day 3 sourdough starter, puffy and smelly

liquid separation on day 3 sourdough

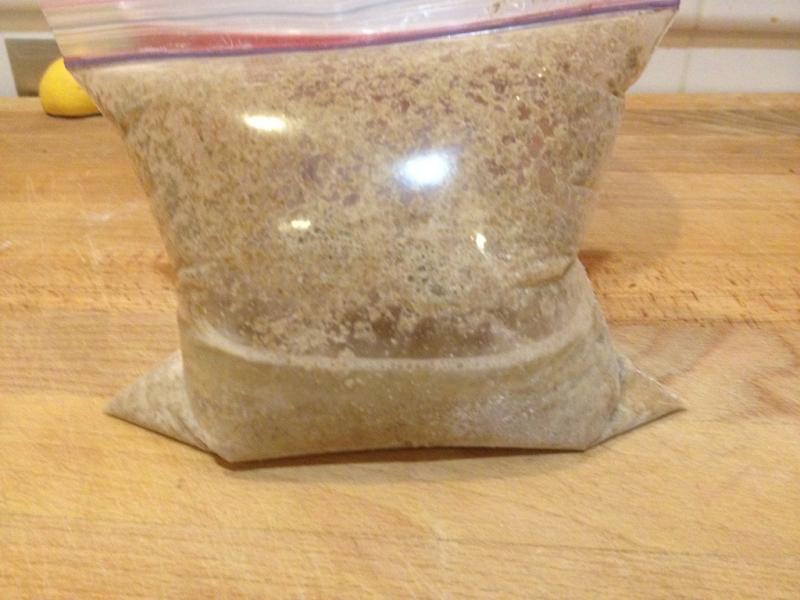
The mixture might look separated, as in the above photo. That's OK, don't sweat it, just give the whole thing a couple of shakes to distribute the mixture again. Now reserve 2 tablespoons of the starter, and dump the rest out down the drain or in the trash.

To the emptied Ziploc, now add:

  • 2 tbsp of the reserved starter
  • 1/4c. warm water (98F)
  • 1/2c. whole wheat flour 

Seal the bag again, squish it around, let it sit at a comparatively cooler (but still warm) room temp (75-85F) for 24 hours. 

Day 4

Today your starter may be starting to show signs of life. This is when you start your regular feed cycle. It's also a good time to transfer your starter to a new container, like a large mason jar, or a plastic quart deli container, or other plastic container. Just don't seal the lid tight, it could pop! 

From here on our, you want to feed once or twice per day, as follows: 

  1. Toss all but 2 tbsp of your starter in the trash
  2. To your reserved starter, add 1/4 c. warm water (85-90F), and stir to combine
  3. Feed it 2/3c. whole wheat flour. 
  4. Store it at warm room temp (70-85F) 

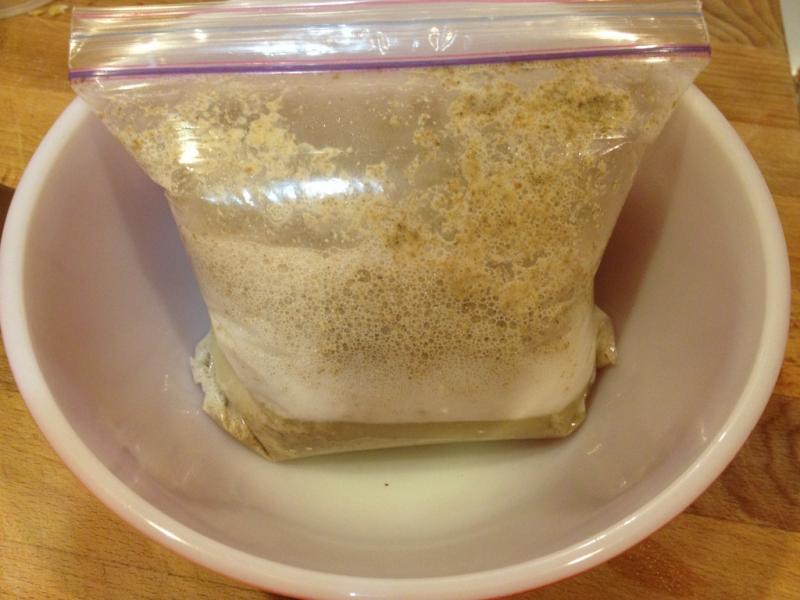
Always try to feed your starter at the same time of day. For this and subsequent feedings, your starter will look pretty thick and pasty, like this:

Day 5, 6, 7: continue feed in the same way as described in Day 4 above.

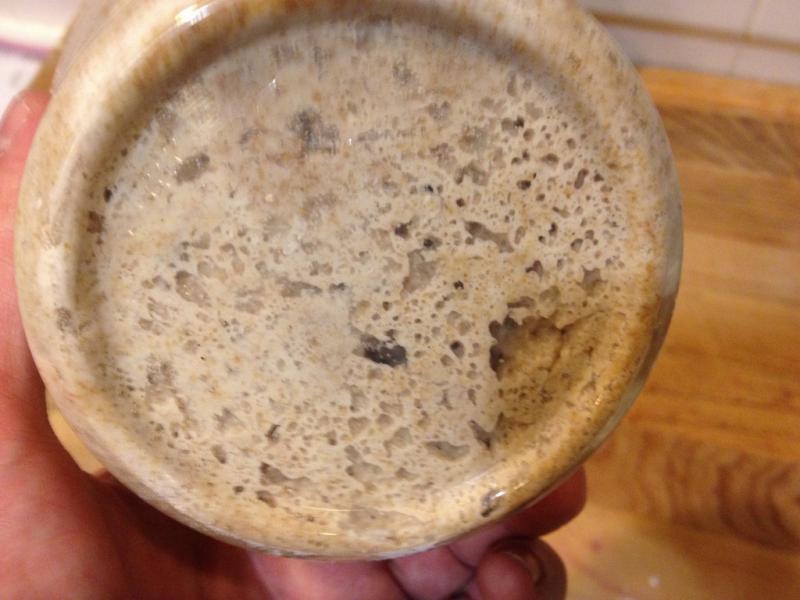
This is what mine looked like on Day 7. Notice the nice air bubbles and pockets visible on the side and bottom of the container: this means your starter is active and ready to use. Don't worry if this doesn't happen for you on Day 7. Be patient, and keep going (as directed) through Day 11, and in that time you will have an active starter that looks like this. 


ready to use, bubbly sourdough starter

Day 8, 9, 10: feed in the same way as Day 4. Your starter should be pretty active by now. Start keeping track of how long it takes for the starter to double. Record the time you feed, and how much it rises. You are aiming to get it to double within 4-6 hours. When it does this, the starter is ready to use. 

Day 11: you can switch to feeding with all-purpose flour or a 50/50 combo of whole wheat and all-purpose flour, if desired. Whole wheat will give a more sour flavor to your starter.

By this point your starter should be quite active and ready to use in your recipes. It will be more active if you feed it 2x per day. It will be more active if you keep it at a warmer room temp (between 75-80F). If you only feed it once per day, it will generally take much longer to leaven your bread. 

Frequent Issues or Problems:

If you ever get black or fuzzy mold, scrape it off, and save a tablespoon or two of the clean starter. Then transfer it to a clean container and feed it. 

Don't store your starter in the fridge. You can if you have to (it is more convenient if you're not baking), but it will change the flavor. If you do, pull it out of the fridge 2 days before baking, and feed it at least 2x over those 2 days before baking. 

After Day 4, you can feed smaller amounts if you're concerned about waste. You can reserve 1 heaping tablespoon of starter, 2 tbsp water, and 1/2c. flour for your daily (or twice daily) feeds. 

Problems? Successes? Questions? Comments? Post them here. 

trailrunner's picture
trailrunner

In my other post I showed the lasagna that I made from sourdough pasta. My husband is the pasta maker and I turn it into dinner...so it is a joint effort. It makes the most remarkably tender and flavorful pasta. I use what ever white starter I have  . Mine is usually at 100% hydration. One very nice thing about the SD pasta is its keeping quality in the fridge after you let it dry on the counter. It will last easily for a week if you wrap it well. We make extra and then dry on the counter on cloth towels and then store in fridge to be eaten with various toppings. Do cut to desired shape though before you dry it. 

286 g  "00" flour ( if you only have AP that works also) or use 1/2 and 1/2 semolina-AP 

3 large eggs

1T EVOO

1/4 c starter 

4g  kosher salt

this made 17 1/2 oz pasta. Depending on starter hydration you made need a few drops of water but you don't want the dough too wet. Should just hold together. R puts the flour on the cutting board and stirs all the liquid into a well in the center. He then uses our pasta machine to knead and roll it out and to cut the spaghetti..he cuts the lasagna by hand. Next time he makes it ...which will be this week as we have company coming I will get more detailed pics..the ones I had are  in a different computer iphoto that is with my daughter who is out of town. c,

Here are some pics : 

 photo IMG_3816.jpg  photo IMG_3818.jpg

dmsnyder's picture
dmsnyder

I like pizza quite a lot, but my wife loves it. She told me last night that Pizza is the one food she can “over-eat.” I could not start to list the foods I will predictably over-eat given the opportunity, but my wife has this super-human self-control. So this confession tells you that pizza is really special to her.

I've made some pretty good pizze and some not so good. Last night I made the best pizza I've ever made by a long shot. In fact, I do believe it was the best pizza crust I've ever eaten.

The crust was based on the “Overnight Pizza Dough with Levain” from Ken Forkish's Flour Water Salt Yeast. I say “based” because, while the ingredients and procedures were pretty much as Forkish prescribes, the timing of many steps was different. Some of those differences were planned, and some were …. accommodations. I'm not going to claim that the crust turned out so well because of my baking genius, but I am going to try to capture what I ended up doing so I can do it again … on purpose next time.


Total dough

Wt (g)

Baker's %

Levain


10*

Caputo 00 flour

980

98

Giusto's fine whole wheat flour

20

2

Water

700

70

Salt

20

2

Total

1720

172

* Percent of total flour that is pre-fermented.


Levain

Wt (g)

Baker's %

Mature, active levain

25

10

Caputo 00 flour

100

80

Giusto's fine whole wheat flour

25

20

Water (90 ºF)

100

80

Total

250

190


  1. Dissolve the levain in the water.

  2. Add the flours and mix thoroughly.

  3. Ferment at room temperature until expanded by 2 to 2.5 times. (Note: Forkish specifies fermenting for 8 to 10 hours. My levain was ripe in 6 hours. So, I went to step 4.)

  4. Refrigerate overnight or for up to 2 days.


Final dough

Wt (g)

Caputo 00 flour

900

Water (90-95 ºF)

620

Fine sea salt

20

Levain

180

Total

1720

  1. Take the levain out of the fridge 1-2 hours before mixing the final dough.

  2. Mix the water and flour to a shaggy mass and allow it to rest, covered, for 20-60 minutes (autolyse).

  3. Sprinkle the salt over the dough and add 180 g of the levain divided into 4-6 pieces. Mix using the “pinch and fold” procedure described by Forkish.

  4. Bulk ferment for 5 to 14 hours, or until the dough has expanded 2 to 2.5 times. Do stretch and folds at 30 minute intervals 2-4 times . Then just let the dough ferment undisturbed. (Note: I know this time range (5 to 14 hours) sounds absurd. Forkish's instructions are to ferment overnight for 12 to 14 hours, but my dough had doubled in 5-6 hours and was very bubbly. If I had let it ferment for another 6 to 8 hours, I would have had soup.)

  5. Transfer the dough to a well-floured board. Dust the dough and your hands with flour. Divide the dough into 350 g pieces. (You will get 4 pieces of 350 g and one that is larger.

  6. Shape each piece into a fairly tight ball and place them in ZipLoc-type sandwich bags with a tablespoon of olive oil in each.

  7. Refrigerate for at least 2 hours and for up to 3 days.

  8. When you are ready to make your pizza/e, 2 1/2 to 4 hours before shaping the pizze, take the number of dough balls you will need out of the fridge. Let them warm up at room temperature for 1 1/2 to 2 hours. The balls should expand by a third to a half.

  9. Put the dough balls back in the fridge for the last half hour to an hour before shaping them into pizze. This is because the dough is a bit more elastic and less fragile when cold.

  10. Take one ball of dough at a time out of the fridge. Shape it. Top it. Bake it. Enjoy!


This “in and out of the fridge” stuff may seem unduly complicated. It happened because we changed our minds about going to a concert a couple times before finally deciding to stay home and make pizza. See, if we had decided to go, there wouldn't have been time to make pizza and eat it beforehand. But, in hindsight, this procedure makes a lot of sense. A longer fermentation improves flavor, but retarding the dough in the fridge was needed to prevent over-fermentation. The warm-up in Step 8. just completed the fermentation to an optimal degree. I could have just let the bulk fermentation go a bit longer – say about an hour – and then not needed Step. 8 and 9 at all.

This dough was a delight to shape. It had just the right balance of elasticity and extensibility. When baked at 500 ºF for 10 to 11 minutes, the edges puffed up beautifully. They were crackling crispy. The dough under the toppings was moderately chewy but not at all “tough.” The most remarkable feature was the flavor. It was mildly sour but very wheaty, sweet and complex. It was astonishingly delicious. My wife, who often leaves pizza crust un-eaten, actually left the center part un-eaten and ate the outer crust in preference.

How much of this was the procedures and how much the use of 98% Caputo 00 flour? That's hard to answer. I suppose I need to make this dough again using a good AP flour to find out.

I made two 10 or 12 inch pizze. One was a classic Pizza Margherita made with olive oil, fresh mozzarella, fresh, locally grown San Marzano-variety tomatoes which were par-boiled, skinned, seeded and cut into strips and fresh basel leaves from our garden, added after the pizza was baked.


The other pizza was topped with a heavy spread of good olive oil, fresh, finely chopped rosemary and fleur de sel. After baking, the top was rubbed with a cut San Marzano tomato which was then hand-shredded and spread over the pizza. (Note to self: Lose the salt, if you don't want Susan to complain. Substitute thinly sliced garlic.)


Well, we do have 3 pizza dough balls left, including a 380 g one. I am going to make a potato pizza that's been on my “to bake list” for a few years, ever since I first read about it in Leader's Local Breads then again in Maggie Glezer's Artisan Breads.

Yum!

Happy baking!

David

Submitted to YeastSpotting

breadsong's picture
breadsong

Hello everyone,

It’s been a summer of so much sun here in the Pacific Northwest – have tried to capture the season with some pictures –  flowers, light and beautiful sunshine.


the center of this flower seemed like the sun's rays...


I’ve been enjoying reading Hanne Risgaard’s book, Home Baked.  Ms. Risgaard’s breads and baking are as lovely to look at her writing is to read; the story of Skærtoft Mølle and Mr. Hamelman’s beautiful foreword adding to this beautiful book of breads.
The photos of the Danish summer landscapes are evocative and so pretty, the gorgeous light-filled images capturing the beauty of the grain, the fields and landscapes, and the flowers…

There are so many lighter foods to enjoy in summertime, but the temperatures in the kitchen here have been in the low 80’s, with some humidity too – rye time! Looking at this book again, I really wanted to bake some of Hanne’s Danish bread …this is her Spelt Rye Bread.

The Spelt Rye, in Ms. Risgaard’s method, is raised with old dough.  The first time I made this bread, I re-worked the formula to use a liquid rye levain (trying to keep the total amounts of each ingredient in line with the original formula) - and made extra dough, so I’d have ‘old dough’ for a second bake.

First bake with liquid rye levain                                  Second bake with old dough
400F oven reducing to 355F                                        500F oven reducing to 355F  


Here are the ingredients, and quantities used:
(Reprinted from Home Baked, copyright 2012 by Hanne Risgaard, used with permission from Chelsea Green Publishing (www.chelseagreen.com))

First bake with rye levain (1750g dough for 9x4x4 pan, 400g dough reserved as old dough for next bake):

The 400g of old dough was based on the recipe in Hanne’s book, which makes a larger bread.
Here’s the formula re-sized (1750g dough for 9x4x4 pan + 339g old dough):


Second bake with old dough:


Crumb, from first bake:

With the second bake, I was delighted with the oven spring – 
not sure if it was due to the hotter start in the oven, or a really happy dough using old dough!
(no crumb shot for this one, this loaf was a gift)

The flavor was really robust and very complex in the version using old dough, but the first version using liquid rye levain tasted pretty good, too :^)  Both were very hearty, and delicious with the seeds.

Have baked Ms. Risgaard’s Pumpkinseed Buttermilk Rye a couple of times, too.  Another  wonderful formula, the buttermilk adding richness; and love how the top crackles so attractively during baking.
  

One more sunny picture, this time of grain ripening in a local field  –
a promise of a good harvest and more good bread to come!
                                               

Happy baking, and happy summer, everyone!
:^) breadsong

Submitted to YeastSpotting 

golgi70's picture
golgi70

So last week the cool guy who trades me goat cheese requested the sesame levain I made on week three.  I was hesitant as I didn't intend to go back and replicate or improve any recipes but I reconsidered quickly and thought it would be nice to fulfill a request.  I had to make a few changes though.  I cut the lemon idea entirely as I dont' want to find out how much zest I'd need to actually taste it and the loaf was so good when I couldn't taste it.  Secondly I doubled the levain and reduced the final dough ingredients to keep the formula the same.  Finally I used Kamut in place of the spelt.  It's been nearly 2 1/2 months since I made the first variety which I recall being very good but honestly I can't really compare them as I just don't remember the taste well enough.  As far as the dough goes: This dough came out much nicer.  The previous dough had some lumpy flour which I didn't not have a problem with this time.  I actually backed off and gave 1 less stretch and fold and allowed a 4 hour bulk ferment to help with development.  I think this was achieved.  The dough was soft and smooth with great extensibility   It sprang in the oven very nicely and has a lovely shiny crumb. Looking at the previous pictures and the spelt certainly made the loaf browner than the kamut and the kamut added some more red tones.  

The formula can be found at Farmer's Market Week 3 with few revisions:

1)  Double the levain and remove those numbers from the final dough.

2)  Cut the lemon zest.  

3)  replace kamut for spelt 

4) only 2 stretch and folds at 45 minutes and a 3:45 bulk fermentation. 

Happy Baking


Josh

Farmers market is booming with great stuff now.  So they were more giving than usual.  We got sweet corn, brocolli, zukes, carrots, baby cabbage, fennel, variety of pluots, the same most amazing pears (last of em and the new varieties are next), heirloom tomatoes, spring onions, spring mix lettuce, local mushrooms (shitake and maitake), 

Now to build a levain for some 30% ryeguettes to bake tommorrow

Happy baking


josh

pmccool's picture
pmccool

Maybe this should be called Hamelman's Pain au Levain, mostly, because there were a couple of small excursions from the formula presented in Hamelman's Bread, 2nd Edition. 

Having enjoyed several days' worth of the Rustic Pumpernickel from Inside the Jewish Bakery, I was ready for a change of pace.  My starter was in need of a good feeding, so I have it a healthy dose of rye flour and water and left it to its own devices overnight.  The next morning, it was ripe and ready for action.  Gotta love these warm summertime temperatures.  At this point, I had no real plan, just a vague notion of something not-pumpernickel.  Remembering that I hadn't baked from Hamelman's book for a while, I started leafing leafing through it and came across the Pain au Levain bread.  Just the ticket, since it has a small portion of rye flour in it.

Since I had fed my starter with rye flour, I calculated that I would have a bit more rye than the formula called for even if I didn't add any in the final dough.  No problem.  It would still be good.  And, the bread flour that I used was the Great River Milling Unbleached Wheat Bread Flour which still contains 20% of the bran.  Again, no problem; just more flavor.  The other thing about the GRM flour is its protein content: 14%.  That's much higher than any French-style flour's protein content.  I mixed the levain, covered it, and left it to ferment at room temperature.  It was ready for use about 3:30 in the afternoon.

Hamelman assumes a room temperature bulk fermentation and final fermentation.  As I looked at the clock, and at the instructions, I decided that I really didn't want to stay up late.  That led to the other deviation: a decision to retard the dough during its bulk ferment.  The rest of the process was pretty much by the book.  The flour and water were mixed by hand and allowed 60 minutes to autolyse.  Then the levain was mixed in.  That was a bit trickier, because the dough was stiffer than the levain, but the dough came together after the initial goopy phase and got even better after the salt was added.  The texture was still fairly firm, so I worked in another 3-4% of water.  The absorptive capability of the flour meant that I still didn't have a soft dough but it felt quite moist and tacky so I called it good enough.  That turned out to be a good decision.

I allowed the dough an hour of bulk fermentation at room temperature, then put it into the refrigerator until the following afternoon, almost 20 hours later.  The dough hadn't doubled in volume, so I gave it an hour or so to warm up somewhat, then shaped it into two batards.  Each was allowed to proof on a piece of parchment paper, covered with plastic.  The dough was firm enough that I did not provide side support for it.  Indeed, most of the doubling was in the upward direction, not the horizontal direction, which is pretty unusual for a sourdough.  When it had grown by perhaps 80%, I preheated the oven with a stone and a steam pan.  After the oven reached temperature, I boiled water and poured it into the steam pan.  The loaves were then slashed and placed on the stone to bake as directed.

During the bake, the loaves continued to expand upwards, but more sideways than they had during the final fermentation.  The scores opened nicely and gave a good ear.

The crumb is less open than might be expected for this style of bread and this level of hydration.  I think that the amount of kneading that was required to incorporate the levain had an effect, as did the high protein content of the bread flour.  I'm not at all unhappy, since the primary use for the bread is in sandwiches.  That means I don't have mayonnaise or mustard dripping into my lap while eating.

The crumb is very moist, probably attributable in part to the rye flour's moisture-grabbing traits, plus the additional water that I added to offset the dough's stiffness.  More would have been too much, so I am glad that I stopped when I did with the extra water.  The color is a bit darker because of the additional bran content not usually seen in a bread flour.  The crust, which was initially quite hard, has softened considerably as the moisture within the loaf has redistributed.  The flavor is excellent, combining wheat and rye notes with a gentle sourdough tang and the toasty/nutty/caramel notes from the crust.  My hat is off to Mr. Hamelman for devising such an enjoyable bread.

Paul

evonlim's picture
evonlim

baked this yesterday... yes, it is for my friends. this time they dropped by my place when i was baking. they were delivering an early birthday cake for me!! 

and i treated them a freshly baked bread from the oven!


home baked blueberry cheesecake :) what a surprised!


 http://www.epikouria.com/issue3/article1-red.php

Saffron "red gold". Saffron threads may also be toasted. Once toasted, these threads can be ground into a powder.


made smaller loaves.. great for giveaways 


had so much fun, drinking dark German beer, long black coffee.. eating cake and fresh hot crunchy and soft bread.

it was a beautiful afternoon with friends.

evon


Skibum's picture
Skibum

I used a small amount of organic rye flour, perhaps 10% in my white bread flour starter and that seemed to kick things up a bit.I have reduced the proofing time to 40 minutes on the batard and while a little easier to score, my lame work still needs work.  Next bake I will try a 35 minute proof for the batard/ baguette.

The boule contains about 5% whole wheat and organic rye and it is a tasty loaf, but I liked my last bake with 10% WW and 15% organic rye better -- better flavour, greater volume in less time, better oven spring and my scores held their ears on the last one.  Okay, I was a little sloppy getting the loaf into the hot DO using parchment paper and oven mitts and need to work on that as well.

Perhaps the best part is that the flavours I am getting from my SD loaves is just amazing.  I also have some VERY happy neighbours as I have been in full on experiment and bake mode and simply cannot eat all I am baking!  The long slow SD process, sorry the DMAN process I have been using really brings out the flavours of the grains, very much P. Reinhart's thesis in using time to bring out flavour and explained som much beter by dabrownman!

Tomorrow I am baking up supplies for my upcoming BC road trip.  A couple of nights in Golden with friends to celebrate my birthday Monday and paddle the Kicking Horse River Tuesday, Wednesday to Sicamous for a couple of days beach time and then up to paddle the Clearwater River and have a look around.

Happy baking folks!  Brian

Wingnut's picture
Wingnut

All three loaves are 20% Rye Sourdough.

one with Caraway Seeds, one with Fennel Seeds…..

and one with Rolled Oats on top…..

Crumb Shot…...

Cheers,

Wingnut

dabrownman's picture
dabrownman

Not long ago Varda did a series of posts on her quest to recreate a non SD Pratzel’s Tzitzel.  She had the good fortune of talking to the original owners about the formula for this bread and gained some good insight.  I though I would do a SD one just to be different and I prefer SD any day, any way to yeasted breads


Varda has been modifying her formula as time goes on too as I found out when I messaged her about her recipe.  I think the key to the bread is what flours are used.  Since we can’t get the exact flour, even if we knew what it was exactly, I just sort of tried to home mill a mix of flours that I though might be fairly close and add in some WWW to balance things out.


The formula has the equivalent of 100% whole grains when including the malts, 40% rye and 40% wheat with the flours being home milled and sifted to 75% extraction and 20% additional being KA white whole wheat.  We used 4 times more aromatic seeds, mainly caraway but some anise, coriander and fennel too.


40 g of the sifted out bran and endosperm were used for the 3rd stage feeding of the levain build which make up the whole grain equivalent of 170 g when adding 10g g of malt to the whole grain - if my math is right.


Varda’s latest recipe has 41% un-sifted home milled rye mixed with KA’s Sir Lancelot at 80 % hydration with .8% caraway seds.  She says that Taitzel has a lower hydration than one would suspect.  I don’t have any high gluten wheat flour so I made my own by using the milled and KAWW wheat and adding 15 g of VWG to get the protein up a bit.  I didn’t bother to calculate what it might have been protein wise.


Varda used 80% hydration for her Tzitzel but I upped it to 85%.   The 80% home milled flours are very thirsty and at 80% hydration the dough was too stiff to do any decent slapping and folding.  Plus the extra 25 g that was added after the autolyse, was used for a 2nd hydration and to get the pink Himalayan sea salt  incorporated – so hold back some liquid to do this.


The stiff (66% hydration) rye and whole wheat starter had been in the fridge for a week.  We used 15 g or it for the levain.   The first 2 feeding were on 3 hour intervals and it doubled after the 2nd feeding   We made the last feeding of bran and 1 hour later it had risen 25% when we refrigerated it for 24 hours to improve the sour.


We want a higher than normal amount of SD levain, 20% this time, since it is the acid that keeps the rye enzymes in check and when doing a long retard with rye  it pays to up the levain and don’t let the dough sit out on the counter too long.


When we retrieved the levain from the fridge to let it warm up and finish the doubling for the 3rd stage, we started the autolyse, which included everything else but the aromatic seeds, the salt and the held back 25 g of water.   We did sprinkle the salt on top of the autolyse dough ball though.


Even leftover Pad Thai looks pretty good.

Normally we would do at least a 4 hour autolyse and prefer 8 if using whole grains but, since the whole portion of the grains was in the levain we did a 2 1/2 hour autolyse which coincided with the doubling of the levain.


After squishing the held back water through the fingers in the bowl to get it incorporated and spread the salt around, we did 10 minutes of slap and folds.  After 7 minutes the dough was no longer sticking to the counter and by 10 minutes the dough was smooth and elastic. After a 15 minute rest, we incorporated the aromatic seeds with the first of (3) sets of S&F’s where one set is 4 stretches 4 folds for the compass points.


We let the dough rest 15 minutes between the S&F’s and after the last one before shaping into a batard and pulling it tight.  We rolled the batard in corn meal that was dusted on the counter as it was plenty sticky enough.  We lined a basket with a rice flour impregnated towel and then dusted the bottom with a little more core meal.


The batard was dropped into the basket, placed into a trash can liner and immediately retarded it in the fridge for 18 hours - a little longer than normal.  We planned on letting the dough rise and proof completely in the fridge and then bake it in the mini oven still cool about 45 minutes out the fridge in the morning.


This cool dough made the scoring easier and kept it from spreading too much like it would want to do at room temperature.  This plan seemed to work OK as the dough proofed well in the fridge and the mini oven only takes 15 minutes to get to 500 F.


We micro waved (2) of Sylvia’s steaming Pyrex cups containing dish rags and half full of water until, they were boiling.   The bread was un-molded diagonally on the mini oven’s vented, broiler pan top that had been covered with parchment paper.


The batard slashed and the steaming cups were placed on the opposite open corners of the broiler pan the whole thing was slid into the mini.  A 1/2 C of water was tossed into the bottom of the oven as the door was closed to give the bread a nice burst of initial steam.


We turned the oven down to 475 F after 2mintes and allowed the batard to steam an additional 13minutes.  At the 15 minute mark, we removed the steaming cups returning the bread to the oven with a new temperature of 425 F, convection this time.

The baby apprentice is all ready for a nap under her blankey 

In 10 more minutes it was done and read 205 F on the inside.  Not the prettiest loaf of bread on the outside so we hope it tastes better than it looks.  Have to wait to slice it since it is a rye and they need time to redistribute the moisture.  Couldn't wait and wanted this bread for a lunch sandwich today.   It tastes like a very good deli rye.  i like the fact that it is over a third whole grain and has 40% rye instead of the usual 30%.  The sour really comes though too and the aromatic seeds are there in the background telling you this is a typical American S Rye.  The crumb is soft, most and open but the taste is it's calling card.

A nice breakfast of apple wood smoked bacon, a sliced peach and plum, a few strawberries, a couple pieces of this fine bread toasted with medium caramelized, minniola marmalade and a fine Denver omelet of mushrooms, red pepper and green onion with habanero jack cheese inside and Colby jack on the outside.

We like this bread very much but have to say we prefer the Prince George's Chacon that  a good stout for the liquid and rye sprouts.  Add in the whole grains and some aromatic seeds and the Royal Baby Chacon would be over the top.  This bread does not remind me of Prazel's Tzitzel though because it is a sourdough - and on a whole different level with the home milled flour.

Formula


Build 1

Build 2

 Build 3

Total

%

Multigrain SD Starter

15

0

0

15

3.10%

75% Extraction Rye

16

24

0

40

8.26%

 25% Sifted Rye and Wheat Bran

0

0

40

40

8.26%

Whole Wheat

4

6

0

10

2.06%

Water

20

30

40

90

18.58%

Total

55

60

80

195

40.25%


Rye & WW Levain


%


Flour

98

20.12%


Water

98

20.12%


Hydration

100.00%


Levain % of Total

20.25%


Dough Flour


%


75% Extraction Rye

125

25.80%


White Whole Wheat

165

34.06%


75% Extraction Wheat

97

20.02%


Dough Flour

387

79.88%


Salt

9

1.86%


Water

336

69.35%


Dough Hydration

86.82%


Total Flour

485

100.00%


Water

434

89.47%


T. Dough Hydration

89.47%


% Whole Grain Flour

100%


Hydration w/ Adds

85.08%


Total Weight

963


Add - Ins


%


Caraway 9, Coriander, Anise & Fennel 2

11

2.27%


VW Gluten

15

3.10%


Red Malt

5

1.03%


White Malt

5

1.03%


Total

36

7.43%


Pages

Subscribe to Recent Blog Entries