Please see here and here to learn more about concentrated lactic acid sourdough (CLAS).
It's been a busy week as I've explored a different approach to making panettone. I made Chef Bigot's panettone before, but this time, I've skipped the starter upkeep, pH checks, and avoided all the unnecessary hassle. I can bypass these tedious tasks thanks to CLAS, offering both efficiency and an exceptional flavor profile, distinct from traditional sourdough. This refined approach also involves proving and baking panettone in the bread machine, giving me more freedom to prioritize what truly matters - caring for my loved ones and myself. Using this approach, making panettone is a breeze—I can make it whenever I want, just like baking any other bread, and enjoy it daily. It is also adaptable to any panettone recipe and consistently works well with recipes from chefs like Giorilli, Pepe, and others.
Most ingredient ratios in my formula align with Chef Bigot's, and I'll specify any deviations from the original recipe (marked as 'OR').
Ingredients
Pre-dough
A.
3% WW flour in WW CLAS (OR 12% pre-fermented flour in starter)
59% Beehive AP (OR 62% AP flour)
38% Giusto Ultimate Performer (OR 38% bread flour, including the flour in starter)
4.5% water from WW CLAS
30.5% water
1% gold yeast (OR nil)
B.
39% sugar
add the following gradually and alternately
C.
44% yolk
D.
17% butter
until a moist and smooth dough forms
Ferment pre-dough
using Zo's "Rise 3"
38C x 100mins
Dough
pre-dough
E.
9% butter
2% gold yeast (OR nil)
1.5% salt (OR 0.5%)
F.
1% rum
18% raisin
18% candied fruits
nil orange peel (OR 6%)
nil lemon peel (OR 6%)
Total dough weight ~570g per panettone
Mix
in the Zo by programming it for a ten-minute cycle. The paddles stir gently for 3 minutes to combine the ingredients, followed by kneading for the remaining 7 minutes.
First, combine A and B to form a dough, similar to mixing a whole wheat dough. Gradually and alternately add C and D until a moist and smooth dough is formed, typically taking around four cycles for the pre-dough. Combine E in another cycle and F in half a cycle. Mixing the dough in this order helps maintain its temperature below 27C while reinforcing its strength.
Bulk
using Zo's "Rise 1"
28C x 150mins
S&F every 30 minutes until the folds can no longer hold and the dough slips apart immediately after folding.
If baking in the oven, preheat to 356°F and position baking stones on both the top and bottom shelves.
For baking in a bread machine, prepare 3-4 layers of 'foil cups' to insulate the panettone paper mold. Note: The bread machine can only bake one panettone at a time.
Scale
~570g@
last gentle folds
place the dough in the mold
Prove
using Zo's "Rise 1"
28C x 60mins
beauty makeover - egg wash (optional)
salon treatment - blow-dry with a hairdryer
score a cross and peel the skin back
sprinkle pearl sugar
Bake
in the bread machine
Set up trivets and a (optional) stainless steel dish to support the mold with the bottom insulated by foil.
Select the dark crust setting; set the machine to bake for 70 minutes, including preheating the machine in the first 10 minutes. After 60 minutes, check the dough temperature, and if needed, leave it in the bread machine for an additional 15 minutes.
P.S.20240110
I don't use the bread machine for baking very often, so when I decided to try making panettone, I knew the first attempt might not be spot-on. I started with some foil insulation experimentation and considered using a cylindrical cake pan for the bake. But little did I know, I had overlooked a crucial detail until Precaud shared some bread machine wisdom. With that insight, I fine-tuned the plan and sealed the viewing window. The second bake turned out significantly better. Thank you, Precaud!
The updated bread machine baking procedure includes the following:
1. Sealing the bread machine's viewing window with foil.
2. Preheating the cake pan on the stovetop for about a minute before placing it in the bread machine.
3. Setting the Zo to bake for 70 minutes, with the first 10 minutes preheating the machine and the cake pan.
4. Placing a stainless steel dish in the cake pan.
5. Placing a trivet on top of the dish and using an S-shaped hook to connect the trivet to the rim of the pan.
6. Placing the panettone paper mold with the risen dough in the cake pan.
7. Rotating by gliding the hook along the rim after 20 minutes, then after 10 minutes, and again after 10 minutes, followed by rotations after 5 minutes each. Total bake time 50 minutes.
8. Checking the bread's temperature, removing it from the machine and mold, and hanging it upside down to cool.
For future bakes, I will experiment with the following:
1. Skipping the preheating of the cake pan on the stovetop.
2. Insulating the cake pan with foil.
3. Rotating the dough sooner at the beginning.
4. Checking the bread temperature sooner.
5. Reduce the baking time if needed.
Bake
in the oven
Preheat to 356F with two stones, no steam
lower to 320F after loading
320F x 20
rotate
320F x 20
rotate
320F x 5
rotate
320F x 5
Mixing pre-dough
+A + B +some C and D DT25.5C +all C and D


Mixing dough
+E


+F


grease the hands, the container, and its lid


Bulk
using Zo's "Rise 1"
28C x 150mins
S&F every 30 minutes until the folds can no longer hold and the dough slips apart immediately after folding.


Scale
~570g@


Prove
using Zo's "Rise 1"
28C x 60mins


beauty makeover - egg wash (optional), salon treatment - blow-dry with a hairdryer


score a cross and peel the skin back, sprinkle pearl sugar


Bake in the bread machine
For baking in a bread machine, prepare 3-4 layers of 'foil cups' to insulate the panettone paper mold.
Set up trivets and a (optional) stainless steel dish to support the mold with the bottom insulated by foil.
The bread machine can only bake one panettone at a time.


Select the dark crust setting; set the machine to bake for 70 minutes, including preheating the machine in the first 10 minutes. After 60 minutes, check the dough temperature, and if needed, leave it in the bread machine for an additional 15 minutes.


P.S.20240110
1. Sealing the bread machine's viewing window with foil.
2. Preheating the cake pan on the stovetop for about a minute before placing it in the bread machine.
3. Setting the Zo to bake for 70 minutes, with the first 10 minutes preheating the machine and the cake pan.
4. Placing a stainless steel dish in the cake pan.
5. Placing a trivet on top of the dish and using an S-shaped hook to connect the trivet to the rim of the pan.
6. Placing the panettone paper mold with the risen dough in the cake pan.
7. Rotating by moving the hook along the rim after 20 minutes, then after 10 minutes, and again after 10 minutes, followed by rotations after 5 minutes each. Total bake time 50 minutes.
8. Checking the bread's temperature, removing it from the machine and mold, and hanging it upside down to cool.


Bake in the oven
Preheat to 356F with two stones, no steam
lower to 320F after loading
320F x 20
rotate
320F x 20
rotate
320F x 5
rotate
320F x 5
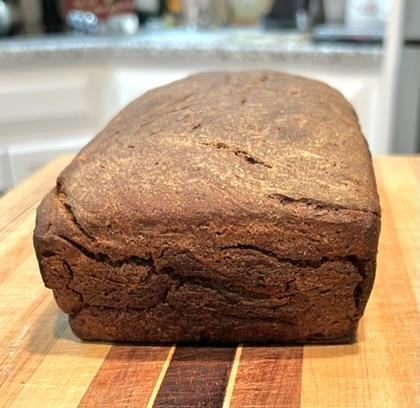
oven-baked loaves

Bread machine loaves


P.S.20240110

 bread machine loaf
  oven-baked loaf
bread machine loaf on top

oven-baked loaf cross-sections

Crumb shots - The lighting in different rooms caused the color difference in the crumb.
oven-baked loaf

bread machine loaf