Continuing our merry end of the work weekly bread bakes, we kept to or recent 100% whole grain multigrain bread formula inspired by Karin’s recent challenge. The twist this time was to limit the whole grains to Kamut, wheat, spelt and rye since we ran out of farro (einkorn).

For dough liquid we used the left over whole berry soaking water from last week’s bake and we added additional seeds of the aromatic kind: Caraway, anise, coriander and fennel. Karin also got us using them in higher percent rye breads and we thought this bread was over 20% rye so why not toss some in?

We added some honey this time because Lucy wanted to and you don’t mess with that without risking a vicious ankle attack when you least expect it. We dropped the red malt because we ran out last week and forgot to get around to sprouting and roasting any more this week Age has it’s privileges especially if you are lazy like my apprentice – who is off to the beauty parlor today and AWOL from today’s bread bake.

The starter smelled especially sour this time when coming out of the fridge. It’s been in there for 3 weeks and getting more and mote sour in the cold. We followed or usual levain build by grinding the grain for this bake in our trusty little Krup’s coffee mill and using the sifted out 25% portion of the hard bits to feed to the starter.

In this case, we ended up with 72 g of hard bits and we used 15 g of starter instead of our usual 10 g. The levain ended up being 19% of the total weigh instead of our usual 12%. Since the temperature in this AZ kitchen is now down to the mid 70‘s from the mid 80’s (after last weeks break in the weather to the mid 90’s )everything takes 25 % longer.

Our normal 3 stage 2.5 hour each levain summer schedule is now 3.25 hours each in the fall. Once the levain had risen 25% after the 3rd progressively larger feeding, it went into the fridge for a 48 h\our retard to increase the labs in comparison to the yeast by a factor of 3 which results in much a more sour producing levain.
Once the levain came out of the fridge it took 3 hours for it to finish doubling. That time was used to make the scald by simmering the berries for 25 minutes and letting them soak and by autolysing the 75% extraction flours and the rest of the ingredients less the scald.

Once the levain and the autolyse came together we did 3 sets of slap and folds, per Josh’s recent example we have been following, of 8, 4 and 2 minutes that were spaced 10 minutes apart in order to develop the gluten. At 86% hydration this was a wet dough in the beginning but not too difficult to work with after the first set of slap and folds.
We then did 3 sets of S&F’s, 4 stretches each time from the cardinal compass points, on 15 minute intervals to develop the gluten further and to incorporate the scalded and soaked berries on the 2nd set. The scaled was fully incorporated by the end of the 3rd set.


Home made bacon wrapped Ahi Tuna - Yum!

We pulled out 65 g of dough before the scald went in to use for old dough for Saturday’s pizza. We added 35 g each of AP flour and water to this whole grain old dough and let it double before making a 72% hydration AP dough for the pizza crust = which we will retard for 48 hours too.

After a 10 minute rest the bread dough was pre-shaped and then shaped into a squat oval to fit this week’s basket and into the fridge it went for an 18 hour retard. We have been using a 20-24 hour retard and the dough has been proofing to 100% in the cold so we thought a little less time would be better.

SD pancakes go well with any sides and set up a healthy, tasty lunch.

The bread warmed up on the counter for an half an hour before the mini oven was fired up to 500 F and Sylvia’s steaming cups were heated in the microwave which takes 15 minutes. The dough was un-molded onto the top of the mini’s vented broiler pan that was covered with parchment paper.

Mis en place for Thai green chicken curry.
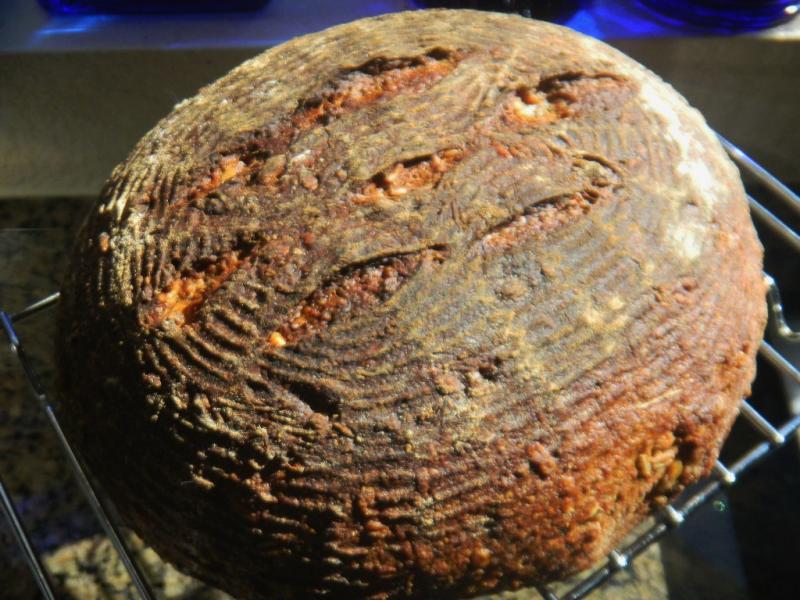
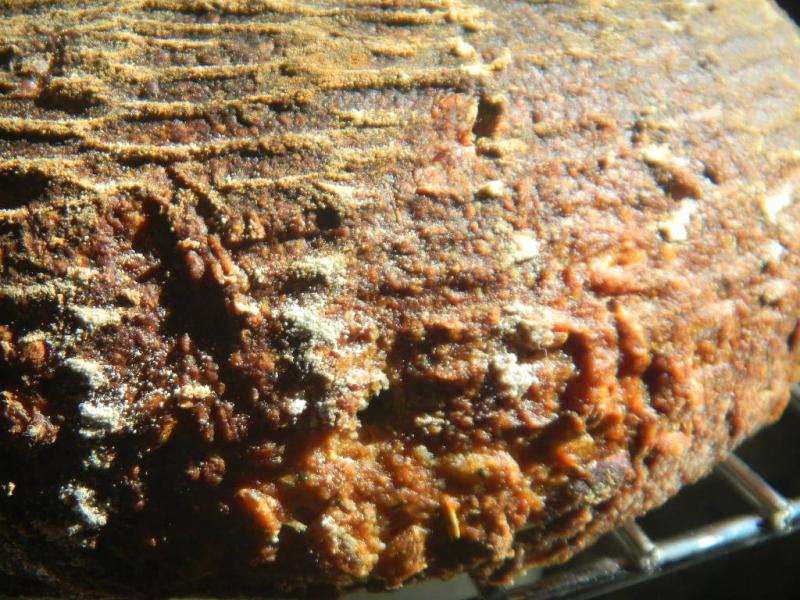
It was slashed, with a single edge razor, in a basket weave pattern we saw Josh use in his last post. Sadly, our slashing technique, even on this cold dough, was hampered because of the scalded seeds getting in the way and a lousy slasher holding the blade. Where is Lucy when you need her?
Into the mini the poorly slashed dough went with 2 of Sylvia’s steaming cups. We tossed in 1/4 C of water into the bottom of the oven to supply some instant steam before closing the door and let the bread bake with steam at 500 F for 5 minutes before turning the oven down to 475 F.

At the 15 minute mark the steam came out the temperature was turned down to 425 F, convection this time. After 20 more minutes rotating the bread 180 degrees every 5 minutes, the bread registered 203 F and the oven was turned off and the bread removed from the oven to a cooling rack when it reached 205 F.
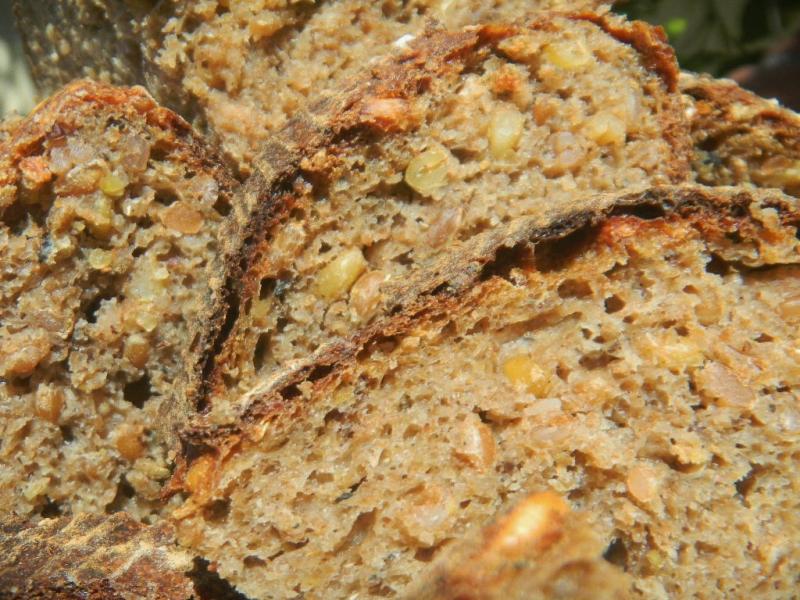
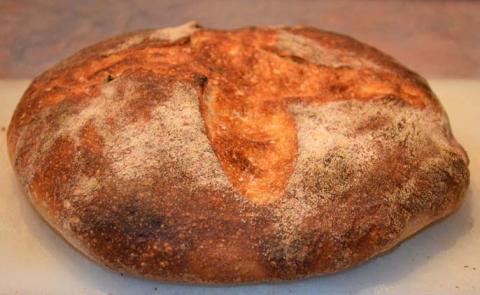
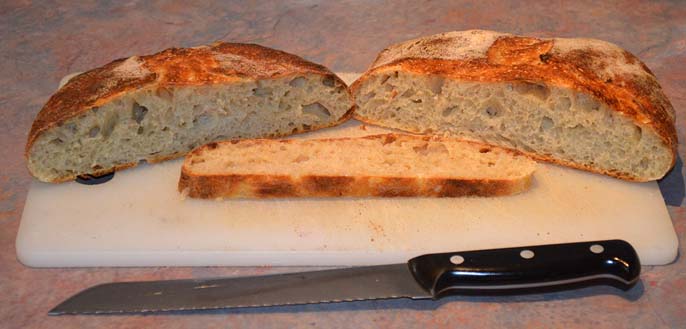
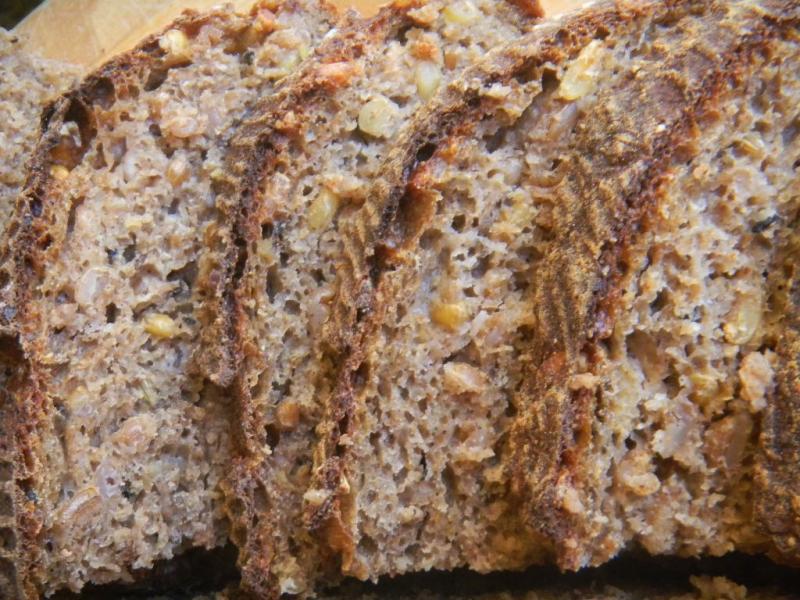
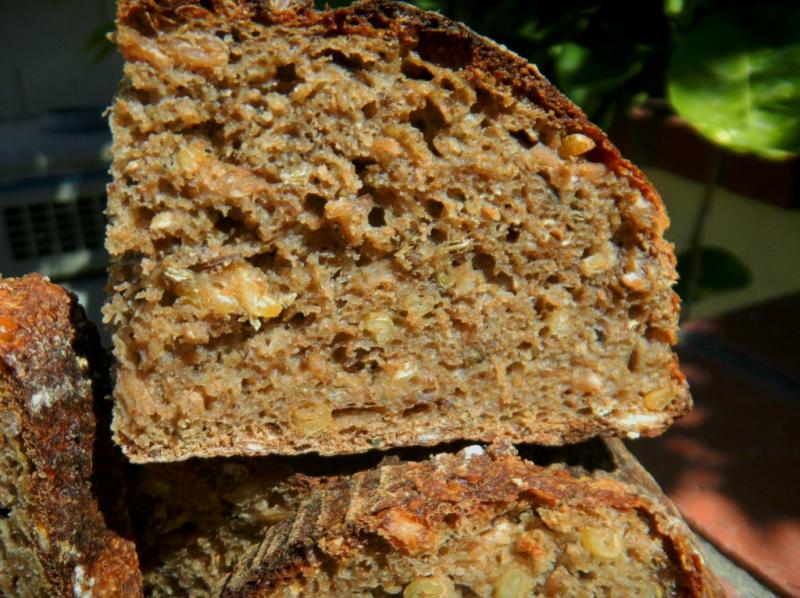
It had browned up boldly with the typical mini blisters the whole grain breads seem to get in the mini oven. Not much bloom or spring though. It sure smelled great when baking due to the aromatic seeds. The crust was crunchy and di not go completely soft when cooled. It was very tasty and thick - just the way we like it. Will have to wait on the crumb but expect it to be like the other whole grain breads. Well the crumb hots are in and while not as open as some this crumb is very moist, soft and open. The chew of the scalded berries is especially nice.

What makes this bread better than other recent interactions that have beer, whey, YW additional grains and nuts is that this bread tastes the best. More earthy and deeply sour, less confusion with the nuts gone from the mix but, the aromatic seeds are what put it over the top and made it better. This is a fine natural, nutritional, healthy whole grain bread that tastes too good - to be that good for you . This is possibly the best whole grain bread we have managed and that is saying something since we have baked so many of late - all were good though. Maybe the bread turned out better than the rest because Lucy was missing and getting her hair done.
Formula
This bread made for a fine lunch sandwich with the usual suspects for sides.

| | Build 1 | Build 2 | Build 3 | Total | % |
| Multigrain SD Starter | 15 | 0 | 0 | 15 | 3.73% |
| Whole Rye | 4 | 6 | 8 | 18 | 4.47% |
| Whole Kamut | 4 | 6 | 8 | 18 | 4.47% |
| Whole Wheat | 4 | 6 | 8 | 18 | 4.47% |
| Whole Spelt | 4 | 6 | 8 | 18 | 4.47% |
| Water | 16 | 24 | 32 | 72 | 17.89% |
| Total | 47 | 48 | 64 | 159 | 39.50% |
| | | | | | |
| Multigrain SD Levain | | % | | | |
| Flour | 80 | 19.75% | | | |
| Water | 80 | 19.75% | | | |
| Hydration | 100.00% | | | | |
| | | | | | |
| Levain % of Total | 18.97% | | | | |
| | | | | | |
| Dough Flour | | % | | | |
| Whole Spelt | 25 | 6.21% | | | |
| Dark Rye | 25 | 6.21% | | | |
| 75% Extraction Multigrain | 224 | 55.65% | | | |
| Whole Wheat | 25 | 6.21% | | | |
| AP | 24 | 5.96% | | | |
| Dough Flour | 323 | 80.25% | | | |
| | | | | | |
| Salt | 7 | 1.74% | | | |
| Soaker Water | 280 | 69.57% | | | |
| Dough Hydration | 86.69% | | | | |
| | | | | | |
| Total Flour | 403 | 100.00% | | | |
| Soaker Water 280, Water 80 | 360 | 89.32% | | | |
| T. Dough Hydration | 89.32% | | | | |
| % Whole Grain | 100.00% | | | | |
| | | | | | |
| Hydration w/ Adds | 86.17% | | | | |
| Total Weight | 838 | | | | |
| | | | | | |
| Add - Ins | | % | | | |
| Honey | 16 | 3.98% | | | |
| White Malt | 4 | 0.99% | | | |
| Toadies | 8 | 1.99% | | | |
| Ground Flax, Sesame Seed | 14 | 3.48% | | | |
| Aromatic Seeds | 15 | 3.73% | | | |
| VW Gluten | 12 | 2.98% | | | |
| Total | 69 | 17.14% | | | |
| | | | | | |
| The Multigrain extractions are equal parts of whole: | | |
| Kamut, rye, wheat and spelt | | | | |
| | | | | | |
| Aromatic seeds include: caraway, fennel, anise and | | |
| coriander | | | | | |
| | | | | | |
| Weight of Scald is the dry weight of the seeds. | | | |
| Wet weight was 197 g. Weight of dough was | | | |
| 933 g with wet scald and 65 G of Old dough removed. | | |