The Fresh Loaf

A Community of Amateur Bakers and Artisan Bread Enthusiasts.

Recent Blog Entries

hansjoakim's picture
hansjoakim

Here are some of the breads baked over the last couple of weeks:

First is a pain au levain with whole-wheat (p. 160 in "Bread"):

Pain au Levain

The original formula is great and it's a very nice dough for practicing folding, shaping and different slashes. It's a pleasure to see the cuts open up and bloom during oven spring, and the subtle flavour works well with just about anything. One of my all-time favourite loaves that I keep making often!

Below is a photo of a levain stuffed with dark raisins:

Raisin levain

The loaf is based on the formula for "Golden Raisin Bread" in Hamelman's book (p. 172), but I made this without commercial yeast, and with 25% prefermented flour from the levain instead. I found a 2hr. bulk ferment and an overnight retardation to work well, and I soaked the raisins in water prior to mixing, so they should not rob moisture from the dough. I like the addition of rolled oats in the formula, which works great with the raisins.

Finally, yesterday I made a flax seed rye with an old bread soaker (click here for Hamelman's recipe). It's a 40% whole-rye loaf, with a healthy dose of flax seeds. I omitted the commercial yeast here as well, and instead lengthened the final proof to 1 hr 45 mins. I would also like to add that my sourdough was fully ripe after approx. 12 hrs, so I did not let it go the full 16 hrs as suggested in the formula. I also had to add some water to get the desired degree of stickiness - I'm guessing an 82 - 83% overall hydration is right for my flour. After final shaping, the loaf was rolled in a mix of sesame, flax and caraway seeds, and placed with the seam side down (i.e. seed side up) in a brotform. Below is a photo of just after final shape (left) and just prior to baking (right):

Flaxseed rye proof

Here's the loaf just after pulling it from the oven - once again baked with the seam side up (seeded side down):

Flaxseed rye

... and here's the crumb:

Flaxseed rye

I think it's a very nice formula that produces a loaf with a deep flavour and a slight sour tang. It keeps for days due to the high hydration, and is a solid every-day sort of bread. Recommended!

Finally, two fruit desserts this week: A galette (using cream cheese pie dough) with nectarines and blueberries:

Galette

... and a charlotte with raspberry bavarian cream (and the remaining blueberries):

Charlotte


mcs's picture
mcs

For those of you who may have missed one or two of the recent postings of the intern bakers who have visited us at the Back Home Bakery this year, I thought I'd use this as a reference page for all of them.  Click on the links to visit the pages specifically about them.  Enjoy.

The cast in order of appearance:

Thomas (tssaweber):  Having grown up in Switzerland, Thomas had the taste of fantastic bread from an early age.  When he moved to the US ten years ago, he began baking his own bread and during the past 5 years he has spent much time experimenting with sourdoughs and native Swiss breads too.  This is the page of his internship.

Diane:  Diane's been cooking and baking bread for many years also.   In her spare time, she's also a cheese maker and dairy farmer.  Here's her internship page.

Paul (PMcCool):   Paul's enjoyed baking breads for over 30 years.  He's also a regular contributor here on TFL and he frequently blogs about his baking adventures.  This is his blog about his visit.

Callie (calliekoch):  Callie has spent most of her life cooking at home and has been baking bread for the last few years.  About a year ago she began to enjoy baking sourdoughs with her own starter.  Here's a bit about her internship.

Greg (gcook17):  Greg's well versed in both pastries and breads.  Although not a professional baker, he's taken several courses at SFBI and has been baking artisnal breads for many years.  This is the page about his stay.

Pat (proth5):  Pat's a great bread baker with the mind of a pastry chef.  Not only has she baked bread since she was a little child, she's also studied under some of the top bread bakers around the country.  This is her blog about her stay.

Brendan (smithbr11)  Brendan is relatively new to bread baking, but is improving quickly.  With his kinesthetic learning style and detail oriented mind, he'll be an expert in no time.  This is my blog entry about his internship.


Thanks so much to all of you interns for all of your help and time.  I hope you went home with some improvement in your skills and maybe a little more baking knowledge too.  Take it easy.

-Mark

http://TheBackHomeBakery.com

Yippee's picture
Yippee

This bread was made with 40% levain and is a variation of Mr. DiMuzio's double raisin walnut bread. I used a 3-build firm starter of 50% hydration and adjusted the formula to Mr. DiMuzio's percentages.  The 75% nuts and passion fruits medley have made this bread very colorful and attractive.  It is a bit chewy and has a medium-mild sourdough taste.

I utilized my Zojirushi to knead the dough for ten minutes and gave it a few folds afterwards before bulk fermenting it in the fridge overnight.  Before shaping, nuts and fruits were folded in.  Shaped dough was proofed in fridge overnight. Steamed and baked at 460F for 40 minutes. 

 http://www.flickr.com/photos/33569048@N05/sets/72157622439976366/

Green Tea's picture
Green Tea


Well.  It has been numerous weeks since my last entry and I have discovered I just don't have the dedication it takes to keep a bread blog.

So... I mean to do a post on these sooner or later.


Mm... I think I may do a post on these also. (Well eventually.  :D)


I became very enthusiastic with my scoring.... (ah, thank you, Russ for your advice on my blog post before...)


And this was my first sourdough bread from the new member of our family, Loxley (a.k.a. the Loch Ness Monster of the Fridge)  I absolutely love sourdough... I find the oven rise is always so much more!  So far my favourite game into the kitchen is to take out 3/4 cup of sourdough starter and 3 cups of flour, then improvise the rest.


Here's another sourdough which i made with spices, buttermilk, fresh orange juice, raisins, dried cranberries and mostly whole wheat flour.


This is the dough for the blueberry buttermilk bread, without the blueberries yet added in.  The specks are lemon thyme.


And here it is cooked...


This isn't much of what bread I've been baking, but it's a tad bit.  Unfortunately i don't have the dedication to take a picture of every bread either!!


Update: Thank you to Kuret. I'll have to work on that so until then I just got rid of the pictures! :)

JeremyCherfas's picture
JeremyCherfas

I went to a really interesting bread-making course about 10 days ago, and have simply not had time to write it up yet. One thing I did want to share though, was a film we were shown. It is called Les blés d'or, and was made by ADDOCS, a French film-making organization.

The film is about peasant bakers (and the word peasant is used as a badge of pride, with no pejorative undertones) who have rescued several old varieties of wheat and who bake in the traditional manner. The commentary is all in French (although the DVD for sale has other languages, including Italian but not English (yet)). I found it fascinating, especially the sequence that shows the mixing of the dough.

The recipe is very simple: 33 kg of flour, 22 litres (i.e. 22 kg) of water and half a bucket (maybe 5 litres?) of starter. And the entire mass is mixed by hand. It is absolutely glorious to watch, and if you've never seen a baker stretch and fold 55 kg -- more than his own body weight, I'm sure -- of dough, you have a real treat in store.

You can watch the video streaming in reasonable quality from the ADDOCS site. It is the second film down in the list on the right. I hope you enjoy it.

In view of an earlier post I was thrilled to see a loaf made from Touzelle what flash up on screen, albeit very briefly.

Jeremy

chuppy's picture
chuppy

I'm considering attending a week long couse for artisan breads. Any suggestions? I already live outside of Chicago, so the French Pastry School is one of my choices.

Thanks,

Jeff

mcs's picture
mcs

This past week The Back Home Bakery had guest intern Greg (gcook17) visiting from Mountain View, CA.  He brought his extensive bread and pastry skills to the workbench and got to try his hand at using the sheeter too.  Thanks a lot Greg for all of your help - we hope to see you again up here!

-Mark
http://TheBackHomeBakery.com


stretch and fold on a 10 loaf batch of Rustic White


lining up the puff pastry bear claws


Here's Greg with his new found favorite toy.


ericjs's picture
ericjs

A quick phone cam pic of my latest pain de campagne (over the kitchen sink where the light is bright).

Scoring was easier and smoother than usual this time. (Perhaps I've been over-proofing and didn't this time?)

Does that expansion of the slash look excessive? Is there such a thing as too much oven-spring?

Still hot, haven't opened it up yet.

wally's picture
wally

This weekend I decided to try Hamelman's Country Bread in the shape of a boule.  However, I lack proofing baskets, and as I proceeded through the recipe, a nagging thought kept injecting itself: So, how do plan on keeping your boule from turning into a pancake?

I baked only one loaf, so I scaled down his recipe thus:

Overall formula:

Flour (sir galahad)    454g    100%

Water                         309g     68%

Salt                                4g      1.8%

Yeast    1/4tsp instant dry       .6%

The pre-ferment is a stiff pâte fermentée:

Flour                        227g

Water                       136g

Salt                              2g

Yeast  1/16 tsp instant dry

Final dough:                DDT = 75° F

Flour                       227g

Water                     173g

Salt                             2g

Yeast  1/4 tsp instant dry

Pre-ferment            365g

Mixing:

The pâte fermentée is made up 12 - 16 hours prior to the final dough.  Final mixing involves incorporating all ingredients except the pâte fermentée on speed one, and then cutting in the pre-ferment in chunks as the dough comes together.  Increase to speed two and continue for 2 - 3 minutes (or longer).  Hamelman's description of the final dough is "supple and moderately loose, with moderate gluten development."  My own experience was that while the dough had developed some strength, it was still relatively slack.

Bulk fermentation:

2 1/2 hours, with two folds at 50 minute intervals.

Shaping and Baking:

Pre-shape, cover with plastic and bench rest for about 20 minutes.  Final shaping into boules is followed by placing the loaf into a floured banneton or a couche.  Final fermentation is approximately 1 1/4 to 1 1/2 hour.  Bake is at 450° in a pre-steamed oven that is steamed again once the loaf is loaded.  Baking time is approximately 35 minutes.

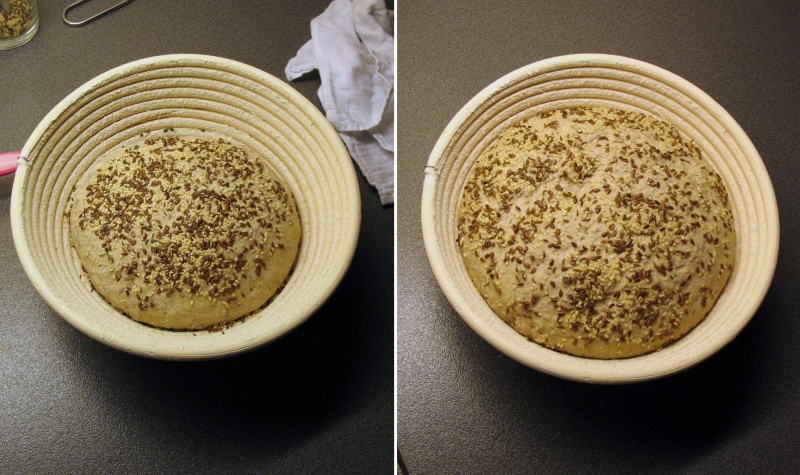
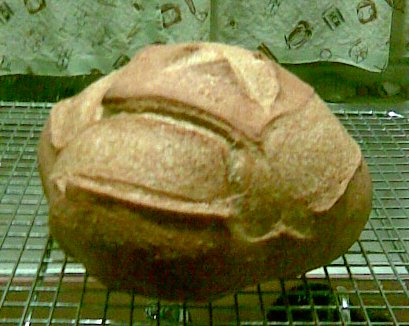
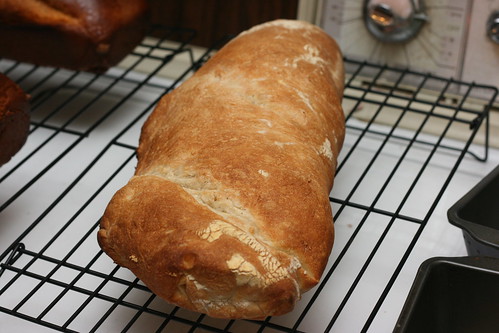
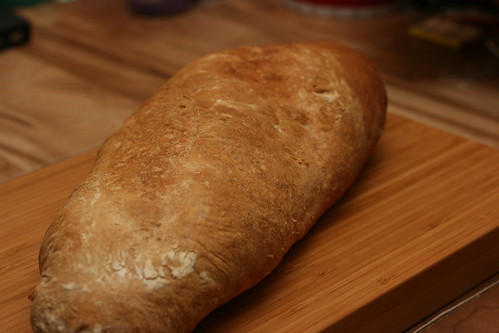
The moment of truth for me came at the shaping stage when I had to decide what to do with this boule I had created.  It was clear to me that with a final fermentation time of an hour or longer, even a tightly shaped boule would begin to imitate ciabatta dough, and I do not have any bannetons.  But as I surveyed my kitchen, it occured to me that I did have a fairly sturdy sieve, into which I could fit a floured tea towel.  That revelation then raised the question, how to suspend the sieve so that it was level/  A 2 qt. calphalon pot volunteered and I glimpsed a true jury rigged solution to my problem.

I heavily floured the tea towel with rice flour, which I've discovered is much less absorbent than AP - I haven't had anything stick to surfaces I've dusted with rice flour and this was no exception.

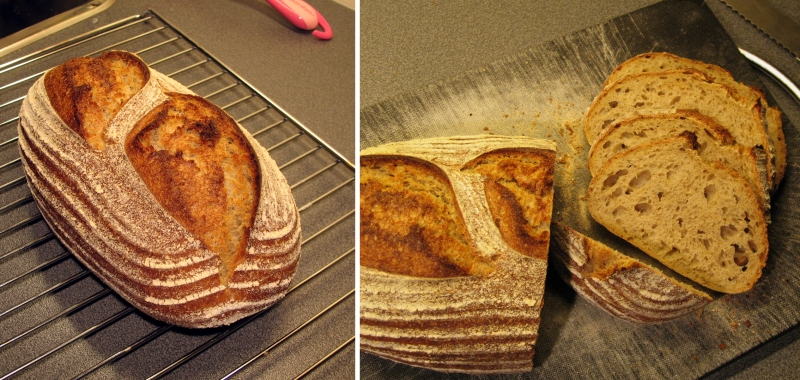
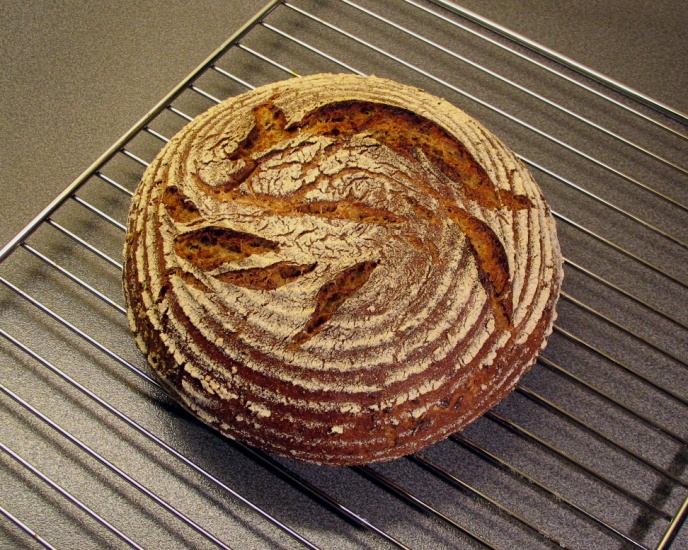
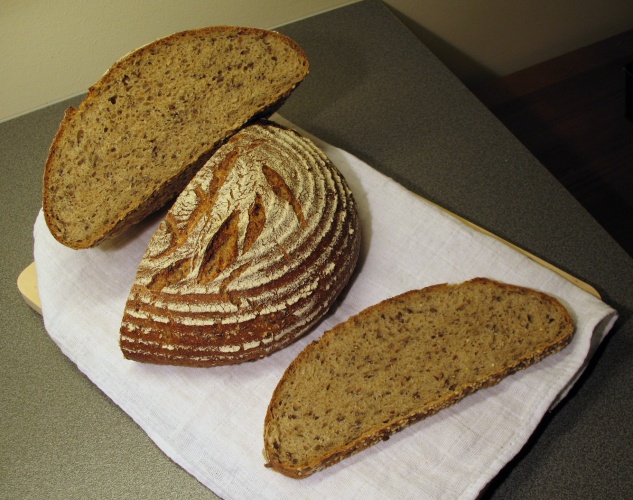
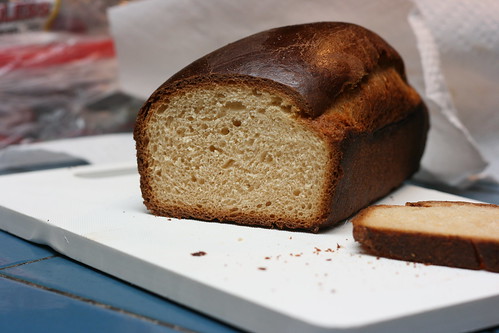
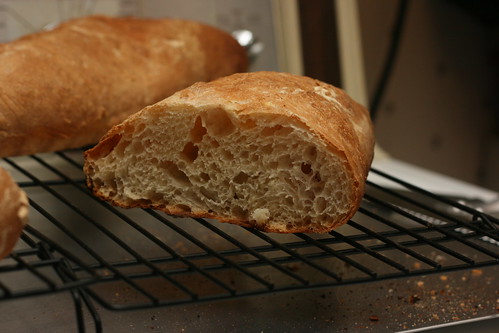
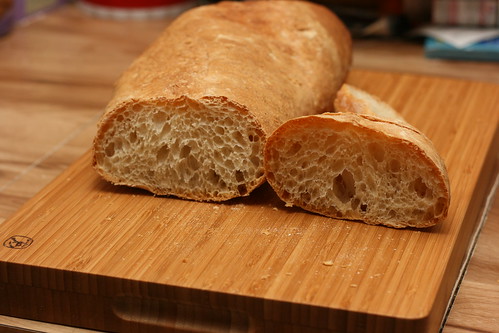
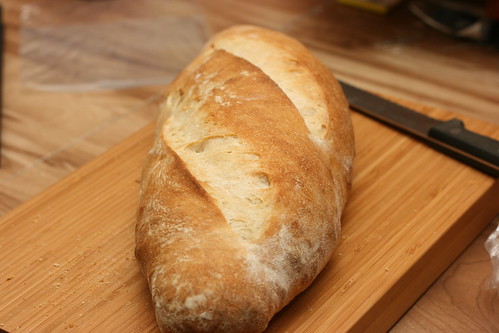
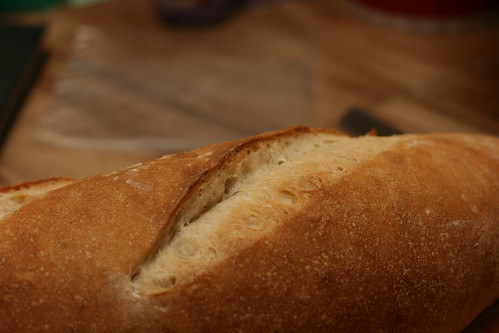
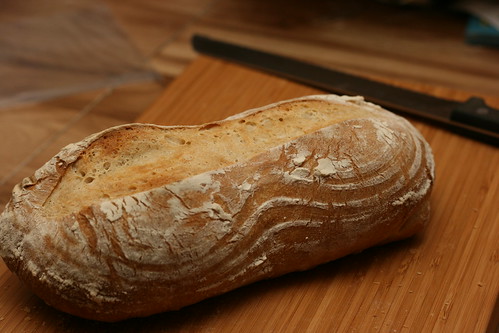
The result is a boule which, though it spread some in the oven, does not resemble the pancake I had dreaded as I began my project.  The country bread has a pleasing taste - thanks to the pre-ferment - and makes a nice (if not so wide) sandwich bread.

Meanwhile I've made a note to add bannetons to my Christmas list.  But in the meanwhile, I'm happy with my sieve and makeshift proofing method!

Larry


SumisuYoshi's picture
SumisuYoshi

Portuguese Sweet Bread Loaf

I titled this post Bake Home as sort of a portmanteau of back and bake, as I am back home from Alaska and this is the first chance I've had to bake! My girlfriend and I had a little tradition going, I'd head down to her house and make bread on sunday to share with her and her sister's dog. Well, she's gone up in Alaska now, but I headed down to bake (and make sure her/her sister's dog got some bread too).

Today was a triple threat from Bread Baker's Apprentice, Italian Bread 2 ways (commercial yeast and sourdough) and Portuguese Sweet Bread.

I spaced out a bit when I was making the commercial yeast Italian Bread and added an extra cup of water (the recipe calls for 3/4 cup to 3/4 + 6 tablespoons... OOOPS). I didn't realize this until much later, so I added more flour in while mixing it, but I didn't want to add too much because I'd be WAY off the recipe (oh if I only knew...). So I tried to give it a number of folds hoping that'd make it pull together, it did a bit but it was still a very wet dough. I proofed the loaves using parchment as a couche (as well as a new brotform I got for my birthday!). Turned out I didn't flour the parchment quite enough so when I turned them over onto another parchment on the peel... they stuck. Was no big deal, I was able to pull it off without too much trouble, but it was becoming really obvious the hydration on the dough was higher than it should've been.

I tried with a bit of success to slash the loaves, and went to put them in the oven. This is when bad thing #2 struck, one of the two loaves had oozed a bit off the parchment onto the peel, and while a portion of it left the peel... not all of it did. Unfortunately, enough was left on the peel that I couldn't just pull the peel out, it would've pulled the whole loaf out. So I hurriedly scraped the dough off the peel (getting a little burn on my arm in the process), and found myself looking at some sort of strange mutant loaf. The loaf in the brotform was far less exciting, although it did take a bit longer to release than normal. I was surprised for all the horrible abuse in trying to seperate the parchment paper, get them slashed, and get them in the oven; these loaves came out with a fairly nice crumb!

Italian Bread Italian Bread Italian Bread Italian Bread


The sourdough version of the Italian bread had no excitement, made a sourdough biga the night beforehand, made the dough today, fermented, shaped, fermented, baked ta da. No burns, no spacing out on recipe quantities. I used my other new brotform for one of these loaves. I need to experiment with that one for a really nifty way to slash it.

Sourdough Italian Bread Sourdough Italian Bread Sourdough Italian Bread

And finally, Portuguese Sweet Bread, again relatively uneventful. I needed sandwich bread for lunch at work so I decided to make them as sandwich loaves rathern than in a pie tin as in the recipe. These two loaves made the house smell just wonderful as they were baking.

Portuguese Sweet Bread Loaves Portuguese Sweet Bread Loaves Portuguese Sweet Bread Loaves Portuguese Sweet Bread Loaf

And my assistant in all of this (be nice to him, he got an unintentional shaving (big misunderstanding with the groomer)

Bread, for me? Yay, for me!

(crumb photos for the sourdough will be coming later when I cut into it!)

Pages

Subscribe to Recent Blog Entries