The Fresh Loaf

A Community of Amateur Bakers and Artisan Bread Enthusiasts.

Recent Blog Entries

txfarmer's picture
txfarmer


This is the first recipe I made from the new book "The art of handmade bread". I followed the instruction closely, only swapping out fresh yeast for instant. I consulted Dan's informative website and forum, it turns out that the amount of instant yeast should be half of the fresh yeast by weight, but fresh yeast is denser than instant yeast, in the end, their volume usage amount are the same, so that's how I made mine.

The minimal kneading techinque worked well, but next time I will leave yeast and salt out until after autolyse. The dough was dryer than what I am used to (which is pretty wet), but that was mentioned on his forum so I forged ahead.

Since the recipe uses both rye starter and instant yeast, the fermentation time was short - bulk fermentation for one hour, with final proofing between 2 and 2.5 hours. That's where I was confused - usually proofing time should be shorter than fermentation, I did't undersatnd why this recipe has such a long proofing time. I went ahead and followed the instruction and that's why my first loaf failed. At the end of first hour, my loaf was already ready to be baked, yet my oven was still off! Massive overproof, I got a flat pancake. I tried again the next evening, same procedure bu only proofing for one hour this time, and oola, I got a nice looking high loaf with incredible smell.

Next time I will reduce, or even leave out entirely, instant yeast. The taste of the bread was fantanstic, the walnut paste really added to the flavor, that's the extra kick of this recipe.

All in all, it's a great recipe, a tasty bread, and a very useful book with lots of interesting new recipes and techniques, can't wait to make more breads out of it. I am eyeing the oatmeal apple one next.

JoeVa's picture
JoeVa

This bread is another of my "everyday sourdough" (I do not bake everyday! just ones in the weekend, and one pizza baking every week).

It's a lean dough made with 60% durum (re-milled) flour and 40% wheat flour. This is not "Pane di Altamura" which is 100% durum flour, but a variation of "Semolina Bread" from "Bread - J. Hamelman". I like durum flour but not 100%, I prefer to mix it with bread flour the get a more light bread. So the name of the bread is "Pane con Semola Rimacinata di Grano Duro" (bread with re-milled durum flour).


Here you can see the durum flour I used in the dough: "Semola Rimacinata di Grano Duro - Il Mugnaio di Altamura (Molino Martimucci)"


Note: this is finely milled durum flour, that is "re-milled".

The flour, and the grain from which it's extracted, is from Altamura a city in the south of Italy (in the region of Puglia). Altamura is famous for its bread: Pane di Altamura.

One thing a like of durum is the color: gold! the flour is a light yellow and gives the crumb a yellow tone, the crust has a golden shadings. I'm not so good in flavor descriptions ... the bread is medium sour (not aggressive); the crumb is soft airy but substantial; the crust is nutty (I like the contrast between crumb and crust when they are mixed in your mouth).

Durum wheat is the hardest wheat, high in protein and used for pasta and bread. It caryopsys is almost transparent (like glass) and very hard and can be milled coarsely or finely. In spite of the high protein content (12% / 16%) its gluten is not "strong" like soft/hard wheat. For this reason I suggest a gentle mixing. This is not a problem for me, I never use intensive mixing because I like hand mixing (gentle mixing with S&F) and improved mixing (by machine).

Overall Formula

Durum Flour 60%
Bread Flour 40%
Water* 60%
Salt 2%

*water should be adjusted with the absorption of **your** flour.

Preferment

15% of the total flour (bread flour) is prefermented at 80% hydratation (12h / 14h at about 21/22°C - with a 20% inoculation). Remember to subtract the flour and water from the final dough ingredients. 

Dough consistency

Medium soft, not too much sticky.

Process

  • Mix all ingredients except salt (desired dough temperature 25/26°C).
  • Autolyse 00:30, then add salt on top
  • 10 stroke (stretch and fold)
  • Repeat 3 more times at 00:10 intervals (10 stroke or until the dough starts to oppose resistance)
  • Bulk fermentation 01:45 with 1 fold
  • Divide and shape (I use a banetton or a bowl)
  • Proof 01:30 at 25°C
  • Retard 12:00 at 4°C
  • Bake on stone at 225°C 00:40, first 00:15 covered, last 00:10 with the door ajar.


Crumb shoot


Slice


Crust


ehanner's picture
ehanner

As I begin to work my way through Dan Lepard's The Handmade Loaf, there is a bread pictured on the inside cover that got me wondering. It looks like a boule with an appendage twisted with pointed tips and makes me think of a handle to hold while carrying or cutting. Dan didn't identify the bread by name and I haven't seen anything like it before so until I hear otherwise from Dan or someone who knows the real name, I'm calling it Medieval Bread. I used the first recipe for White Leaven Bread as the mix and tried to shape the dough as pictured.Waiting until after proofing to shape the twist was a mistake I suspect. If you have the book, you will be amused at my rookie attempt to replicate the image.

I have made Dan's Black Pepper Rye and the White Thyme bread which were delicious but I think I should progress in an order that will let me understand Lepards thinking. After looking at nearly every bread in the book, I see the ratios of leaven and timing are different than I have been accustomed to using. There are also a few specialized techniques that I haven't used and ingredients while common at home are unfamiliar to me in baking. Pickle Juice would be a good example. It would be easy for me to get distracted by the many wonderful new recipes and ignore the common sourdough white loaf. As I discovered, that would be a mistake.

I made the White Leaven bread by the book except I substituted 30 grams of sifted rye into the 500g white bread flour. Dan suggests using fresh yeast and as soon as I find a local source for 1 pound bricks I intend to make the change from Instant Dry (IDY). Most of the brick fresh yeast sold in the US is made just a few miles from here so it's just a matter of finding a distributor.

The method of developing the gluten in all of the recipes in this book are most easily done with your hands or a plastic scraper. Dan is insistent on minimal kneading, waiting 10 minutes and again just a few seconds of kneading and wait 10 minutes. After a few cycles of this you begin to see the dough come together well and become smooth and silky. Following the initial development comes a schedule of stretch and fold, waiting between folding sessions. All very gentle and effortless steps. The result is a perfectly incorporated and developed dough with just the right amount of aeration.

Remembering that these same four ingredients can be mixed and handled in many ways to arrive at vastly different ends, I am very pleased to have followed the procedure exactly. The bread is wonderful. For me a perfect outcome is a bread that looks wonderful and has a full flavor with a long lasting after taste. The crust has been baked to a dark brown and has a deeper caramelized flavor that contrasts the crumb. When I manage to bake a bread that has this contrast and tastes this good, I'm really pleased.

I know there are many bread books out there to choose from. Many are very similar and will produce great breads. If you are serious about making breads that are not merely great but outstanding, "The Handmade Loaf" or the US version "The Art of Handmade Bread"  is available from our link for $12. At this point it's the best value in my library and I'm delighted with the best breads I have made. Lepard has traveled Europe and befriended some of the old time bakers in far off the beaten path corners of the world. Developing these recipes for modern use is a gift to those of us who strive to bake these old style hearty breads.

No snickering at my attempt to make the twisted boule now!

Eric   

turosdolci's picture
turosdolci

Sometime ago I took a cooking course in Gargano and Chef Marco gave me a delicious family recipe that I is perfect for a luncheon with friends. 


http://turosdolci.wordpress.com/2009/10/31/a-recipe-from-gargano-calzone-con-cipolla/


SylviaH's picture
SylviaH

 P.R. new book 'artisan breads every day' just arrived and I have 3 lbs. of wild rice and plenty of organic dried onions.  So what better reason to bake this bread.  I added a little extra hydration for the dried onions and changed only one ingredient ..the salt I used is Italian sea salt and summer truffle.  The aroma from this bread was intoxicating as was the flavor.  I over proofed the batards but they baked up without deflating.  I froze some extra wild rice so it will be ready for my next batch of maybe some rolls, they would be delicious with Thanksgiving dinner!  The recipe was very easy to make and I retarded the bulk dough for a little more than 24hrs. though it will keep longer.  Recipes like these that are bulk retarded make my wood fired oven baking so much easier.  Timing bread and oven to ready at the same becomes so much easier.  These batards were not baked in the wfo. 


Sylvia


hansjoakim's picture
hansjoakim

Everyone's got a little Holden Caulfield in them, I presume?

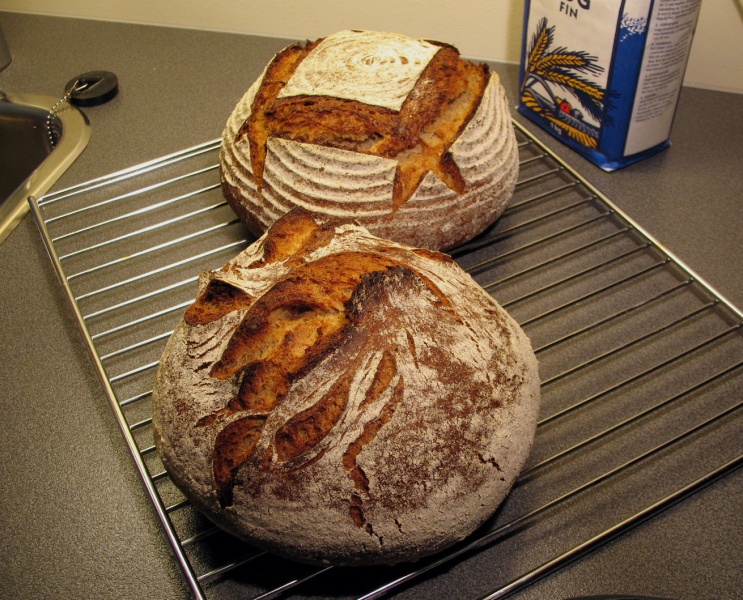
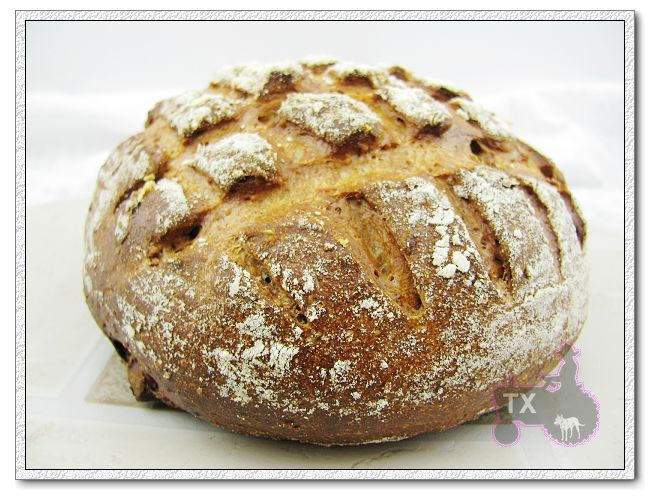
I thought I should put up some of the recent loaves I've baked, and first are two 40% rye boules that are loosely based on Hamelman's flaxseed rye with old bread soaker. David, Eric and myself loved the original recipe, and David put up a detailed breakdown of it on his blog (by the way, reading through David's blog entry again, I believe that the blog entry should list fresh yeast, not instant). This time, I wanted to combine the complex flavour of the stale bread soaker and acidity of the sourdough with something sweet. I have a hopeless, irrepairable sweet tooth, so that's why!

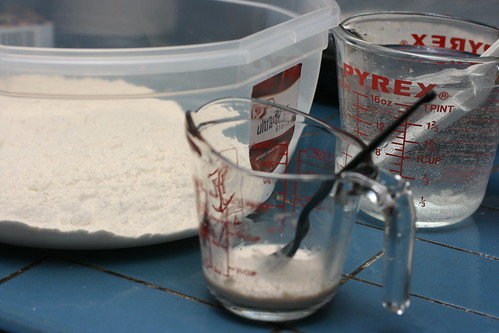
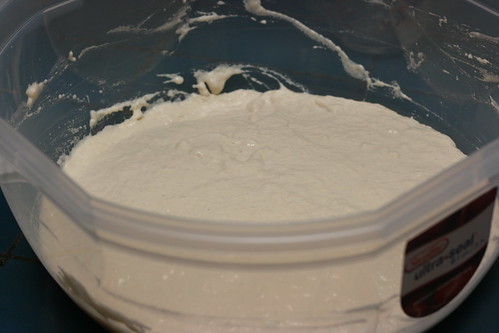
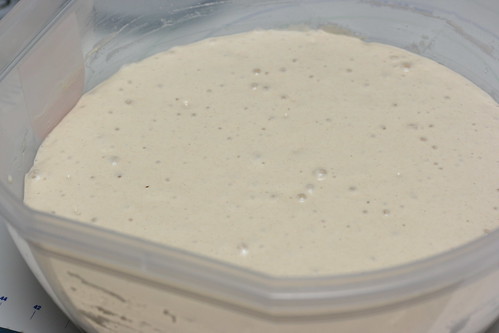
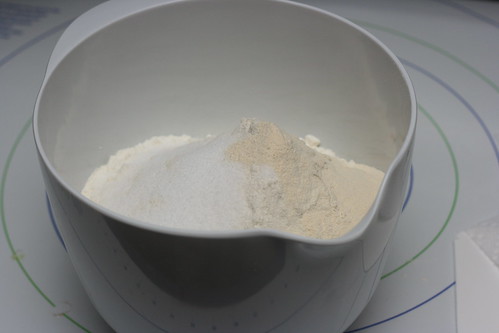
The sweetness I had in mind was something along the lines of the classic Borodinsky rye. I've made some Borodinskies before, and I've found a combination of coriander seeds, honey and barley malt extract to be truly divine. So, I started with Hamelman's recipe for the flaxseed rye, and a) omitted the flax altogether, and b) reduced the overall hydration to 70%. Then, c) added 1% coarsely crushed coriander seeds, and d) 3% honey and 3% barley malt extract. I also omitted the (optional) seed coating mentioned in Hamelman's formula.

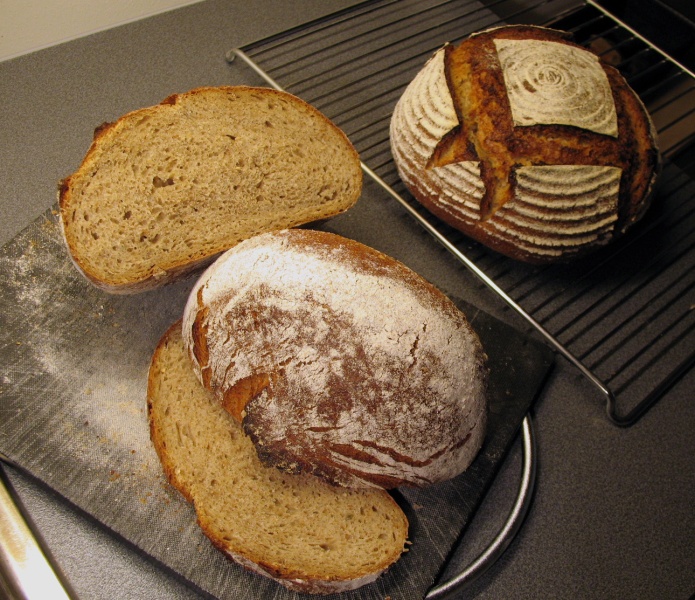
I shaped two 1kg boules, and let one proof as usual in a brotform, and let the other proof seam side down. Due to honey and barley malt extract, I watched the dough carefully during final proof, and found that 45 - 50 mins. was sufficient for my dough. I also found that the crust quickly gained colour during the bake (also due to honey and the malt extract), so I reduced the temperature a bit quicker than usual. I ended up with 250dC the first 10 mins. (with steam) and then gradually lowered the temperature towards 205dC for 35 mins. more. Total baking time approx. 45 mins. I wanted a dark, thick crust, a deep, nutty brown colour, that will enhance the overall aroma of the loaves. So if you want to try it, don't shy away from giving it a full bake, but do watch it. You want nutty brown, not charcoal black :)

40 percent rye

40 percent rye

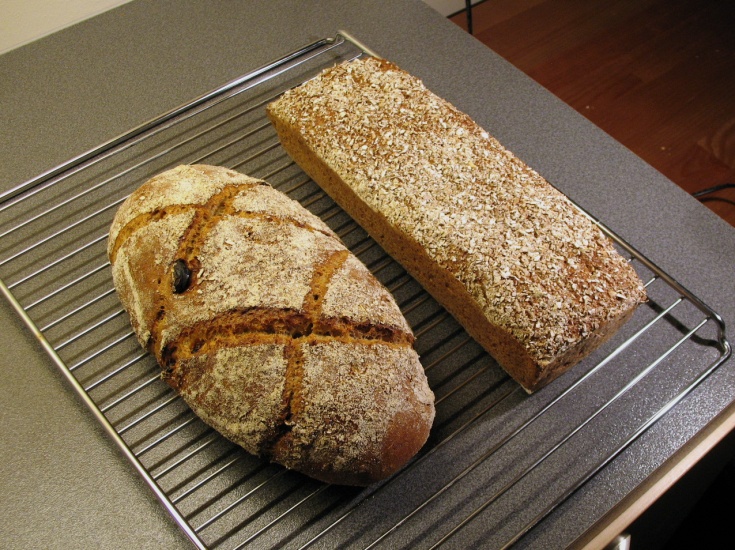
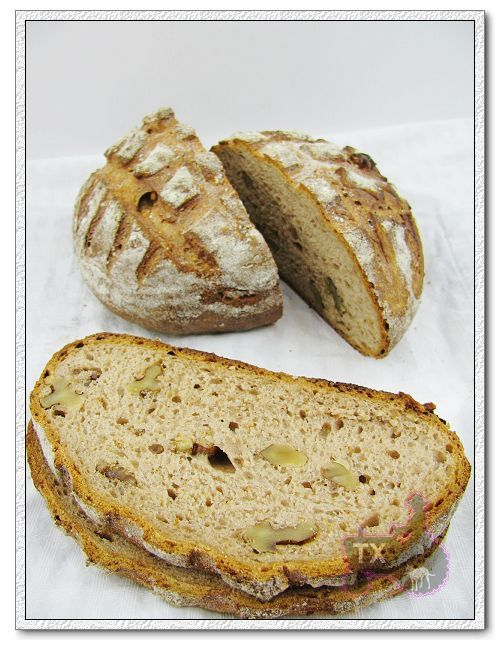
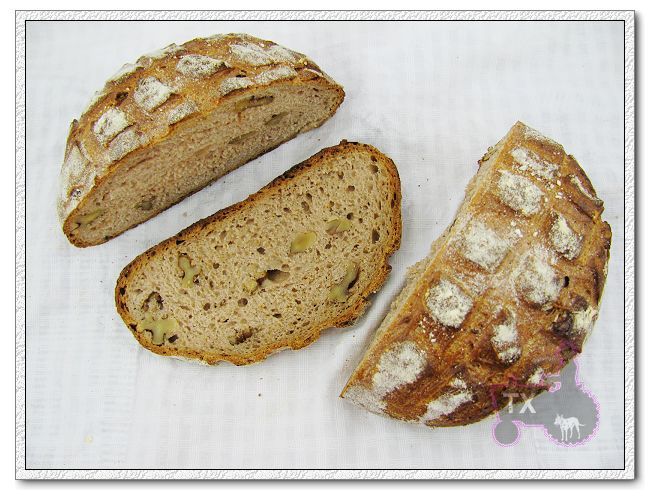
A friend of mine requested a Vollkornbrot, so I baked him the one from "Bread", shown on below on the right. No crumb shot unfortunately... but he said it satisfied his Vollkorn cravings, so I take that as a good sign. Below on the left is Hamelman's sourdough rye with raisins and walnuts. Sweet tooth again, I know...

Sourdough rye with raisins and walnuts

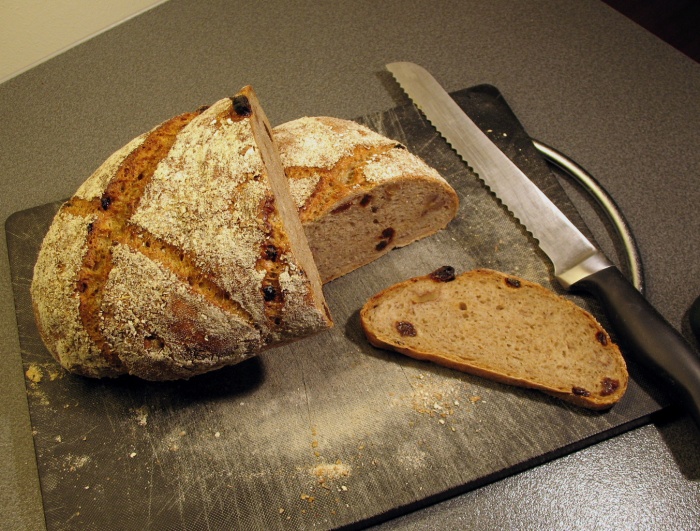
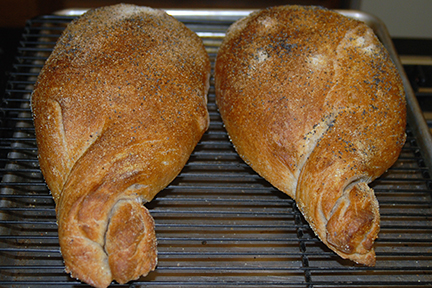
I shaped it as a "viverais": This shape is shown in Suas' ABAP, and on p. 13 in this .pdf. You shape it into a batard and (yes, this step had me hesitating a few seconds - mangling that pretty batard...) divide it in seven pieces by cutting two X's in the dough. Pretty harsh treatment, I agree, but the loaf did recover some during final proof, and the separated pieces baked together nicely in the oven. It produced an appealing, rustic look, I think!

PS: A slice of this is a perfect match for goat cheese.

Sourdough rye with raisins and walnuts

SumisuYoshi's picture
SumisuYoshi

Bagels

I've never been a big fan of bagels, which is part of why I skipped this recipe at first, but I know a lot of people who like them so I finally decided the time was right. First step of the recipe is easy, making a sponge, just water, flour and yeast left to expand for a few hours.

Bagel Ingredients (for sponge)

Mixed Sponge

Bagel Sponge

Once the sponge is ready, time to (attempt) to mix in the rest of the flour, the yeast, and malt powder. I say try, because bagel dough is really low hydration so I ended up needing to add a fair portion of the flour during the kneading. There was just no point in adding more to the dough while it was still in the bowl. And boy did it require a lot of kneading...

Flour, Salt, Malt Powder

Once kneaded I let the dough rest for a bit and started dividing it into roughly equal balls. Followed by a bit more resting, and shaping into bagels (I used the thumb punch shaping method shown in the book, it worked really well). Then the shaped bagels took a trip to the fridge for retardation overnight.

Divided Bagel Dough

Preshaped Bagels

Shaped Bagels

I wasn't really sure of the taste in bagels of the people I was making these for, so I stuck with plain, poppy seed, sesame seed and cinnamon raisin (trying to make 1/4 of the dough cinnamon raisin after the dough is already mixed is VERY tricky, I do not recommend it, but it was the only way I could see to easily divide it so). The boiling process before topping the bagels was easy, a little bit of baking soda and malt powder added to the water (they really make it foam up!) and away they went. I didn't notice I had no cornmeal or semolina left before I started, and the semolina flour worked less than perfectly when placing the boiled bagels back on the sheet pan, which definitely reminded me to pick up cornmeal the next time I was at the store.

Boiled and Topped

I followed the suggestion in the book to top the cinnamon raisin bagels with brushed on butter and a cinnamon sugar topping, looked delicious! As did the rest of the bagels. Note, I say looked, I made this first batch to take in to people at school and since I only made the single batch of 12 I didn't actually get to try any(I did the next time I made them though)! One thing I was surprised by during the baking process was the blast of steam/water vapor when you open the oven to turn them around, I'm not sure if it is because of all the water in the crust from the boiling or the baking soda... But when I opened the oven to turn them around it felt like some sort of chemical weapon assault! Never experienced that when baking bread before.

Cinnamon Raisin Bagels

Plain Bagels

Sesame Seed Bagel

Poppy Seed Bagel

Sliced Bagel

Another post submitted to YeastSpotting , having that available to submit posts to really keeps me inspired to bake, and I love seeing what other people have made each week, thanks so much Susan! Bread Baker's Apprentice Challenge

xaipete's picture
xaipete

Hi to everybody. I've missed not being on this forum over the past few months. My husband was diagnosed with early Parkinson's disease mid-August and that really threw us for a loop. I've had MS for 40 years and although I am very active and strong in many ways, I can't walk very fast any more. Anyway, we've had to make a lot of decisions about whether to stay where we are or move, plan for the future, get educated on his disease, etc. I just felt too distracted to continue participating.

Plus I think I literally wore my oven out testing for PR's new book. I finally got a new oven installed last month.

Anyway, we're over the shock and awe of our situation now, and I have an oven again, so I'm looking forward to participating again in this forum.

I haven't made any bread since mid-August. I hope my SD starter can be revived.

--Pamela

yozzause's picture
yozzause

Recently there have been some postings about wine bread with some interesting colours coming from the inclusion of red wine. And who could forget Shiao-Pings Praline Almond bread. 

Well i decided to have a go with the inclusion of Beetroot on 2 counts first it makes an excellent  BEETROOT & CHOCOLATE pudding which is a lovely and moist. The 2nd being the vivid colour.

The duty chef was keen to give the idea a run so we produced dinner rolls for the evening restaurant crowd

The dinner rolls are pictured above and show a vivid outside colour but the inside was an orange tint which interested me some what.

I decided to make a Beetroot sour dough, i have been maintaining a sour dough culture here at the college for over 6 months now so it was a good reason to try it at home as i had beetroots left over.

The total flour was 500g, 400 being white and 100 wholemeal (ran out of white)

over night ferment featured 250g of the flour  100g of grated beetroot and and all the water 250ml and 50g of the sour dough starter , i kept this low as i wanted it to take the night to ferment.

I started it at 5.00pm see the pretty mix in the bowl, 12 hours later 5.00am i made up my dough adding the other 250g flour and 10g salt and 50g of oil and made a dough on the bench by hand.

The dough came to work and bulk fermented till about 9.30am  when i added 100g of pistacchios and divided and handed up into 2 boules .

1 of my colleagues took a pic with his mobile phone (hence poor quality) but what a lovelly colour!

After a further 3 hours i turned the boules  out onto a sheet and baked in the deck oven. The crust colour had changed somewhat  and lo an behold when i cut into the loaf, some one had pinched the colour or changed it just like a CHAMELEON.

My taste team all had some with only one person describing the sour as too much for their liking but i already knew that would be their viewpoint. but for me superb taste.

I would have like to have tried some as toast but alas with a large taste team it didn't see the next day. i wll be trying a larger batch soon. 

ehanner's picture
ehanner

This is the first recipe I baked from my new copy of Dan Lepard's "The Handmade Loaf". The book is beautifully illustrated and has breads from all over Europe that are unique and well described. The official name of this bread doesn't do justice to the ingredients list. Lurking in the list are 100g of olives and olive oil that help make the dough smooth and delicious. I thought the final dough was a touch dry, so I added a couple Tablespoons additional water. In the end I might have added a little to much but it was quite a nice dough by the time I got to the stretch and fold part.  The method calls for final shaping on a baking sheet coated with oil. I used parchment with a small amount of oil rubbed in. Dan calls for semolina or corn meal to be sprinkled on the top. That gives the bread a nice texture on the surface.

I baked this at 420F for 30 minutes and then lowered the heat to 390F when I turned the loaf for color. It was browning nicely at that point. My finished bread is quite a bit darker than the one in the book and the profile isn't as flat as shown. I did dimple the top with my fingers just before loading but I was taking care not to deflate the dough. Still, you can see by the pre-bake image, it did spring nicely.

The flavor is delicious. I would say the predominate taste is from the olives but I can taste the Thyme in the background. The Thyme may improve with time if it lasts that long. This is a keeper and I know will be a hit with the family.

This is the second bread from Mr. Lepard I have baked that tastes unique and better than the ingredients would lead you to expect. I think I am going to enjoy exploring here.

Eric

Pages

Subscribe to Recent Blog Entries