The Fresh Loaf

A Community of Amateur Bakers and Artisan Bread Enthusiasts.

Recent Blog Entries

Shiao-Ping's picture
Shiao-Ping

Squeaky wheels get the oil? Or, whinny kids get the lollies, as Chinese put it?

I bought a tray of mangos for my daughter to take to her schoolie’s holiday week. She left half a dozen of mangos at home for her brother. I didn’t realize it at the time of purchase but these weren’t very good quality – they have nice smells but have already started having black skins, a sure sign of over-ripening. After the second one went into my son’s breakfast cereal, I had a feeling that the rest won’t get consumed. I cut them up, mashed the pieces with a fork, and added a couple of teaspoons each of hot curry powder and coriander powder.  I made them into dinner rolls.  These were enjoyed with King Snapper, grilled with lemon, last night.


A slice with morning coffee?  Why not?


Happy Thanksgiving to all of you out there in America!


Shiao-Ping

bakerking's picture
bakerking

We are headed 300 miles tomorrow to visit our daughters so I had to bake last weeekend. The loaves in the back are Susan's Sourdough with kalamata olives and rosemary. The darker loaves are toasted pecan with blue cheese inspired by PR. The rolls are Floyd's sweet potato. It has been a great 9months of learning to bake. Thanks for the recipes and inspiration, this is a great site for learning if you take it one bite at a time.

Shiao-Ping's picture
Shiao-Ping

My herbal garden has been neglected since I started baking sourdough.  Occasionally I asked my son or my daughter to give the plants a drink. I have seen the bush turkeys in my yard a few times and was wondering what they were up to.  Yesterday morning I finally went and had a good look at my herbs.  My parsleys and mint are surviving but my rocket and cherry tomatoes are non-existent.  The bush turkeys!   I found my red-color garden tray covered in cob webs.  I brought it up to the kitchen for a clean.  Perhaps it will stay in my kitchen for a while now.


     Mixed fruits, nuts & seeds, and caraways sourdough


What I have learnt from this levain bread are these:

(1) David (or Anis Bouabsa)'s 21-hour (or at least 18-hours) retarding is well worth it.  To do a retarding of 7 - 8 hour is just not the same in crumb flavor achieved.  And toward that end, (a) slightly under-proofing the dough before going into the refrigerator is a good idea; and (b) the starter must be in tip top condition.

(2) Also, it's a good idea not to be tempted to using instant yeast when long retarding is involved.  As long as the starter is healthy, there is no need to use instant yeast simply because the dough is fully loaded with fruits and nuts, and seeds.  Unless we are very careful with the instant yeast quantity used, in the long retardation, the dough tends to rise then collapse. 

(c) As our tastes are more developed, the complex flavors from herbs and seeds (coriander seeds, caraways, etc) will be acceptable to our palate when mixed into the traditional combinations of breads as seen in this levain bread.


Shiao-Ping

Floydm's picture
Floydm

By the way, the food issue of The New Yorker just came out and had a long article on Baumkuchen, aka "Spit Cake."  The "spit" in the cake is a large metal stake that is dipped in batter and then rotated near a flame.  This process is repeated dozens of times and then the cake is removed from the stake and slices into disks.  Each slice has "rings" like a tree from the multiple layers of batter getting baked.

In Poland they call this sękacz (or senkacz).  I think I ate sękacz every single day we were in Warszawa.  You can find it here too, but it is not cheap.  But I cannot recommend it highly enough.


Floydm's picture
Floydm

Last week I grabbed one of my favorite sandwiches from the Pearl Bakery, a pear and gorgonzola number served on their Walnut Levain.  This weekend I tried recreating the bread at home.

Walnut Levain

I was pleased with the results.  The formula was roughly:

500g AP flour (Pendleton Flour Mills Morbread)

330g water

100g ripe starter

10g kosher salt

Walnut Levain Crumb

I also made cinnamon rolls for the first time in a long while.

They were more tan than the yellow they appear to be in this picture.  Oh well.  They tasted great.


occidental's picture
occidental

Hey folks.  I've been reading posts at this site for a very long time (years?) and finally decided to sign up.  It's certainly been a good resource for me to learn from and improve my baking.  I have had a few sourdough cultures for a while now and that is what I really enjoy baking with - it all just seems like a big science experiment that you get to enjoy eating when you are done with it!  I've recently relocated from the east side of Oregon to the west side and the rainy season is looking to be the bread baking season for me.  Thanks to all of you who I have enjoyed reading and learning from.  I'll look forward to posting some pictures of my breads as that is what I seem to enjoy more than anything else from others posts!

Ed

txfarmer's picture
txfarmer


This one is from "Local Breads", a book I have love/hate relationship with. All 4 recipes I've tried so far from this book have turned out beautifully, however, with so many errors, I have to do extensive research online before trusting a recipe from there, such a shame, I would've loved to bake more from it. This one is super delicious, how can it not be, since bacon makes everything better, not to mention the already delicous baguette!


I followed the recipe closely, except for two things:

1)I kneaded minimally (2 minutes with my KA at speed 4) after autolyse and did a couple of folds during bulk fermentation, while the recipe instructed to knead the dough a lot longer. I like open crumb for my baguette, so I didn't want to over knead.

2)I put in all of the starter build by mistake (195g rather than 125g), luckily I realized it early on, so I adjusted water, everything ended up OK. With the extra starter, I did manage to get 4 baguettes, each about 310g, while some other posters have mentioned that they could only get 3 of 360g ones.

I put the shaped dough in the fridge for 12 hours, took them out and left at room temperature for 75 minutes before slashing and baking. They had great oven spring and the slash opened up well:

And ears one can lift up with

Fairly open crumb with visible bacon bits

The bacon flavor permeate throughout the bread, the best part is the crust - extra crunch and fragrant with the bacon fat.We ate this one straight without anything else, so yummy!

Salome's picture
Salome

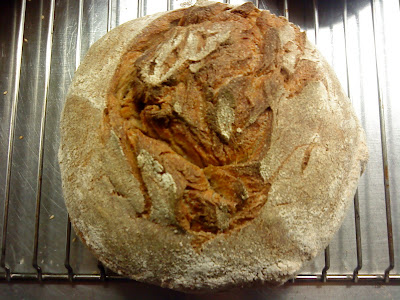
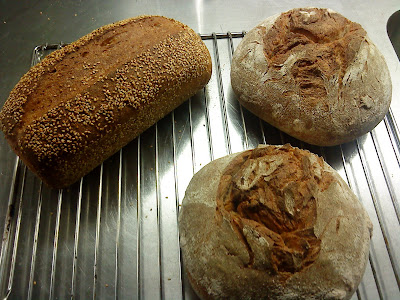
I undigged an old and beloved recipe, which I somehow just didn't bake in the last time. It's a rather simple recipe; I got it from a woman originating from South Tyrol, she calls it her Farmerbread (Bauernbrot). It's a sourdough bread which can be altered fairly much.

This time I used only whole-grain flours, although the recipe originally asks for high extraction flour (partly).

I posted the recipe for the first time here in my very first forum post when I was asked to share some of my favourite recipes.

The recipe below is how I did yesterday.

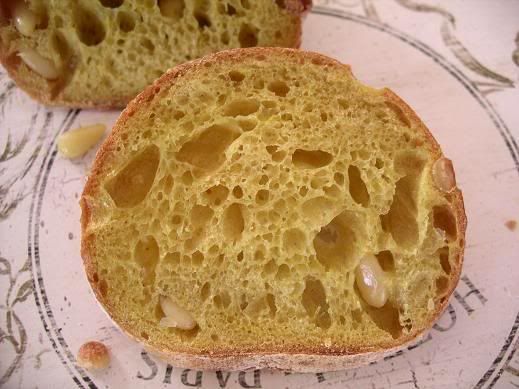
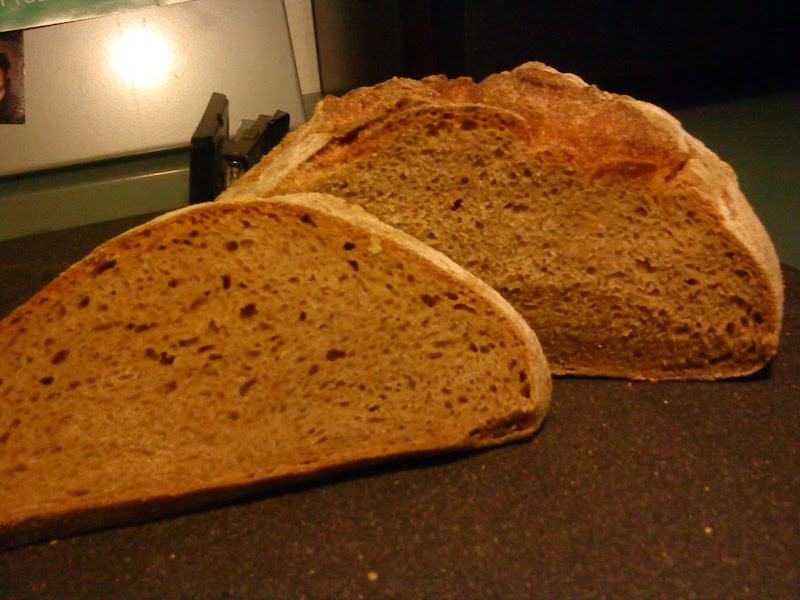
The resulting bread remains one of my favourites, it has a fully developed flavour, is pleasantly "heavy", moist, somewhat chewy. Perfect for a hearty sandwich, for instance with a strong cheese or ham. My today's sandwich is made with this bread, a bean spread, cucumber and radish slices. Yum!

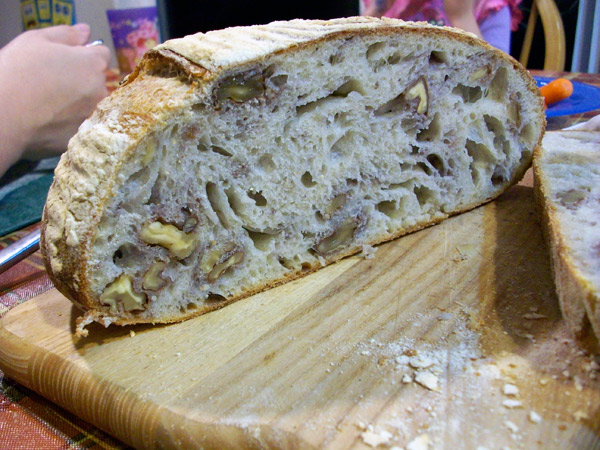
the lady of South Tyrol told me that she alters the recipe according to what she's got on hand, sometimes she increases the rye percentage, sometimes she makes it completely wheat. She reccomends to add 150 g of walnuts as well, but this amount seems to be fairly little to me. but I've never tried it yet. I could imagine that a toasted seed-soaker (especially sunflower seeds, flaxseeds...) would work outstandingly.

Bauernbrot

(Farmerbread)

------------

(1) "Preferment"
250 g whole grain rye flour
250 ml water
200 g ready to bake sourdough (100% hydration whole grain rye)

(2) final dough
1 kg whole-wheat flour (original: 500 g whole-wheat rye, 500 g high extraction wheat flour)
750 ml lukewarm water
27 g salt
1 tablespoon honey

3 tbs Vital Wheat gluten (can be excluded)

1. Prepare the sourdough (200 g), let it ripe.


2. Mix all the ingredients of (1) in a bowl ("Preferment"), cover it and let it rest for 12 hours on a warm spot.

I'm sure that the "preferment" could be substituted by a normal whole rye sourdough, without this extra step. Just mix 335 g flour, 335 g water and 30 g ripe culture and let it fully ferment. But this must me quite harder to digest for the yeasties, so if you have time it's maybe worth to feed the dough in two steps.


3. mix this "preferement with all the other ingredients of the final dough. Knead the dough for at least 15 minutes (by hand). This time I added vital wheat gluten, but I didn't feel much of a difference compared to my earlier bakes.


4. for the first fermentation: cover the bowl and let the dough ferment until it feels light, it should slightly less than double. This took me around four hours, but be aware that sourdough can differ a lot depending on dough and room temperature! I had the same recipe fully fermenting in two hours in summer.

5.Shaping

for the baking in pans: grease two or three pans ane it with baking paper. (I don't know how big american pans normally are, so just divide into two or three pieces as you feel)

For baking as hearth loaves: Shape like discussed here (ff)


5.  let the loaves rest until they've risen quite a bit (slightly less than doubled, until they feel "light")  watch your dough and judge yourself.

6. preheat your oven as hot as possible (450°F) , steam well, put the breads into the oven and lower the temperature to 420°F, lower the temperature gradually during the rest of the bake, ending at around 390°F. I baked for about 50 minutes.

7. Let cool and let the loaf set over night.


Salome

davidjm's picture
davidjm


Secrets to successful Clay Oven Usage

I'm still relatively new to this, but I haven't seen the information below in other places.  I welcome your comments and suggestions from your experiences as well.  They will benefit the whole community!

First, go ahead and buy the book by Kiko Denzer "Build your own earth ovens" (amazon.com $15)

Insulated Hearth Subfloor:

In Kiko's book, he recommends using plain sand as a subfloor for the hearth.  That is the cheapest way to do it, but for $50 more, you can have an insulated subfloor that will hold heat much better than sand.  Build a form the size of the top of you base at least 2" thick.  Buy a bag of Portland cement and 2 big bags of vermiculite from a plant nursery.  Mix the two at a 5:1 ratio (vermiculite:Portland) dry.  Then add water and mix until you get an oatmeal consistency.  Pour into the form.  Smooth out the top.  Make sure it's level!  Let dry for at least a week.  Then you will set your fire brick directly on top without mortar.  The clay walls will hold it in.  Ideally, you would have 4-5" thick subfloor.  I found that I loose heat out the floor faster than the walls with 2" thick subfloor.

Oven Dome:

Kiko, in one of his blogs, actually says the ideal height of the dome, no matter the size of the floor, is 16".  He plans to add it to the next edition of his book. In the present edition, he gives a percentage formula. 

Firing the oven:

After a couple miserable failures, and combing the web for advice, I finally figured out how to successfully fire a clay oven.  Here's what I learned.

You really need good seasoned oak to make it get hot enough. 

Buy an Infra-red thermometer (amazon.com $80).  It is worth it.  You'll need to chart out the heating behavior of your oven at least one time.  Then you can use it to give you a frame of reference during a heating. 

And, plan to spend at least 3 -5 hrs heating it up, depending on the size of your oven.  My oven floor is 28" wide by 31" deep, and 20" high ceiling inside.  It is a relatively large oven.  I found that I have to fire the oven for 4+ hrs to get the temp high enough. 

Think in terms of heat saturation of the clay walls and floor.  Noah Elbers at Orchard Hill Breadworks (orchardhillbreadworks.com) says he fired his clay oven 6 hrs before he attained proper heat saturation. 

The outside walls are a good guide as to heat saturation.  In my oven, I need the outside walls to gain 100 degrees in temp before I am near having proper saturation; even more if I want to bake a larger quantity.  (This is where an IR thermometer comes in handy!)

I think firing time depends on how much you are baking too.  If you are only doing a couple pizzas and no breads, then you don't need as much heating time.  But if you're going to maximize your baking potential, you'll want a long hot heating.

I took hundreds of data points of my oven during a firing, and I put my findings into a graph.

(The upper lines are inside temps.  The lower lines are outside temps.)

Couple observations from the graph:

  1. You see a big jump in internal temp at 75 minutes when I put in a few pieces of nice seasoned oak.  After which time, the internal temp continues to grow.
  2. Inside temp reached 1000+ degrees F at its peak.
  3. The rate of heating of the outside increased after the good oak was added and steadily gained in temp until the fire went down to coals.  (I rake the coals across the floor and let sit for 30 min to heat the floor uniformly.)
  4. After that time, the outside temp remained relatively constant.
  5. You can see clearly how after the fire is taken down to coal at 255 minutes (or 4:15 into firing), we immediately start losing inside temp at a steep rate.  Coals stayed down for 30 minutes and then raked out. 
  6. Once the oven inside temp reaches around 450, we see a leveling off of the rate of cooling.  I think that if I had fired the oven another hour, the inside temp would have leveled off at a higher temperature.  That would have given me addition time in the pizza and bread baking range.  As it was, I got about 90 minutes worth of baking time on that firing.  My max capacity in that firing was: 14 pizzas, seven 30" baguettes, and 6 whole grain loaves.

I hope this is helpful.

Let's hear some of your secrets!

David


Debra Wink's picture
Debra Wink

Thanksgiving is fast approaching, so I thought I'd get in a quick blog entry before things get really busy... and to prove that I really do make breads once in a while. I found this recipe while searching The American Country Inn and Bed & Breakfast Cookbook (vol. 2), for a vegetable dish to take to my sister's on Thursday. I'm Still undecided on the vegetable, by the way, but these sounded perfect for the Thanksgiving table, so I had to try them out. (I get side-tracked easily.)

My thought was, If they turn out well, I'll freeze and take them, and if not, we really don't need the extra starch anyway. Well, I'm taking them, and I kinda hope they don't all get eaten, because I'm already thinking they'll make a mighty fine bread pudding. I think the dough would be good for other things too---like warm caramel pecan sticky buns.... Okay, enough of that! Time is running out, and I have to decide on a vegetable.


Pumpkin Crescents
makes 3 dozen rolls

2 1/4 tsp. (1 package) active dry yeast
1 cup warm water
1 cup canned pumpkin
1/3 cup sugar
1/2 cup cold butter [the recipe calls for shortening]
1 egg
1 1/2 tsp. salt
5 to 6 cups all-purpose flour
more butter, softened

This is how I put the dough together:
Dissolve the yeast in the warm water, then mix with the pumpkin, sugar, egg and salt. Add half the flour, and then as much more as needed, a little at a time, kneading until a firm, elastic dough forms. Add the butter in small pieces and continue kneading until it disappears and incorporates into the dough. Add a little more flour if the dough becomes too soft and sticky (you're going to have to roll this out later).

Round the dough and place into a greased bowl. Let rise until double. (The recipe says about 1 hour in a warm place, but that's not likely with only one package of yeast---mine took 2-3 hours.)

Deflate the dough and divide into 3 equal portions. Round each piece and let rest 20-30 minutes. Roll out into 12" circles, and spread with the softened butter. (It will take around 2 tablespoons per circle.) Cut each into twelve wedges---a pizza cutter works best for this. Cut a small notch in the center of the curved edges. Stretch each triangle from the curved edge to the narrow point, and then widen the curved edge to open the notch by pulling out from the other two corners. Roll up, beginning from the notched edge. Place the rolls on lightly greased sheet pans, with the points tucked underneath, and curve into a crescent shape. Let rise until doubled. Bake at 400F for 14-20 minutes, until golden brown.

Adapted from the recipe by Liberty Hill Farm, Rochester, VT

Pages

Subscribe to Recent Blog Entries